How to Create a Digital Business Card on iPhone
Today, we’re showcasing 3 of the best methods to create a digital business card on an iPhone. We’ll show you the iPhone’s built-in method of sharing your contact card, a great 3rd party alternative, and a robust digital business card leveraging the power of AI.
Let’s get straight into it!
1. Create Business Card on iPhone Using Contacts App
First up, we’re using the iPhone’s built-in feature to create and share business cards. Of all the methods, this is the quickest and easiest way to share your business card information with someone online. This method also sends your contact information in a .vcf file format, so it’s convenient and easy for others to add your information, no matter it’s an iPhone or Android device.
Here’s how to create a digital business card on iPhone using the Contacts app:
- Step 1.Open the Contacts App on your iPhone. Alternatively, you can also open the Phone app and go to the Contacts page.
- Step 2.If you want to create a digital business card for yourself, click ‘My Card’; if you want to create a digital business card for others, click the + button.
- Step 3.Here you can add any information in the text fields you’d like to include in your contact card, such as name, mobile phone number, email address, and more.
- Step 4.After filling in all the necessary information, tap on the Done button.
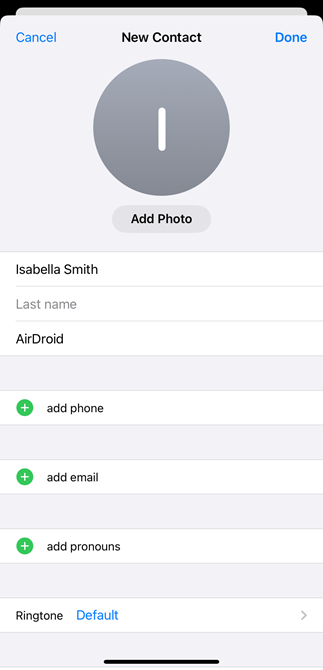
This will create a digital business card on your iPhone easily.
Alternatively, you can save the digital business card you receive on your iPhone directly. You could also use iOS 17’s NameDrop method which shares your contact information with someone in person.
2. Create Digital Business Card on iPhone Using Third-party Apps
Instead of relying on the standard iPhone feature to share your contact info, you can use other 3rd party digital business card apps to gain more functionality. Digital business card apps typically allow users to add more than just a phone number or email.
You can link a variety of social media platforms, websites, payment channels, media content, and more. Digital business card apps also have several sharing methods including unique URLs, QR codes, and NFC implementations.
Follow these steps to learn how to create your digital business card with the HiHello app:
- Step 1.Open the HiHello app and sign into the HiHello account on your iPhone.
- Step 2.On the Cards page, tap the + button.
- Step 3.Follow the on-screen instructions enter the information you want, including Display, Information, and Fields.
- Step 4.After that, save your information and you have successfully created the digital business card on iPhone.
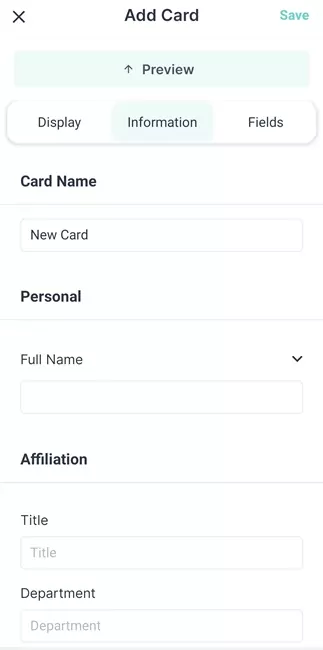
HiHello also allows you to add the business card to your Apple Wallet on your iPhone:
- Step 1.Tap the Cards menu in the bottom, and double tap your business card.
- Step 2.You will enter the page to send your card. Tap the three-dot on the upper right.
- Step 3.Tap ‘Add to Apple Wallet’.
- Step 4.Tap ‘Add’.
- Step 5.Open the Apple Wallet app on your iPhone and access your digital business card.
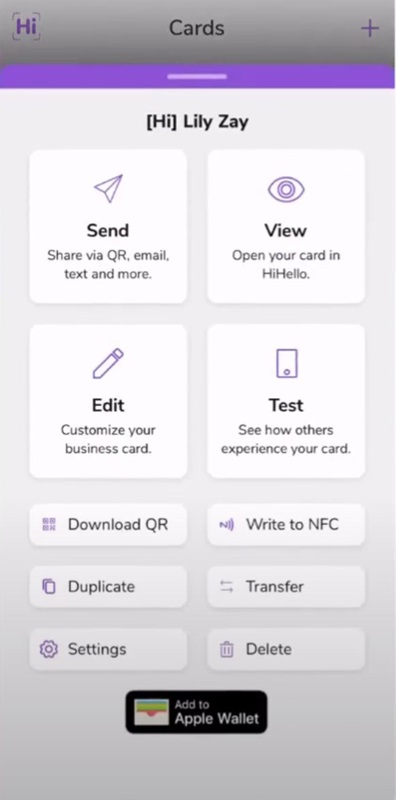
Meanwhile, digital business card apps like HiHello also supports sharing cards via URL or QR code.
3. Create Digital Business Card on iPhone Using QR Codes
The last method to create a digital business card on an iPhone is by using a digital AI business card and sharing it via a QR code on your iPhone.
For example, ChatInsight’s AI business cards have a lot to offer professionals and businesses, leveraging the power of AI to enhance and streamline your arsenal of networking tools.
Key Features
- Share all your contact details, company’s information, product details, meeting schedule, social media, and more!
- It supports communicating in any language even if the knowledge base is in English.
- It’s easy-to-use and customizable.
- Many Ways to Share: QR codes, social media, URLs.
Follow these steps to create digital business card on iPhone:
- Step 1.Click the button below to sign up a ChatInsight account and log into ChatInsight online dashboard.
- Step 2.Select Bots on the left menu, and click New Bot > AI Business Card.
- Step 3.Key in all the information for your business card: name, phone, email, organization.
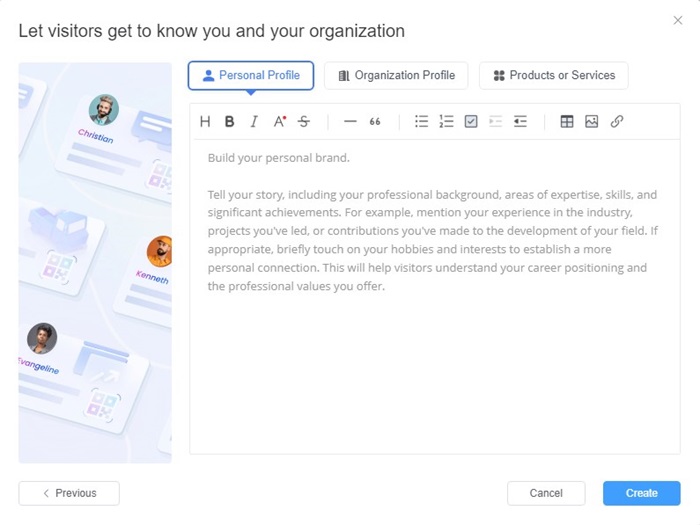
- Step 4.Add information for personal profile, company profile, products/services.
- Step 5.After that, your AI business card has been created. You can also click the card’s name to test it.
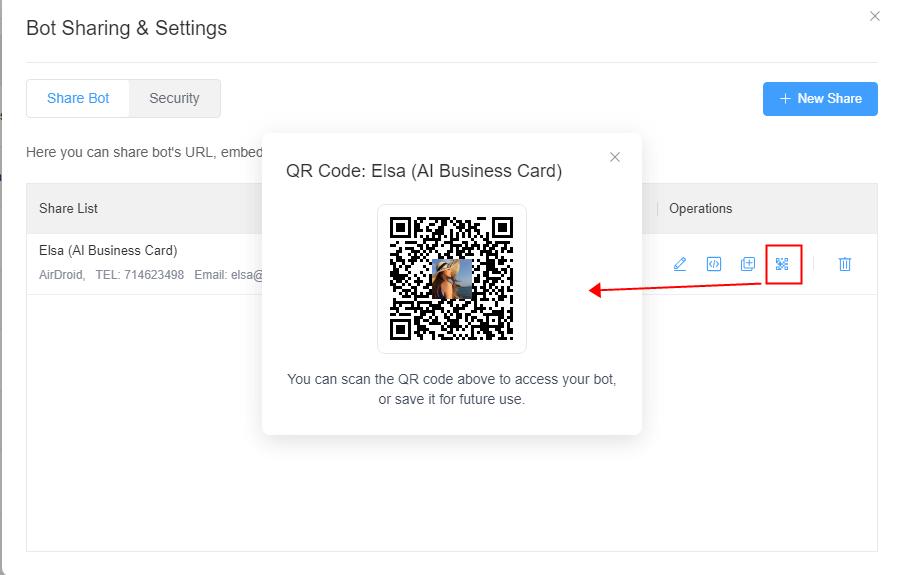
- Step 6.Click the Share button next to your AI business card, and click the QR code to save it to your device.
- Step 7.You can also send the QR code image and save it in your iPhone, then you can share it whenever you want.
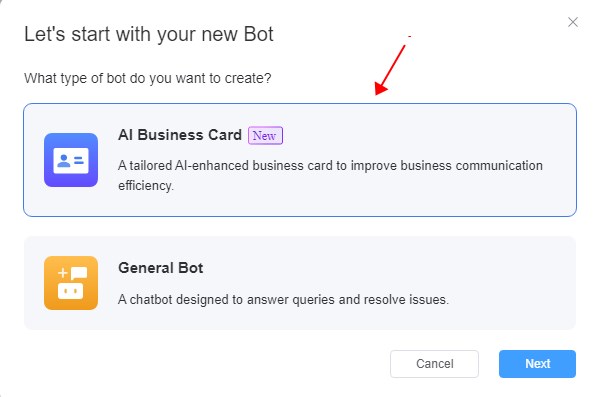
Tips: You can also save the link of your AI business card and share it online.






Leave a Reply.