

How to use App Allowlist for Kiosk Mode in AirDroid Business?
Device administrators often struggle with maintaining control over app usage and ensuring only enterprise-approved apps are running on remote devices. Unauthorized app installations can compromise security and lead to a fragmented user experience.
In this tutorial, we will explore how to leverage the App Allowlist feature in Kiosk Mode within AirDroid Business to address these challenges effectively.
1Understanding App Allowlist for Kiosk Mode
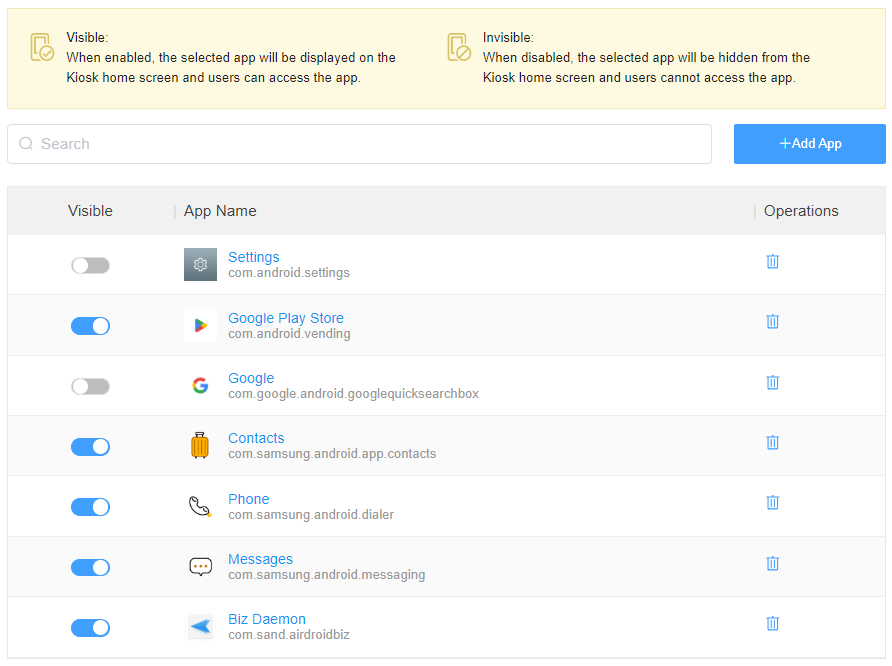
App Allowlist for Kiosk allows you to select specific apps that can be used in Kiosk Mode, while hiding other apps. This feature offers two visibility options:
● Visible:
When enabled, the selected app will be displayed on the Kiosk home screen and users can access the app.
● Invisible:
When disabled, the selected app will be hidden from the Kiosk home screen and users cannot access the app.
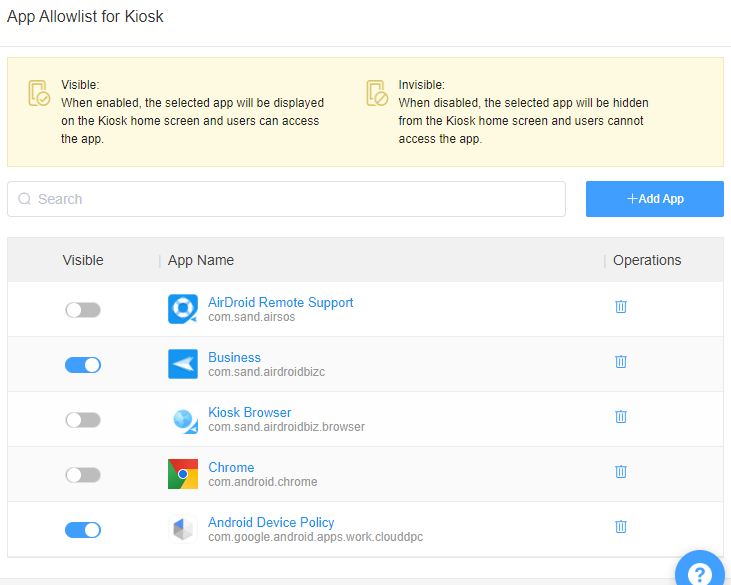
By configuring the allowlist, you can select the desired apps to run in Kiosk Mode, enhancing security and ensuring a controlled user experience.
2Steps to set up the App Allowlist for Kiosk
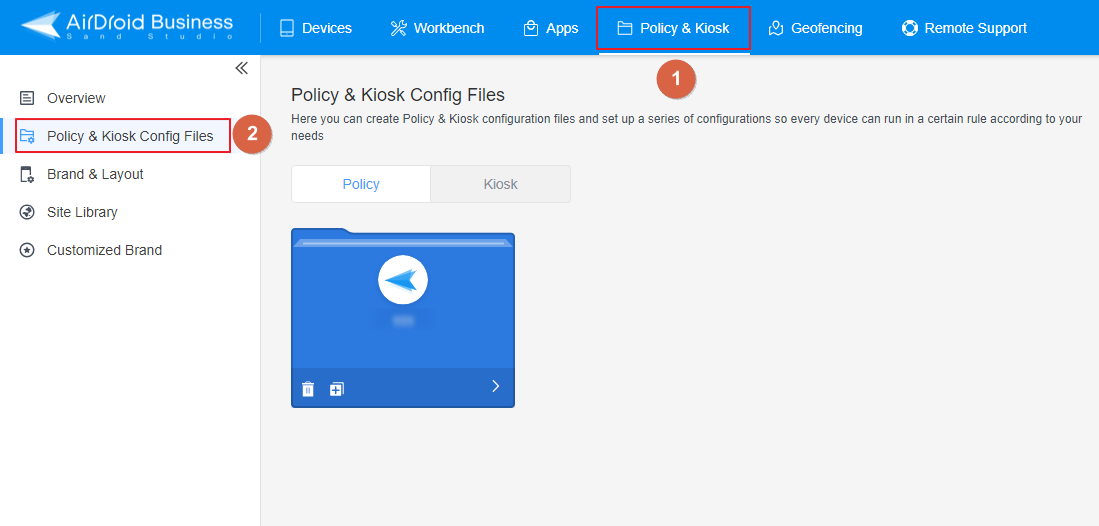
- Step 1Access Kiosk Setting
- Log into Admin Console, navigate to the "Policy & Kiosk" Section on the dashboard, and click "Policy & Kiosk Config Files".
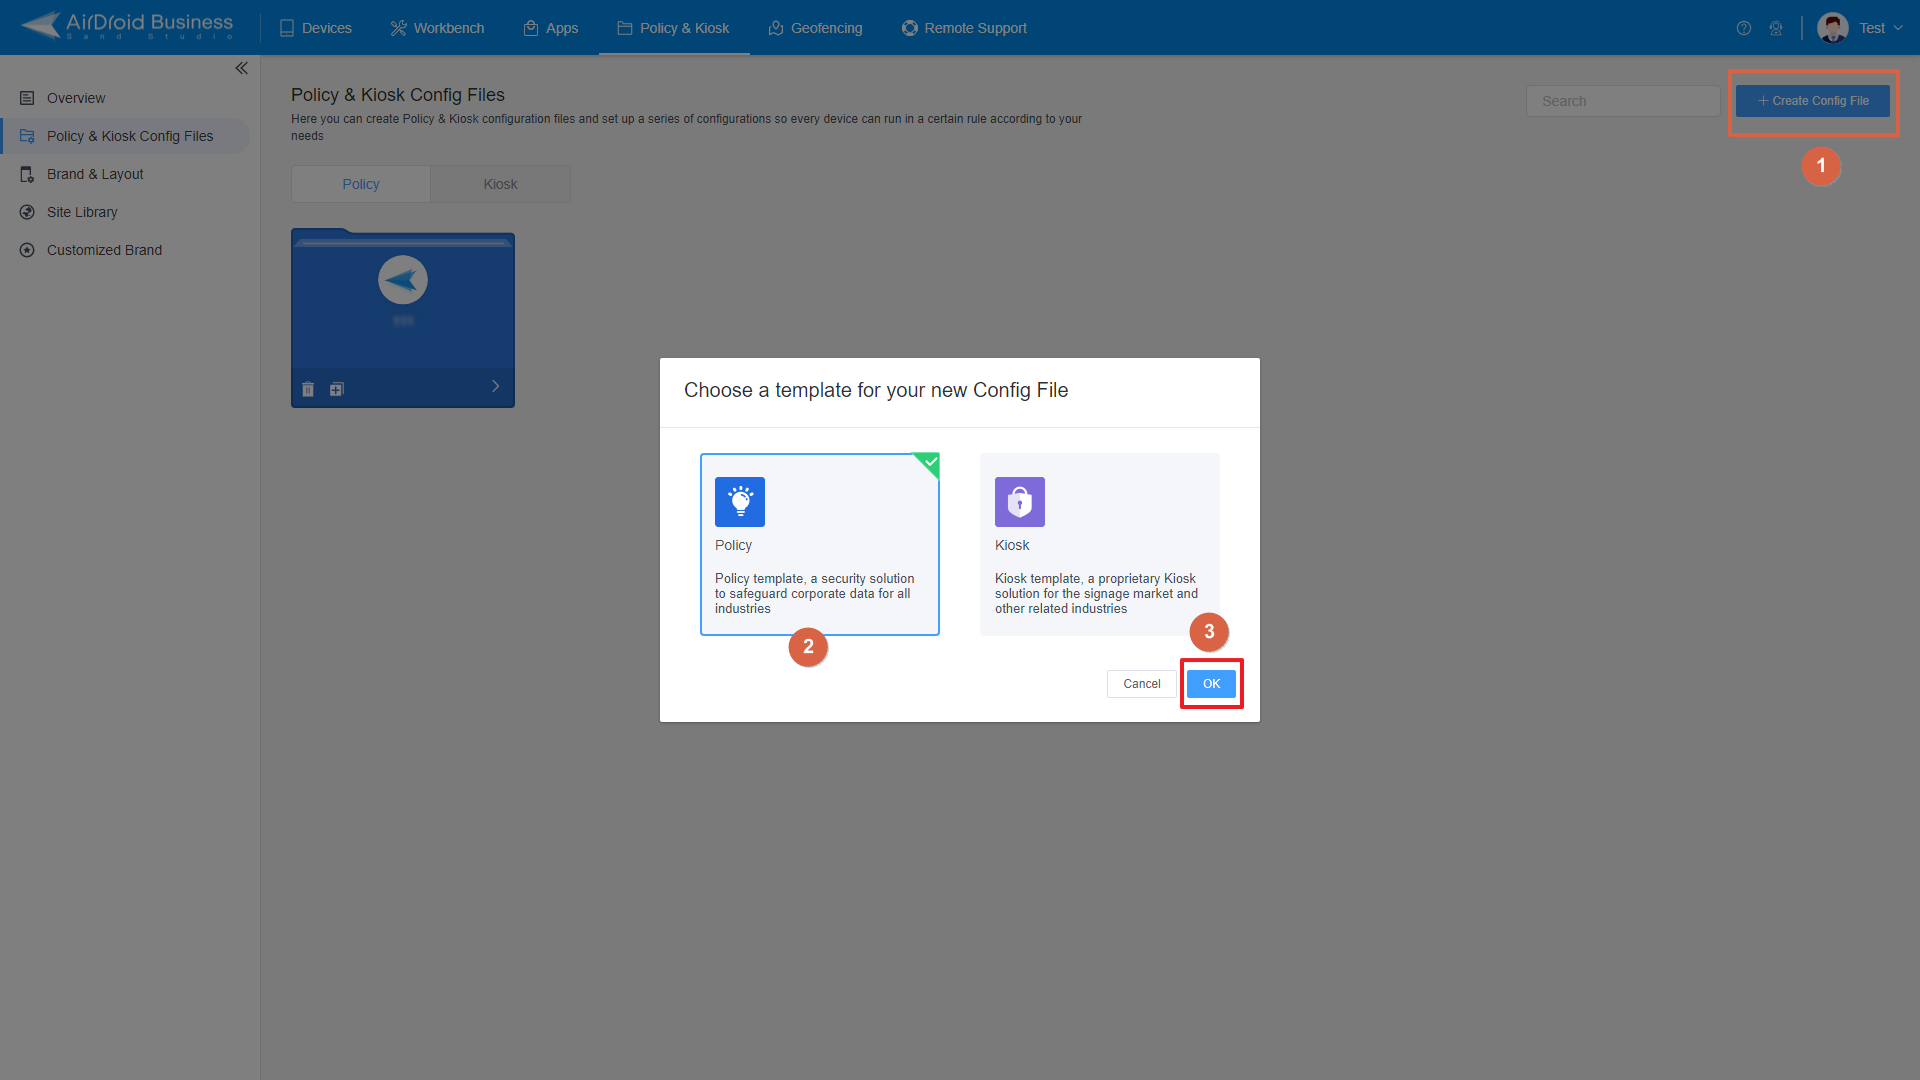
- Step 2Create or Edit a Kiosk File
- In this section, you can either create a Kiosk File or modify an existing one.
- ● To create a new Kiosk File, click on "+Create Config File", choose "Kiosk" and then click "OK" on the pop-up.
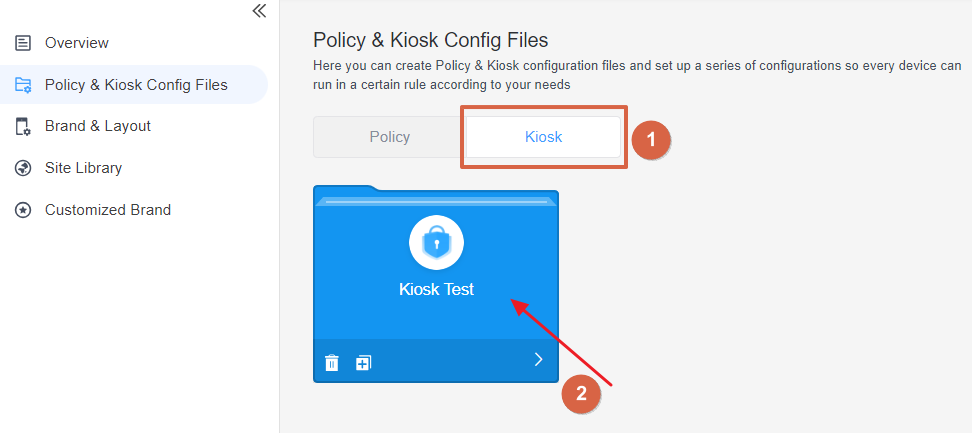
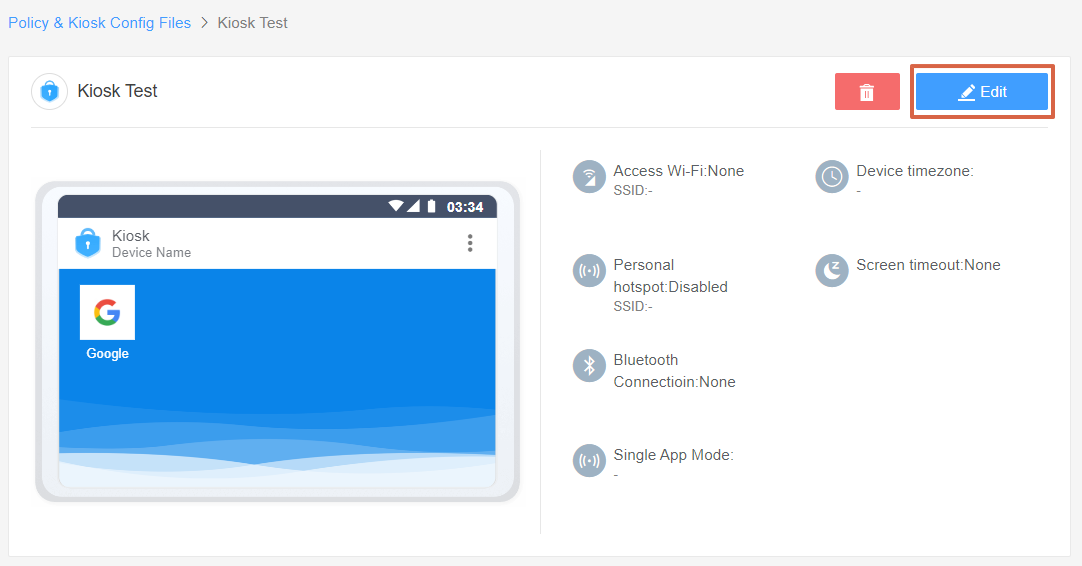
- ● To modify an existing Kiosk File, switch to the "Kiosk" tab, select the Kiosk File you want to modify.
- Click on the "Edit" Button in the top right corner. On the following page, you can set all kinds of limitations and settings for your config file.
- Step 3Add Apps to the Allowlist
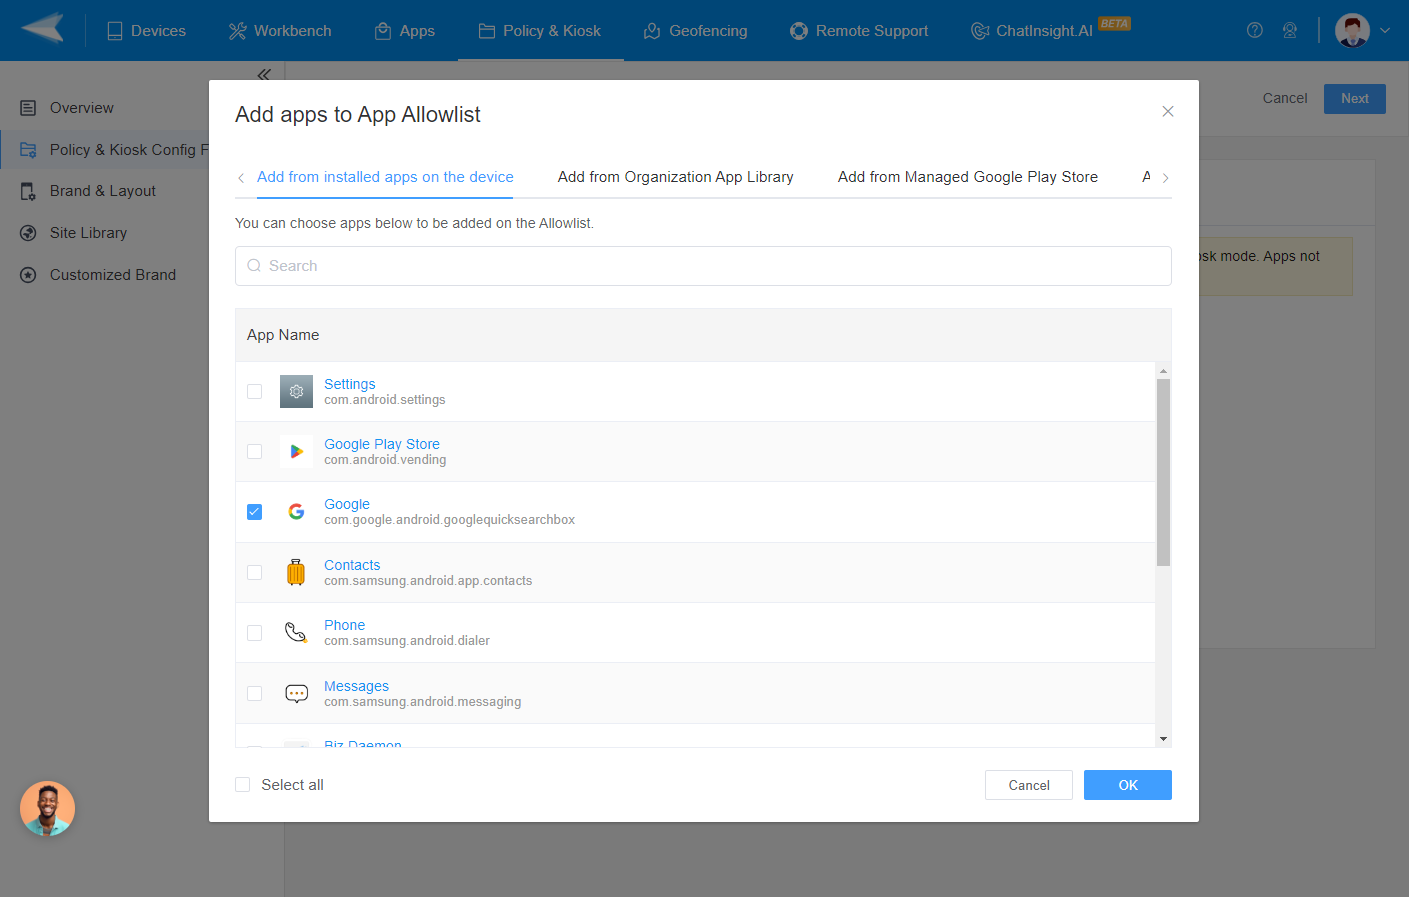
- Click on [App Allowlist for Kiosk] in the left navigation bar. To start adding apps to the allowlist, click on button [+Add Apps].
- In the pop-up, you can see there are four methods to add apps:
- ● Select apps from devices that are already installed.
- ● Add apps from the Organization App Library.
- ● Add apps from Managed Google Play Store.
- ● Enter the App package ID, a unique parameter for each app.
- Tick the Apps you want to add to the allowlist and click [OK] to confirm.

For example, in the URL "https://***.com/details?id=com.android.example," the App package ID is "com.android.example."
- Step 4Review and Customize the Allowlist
- Once you have added the desired apps, you can review the allowlist. Additionally, you can choose whether the apps should be visible on the device or not.
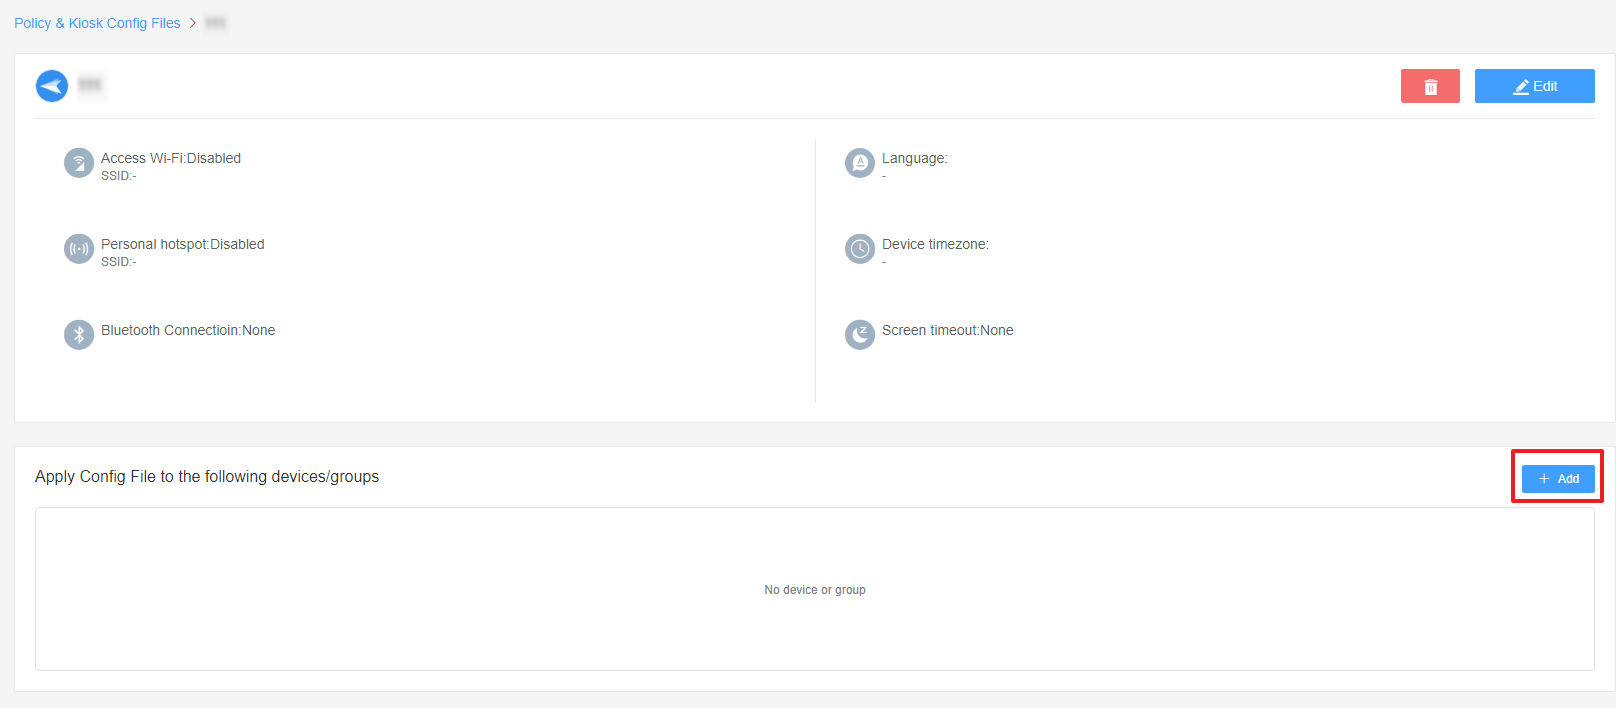
- Step 5Save and Apply the Kiosk File
- After setting up this Kiosk File, click the "Save" button on the top right corner. (When you create this file for the first time, you need to fill in the file name and remarks.)
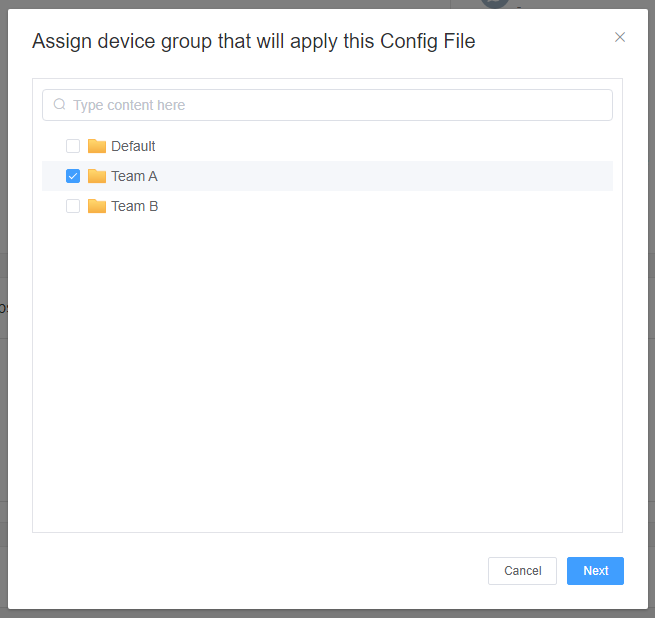
- Then, select the policy you just created or edited, go to the Policy&Kiosk Files Management section, find the [Apply Config File to the following devices/groups] and click [+Add]. Choose the devices or groups you want to apply the policy to and confirm.
- When the status in the list turns to "Applied successfully", the policy settings have been successfully applied to the target devices.


By creating an App Allowlist, administrators can prevent unauthorized app installations and maintain control over the user experience. This granular control ensures a secure and tailored environment for your managed Android devices.
3Video Tutorial
We have created a YouTube video to help you understand this guide better and faster.
Video Tutorial: How to Use App Allowlist for Kiosk Mode in AirDroid Business
Still need help? Submit a request >>
Related Articles
- How to Set up Kiosk Website Allowlist on AirDroid Business?
- How to set up Kiosk Browser Settings on AirDroid Business?
- How do I Customize the Kiosk Brand within AirDroid Business?
- How to Modify My Brand and Layout in Kiosk Mode of AirDroid Business?
- How to use Kiosk Launcher for AirDroid Business?