

How to implement App Blocklist/ App Allowlist on AirDroid Business?
In the process of device management, administrators often face the challenge of controlling the accessibility of applications on their organization's devices. This is where AirDroid Business' App blocklist and App allowlist Policy come in.
In this tutorial, we will tell you what App Blocklist and App Allowlist is and guide you on implementing an App Blocklist or an App Allowlist using AirDroid Business.
1What is App Blockist/ App Allowlist Policy?
App Blockist: Prevents users from accessing certain apps.
Once an application is listed on the App Blocklist, the application will be invisible on the App drawer of the affected devices. For additional security, the system will also block access to the application.
App Allowlist: Only allows users to access the apps specified.
If the application is listed on the App allowlist, it will be the only application that is displayed on the App drawer of the affected devices.
1. When using the App Allowlist, system apps will remain visible to ensure the stability of the Android system.
2. Devices enrolled through Android Enterprise or Zero Touch are not supported.
2Steps to implement App Blockist/ App Allowlist Policy
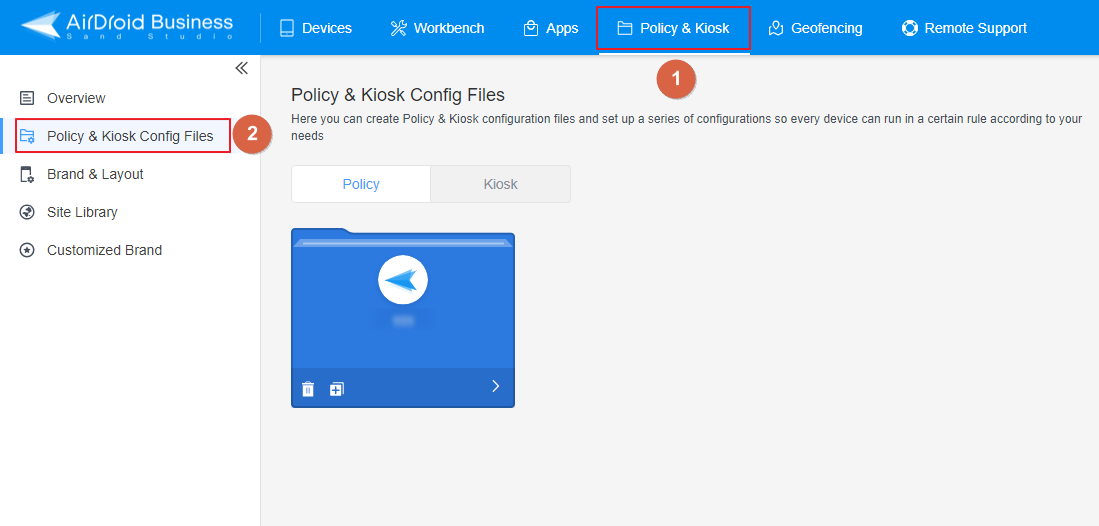
- Step 1Access Policy Setting
- Log into Admin Console, navigate to the 'Policy & Kiosk' Section on the dashboard, and click on 'Policy & Kiosk Config Files'.
- Step 2Create or Edit a Policy
- In this section, you have the option to either create a new policy or modify an existing one.
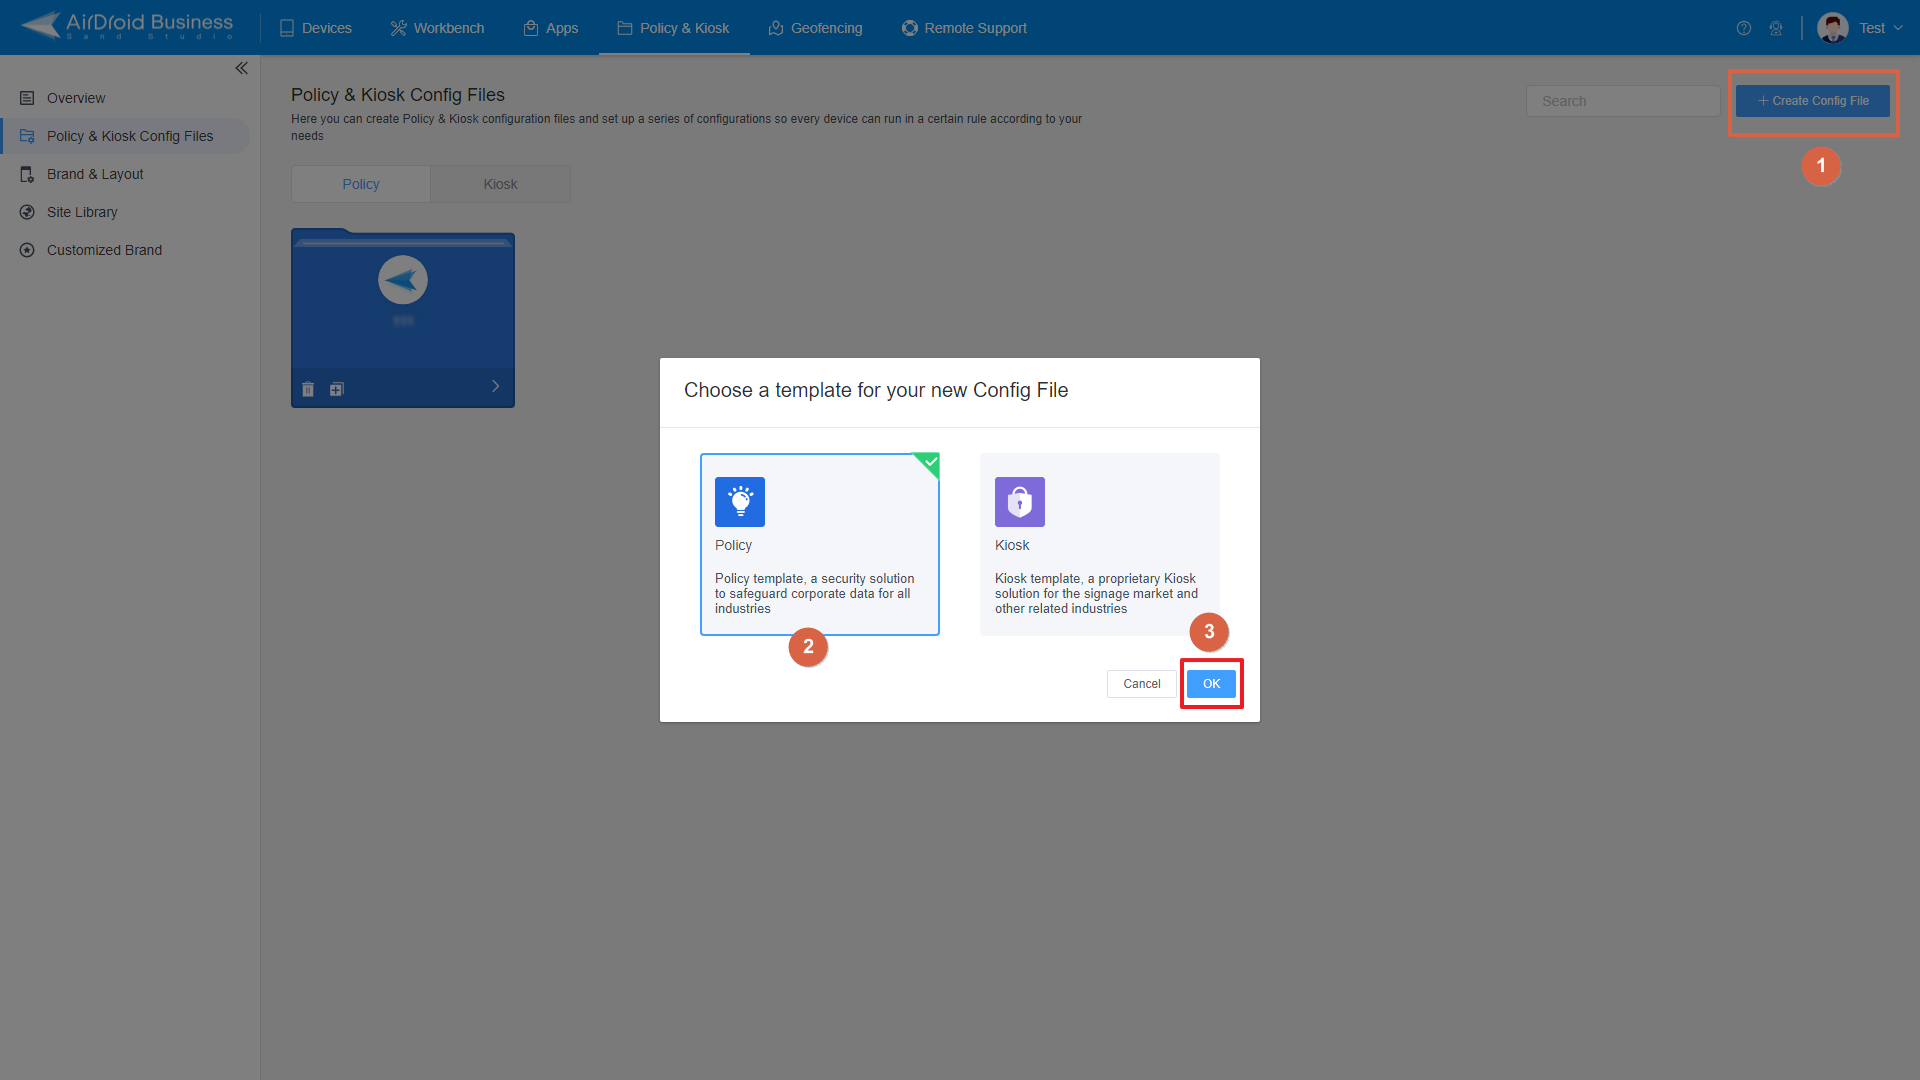
- ● To create new policy, click on "+Create Config File", choose "Policy" and then click "OK" on the pop-up.
- ● To modify an existing Policy, switch to the "Policy" tab, select the Policy File you want to modify, and
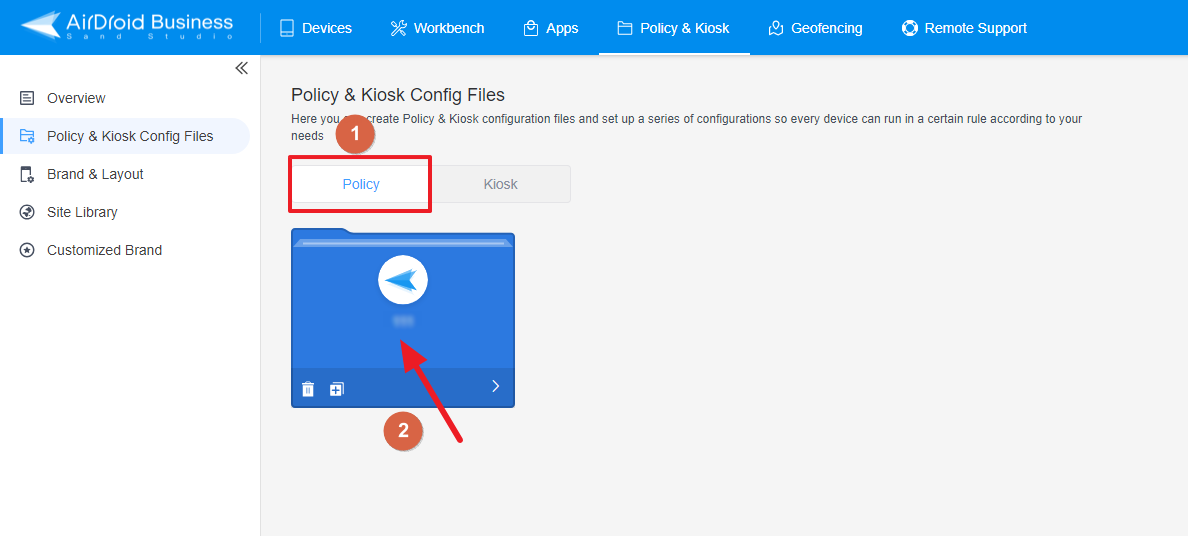

click on the "Edit" Button in the top right corner. On the following page, you can set all kinds of limitations and settings for your config file.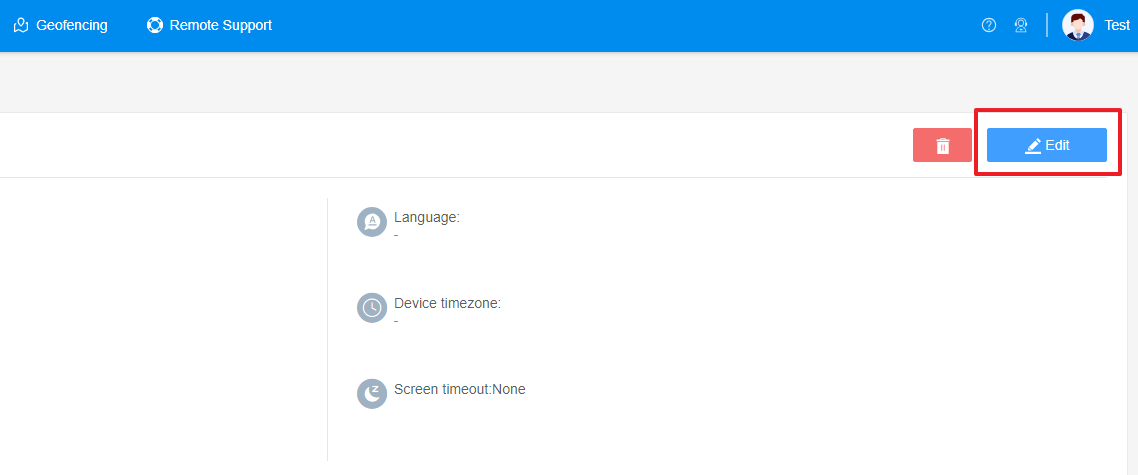

- Step 3Go to "App Blocklist/Allowlist"
- Find the "App Blocklist/Allowlist" section.
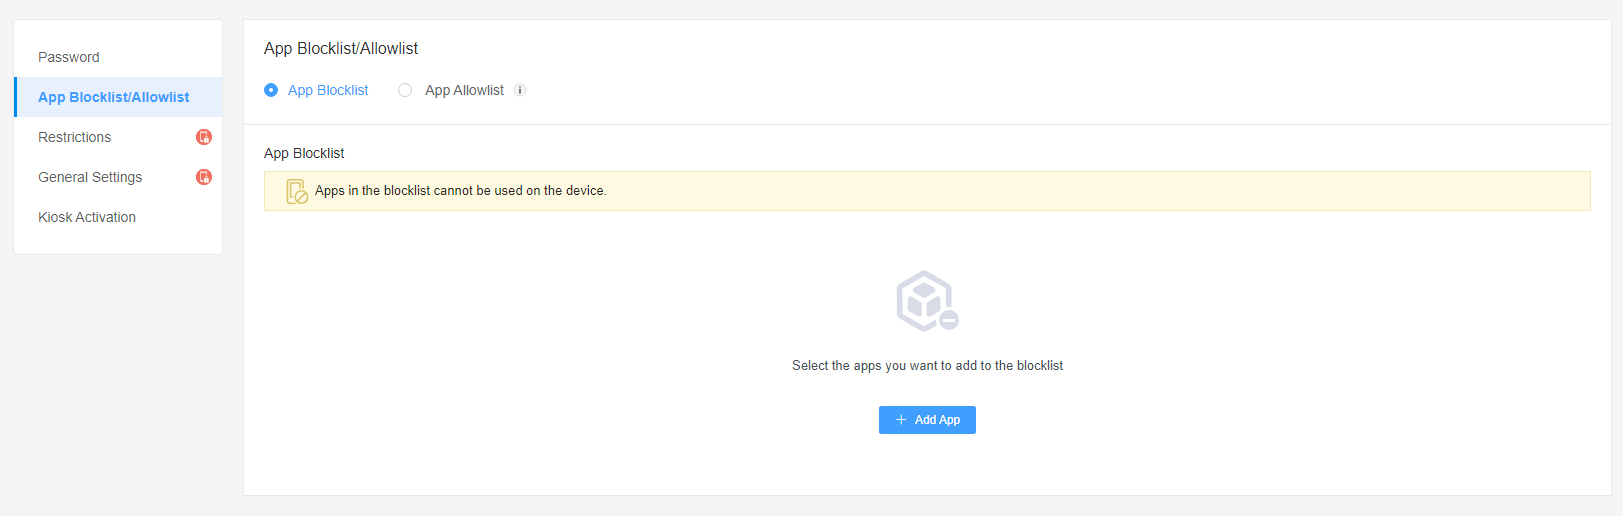
- Step 4Set up the App Blocklist or App Allowlist
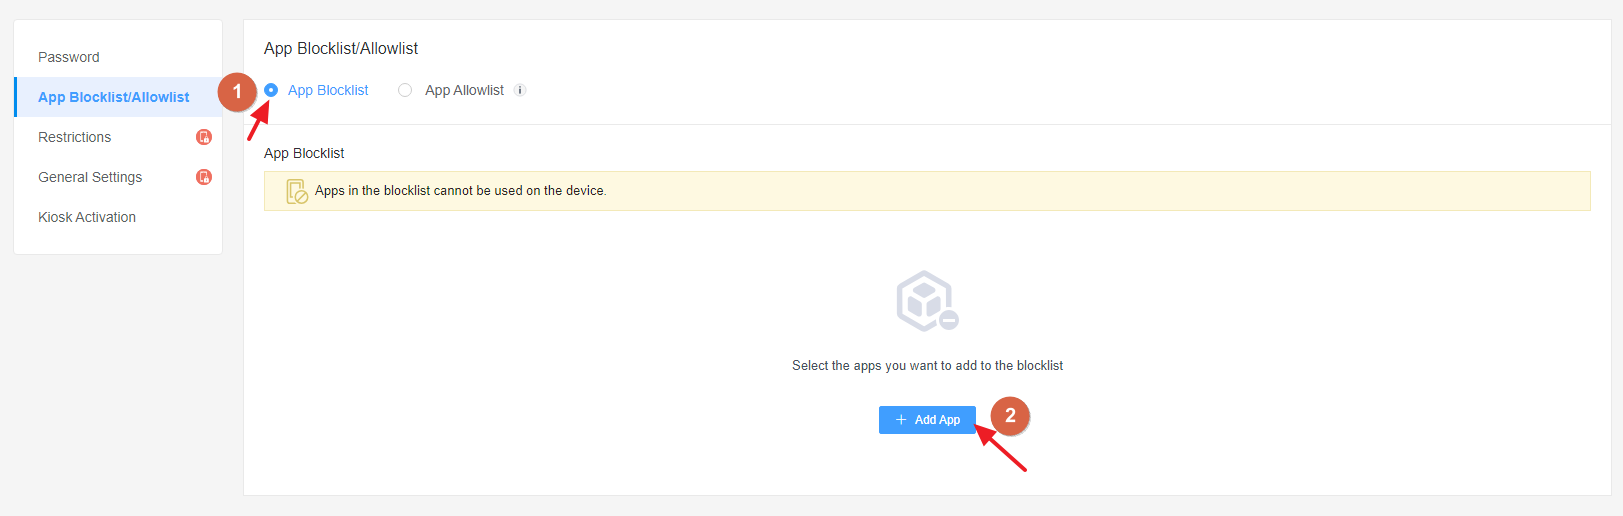
- ● To set up an App Blocklist
- Choose and click "App Blocklist". Click [+Add App], and select the apps you want to block.
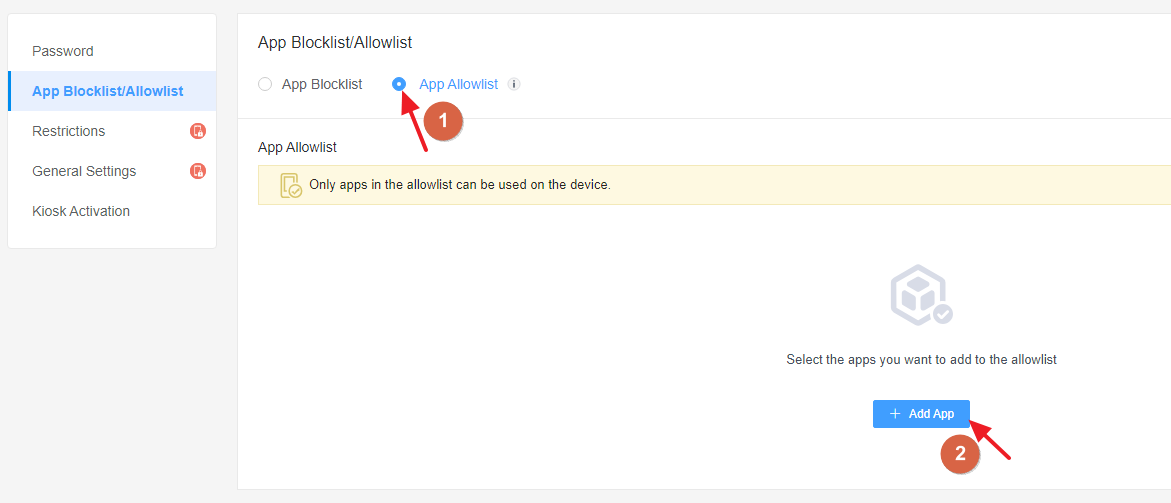
- ● To set up an App Allowlist
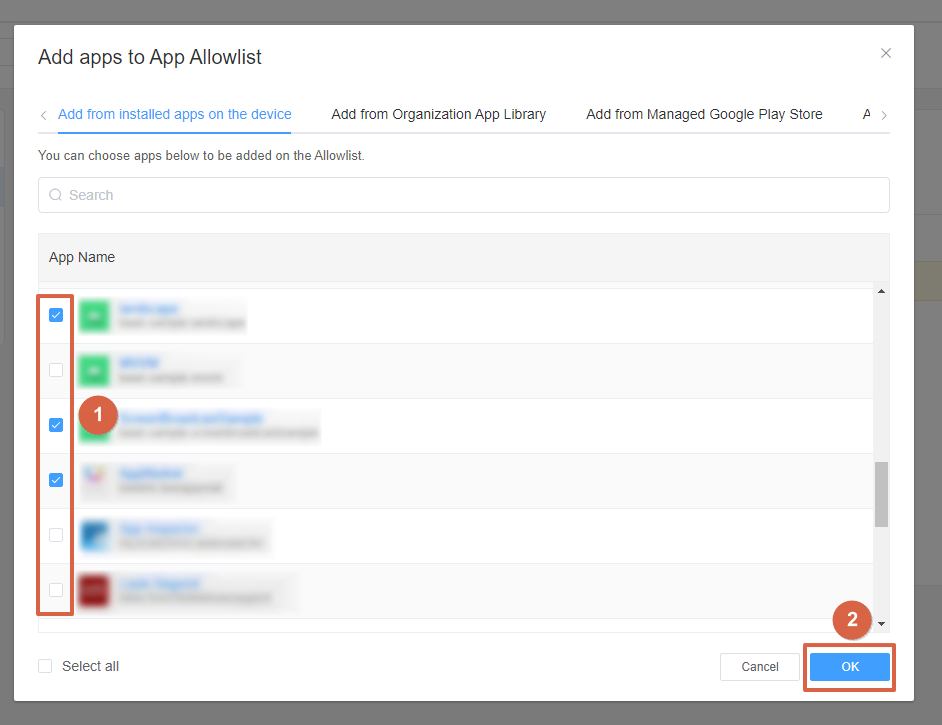
- Choose and click "App Allowlist". Click [+Add App], and select the apps you want to allow and click "OK". A list of all apps you selected will appear.

Here you can select the Apps from installed apps, Organization App LIbrary, Managed Google Play Store and by Package ID. At last, click "OK". A list of all apps you selected will appear.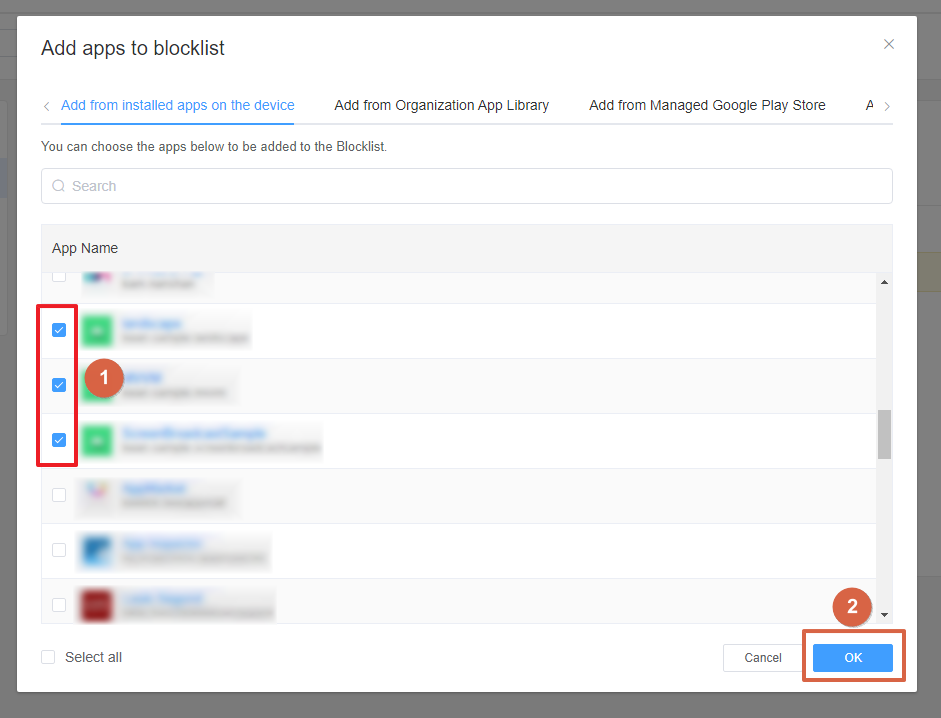
- Step 5Save and Apply the Policy
- After setting up the App Blocklist or Allowlist, click "save" button on the top right corner.
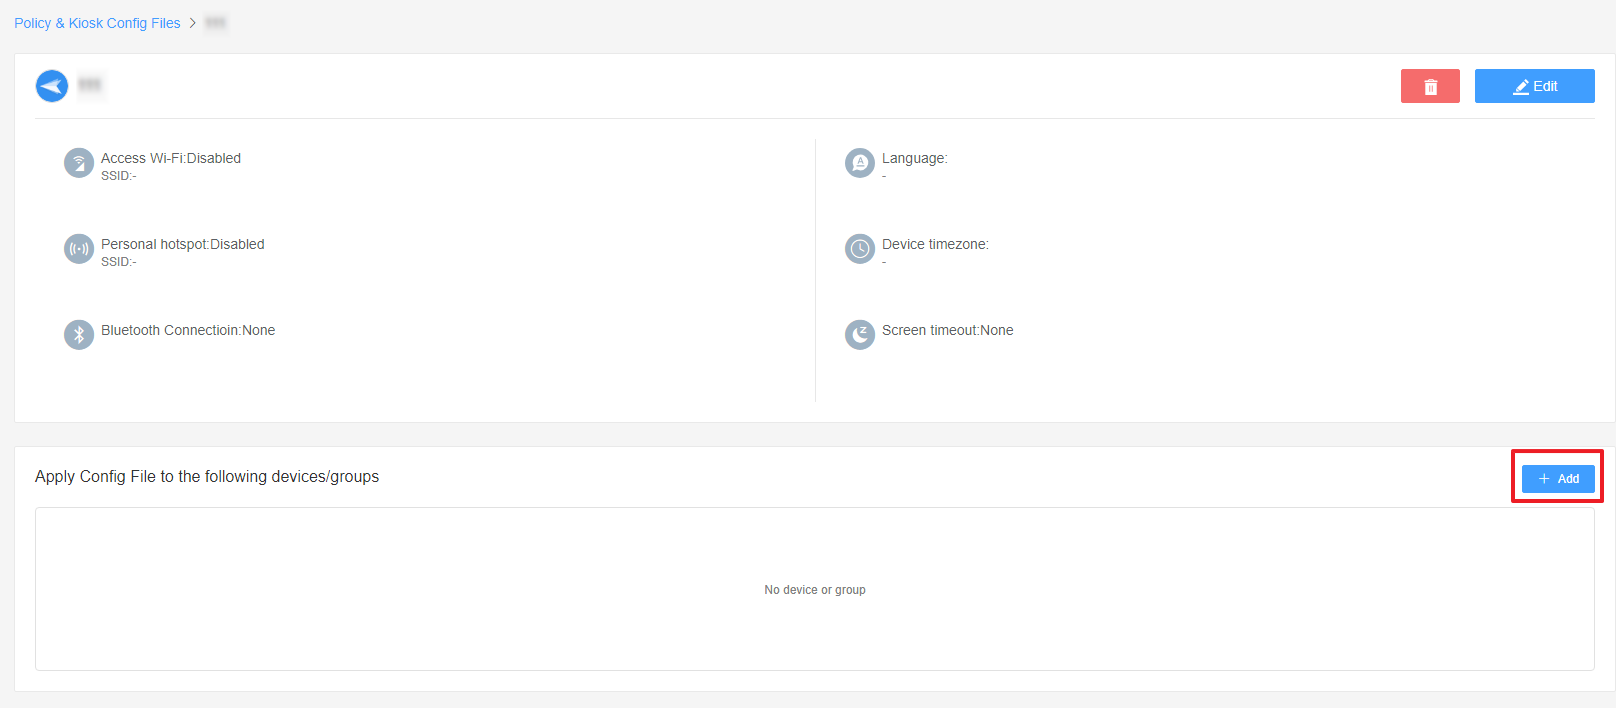
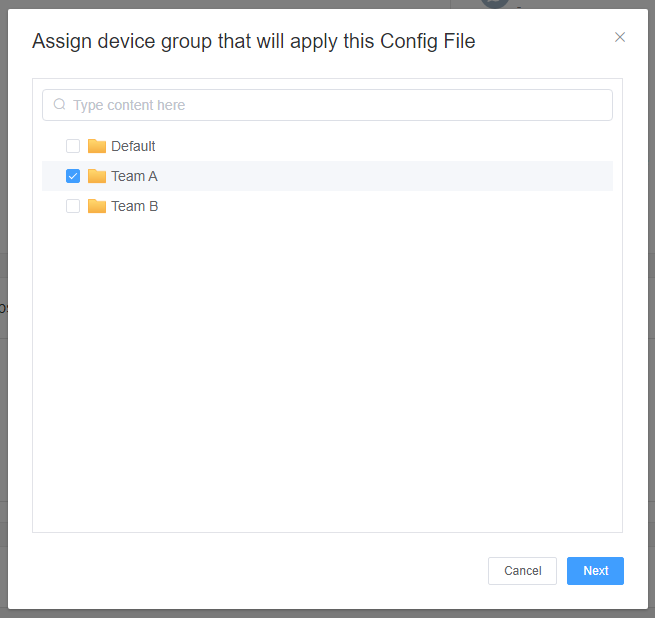
- Then, return to the Policy Management section, select the policy you just created or edited, find the [Apply Config File to the following devices/groups] and click [+Add]. Choose the devices or groups you want to apply the policy to and confirm.
And that's it! By following the steps above, you can successfully implement an App Blocklist or App Allowlist on AirDroid Business. This will ensure that users can only access the apps you've specified, preventing unnecessary distractions, conserving data usage, and protecting corporate information.
Still need help? Submit a request >>
Related Articles
- How to Use OEMConfig Policy to Restrict the Samsung Device
- How can I control camera access using Camera and Lockscreen Camera Settings in AirDroid Business?
- How can I set up password rules with Android Password Policy in AirDroid Business?
- How do I manage Microphone Permissions in AirDroid Business?
- How can I ensure data security with Mandatory Storage Encryption in AirDroid Business?
You May Also Like
- How to use App Allowlist for Kiosk Mode in AirDroid Business?
- How to Set up Kiosk Website Allowlist on AirDroid Business?
- How to set up Kiosk Browser Settings on AirDroid Business?
- How do I Customize the Kiosk Brand within AirDroid Business?
- How to Modify My Brand and Layout in Kiosk Mode of AirDroid Business?