Table of Contents
How to Set up Tasks to Schedule Tasks and Manage Your Devices in Bulk?
Table of Contents[ShowHide]
Tasks function of AirDroid Business allows simultaneous management, notifications, or security implementations across numerous devices. For large-scale deployments, this feature ensures consistency, reducing the likelihood of errors and enhancing overall reliability.
- Step 1Access to Tasks & Action Logs
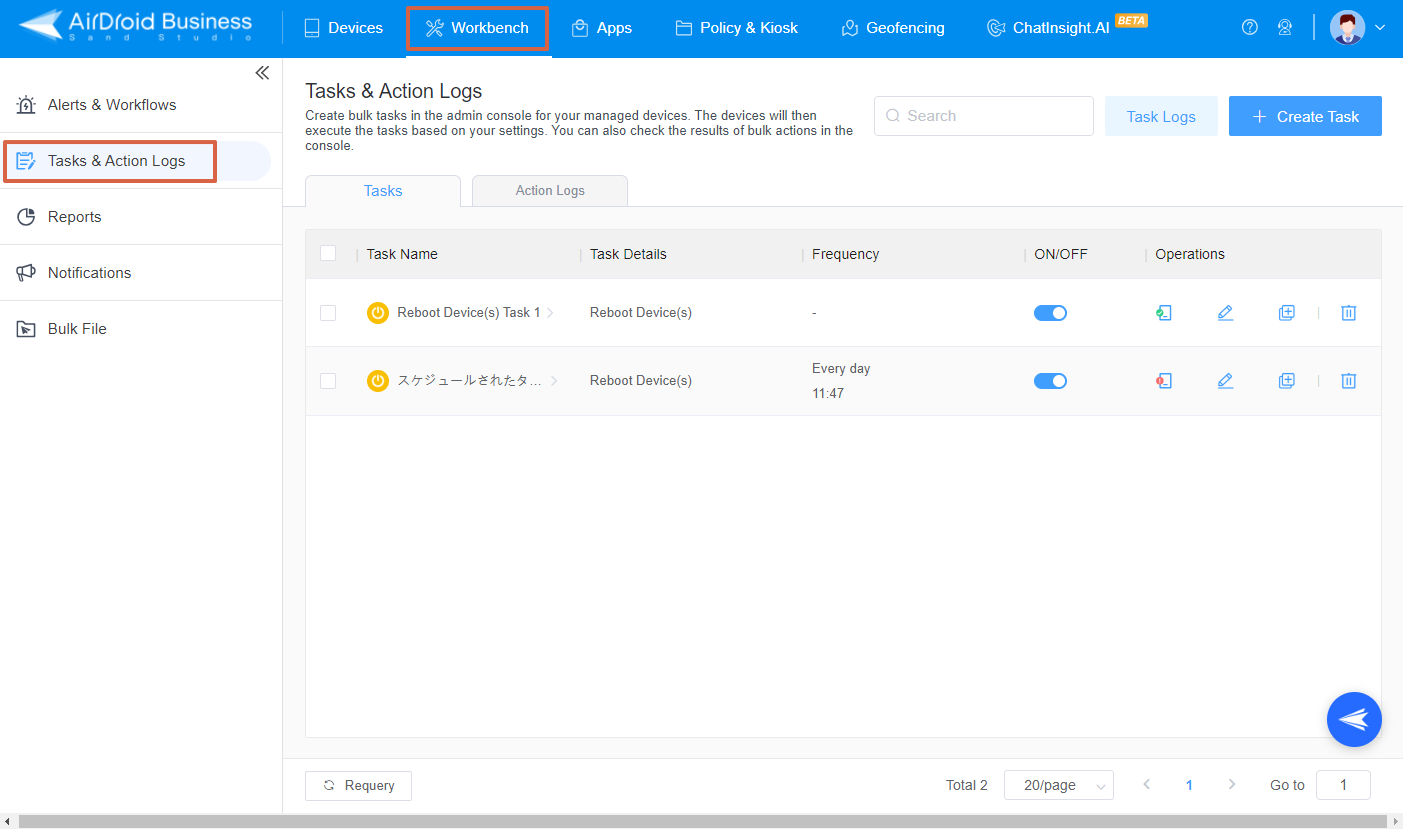
- Log in to AirDroid Business Admin Console, and go to the Workbench > Taskd & Action Logs.
- Step 2Create Task
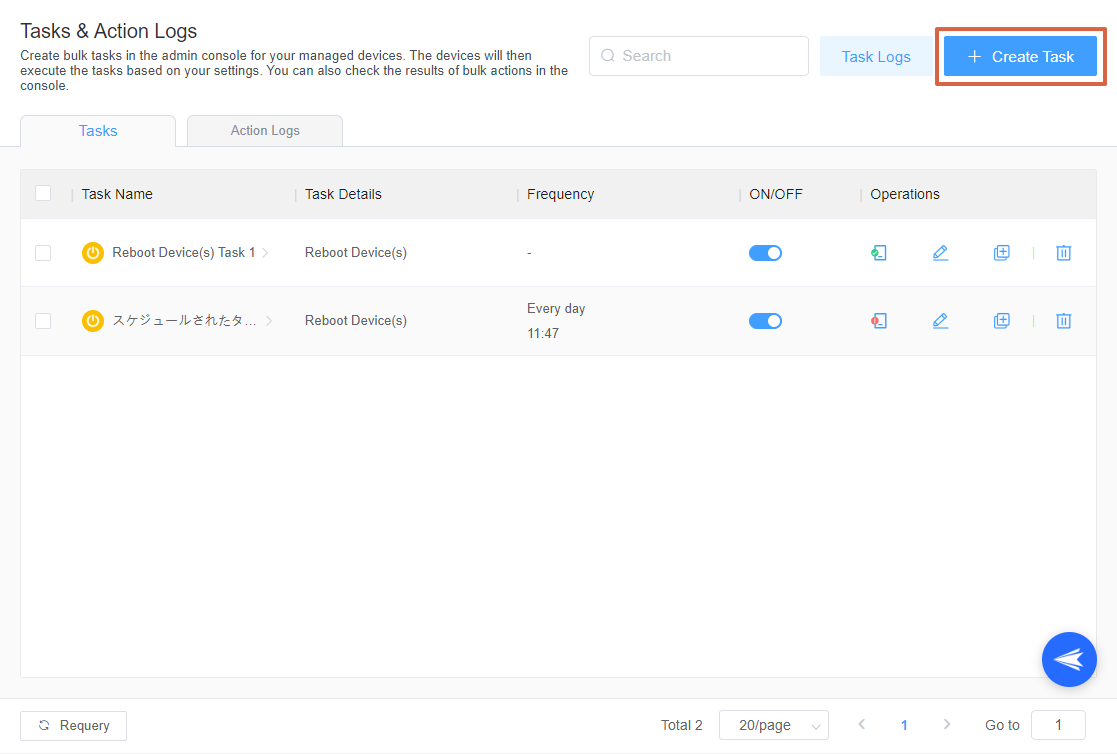
- Choose [+Create Task] or Click to edit existing Task.
- Step 3Set up Task
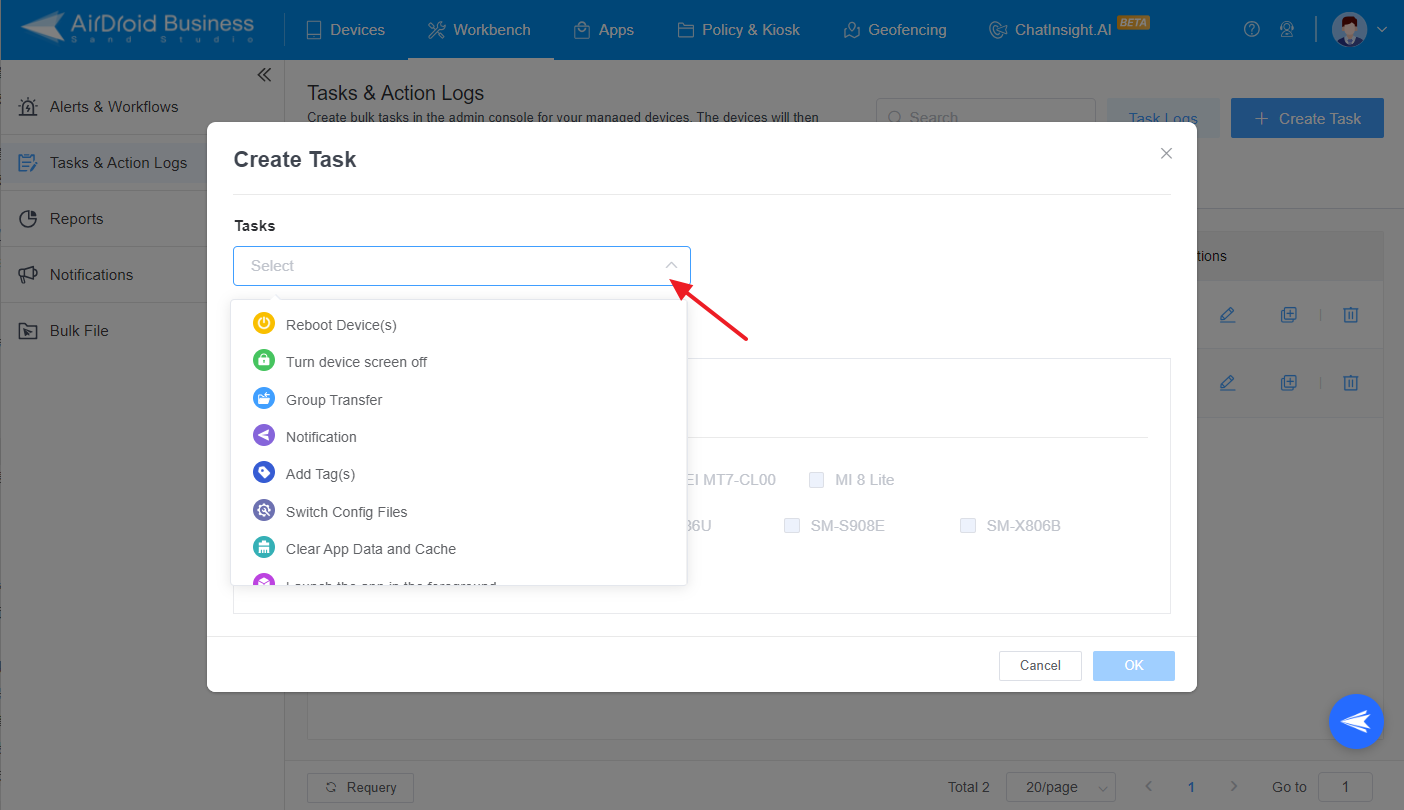
- Choose the task by clicking the drop-down box. The tasks available correspond to the actions of "Batch Operation".
- ● Reboot Device(s)
- ● Turn device screen off: This will trigger the screen time-out function of the device. If the screen lock of the device is not set to "None," the screen lock will be applied to the device simultaneously.
- ● Notification: An alternative way of setting up Notifications.
- ● Group Transfer: The selected devices will be transferred to the selected group of the "Group."
- ● Add Tag(s)
- ● Switch Config Files
- ● Clear App Data and Cache
- ● Launch the app in the foreground: This Task will open the designated application to the foreground of the device.
- ● Factory Reset: This will unenroll the device and factory reset the device.
- ● Unenroll Device(s)
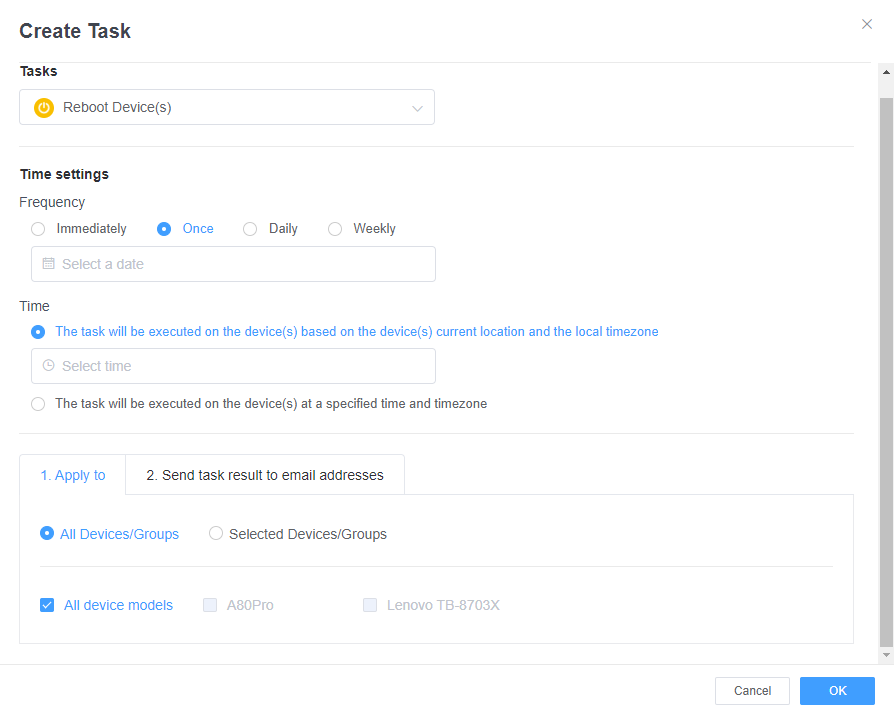
- Take Reboot Device(s) as an example, this is what you will see.
- There are options for you to set for tasks:
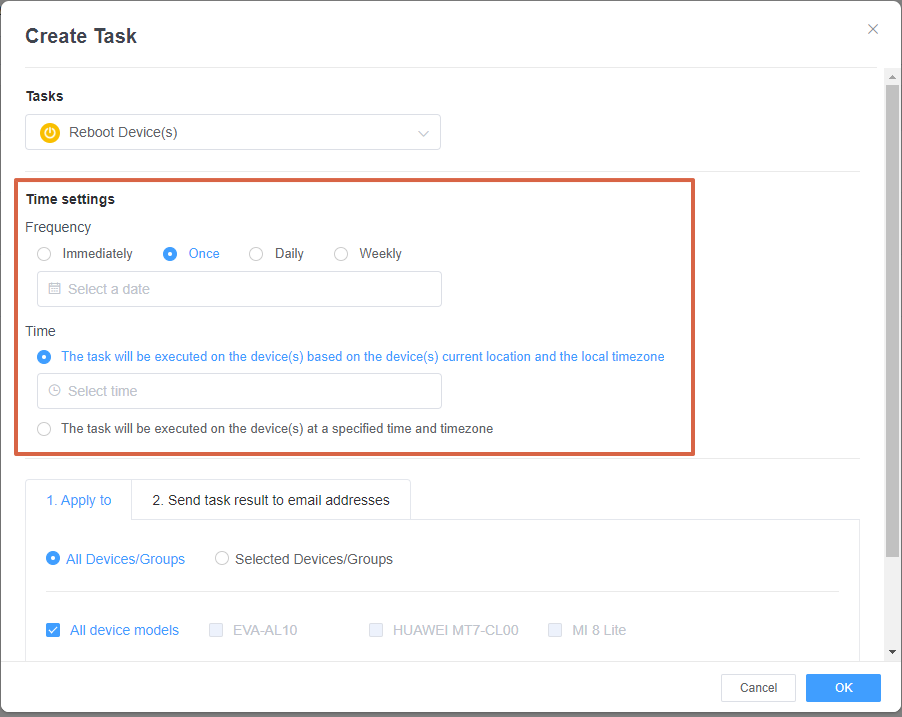
1Time settings
- You can choose from Immediately, Once, Daily, or Weekly.
- You can also set a united time zone for all devices in different time zones for the task or just let the task perform an action based on the local time zone.
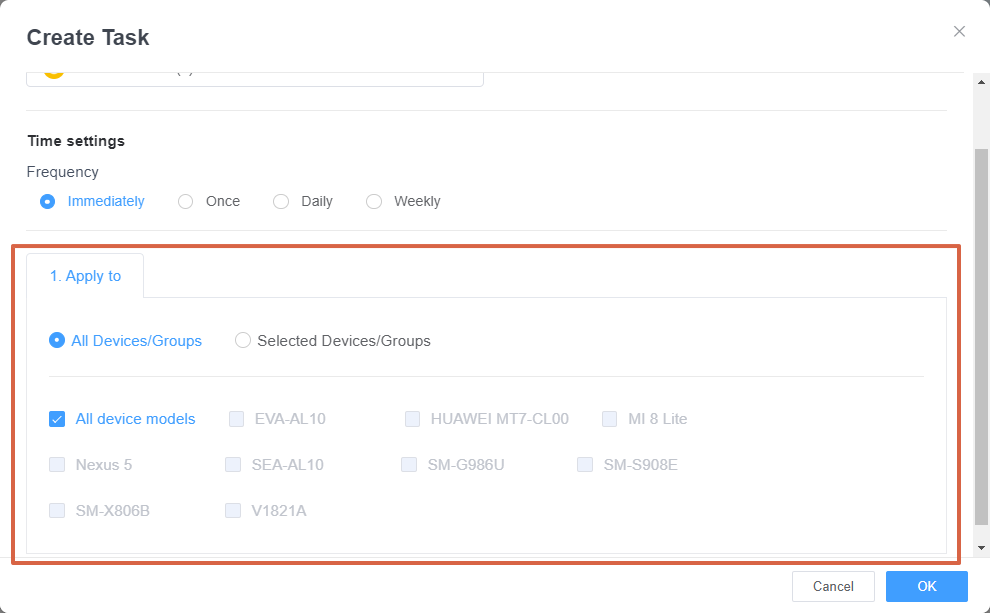
2Apply to
- You can set which device groups or device models the task will apply to.
3Send task result to email addresses
- If the Task is a scheduled Task, not an immediate Task, you will have the option to send the result of the task to designated email addresses.
Note :
1. If you have not set Biz Daemon to launch at startup, your device's online/offline status will be inaccessible after reboot.
2. Devices enrolled through Android Enterprise or Zero Touch are not supported.
1. If you have not set Biz Daemon to launch at startup, your device's online/offline status will be inaccessible after reboot.
2. Devices enrolled through Android Enterprise or Zero Touch are not supported.
- Step 4Add Task Name
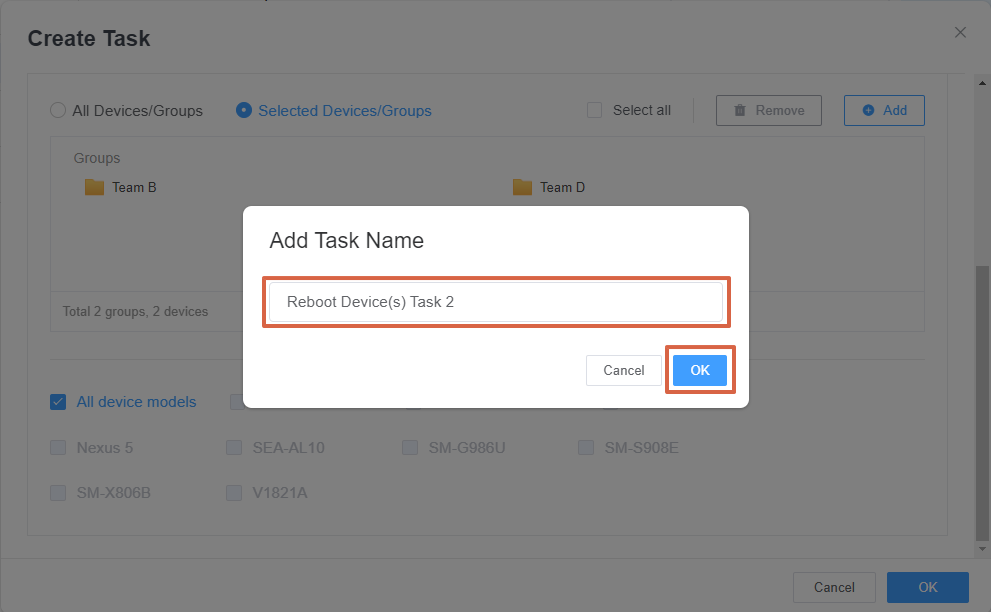
- After setting all the above, you can add a name to the task and confirm it.
- Step 5Review the Task Logs
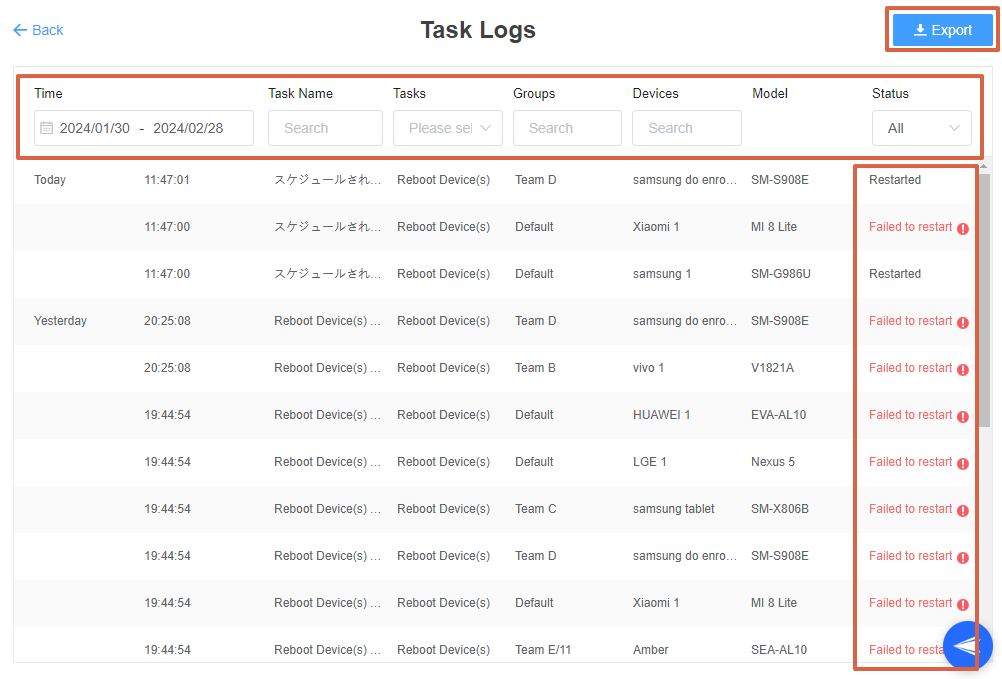
- You can check the Task Logs by clicking the [Task Logs] button.
- You can set filter conditions to view the task log.
- In addition, the Task Logs will show if the device operations were carried out successfully or if they failed. In case of a failure, you can hover the mouse over the exclamation point and the specific reason for the failure will be displayed.
- If you want to export Task logs, please click the [Export] button of the top right corner. This feature allows you to view and export all task logs from the past 90 days.
- Step 6Manage Task List
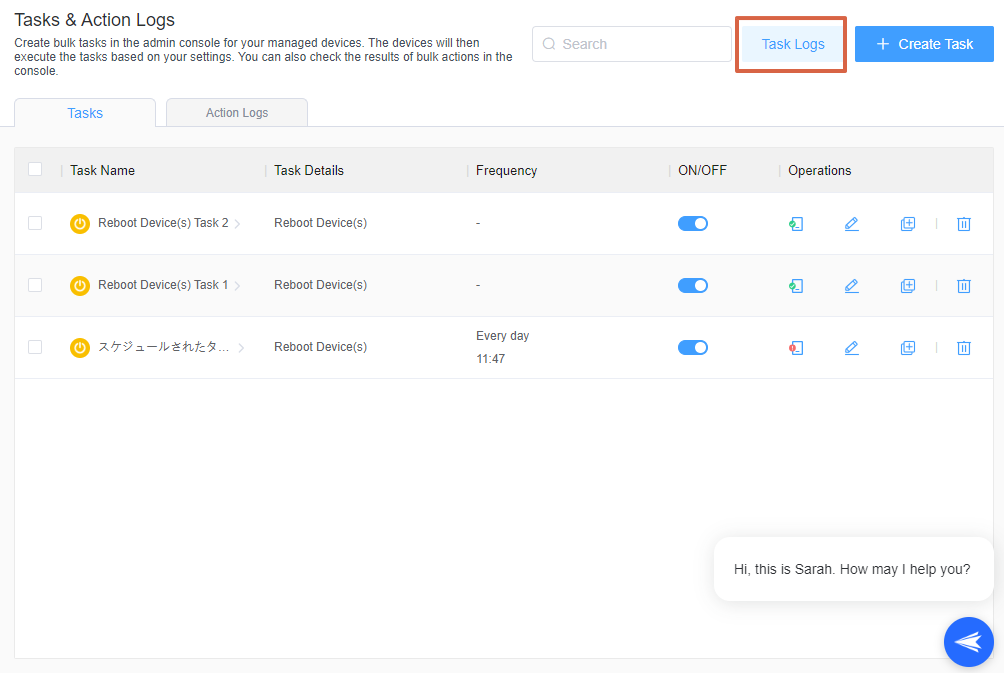
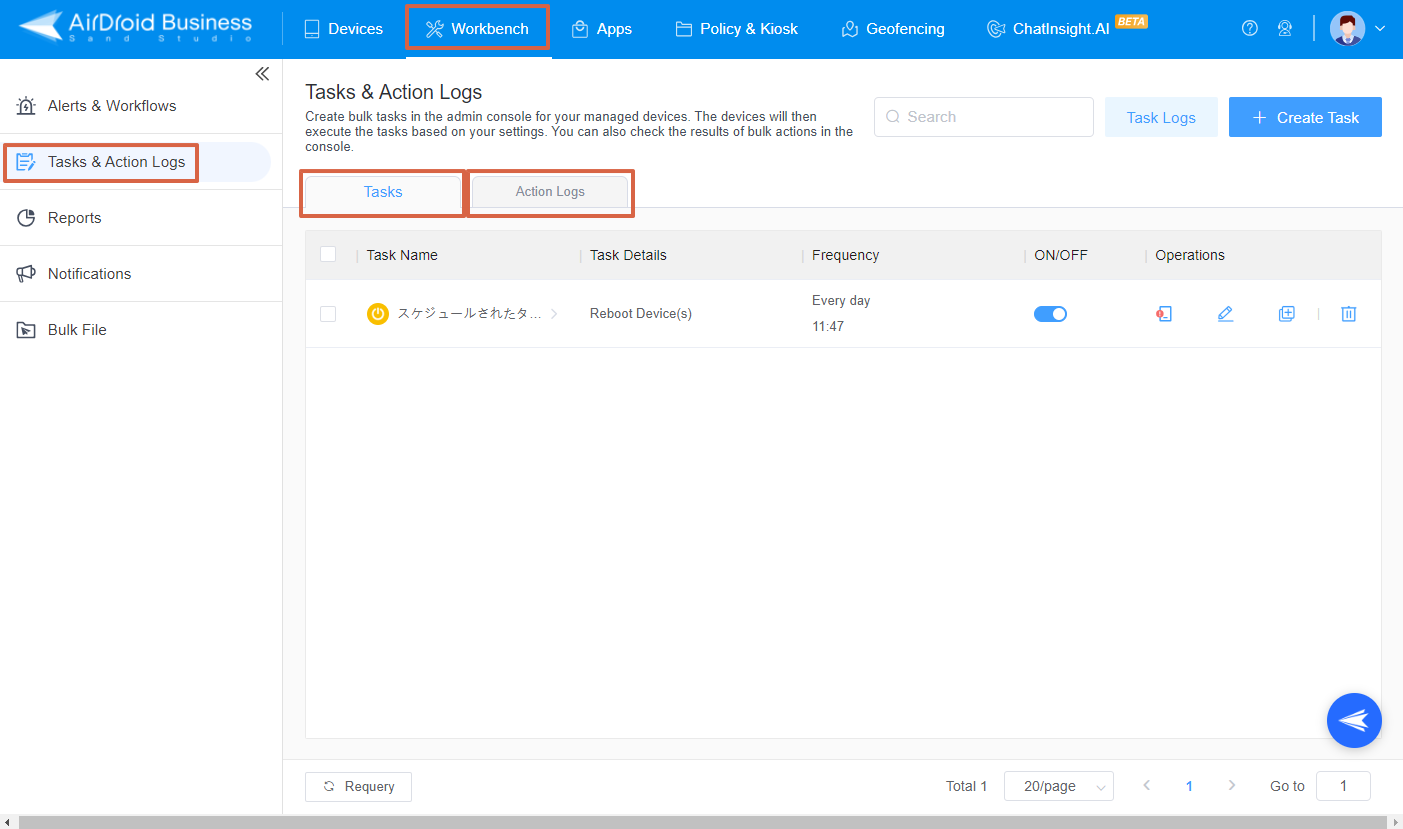
- Once the task is created, it will appear on the task list. This list allows you to view details of the task, its frequency, and status. Additionally, you can perform various operations here such as viewing more details, editing the task, making a copy, or deleting it.
1Task Name
- By clicking the name of a task, you can check the Logs and Send History of that individual task.
2Task Details
- You can view the type of Task here.
3Frequency
- You can check the frequency of the task here.
4ON/ OFF
- You can start a task by switching it on. If you wish to stop the task, simply switch it off.
5Operations
- ● See details: The Task sending history can be checked here.
- ● Edit: Click it to edit existing Task.
- ● Copy: Click it to copy a Task with exactly the same setting.
- ● Delete: Delete the chosen Task.


Was This Page Helpful?
Still need help? Submit a request >>
Related Articles
- How to Create and Manage Device Groups on AirDroid Business?
- How to invite and manage account members on AirDroid Business?
- How to create a custom role on AirDroid Business?
- How to manage the devices in the Device List?
- How to Use “Batch Operations” to Improve Device Management Efficiency?
See all articles
You May Also Like
- What features are available for Remote Access on AirDroid Business?
- How to remote access a device via Admin Console on AirDroid Business?
- How to Manage Devices on AirDroid Business Desktop Client?
- How do I use the View Mode on AirDroid Business?
- How to use Black Screen Mode to maintain the remote device during Remote Control?
See all articles

