How to Use Credential Setting Policy to Secure Corporate Data?
In the digital age, securing corporate data is paramount. One effective way to enhance security across your organization's Android devices is through the implementation of a Credential Setting Policy.
This tutorial will guide you through the process of setting up such a policy using AirDroid Business, ensuring that only authenticated users can access sensitive corporate information.
1Understanding Credential Setting Policy
Credential management is an essential component within policy settings, enabling administrators to remotely handle digital certificates on Android devices. These certificates play a crucial role in enhancing security by verifying the identity of users and ensuring their secure access to corporate resources such as VPNs and Wi-Fi networks. Additionally, they contribute to the protection of network connections, the authentication of email correspondence, and the reliable accessibility of data for users.

For Android devices, the following types of certificates are supported:
● Identity Certificates: These certificates are used by applications/browsers to recognize a user's identity for Certificate-Based Authentication (CBA). They typically come in formats like .p12 and .pfx.
● CA Certificates: These are used to establish the trustworthiness of the provided certificates and can be in formats such as .cer, .pem, and .der.
Note:
- This feature supports only devices with Android 7.0 and above.
- Devices enrolled through Android Enterprise or Zero Touch are not supported.
- These settings only take effect when AirDroid Biz Daemon has the Device Owner permission on the device.
- Devices enrolled through Android Enterprise or Zero Touch are not supported.
- Important: To install credentials on devices running Android 9 and below, please go to [Password] - [Password Configuration] to set a password first before issuing a credential.
- The Basic plan does not include access to the Credential Setting Policy. Users on the Standard plan will need to upgrade their plan to access this feature, while the Enterprise plan includes direct access to the Credential Setting Policy.
2Steps to Set up Credential Setting Policy
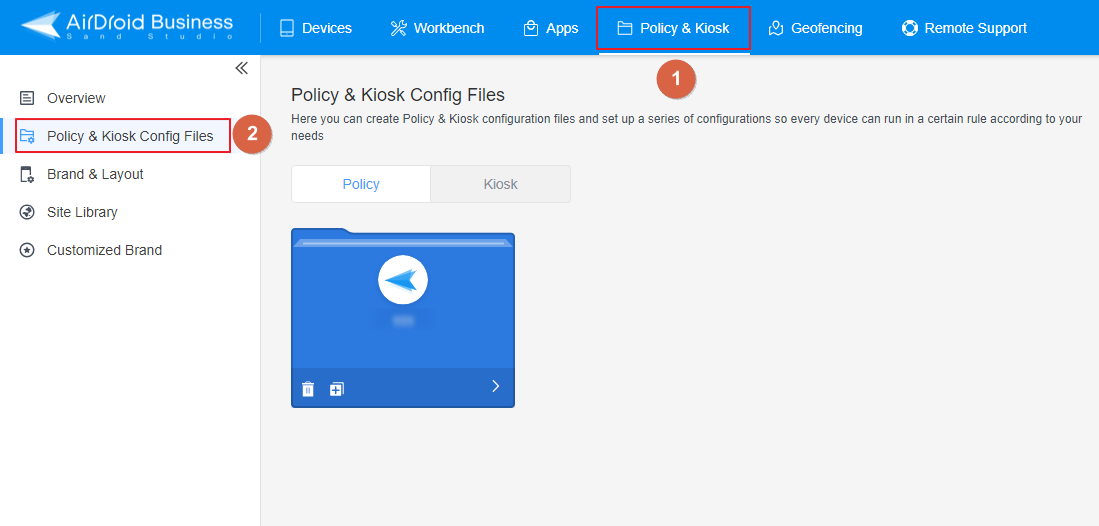
- Step 1Access Policy Setting
- Log into Admin Console, navigate to the "Policy & Kiosk" Section on the dashboard, and click "Policy & Kiosk Config Files".

- Step 2Create or Edit a Policy
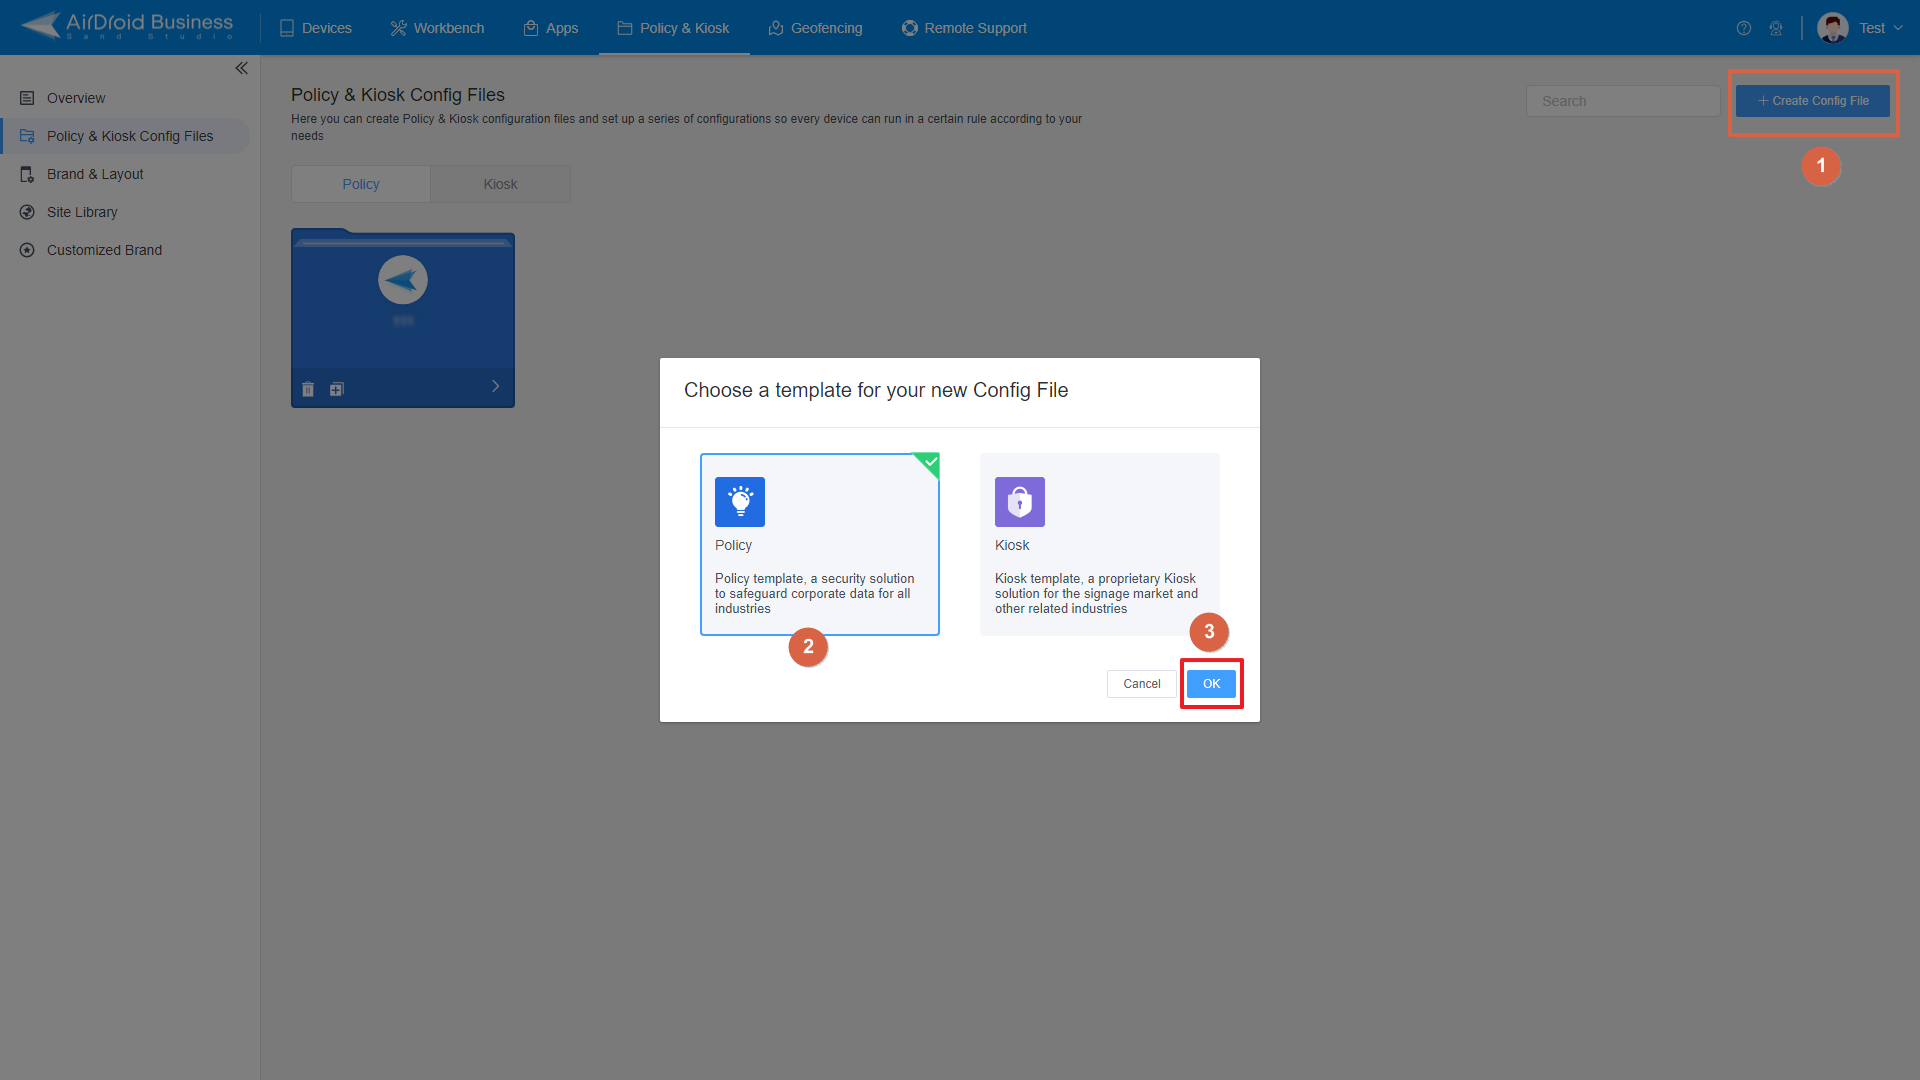
- In this section, you have the option to either create a new policy or modify an existing one.
- ● To create a new policy, click on "+Create Config File", choose "Policy" and then click "OK" on the pop-up.

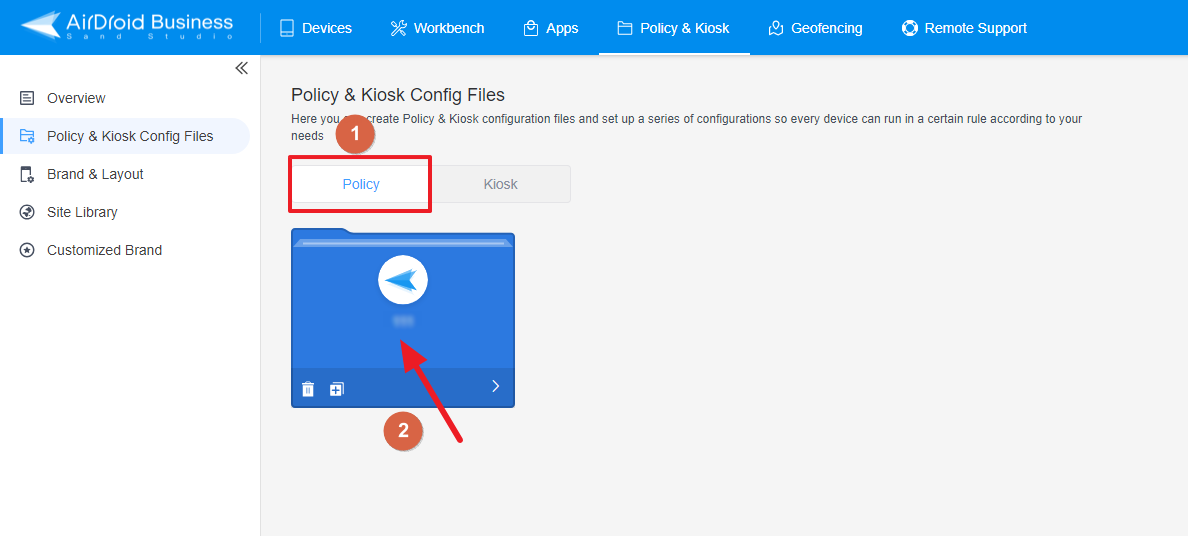
- ● To modify an existing Policy, switch to the "Policy" tab, select the Policy File you want to modify.

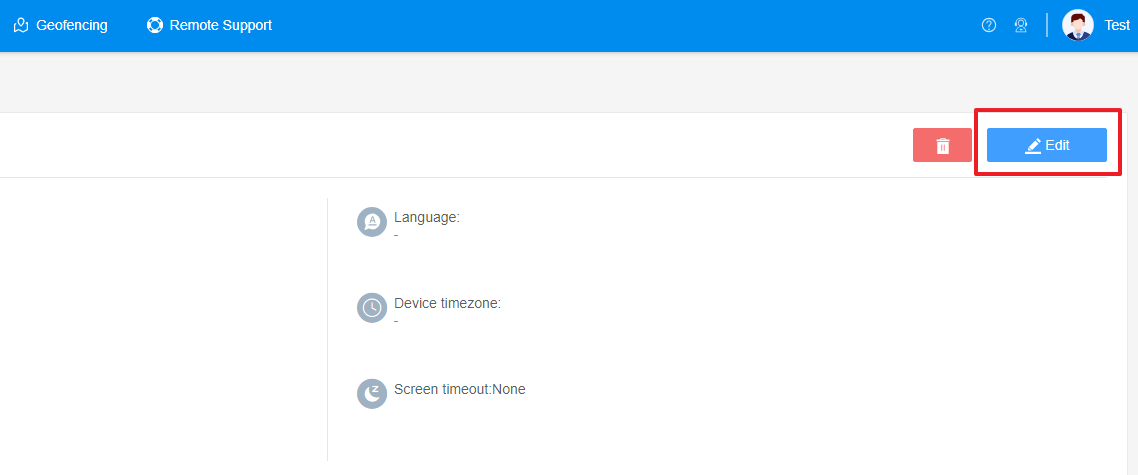
- Click on the "Edit" Button in the top right corner. On the following page, you can set all kinds of limitations and settings for your config file.

- Step 3Access the "Credential Setting" Policy Section
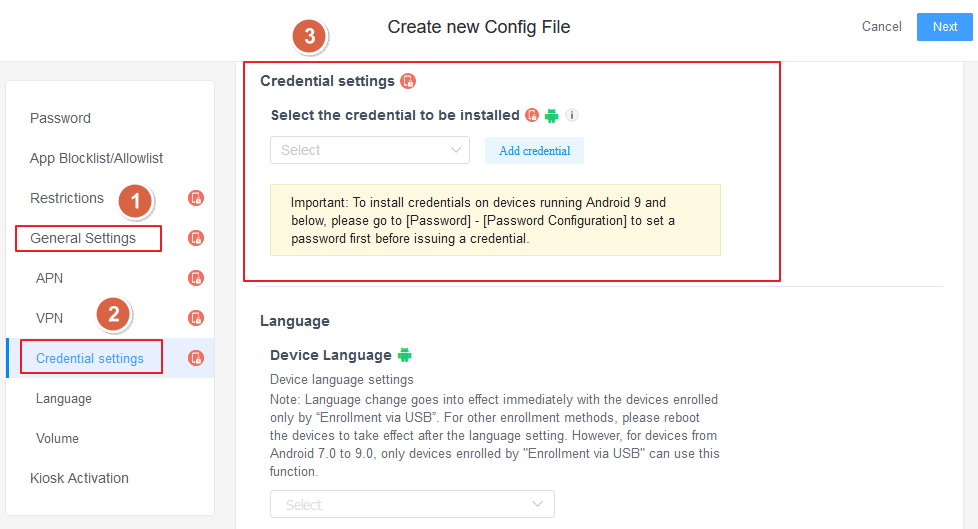
- Click on [General Settings], and find the "Credential settings" section. Here, you can configure the "Credential settings" Policy.

- Step 4Add Credentials
- There are two methods to add Credentials.
- Method 1:
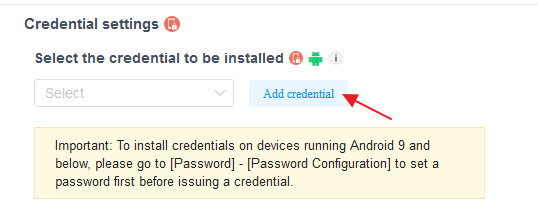
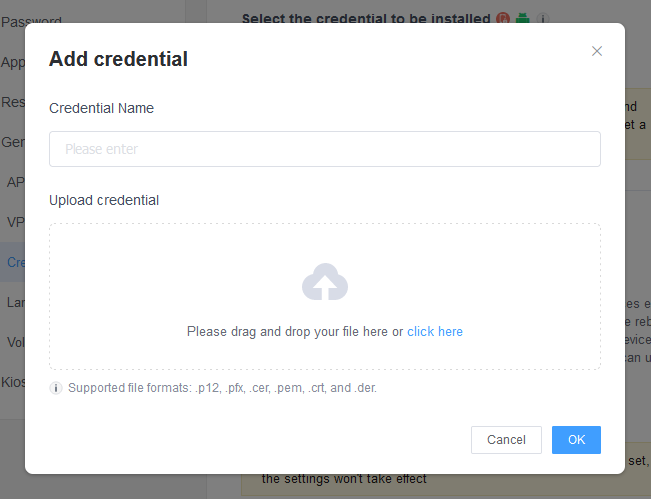
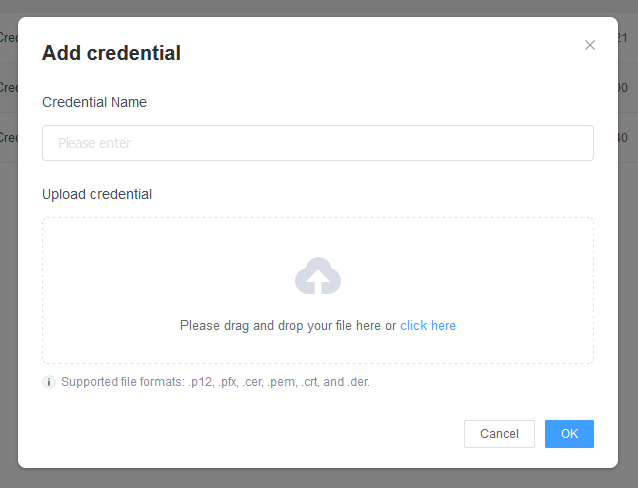
- Click the button [Add Credential], and you can set up the Credential you want to add in the pop-up window. You can upload the Credential file, set up the Credential name, and Password, etc.


- Method 2:
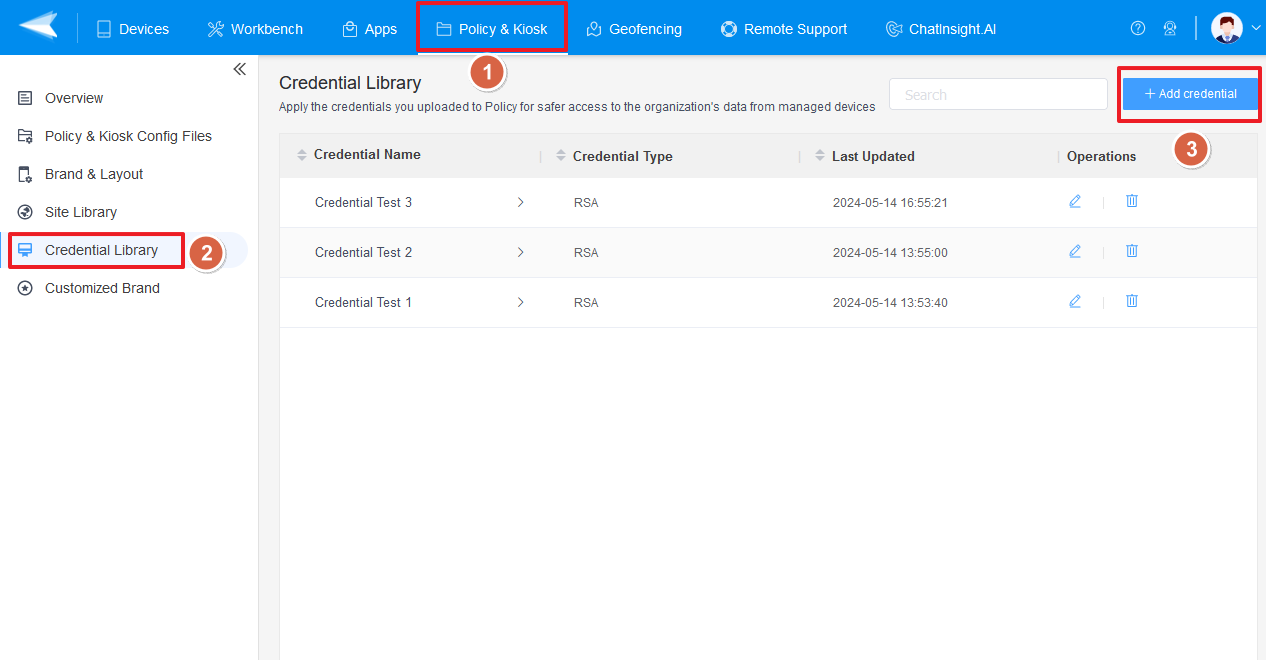
- Go to Policy & Kiosk > Credential Library > Click the button [Add Credential] > Upload the Credential file and complete other information.


1. This feature only supports the credential formats: .p12, .pfx, .cer, .pem, and .der.
2. If the uploaded certificate is an identity certificate (.p12 or pfx), you need to enter the password of the file additionally.
- Step 5Choose the Credentials
- There are two methods to add Credentials.
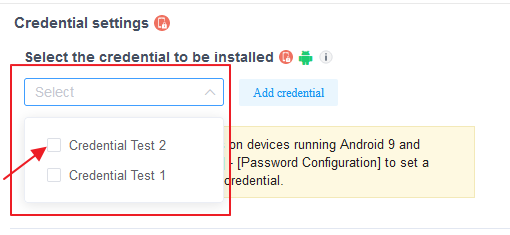
- After you add the Credentials, you can click the drop-down box to choose the Credentials.
- Step 6Save and Apply the Policy
- After setting up the this Policy, click "Save" button on the top right corner.

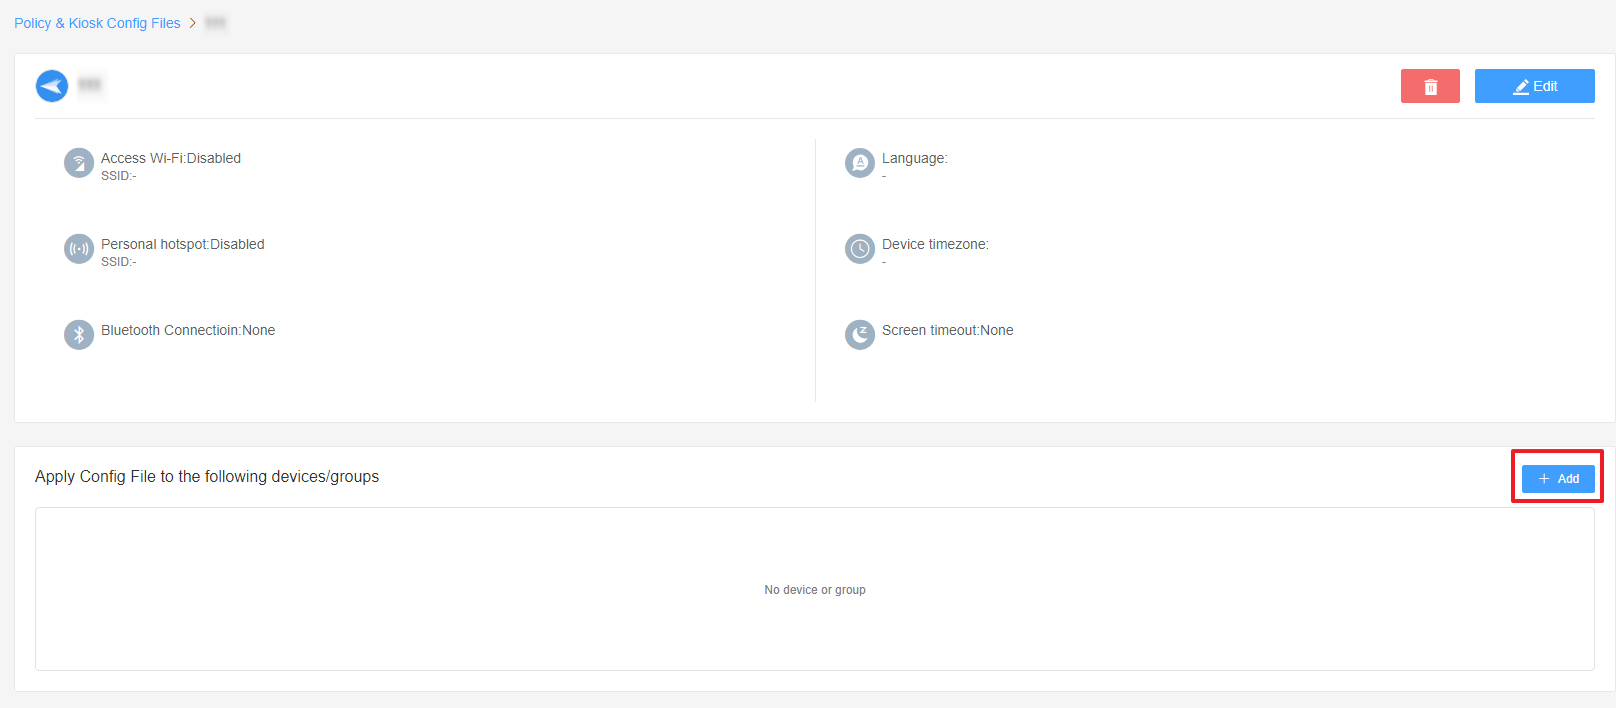
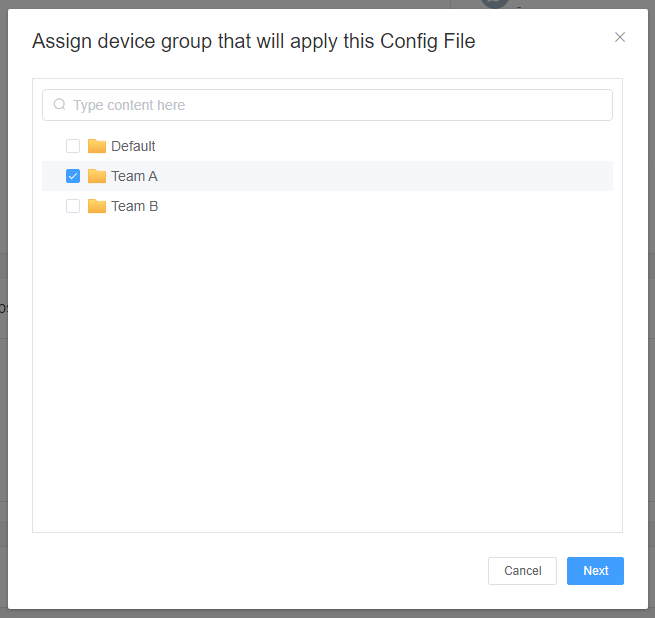
- Then, return to the Policy Management section, select the policy you created or edited, find the [Apply Config File to the following devices/groups] and click [+Add]. Choose the devices or groups you want to apply the policy to and confirm.


- When the status in the list turns to "Applied successfully", the policy settings have been successfully applied to the target devices.

- Step 7Confirm Certificate Installation
- After applying the credential policy, you should check the application result on your device.


Identity certificates require a screen lock password for silent installation. If not set, a notification will guide device users to set a password, enabling certificate installation.
Still need help? Submit a request >>
Related Articles
- How to implement App Blocklist/ App Allowlist on AirDroid Business?
- How can I control camera access using Camera and Lockscreen Camera Settings in AirDroid Business?
- How can I set up password rules with Android Password Policy in AirDroid Business?
- How do I manage Microphone Permissions in AirDroid Business?
- How can I ensure data security with Mandatory Storage Encryption in AirDroid Business?
You May Also Like
- How to use App Allowlist for Kiosk Mode in AirDroid Business?
- How to Set up Kiosk Website Allowlist on AirDroid Business?
- How to set up Kiosk Browser Settings on AirDroid Business?
- How do I Customize the Kiosk Brand within AirDroid Business?
- How to Modify My Brand and Layout in Kiosk Mode of AirDroid Business?


