How to manage the devices in the Device List?
After you enroll your devices, you can manage your devices and take certain actions on the Admin Console through Device List.
Device List provides a centralized view of all your connected devices. You can quickly access device information, perform remote actions, and organize devices into groups for efficient management.
In this article, we will show you how to manage and organize your devices using Device List, ensuring smooth device management for your business.
1Accessing the Device List
To access the Device List in AirDroid Business, follow these steps:
1. Log in to the AirDroid Business Admin Console.
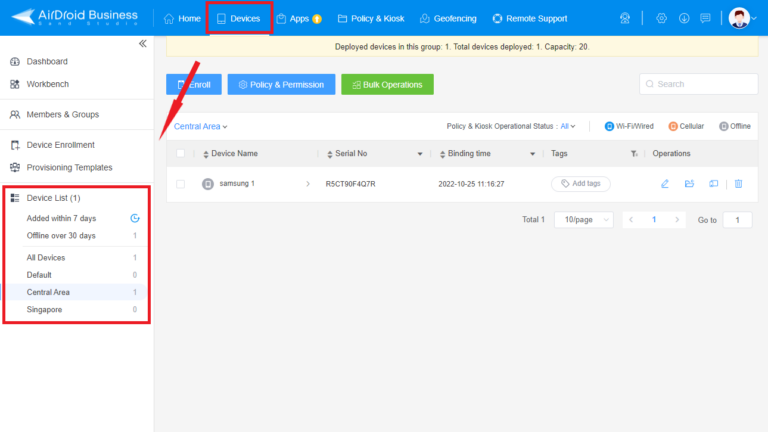
2. Click "Devices" at the top Navigation Bar.
3. Find Device List on the left side menu. The device list by default shows devices added within 7 days, offline over 30 days, all devices, default group, as well as the device groups you added. (If you don't know how to create a new device group, please refer to this article.)
4. Find the specific devices you want to take action on from a specific group or All Devices.
2Manage the devices in the Device List
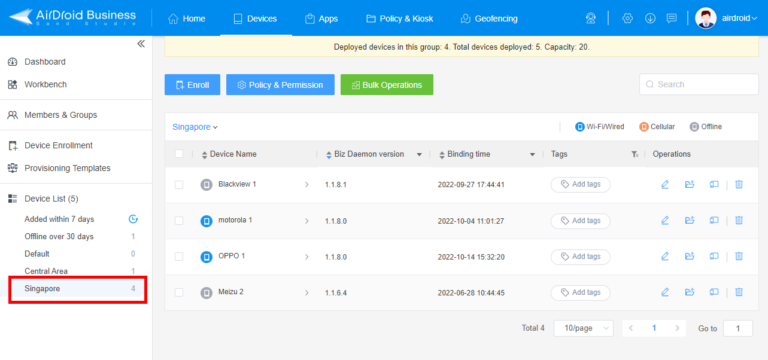
1View Devices in Groups
According to the group you choose, you can find the list of the devices in the group. The Device List displays essential information about each device, such as device name, Biz Daemon version, Binding time.
2View Device Information
If you want to view a specific device's detailed information and available actions, you can click on the device name.

The newly opened page will show you the information, such as Model, Battery Capacity, Biz Daemon version, Available Storage, Root Status, Network status and Enrollment Method, etc.
3Edit device
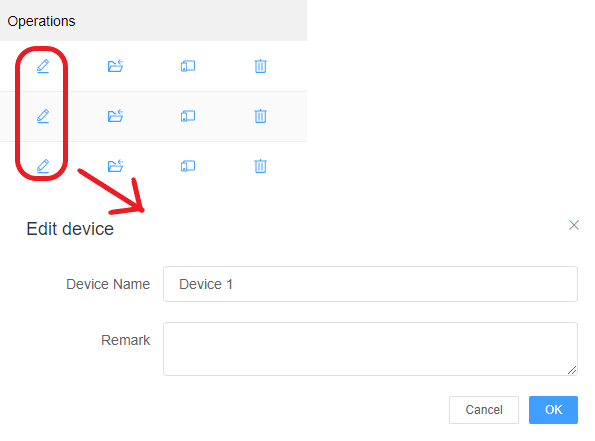
Under the Operation column, The pen icon can let you customize the device name or leave remarks as you need.
4Moving Groups
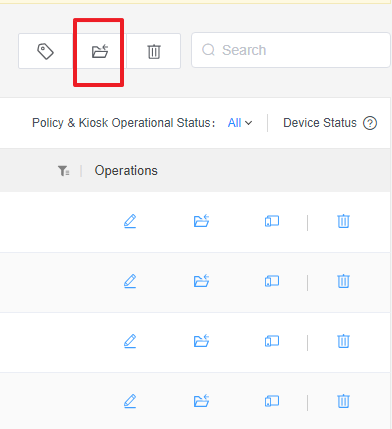
The second folder icon allows you to move devices from group to group for better organization and management. You can move devices individually or in bulk, depending on your needs.
Single Device Operation
1. Locate the device you want to move in the Device List.
2. Click the folder icon in the Operation column.
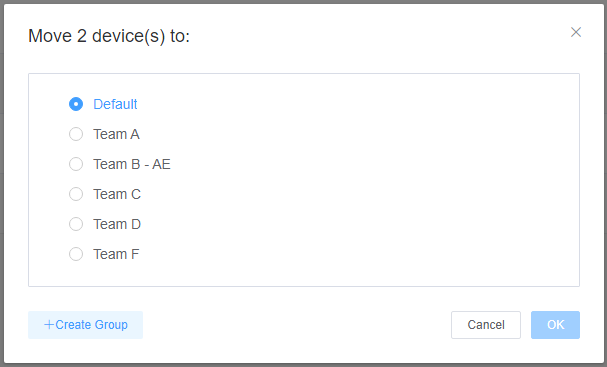
3. In the pop-up window, select the target group to which you want to move the device.
4. Click "OK" to complete the process.
Bulk Device Operation
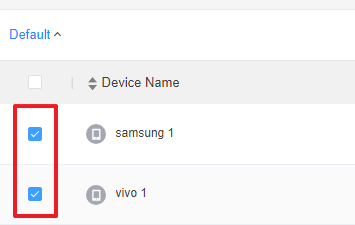
1. In the Device List, select the checkbox next to each device you want to move.
2. Click the folder icon located above the Device List, near the search box.
3. In the pop-up window, select the target group to which you want to move the selected devices.
4. Click "OK" to complete the process.
5Remote Operations
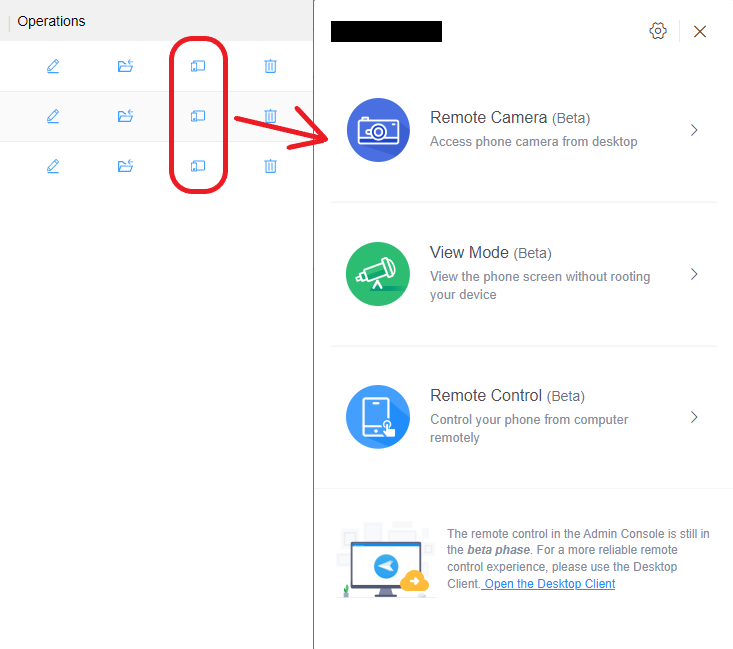
The third devices icon can let you perform remote operations.
6Remove Devices
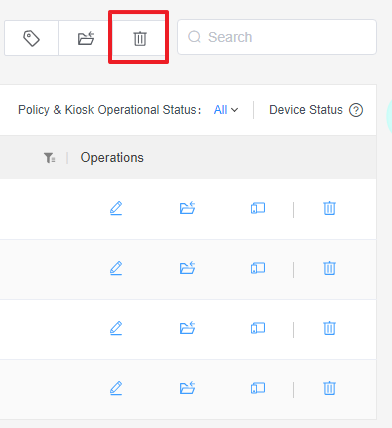
The last bin icon allows you to remove the devices from your organization.
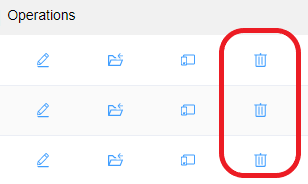
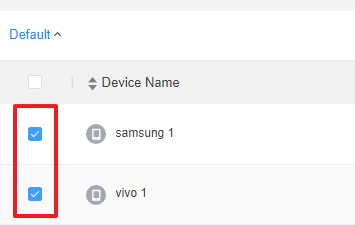
If you need a bulk operation, please select the checkbox next to the devices you want to delete. Click bin icon above the Device List. And then click "OK" in the pop up window.

7Tag Management and Filtering
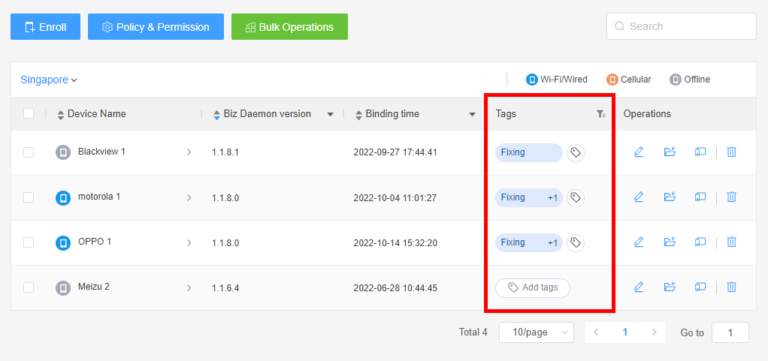
If you like to use the tags to manage and filter the devices, you could refer to this article for more details.
8Filter Devices by Policy & Kiosk Status
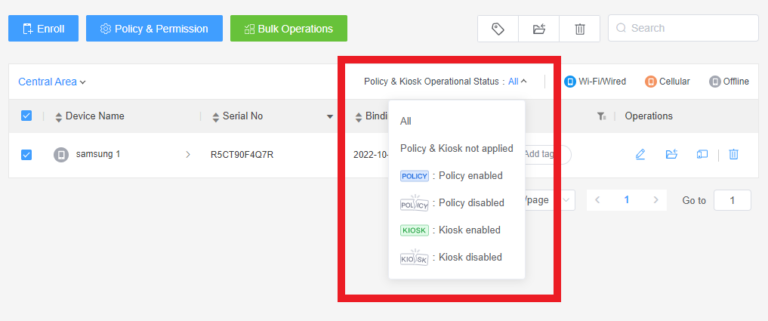
If you want to filter the devices in the group by the Policy or Kiosk status, click the drop-down menu of Policy & Kiosk Operational Status and choose the corresponding Policy or Kiosk status.
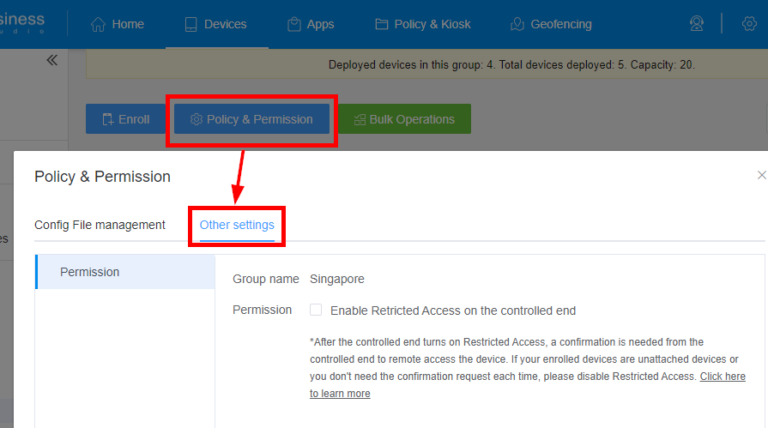
9Set Access Permissions
You can also set the access permission for devices in the group by clicking the Policy & Permission > Other settings > Permission
10Search Devices
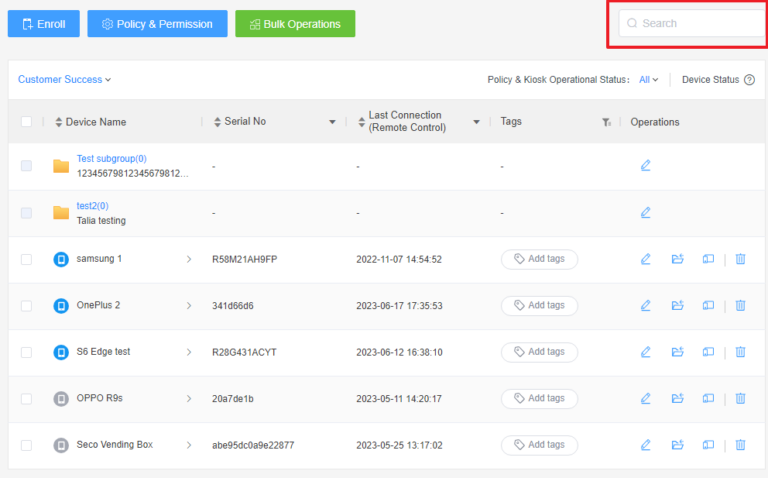
Use the search bar at the top of the Device List to quickly find specific devices by their name, Serial No. , Tags or other identifying information.
Congratulations! With this article, you have now mastered how to use Device List to manage and organize your devices.
If you want to learn more about Device Monitor, please refer to this article.
Video Tutorial: Manage the Devices in the Device List
Still need help? Submit a request >>
Related Articles
- How to Create and Manage Device Groups on AirDroid Business?
- How to invite and manage account members on AirDroid Business?
- How to create a custom role on AirDroid Business?
- How to Use “Batch Operations” to Improve Device Management Efficiency?
- How to Set up Tasks to Schedule Tasks and Manage Your Devices in Bulk?
You May Also Like
- What features are available for Remote Access on AirDroid Business?
- How to remote access a device via Admin Console on AirDroid Business?
- How to Manage Devices on AirDroid Business Desktop Client?
- How do I use the View Mode on AirDroid Business?
- How to use Black Screen Mode to maintain the remote device during Remote Control?

