How to invite and manage account members on AirDroid Business?
AirDroid Business provides the functions for you to invite all the members you need to manage all your devices and to efficiently distribute the proper permission to each of your members so that they will not mistakenly access or change anything they are not familiar with.
In this article, we will guide you through managing device members and permissions in AirDroid Business, to help you effectively control access and ensure a secure environment for your devices.
We will cover two main aspects: understanding roles and permissions, and inviting and managing account members.
1Understanding Roles & Permissions
The Role & Permission function allows you to limit your managers' accessibility to the admin console. With this function, you can easily make sure each manager will only be able to use the functions aligned to their daily duties without misusing the functions they are unfamiliar with.
We provide four default roles that you can apply to your members without extra effort. You can use these roles as references to create your own custom roles so that they will be adapted to the company operation perfectly.
Introduction to the Role & Permission:
Default Role
1Super Admin
This role has permission to use all functions and accessibility to all devices just like the Owner account but the payment function.
2Admin
This role can only manage Team Members and Viewers, which means they can only invite users as Team Members or Viewers. This role can also use most of the functions and access all devices, and only a few functions are limited to this role.
3Team Member
This role can only access specific functions and settings such as Dashboard and some tools in Workbench. The accessibility of this role is mainly focused on remote monitoring and devices management.
4Viewer
This role can only remotely monitor devices and has no access to any other functions such as remote control or settings in the Admin Console.
Custom Role
With customized permission and name, you can create roles that meet your company's demands as perfectly as possible. If there are only a few differences between your needs and what a current role already has, you can copy the role's permission to simplify your process and customize it.
You can also check the article to learn how to create a customized role and apply the role to your members.
Here is a comparison table of the different roles & permissions.
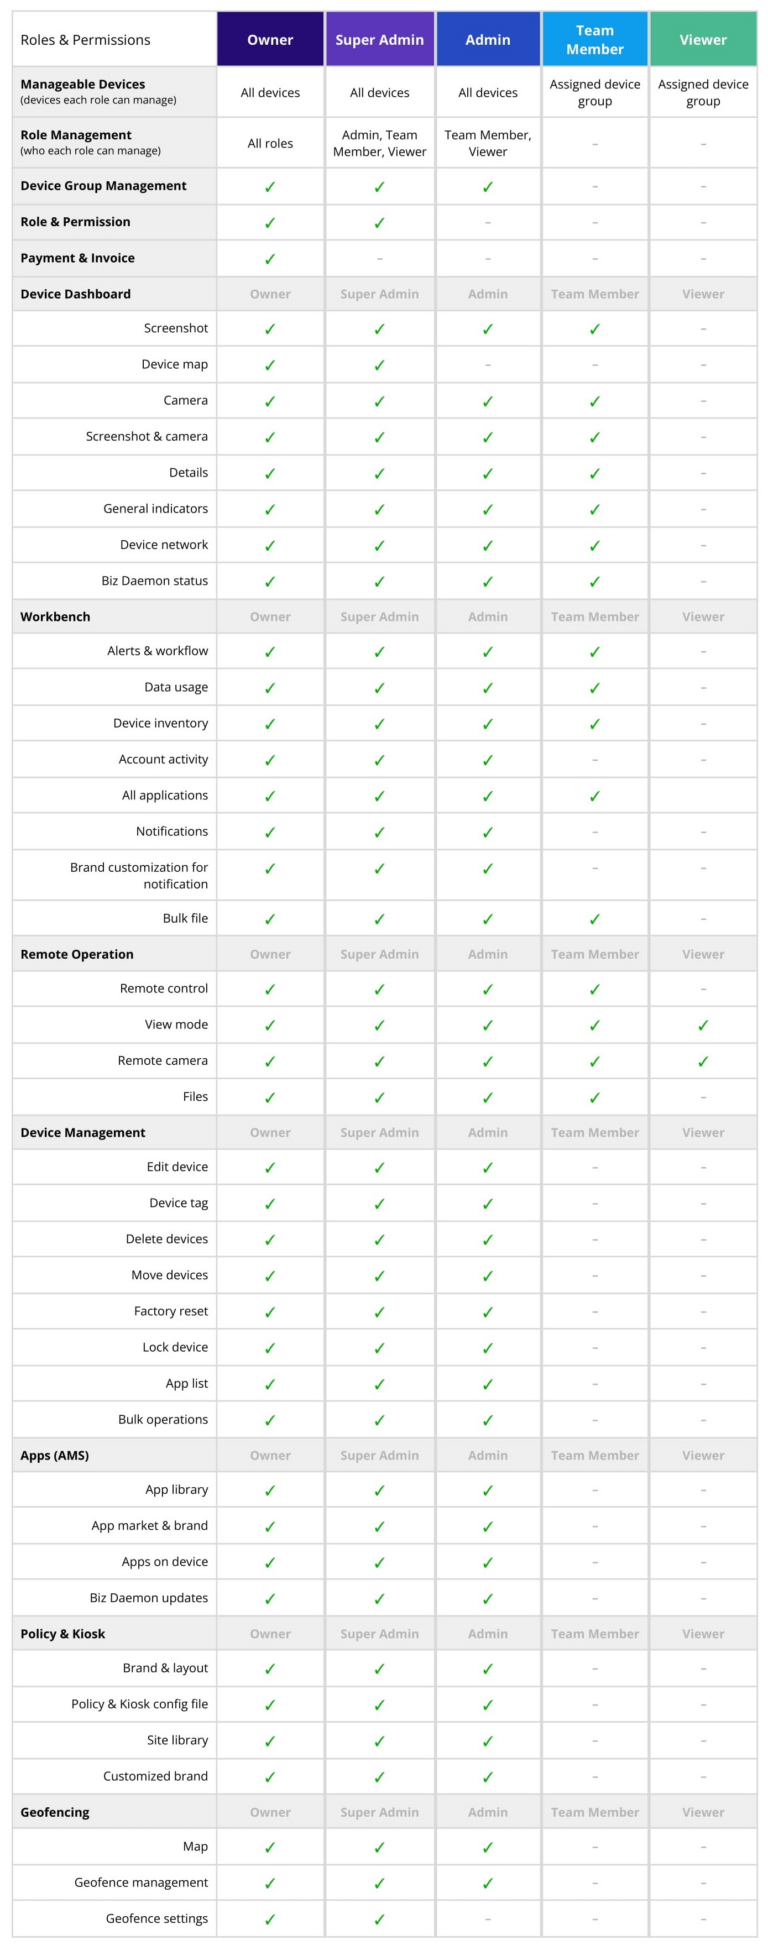
Just a reminder, This function is only available for the Standard plan or above.
If this function is not available to you, please refer to the detailed article for the plan you have.
2Invite and Manage Account Members
1Inviting Members
Pre-invitation Reminders
Before you start to invite any member, please check the reminders below:
1. The invitee's email address cannot be registered for AirDroid Business's owner account before.
2. The invitee's email address cannot be currently registered as a member under another AirDroid Business's owner account.
3. Removing a member will take away their accessibility to the admin console.
4. If you want to assign a device group when sending the invite, please create the group prior to the invite.
5. Not all plans have the accessibility to every function, please refer to the plan you purchased.
Accessing to the Members Management Page
There are two ways to visit the Members management page for you to start inviting someone:
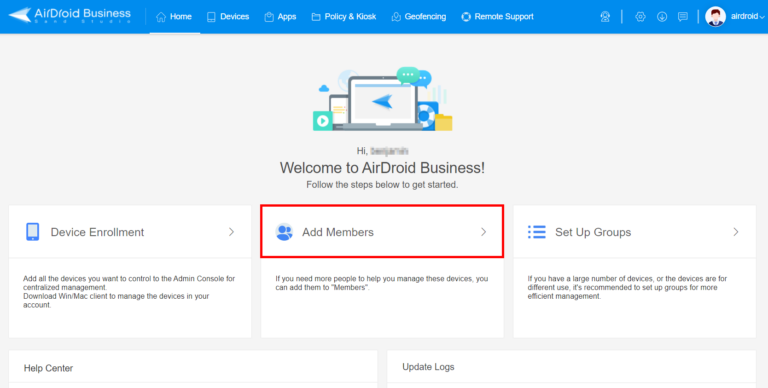
1. Click Add Team Members on the Home page
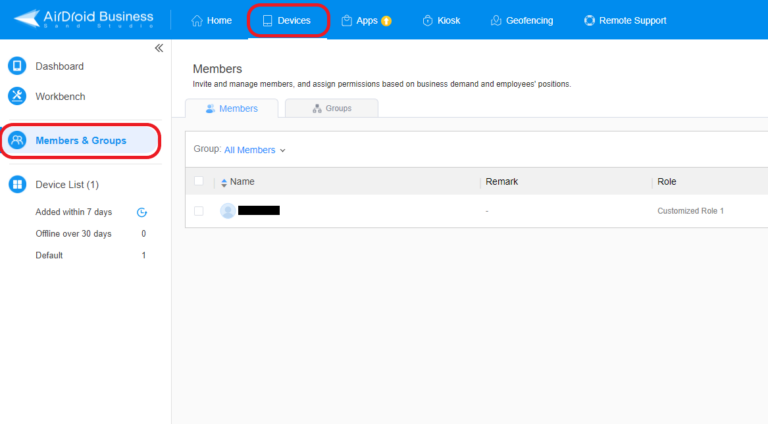
2. Click Devices on the top of the page>Choose Members & Groups
Inviting Members
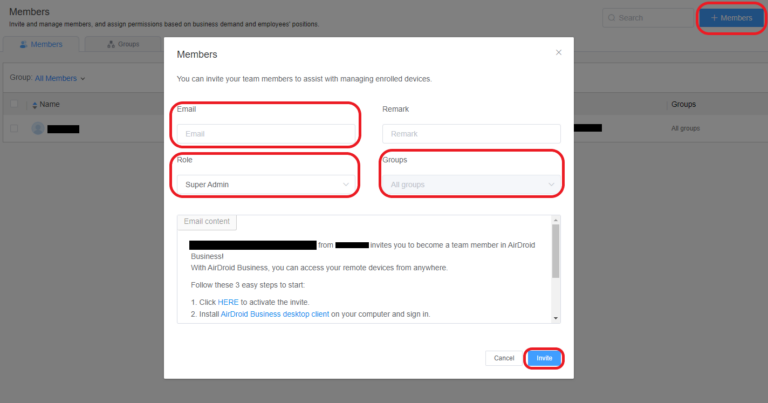
1. Click +Members on the top right of the page>Insert the email of the invitee, assign a role and group>Click Invite
Changing Member Accessibility
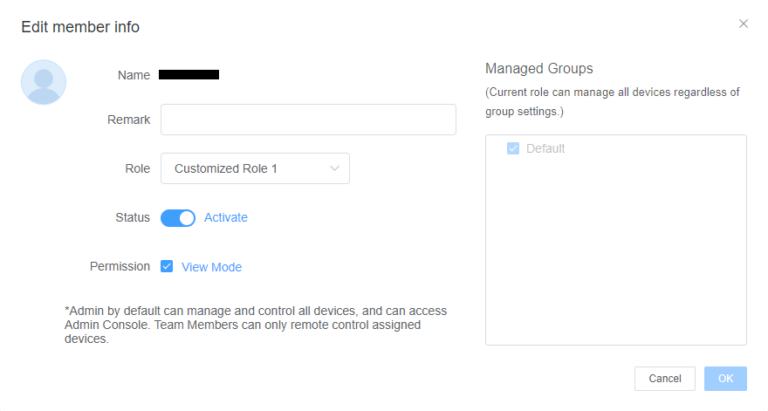
If you want to change the accessibility of a member, find the member and click the edit icon at the end of the row.
![]()
Removing a Member
If you want to remove a member from your organization, find the member and click the trashcan icon at the end of the row.
![]()
This article has guided you through understanding roles and permissions, inviting and managing account members, and customizing roles to fit your company's needs.
We hope this tutorial has been helpful in setting up your AirDroid Business account and effectively controlling access to your devices.
To learn how to create a customized role, please visit our designated article How to create a customized role.
Still need help? Submit a request >>
Related Articles
- How to Create and Manage Device Groups on AirDroid Business?
- How to create a custom role on AirDroid Business?
- How to manage the devices in the Device List?
- How to Use “Batch Operations” to Improve Device Management Efficiency?
- How to Set up Tasks to Schedule Tasks and Manage Your Devices in Bulk?
You May Also Like
- What features are available for Remote Access on AirDroid Business?
- How to remote access a device via Admin Console on AirDroid Business?
- How to Manage Devices on AirDroid Business Desktop Client?
- How do I use the View Mode on AirDroid Business?
- How to use Black Screen Mode to maintain the remote device during Remote Control?

