Facing AirDrop Only Working One Way: Here’s How to Troubleshoot It
AirDrop is the go-to option for Apple users to transfer files between iOS and Mac devices. With just a few taps, you can share data with the target device at a remarkable speed.
But unfortunately, AirDrop is not a perfect tool, and often, users encounter unexpected errors like AirDrop only working one way. If you also face this problem and cannot transfer files, fret not.
In this article, we will talk about several simple ways to troubleshoot AirDrop to ease you back into transferring files. Let's find out!
Part 1: Why AirDrop Only Working One Way?
Before learning how to make AirDrop work, it's important to understand the main reasons behind this issue. Our research shows that the "AirDrop only working one way" problem is mostly caused by the following:
- Faulty AirDrop settings, as you might have disabled the sending option.
- A minor glitch in AirDrop can also result in AirDrop not working.
- One or both of your devices aren't connected to a Wi-Fi or Bluetooth network. Toggle on Wi-Fi and Bluetooth on both devices.
- An out-of-date OS on either device can malfunction many apps, including AirDrop.
- Third-party antivirus software or VPN installed on your device may interfere with the normal working of AirDrop.
- Any unexpected issue in the system software of your iPhone or Mac.
No matter the reason, the next section will introduce multiple ways to get AirDrop to work without any trouble.
Part 2: Ways to Troubleshoot AirDrop Only Working One Way
Just implement the tips below one after another, and hopefully, your issue will be resolved.
1Make Sure the Devices Are Compatible
First, be sure that the AirDrop tech is compatible with both of your devices. If you're trying to share data between iPhone and Mac, then:
- The iPhone must be running on iOS 7 or later.
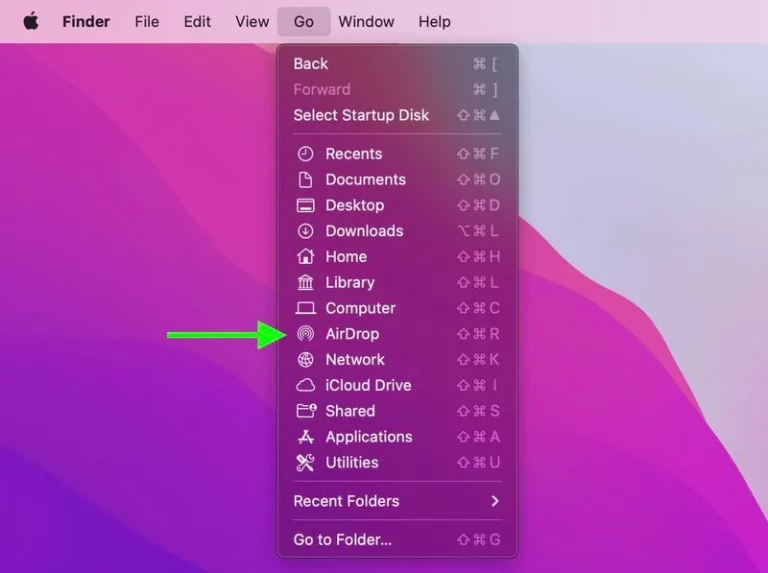
- AirDrop is available for all Macs introduced after 2011 (excluding the 2012 Mac Pro) running OS X Yosemite or later. To confirm that, hit the Finder icon and select Go. You should see the AirDrop icon.
2Check Basic AirDrop Settings
AirDrop allows users to customize the file-sharing or receiving settings to ensure they aren't victims of unsolicited sharing. It has three levels: Off, Contacts Only, and Everyone.
Be sure you have enabled the "Everyone" option in AirDrop and turn it off again after the transfer. This might fix the AirDrop not seeing iPhone issue.
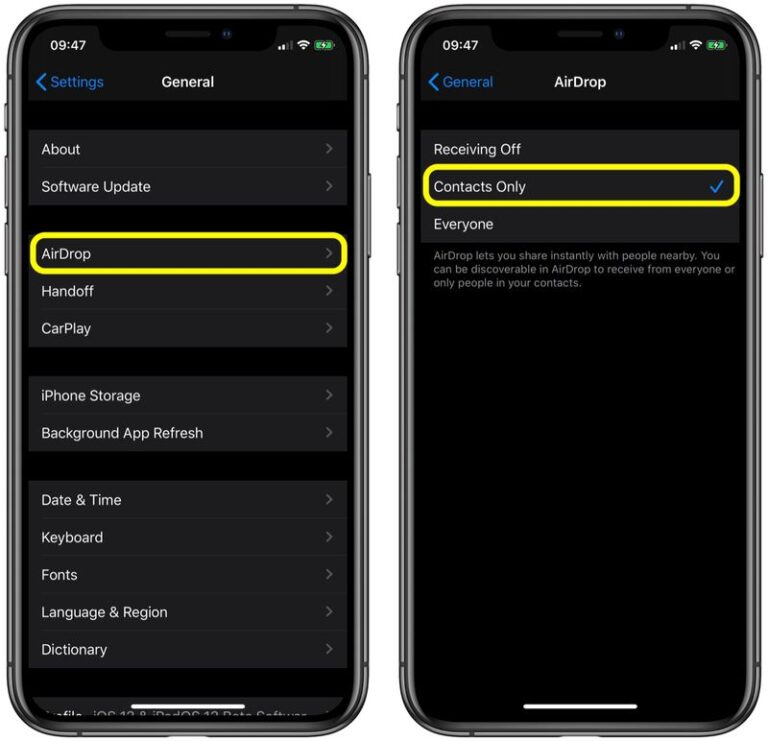
Here's how to do that for iPhone:
- Step 1. Go to Settings > General > AirDrop.
- Step 2. Here, tap Contacts Only and try to transfer files again.
You can set AirDrop receiving off after sending the files. Aside from privacy, this also somewhat preserves your iPhone's battery.
For Mac:
- Step 1. Open Finder and choose AirDrop from the Finder sidebar. Else, hit Shift-R on your keyboard to open it
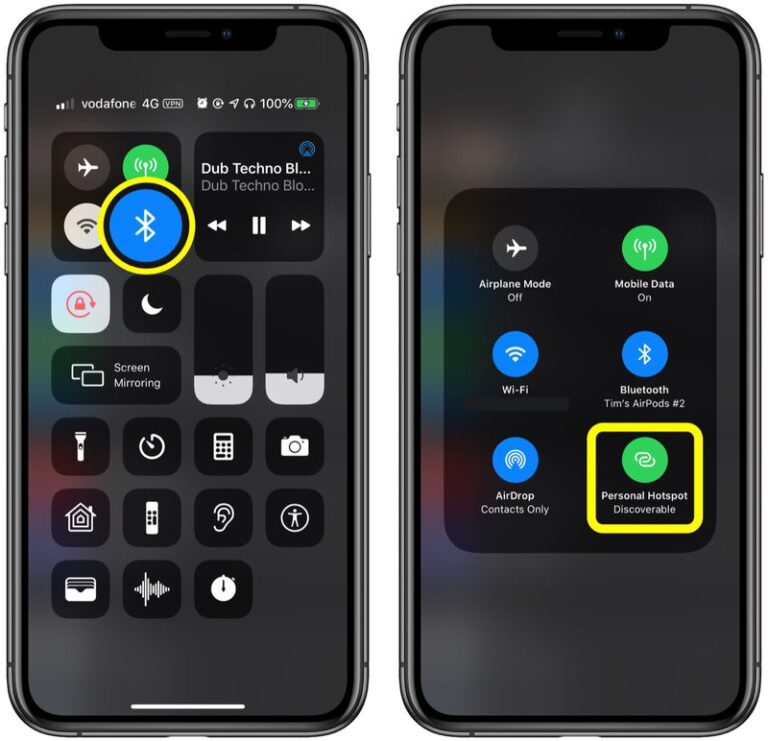
- Step 2. Click on "Allow me to be discovered by" at the bottom and select Everyone. In addition, be sure that the devices are at least 30ft apart from each other. And also, the personal hotspot should be disabled on the iPhone.
3Restart iPhone and Mac
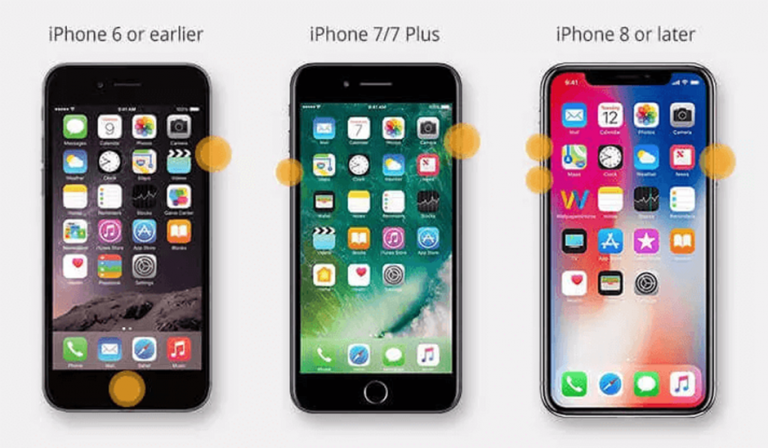
If any minor bug is why AirDrop is only working one way, try restarting both devices. This is the quickest way to refresh the iPhone or Mac and get AirDrop to work. The good thing is rebooting takes just a couple of minutes at most.
Follow the below steps to restart iPhone:
For iPhone 8 and later models:
Press and quickly release the volume+ button and do the same for the volume-down button. Then, hold the side button for a few seconds until you see the Apple logo.
For the iPhone 7 and iPhone 7 Plus:
Press and hold power and volume-down buttons simultaneously for a few seconds until the Apple logo appears.
For iPhones older than the 6s:
Press the power and Home buttons simultaneously for a few seconds until the Apple logo appears.
4Update Operating System
Sometimes, the new Apple update automatically fixes compatibility issues and minor glitches, including AirDrop troubleshooting. Installing the new iOS or macOS updates when available is always a better choice.
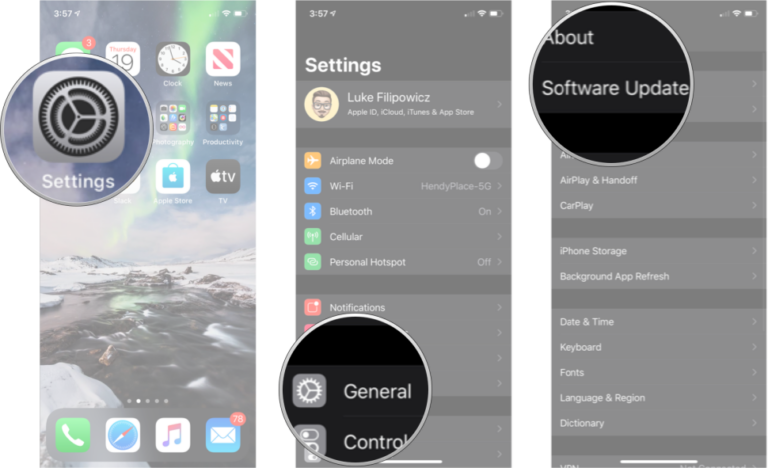
To install the update on iPhone:
For that:
- Step 1. Go to Settings > General > Software Update.
- Step 2. If new updates are available, tap Download & Install.
- Step 3. Wait until your iPhone is restarted.
To install the update on Mac:
- Step 1. Hit the Apple icon at the upper-left corner and select System Preferences.
- Step 2. Next, click on Software Update, and if an update is available, hit Update Now.
- Step 3. Finally, hit Restart and wait until the process is finished.
After updating both devices, try using AirDrop again; hopefully, you won't face any issues.
5Disable the Firewall on the Mac
At times, the third-party antivirus program or your Mac's default security procedure might be why AirDrop is not showing on your Mac. Thus, be sure to disable or limit the strictness of Mac's firewall.
Here's how to get AirDrop to work by disabling the Mac Firewall:
- Step 1. Click on the Apple symbol in the menu bar and select System Preferences.
- Step 2. Then, choose Security & Privacy preference.
- Step 3. After that, hit padlock and enter your admin password.
- Step 4. Then, click Firewall Options and uncheck the box for "Block all incoming connections."
- Step 5. Finally, tick the box for "Automatically allow built-in software to receive incoming connections."
Part 3: Bonus Tip: A Perfect Alternative to AirDrop for Transferring Files
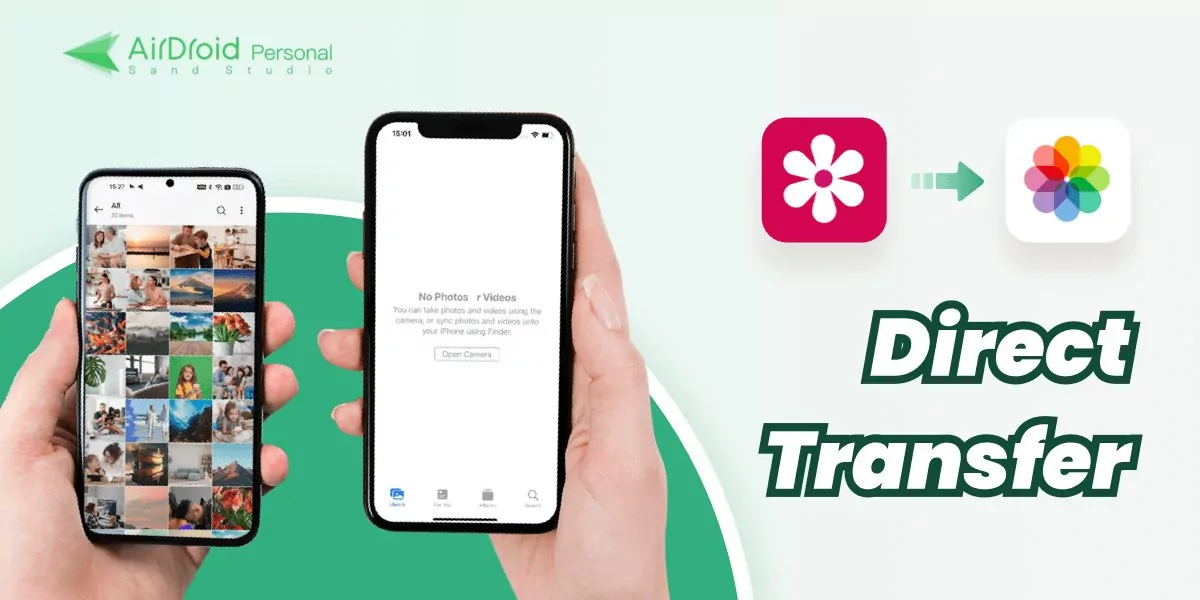
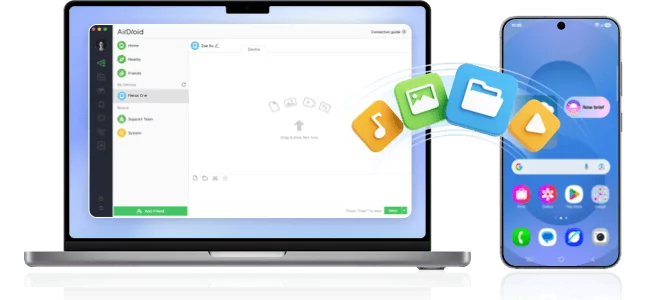
Don't want to go through the hassle of how to make AirDrop work now and then? Look no further and get AirDroid Personal as a perfect alternative to AirDrop. It is a one-stop solution to wirelessly transfer photos, videos, songs, contacts, and any other data between two iPhones or iPhones and Mac.
Compared to AirDrop, this program can share data between any two devices, not just Apple devices. You can instantly transfer files between Windows, Mac, Android, and iPhone. It's transfer speed is also remarkably excellent.

And if that's not enough, users can send files to both Nearby and Distant devices, a feature not available in AirDrop.
Check out how to use AirDrop Personal to eliminate the AirDrop-only working one-way issue.
- Step 1. Install AirDroid Personal and both iPhone and Mac. Be sure to log in with the same AirDroid account.
- Step 2. To transfer data from iPhone to Mac, open the mobile app and tap My Devices. Then, click on your Mac's name to wirelessly connect both devices.
- Step 3. After that, tap File Transfer > attachment icon > Files, and select the files you want to transfer. Hit Send.
The sent files will be automatically downloaded to the AirDroid default folder on your Mac. And that's how easy it is to use AirDroid Personal.
Final Remarks
This article shows that many reasons can lead to AirDrop only working one way. But you don't have to worry; the abovementioned tips will help you troubleshoot AirDrop conveniently.
But if you want a more flexible method to share files, get assistance from AirDroid Personal. This versatile tool allows you to send unlimited data across different platforms, including Windows, Mac, Android, and iPhone.
Get its premium version to enjoy file transfer and other stellar features.
Common FAQs
Check out the common queries below about getting AirDrop to work for transferring files.
1. Why is AirDrop not seeing iPhone?
The main reasons include the following:
- Bluetooth or Wi-Fi are not enabled.
- Devices are far from each other.
- AirDrop settings are disabled for receiving.
- Mac's firewall is preventing AirDrop from sharing files.
- Faulty or outdated OS in either device.
2. How to fix AirDrop only working one way?
Try the below solutions:
- Enable Wi-Fi and Bluetooth on both devices, and turn off Personal Hotspot on your iPhone.
- Restart both devices
- Install iOS and macOS updates if available.
- Disable firewall on Mac
3. Do you need Wi-Fi for AirDrop?
Yes, AirDrop requires users to have Wi-Fi switched on. But you do not need to be connected to a Wi-Fi network





Leave a Reply.