3 Ways to AirDrop Photos as JPG Not HEIC
In 2017, Apple transitioned to HEIC photos with their iOS11 systems, saving images by default in the HEIC format instead of JPG or JPEG. This feature is great since it saves a lot of space and has fantastic quality, but it's a problem for other devices. Not everyone uses an iPhone, and many mainstream operating systems do not support HEIC formats.
So to look at these photos on an Android phone or a Windows system, you would need to manually convert them to a more standard file format like the JPG or JPEG. To make it easier to share your photos more conveniently, you should know how to AirDrop photos as JPG, not HEIC. Let's check it out!
Part 1: Why Are My Photos AirDropping as HEIC?
You might be wondering why do photos AirDrop as HEIC in the first place. Your photos are AirDropping as HEIC files because your phone saves them as HEIC files from your camera. Apple introduced this feature from iOS11 devices to produce better quality images but at lower storage requirements.
HEIC stands for High-Efficiency Image Container and is Apple's proprietary version of HEIF. It is a container format that you can use to store individual images or a sequence of pictures in high quality. Therefore, HEIC files can store live photos and even animation sequences.
The HEIC file type allows your phone to store images better, and there's a significant difference in quality. HEIC is better than JPG images, and more and more platforms are switching over. However, its JPGs are still the norm, so it will take a while before you can easily use HEIC files on non-Apple devices.
Part 2: How to AirDrop Photos As JPG Not HEIC
You can use different methods to Airdrop your photos to share them as JPG files. You can save them as JPG in the first place by overriding the HEIC setting, or you can manually convert them to JP files before sending. You can also avoid all this hassle and automatically use AirDroid Personal to convert your photos to JPG.
With so many different ways to AirDrop photos as JPG files instead of HEIC files, you might be confused about which method to use. They all work well, but when it comes to a comprehensive solution, AirDroid is the way to go.
By using AirDroid to convert and AirDrop your photos, you can save your photos as HEIC and enjoy the fantastic quality and storage perks without overriding the settings to keep everything as JPG. Only convert the files that you send. You don't have to manually copy and paste them each time you send these files!
So the whole process is automatic and seamless and works way more straightforwardly than the other two methods. And the best part is that AirDroid works with Android phones and Windows/Mac/Linux PCs. AirDropping, on the other hand, only works with iOS devices. So AirDroid is the clear winner.
Way 1: Use AirDroid To Send Your Photos
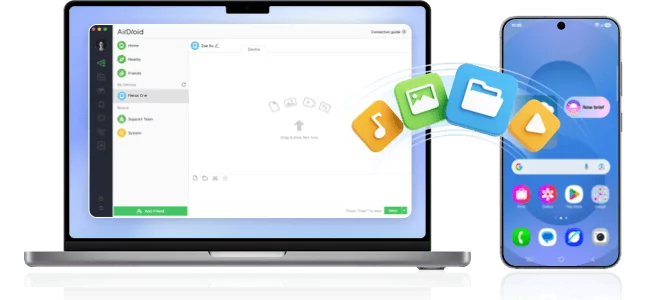
If you want to skip all of this hassle, you can use AirDroid Personal to send your photos. It works just like AirDrop, and it auto-converts all your photos to JPG if you want. Here's how.
- Step 1. Download and Install AirDroid Personal
- Download and install AirDroid Personal from the App store. Create an account with your email and password.
- Step 2. Go to Settings
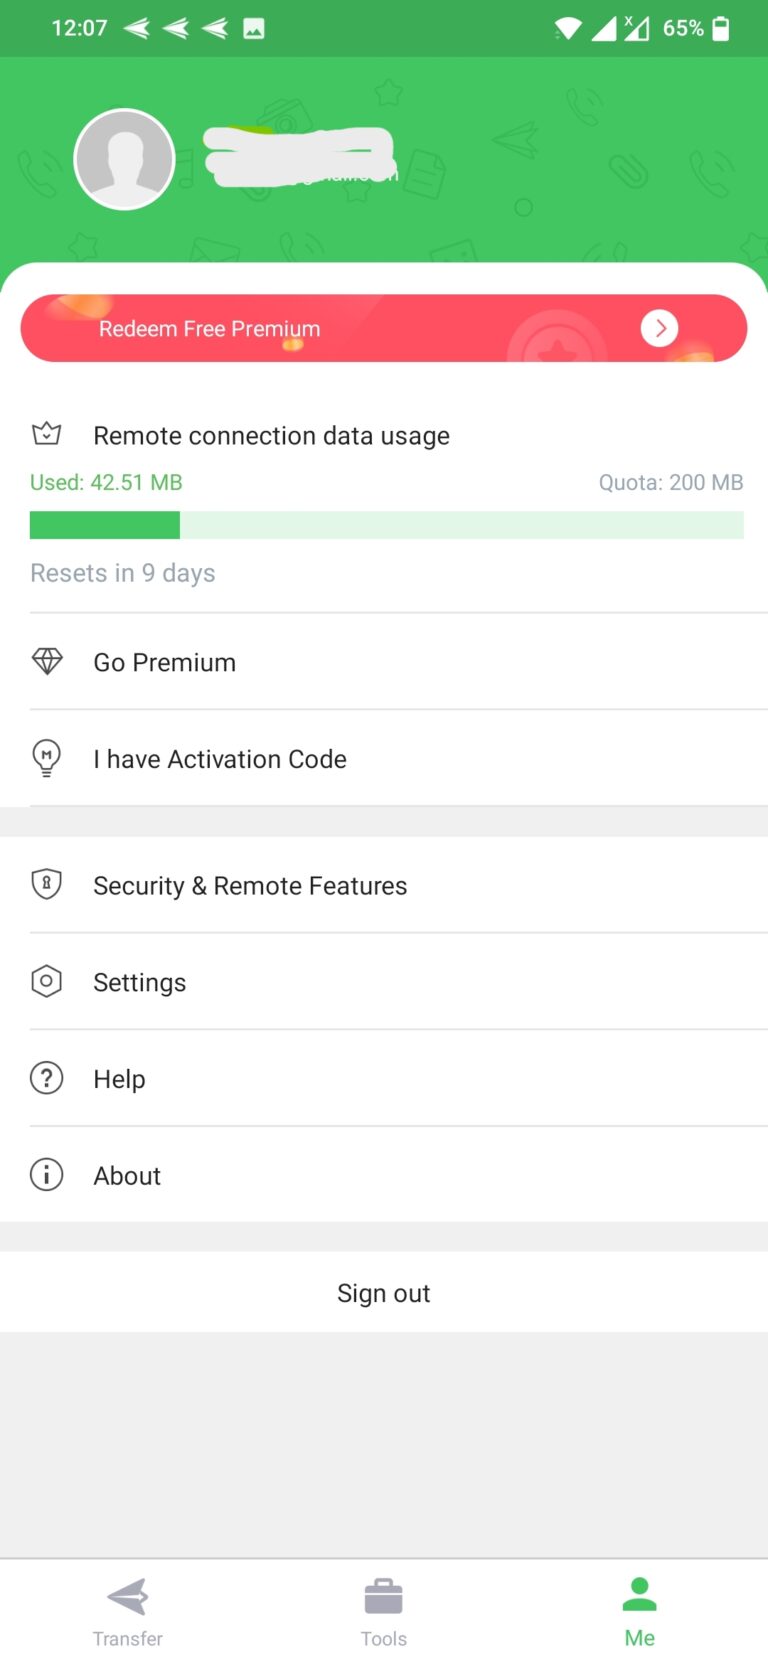
- Inside the app, you should see a Me icon on the bottom right of the screen. Tap on it and then go to Settings.
- Step 3. Select Auto Convert
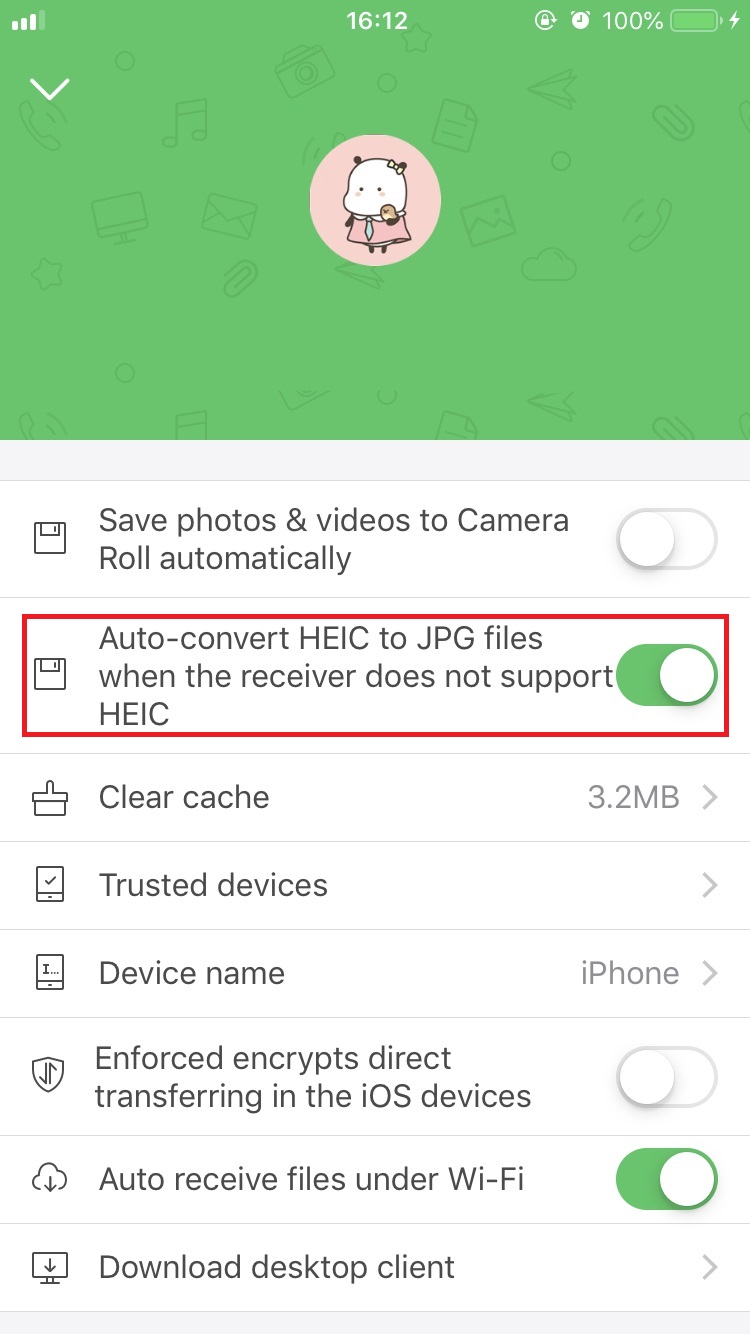
- From the Settings menu, find and turn on the "Auto convert HEIC to JPG files when the receiver does not support HEIC" button. Now every time you transfer photos with AirDroid, they will automatically be converted.
- To share photos with AirDroid, tap on the Share button and select AirDroid from the options.
Way 2: Save Photos As JPG
If you don't want the HEIC feature, you can change the settings to always save your photos as JPG. Here's how.
- Step 1. Go to Settings
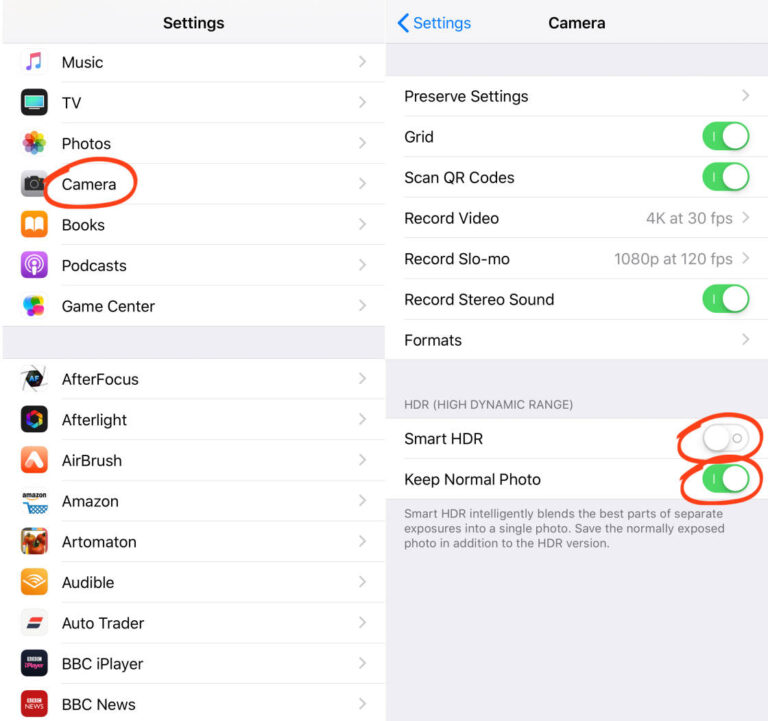
- Go to the Settings app and then select the Camera option from the list of settings on the home page.
- Step 2. Go to Formats
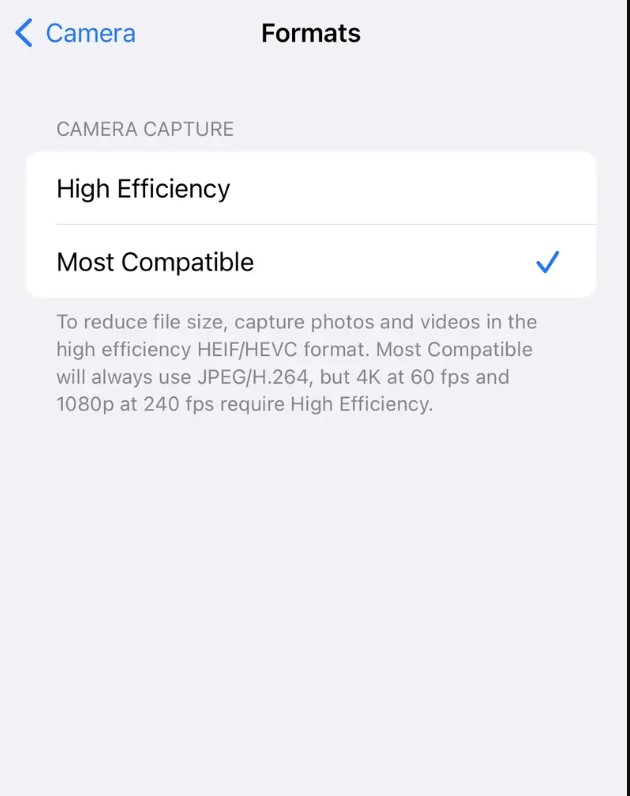
- Tap on the Formats option, and you'll see the Camera Capture section. Check the Most Compatible option to save all your photos in JPG format. This way, no matter how you send the images, they'll be in JPG format (as long as you took them after changing the setting).
Way 3: Convert Photos To JPG Before Sending
If you like the quality bump that HEIC photos give you, you might want to change the images to JPG when you send them to another device. You don't always send all your photos, so there's no need to save them in a JPG format. Here's how to change them to JPG manually when you want to send them. You can also use this for older photos already in HEIC.
- Step 1. Go to the Photo
- From your home screen, go to the Photos app and select the picture you want to send. You can select multiple photos or just a single one.
- Step 2. Copy the Photo
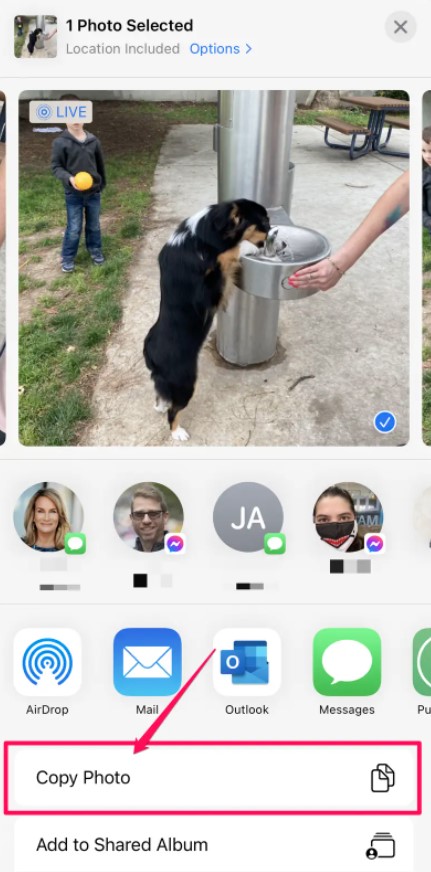
- Select the photo and tap on the Share button from the bottom of the screen. Then tap on the Copy Photo Option. This action will copy your image to the clipboard.
- Step 3. Create a Folder in Files
- You need to create a folder in the Files app to save your photos. You can leave a folder in the Files app dedicated to this conversion process. Go to Files, then tap on the top three dots menu to choose New Folder.
- Step 4. Paste the Photos
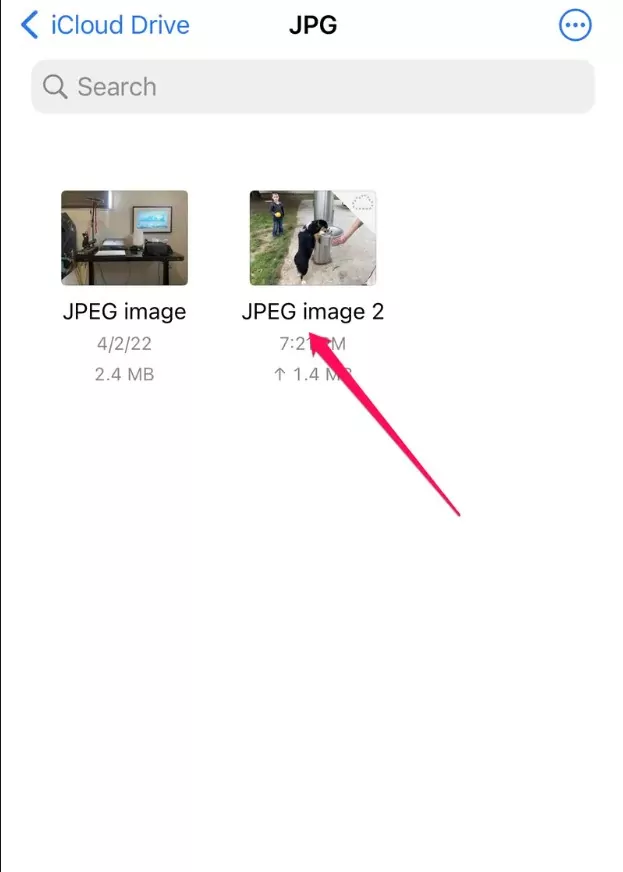
- Tap and hold the blank space inside the folder. You should see a Paste option pop up. Tap on Paste, and your photos are now saved here as JPG files. You can now AirDrop them from here to send as JPG photos. Tap on the image and tap the Share icon to AirDrop the images.
Part 3: Photos AirDrop Not Working
When you AirDrop photos, you can't find AirDrop photos on iPhone. By default, all your AirDropped files get sorted into different apps according to the file type. So for pictures, you should find them in the Photos app. If not, you can check the Downloads folders, and they'll surely be there.
If your AirDrop photos are not saving to the camera roll, it's usually a glitch or a format problem. Check if your image was sent correctly and in the correct format. If you can find it in the Files app but not on the Photos app, try turning your phone off and on again, to see if the file shows up.
If your problem is AirDrop photos not showing up on MAC, check the Downloads folder. On MAC devices, all AirDrop files are saved in the Downloads folder by default.
You might also notice that the Photos app opens automatically every time you AirDrop a photo. If you want to know how to stop AirDrop from opening Photos, the answer is, unfortunately, that you cannot. Sadly it's a built-in Apple feature, and there's no way around this.
Part 4: Conclusion
Having your photos in HEIC is pretty cool because of the quality and lower storage requirements. However, until other devices can support this format, it's inconvenient to share your photos as HEIC files. But now that you know how to AirDrop photos as JPG, not HEIC, you can rest assured.
FAQs





Leave a Reply.