3 Simple Methods to Download All Google Drive Photos to iPhone
“I have thousands of photos synced to my Google Photos account. Is there a way I can download all the photos on my iPhone together, not just one by one? Thanks.”
Google Photos is a life savior when it comes to storing your precious photos. Whether you have factory reset the phone, got a new one, or accidentally deleted the gallery media, you wouldn’t have to worry about losing the photos.
With Google Photos, you can easily download all the backed-up photos to your iPhone again. The same is true for downloading photos from Google Drive to iPhone. Keep reading and learn how to transfer photos from Google Photos to iPhone in all the possible ways.
Part 1: How to Download Google Photos to iPhone Manually
This section introduces the 3 simple tricks to download all Google Photos to iPhone, with and without a computer.
Solution 1: Download Photos from Google Photos to iPhone Via App
If you wish to transfer only a handful of photos from Google Photos to the iPhone, you can do so directly from the app. This method is suitable for downloading a few photos as you can only save one photo at a time.
Here are the steps you should refer to proceed:
Step 1: Open the Google Photos app and make sure you’re signed in with your Google account.
Step 2: Locate and open the photo, click the 3-dots icon on the top, and click “Save to device.”
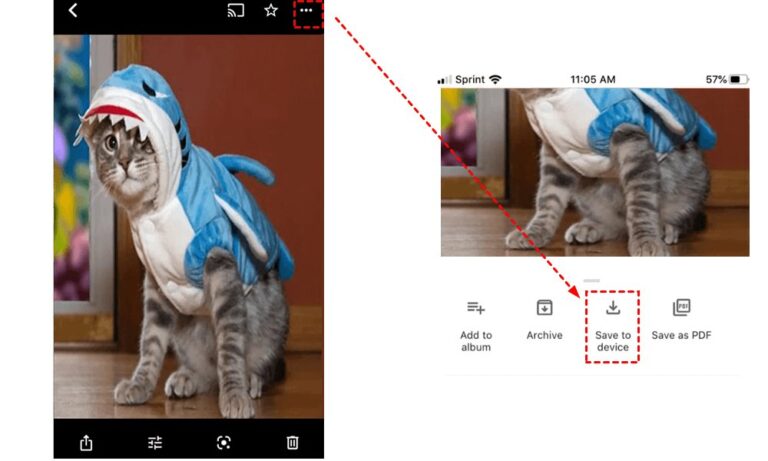
Step 3: A progress bar will appear briefly followed by a confirmation that the photo is saved.
Step 4: Repeat the same steps to save as many photos as you’d like.
Bonus Tip: Note that the “Save to Device” option won’t appear if the selected photo is already in your iPhone’s Camera Roll.
Solution 2: Download Multiple Google Photos Using A Computer
Downloading multiple photos from Google Photos is not possible via its app. You need to visit the Google Photos web to save many photos simultaneously. The procedure is not complicated as long as you have access to a stable internet connection.
Follow the below instructions to download multiple Google Photos to iPhone using a computer:
Step 1: Open Google Photos on your web browser and sign in.
Step 2: There’s no “Select All” option. So, manually select the photos or albums and click the three-dots icon.
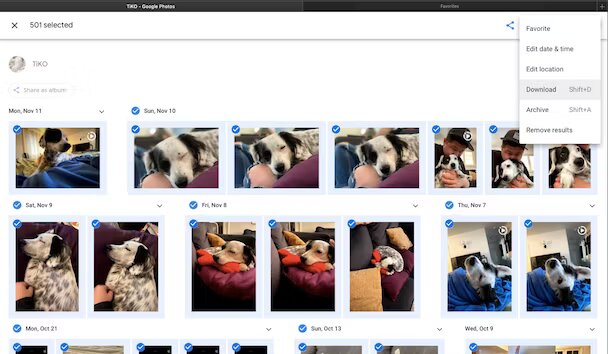
Step 3: Hit Download at the top to save the photos in a zip file.
Step 4: Visit the Downloads folder on your PC and extract the photos from the zipped file.
You can select up to 1000 photos at a time. Depending on your internet speed, it will take Google Photos some time to save the photos on the computer.
Bonus Tip: Move All Photos from PC to iPhone Wirelessly in Lossless Quality
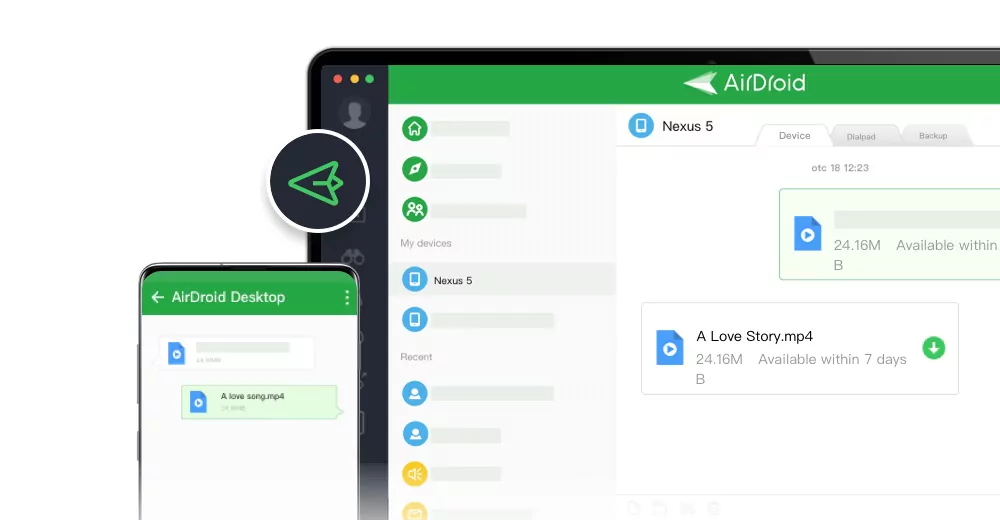
After downloading Google Photos to your computer, use AirDroid Personal to migrate them to the iPhone. Equipped with AES-256 tech, it is the industry leader when it comes to sharing files between PC and iPhone securely and quickly.
Besides photos, it supports all file formats at an exceptional speed of 20MB/sec and even more. Now you can transfer GBs of data across your devices within minutes.
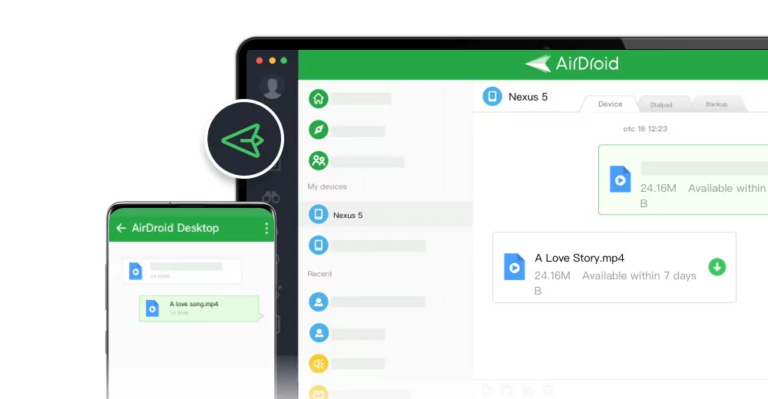
Apart from file transfer, AirDroid offers countless features in the domain of remote file management, screen sharing, and remote phone control.
Solution 3: Download All Google Photos to iPhone Via Google Takeout
Probably the most efficient solution to download all Google Photos to iPhone is through Google Takeout. It is a built-in service of the Google One bundle that creates a downloadable archive file of all your Google Photos.
Note that Google Takeout doesn’t delete your data from Google Photos; it only exports a copy of your photos. Here are the steps to download Google Photos to iPhone using Google Takeout:
Step 1: Open Google Takeout on a web browser and sign in with your Google account.
Step 2: On its main interface, click Deselect All and only mark the Google Photos option.
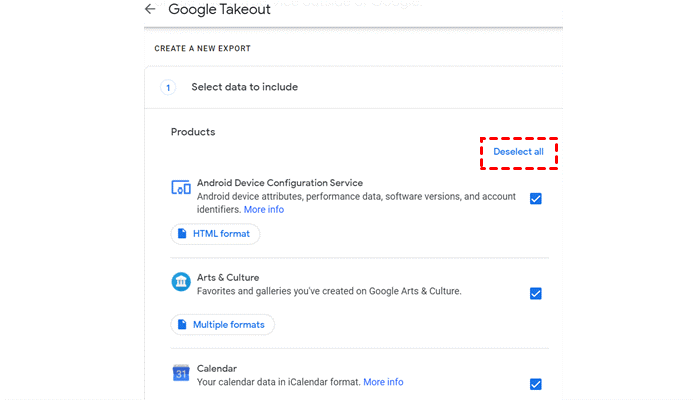
Step 3: Make sure the “All photo albums included” option is marked. Now, scroll through its default settings. If you’re satisfied, hit “Next step” at the bottom.
Step 4: Select “Email” as the type of Delivery Method and click “Create export.”
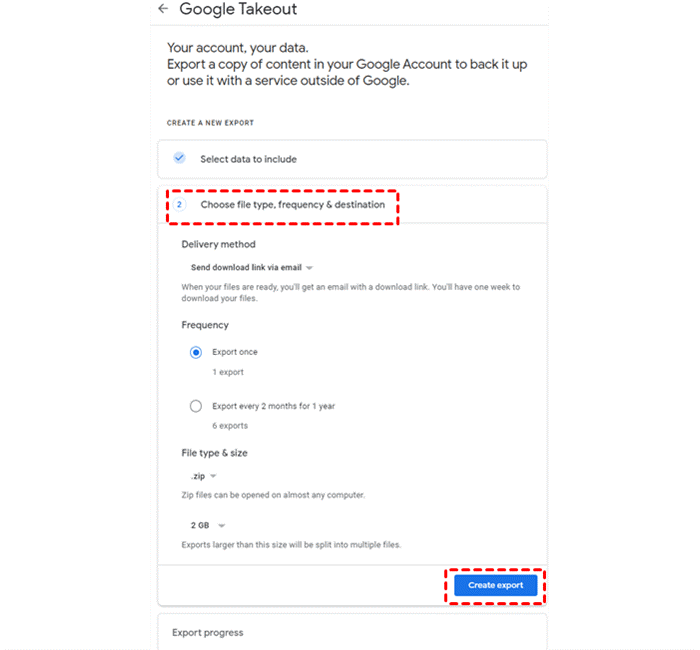
Step 5: Wait patiently until it processes the data which can take hours depending on the size of data.
Step 6: Now, open your email ID, download the RAR file, and extract the photos.
If you have extracted the photos on the computer, use AirDroid Personal to move them to the iPhone.
Part 2: How to Download Photos from Google Drive to iPhone
With Google Drive, you have the freedom to download multiple photos to your iPhone from both the app and the web version. Let us discuss both:
Solution 1: Download Google Drive Photos to iPhone Via Google Drive App
It’s pretty straightforward to transfer photos from Google Drive to your iPhone through the app as it supports batch downloading – unlike Google Photos. Here are the steps you need to follow:
Step 1: Open the Google Drive app, sign in, and go to the folder containing the photos.
Step 2: Tap and hold to select multiple photos. Click the three-dots icon and on the pop-up menu, hit Download.
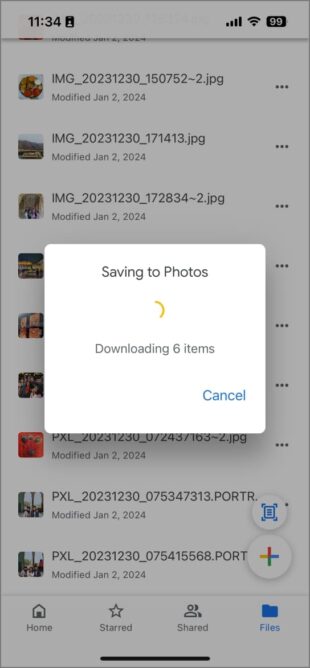
Now, repeat the same steps to download photos from other Google Drive folders since there’s no direct way to select all the Photos in Google Drive.
Solution 2: Download Google Drive Photos to iPhone via Files App
When downloading 1000s of photos from Google Drive, you need to keep the screen on during the process which can take hours. For a better experience, try downloading Google Photos to iPhone using the Files App.
To do that:
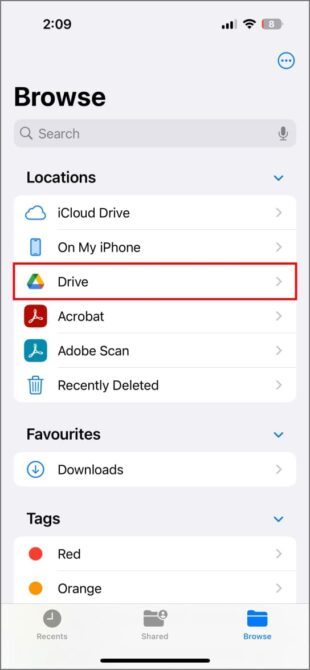
Step 1: Launch the Files app, click Browse, and look for the “Drive” option.
(If it’s not visible, tap the three-dots icon at the top, select Edit, and enable the toggle for Drive.)
Step 2: Now, tap and hold a picture, and select all the photos you want to store.
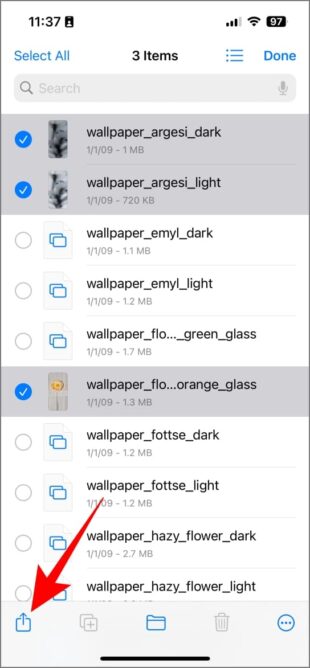
Step 3: Click the Share icon and hit “Save xxx images.”
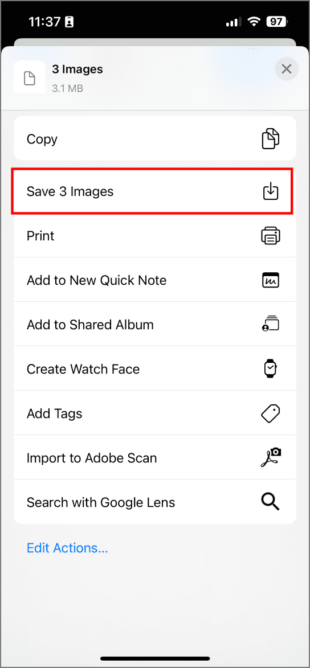
All the photos will become visible in the Photos app.
Solution 3: Download Google Drive Photos to iPhone via Computer
You can also download Google Drive photos on an iPhone using a computer. It’s a lot more convenient if you wish to save thousands of photos. Here are the steps to do that:
Step 1: Open the Google Drive website and sign in.
Step 2: Now, navigate to the specific folder and select all the photos you need to download.
Step 3: Right-click and hit Download.
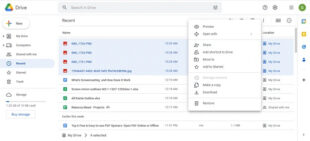
Step 4: The photos are downloaded in a ZIP file. Find it in the Downloads folder, right-click, and hit Extract.
Finally, use AirDroid Personal to move these photos to your iPhone without losing the original quality.
FAQs
Q1: How Do I Sync Albums on My iPhone or iPad to Google Photos?
There’s no option to sync specific albums on your iPhone to Google Photos. When the “Backup & sync” option is enabled, it automatically backs up all the photos and videos in your iPhone’s gallery.
To turn it on, go to Google Photos, click your profile pictures, select “Photo Settings, and switch the "Back up & sync" option to the ON state.
Q2: Are the downloaded photos from Google Drive stored in my iPhone's Photos app?
If you download Google Drive photos through its app or “My Files”, they are automatically saved in the Photos app. But when downloaded from the Google Drive web, the photos are stored in a ZIP file. Extract these photos from the ZIP folder to view them in the Photos app.
Final Remarks
This article shows you don’t need exceptional skills to download Google Photos to an iPhone. It outlines the best ways to download all the photos from Google Drive or Google Photos to your iOS devices without using a third-party app.
However, it’s crucial to rely on a professional file transfer app like AirDroid Personal to transfer photos from PC to iPhone in lossless quality. It ensures super-fast speed, universal platform compatibility, and seamless transfer without any interruptions.
Feel free to ask any questions.



Leave a Reply.