[Simple Guide]How to Move Photos to SD Card?
SD cards are a great way to enhance your phone storage and have that chunk of extra space beside the internal storage. If we talk about smartphones, most of them have the SD card feature, but many companies are providing SD cards as an option instead of a stand-alone slot. However, almost every smartphone other than iPhone has an option to keep an SD card besides the internal storage. We have listed the best solutions if you have just installed an SD card and don't know how to transfer photos to SD card.
Let's get into it.
Things to Do Before Transferring Photos to SD Card
Before you know how to transfer photos to an SD card, make sure that you have done the things below:
- Make sure to get a compatible SD card for your Android smartphone.
- Insert the SD card into the dedicated slot on your smartphone.
- Scan it for any virus or corrupt data by using any antivirus software
- Change storage location to SD card after inserting it.
How to Move Photos to SD Card Android?
Let's start with the straightforward way of moving photos to an SD card if you are an Android smartphone user. Regardless of the company or brand, the method we will discuss can be used to transfer photos from a phone to an SD card.
Here is the step-by-step solution of how to move photos to an SD card as an Android user:
Step 1: Insert SD Card
First, you must insert the compatible SD card into the dedicated slot on your Android phone. Also, complete the checklist we have given above before starting file transfer.
Step 2: Open App Menu
Open the app menu on your smartphone. Different methods can be used depending on the brand or Android version you are using. For instance, the latest versions of Android have a swipe-up feature to open the app menu.
Step 3: Go To File Manager
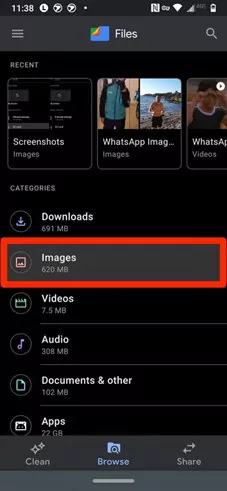
Once in there, look for the file manager app on your smartphone. There can be different names for file managers like My Files, Files, and Files Explorer. If you can't find the file manager, you can install it from the Google Play store to access and manage your data.
Step 4: Select The Photos
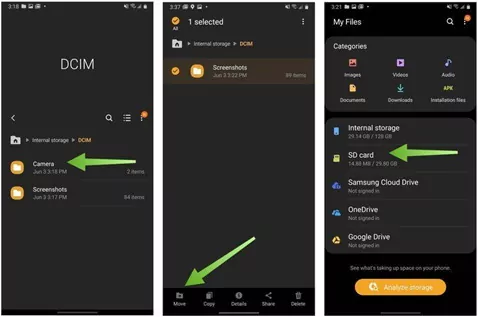
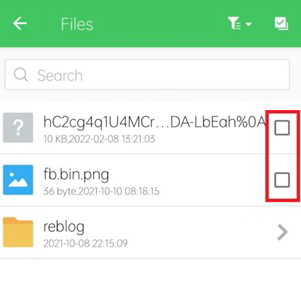
As you want to move photos from your internal storage to your SD card, open the internal storage and the folder where the photos are already saved. In most cases, it can be DCIM, Gallery, or Captures, depending on your phone. Once in there, long press the photo and start marking all photos you want to move.
Step 5: Move or Copy
Once selected all photos, tap on the Move or copy in the bottom menu bar shown.
Step 6: Select the destination folder
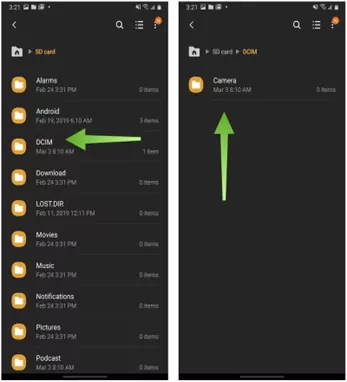
Once you tap on Move, it will ask you where to move the files. Now you will tap on the SD card and go to the destined folder. Alternatively, you can also create the folder on the spot.
Step 7: Paste Photos
Once in the destined folder, tap on paste, and the photo transferring will start. Once completed, you can access all transferred photos on your SD card.
How to Move Photos to SD card Samsung?
What if you are a Samsung user?
Is the method of transferring photos from internal storage to SD card different? Well, Samsung phones are based on Android with the skin of their own UI. Therefore, the method might be a bit different but very similar to transferring photos from the internal storage of Android to an SD card. However, if you are using Samsung Galaxy S21, S21+, S21 Ultra, s6, Note 10, or Note 20, there is no option for SD card storage.
So how do you transfer files on a Samsung phone?
Here is the complete guide to doing so:
Step 1: Mount The SD card
Insert the SD card on your Samsung device by looking for the dedicated slot to insert the card. It can be on the top of the phone for newer models and on the side for older models. Complete the checklist we have mentioned.
Step 2: Go To Files
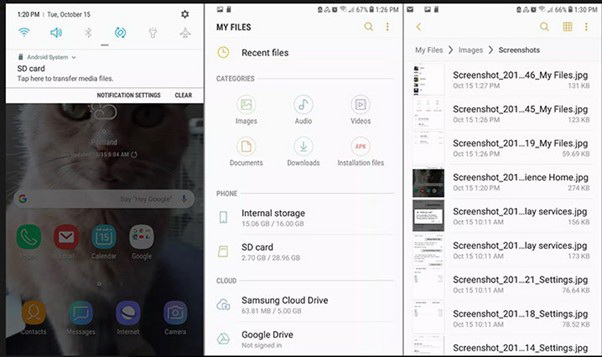
Open the app menu and look for the in-built Files app on your Samsung phone. Open the file and go to the internal storage.
Step 3: Open The Photos
Once in there, open the photos folders from where you want to transfer files. For your Samsung devices, most photos are saved in DCIM. Tap on the main folder and open the sub-folder where photos are saved.
Step 4: Select Photos For Transfer
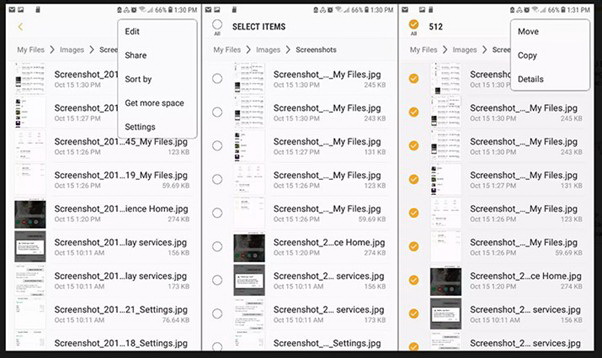
Now mark the photos individually or tap on Select all to move all photos from internal storage to the SD card.
Step 5: Move And Select Destined Folder
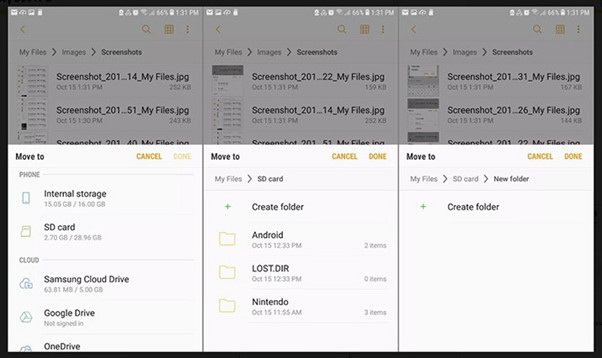
Now tap on Move, as shown at the bottom of the screen. Now you will have to tap on the SD card and choose the specified folder where you want to move the pictures.
Step 6: Paste
Once there, tap on paste, and the photo transfer will start. That's it!
How to Transfer Photos to SD Card Windows?
Windows phones are not commonly used, but if you own one, we will also tell you how to transfer photos to SD card Windows. So let's get into moving photos on your Windows phone.
Here is the step-by-step guide to doing so:
Step 1: Insert SD Card
Look for the dedicated SD card slot on your Windows phone, insert the card and set it up.
Step 2: Install Files App
Most windows phones do not have a default file manager app. Therefore, you can download the Files app from the Windows store, which is free to install.
Step 3: Open Internal Storage
Once installed, launch the app, and open the internal storage where pictures are saved.
Step 4: Select Photos
Go to the specified pictures folder and mark all the photos you want to transfer.
Now tap on Move, as shown at the bottom of the screen. Now you will have to tap on the SD card and choose the specified folder where you want to move the pictures.
Step 5: Paste
Once there, tap on paste, and the photo transfer will start. That's it!
How to Transfer Photos to SD Card iOS?
What if you are an iPhone user but want to transfer data to an SD card? Well, the most common method is using the computer as a bridge between you and your SD card, where data is indirectly copied to the SD card. However, if you have an Android phone with an SD card and your data is saved on iPhone. We are going to introduce you to one of the best iPhone file transfer software.
AirDroid – Best Solution For Wireless Transfer From iPhone
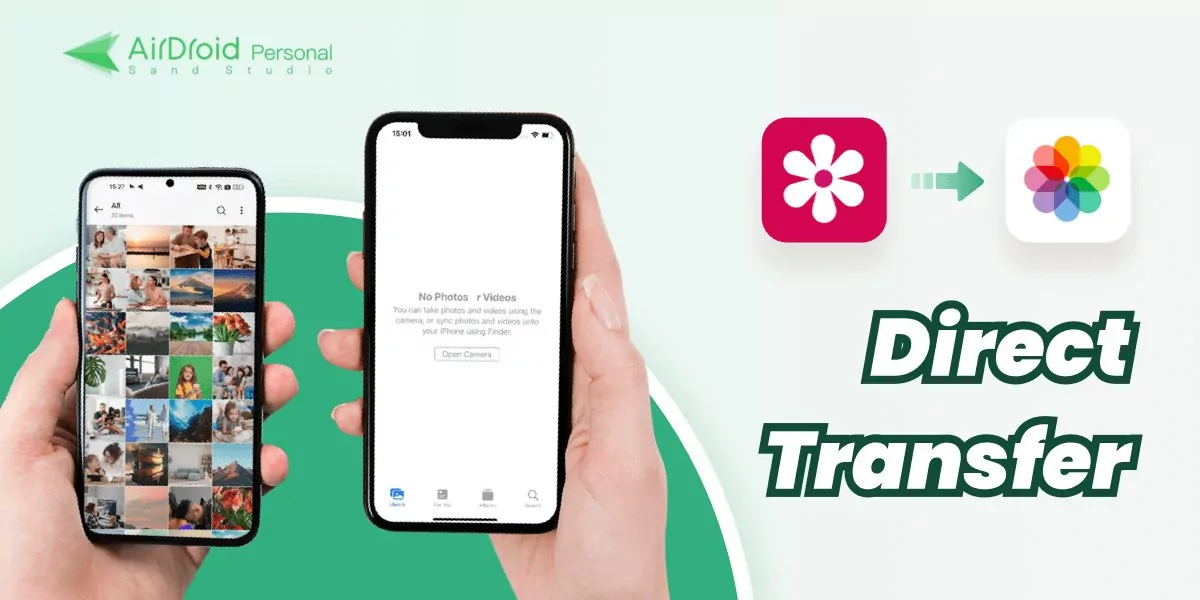
AirDroid is file management and transfers app for iOS, Android, Windows, and other operating systems. If you want to move photos to an SD card from iOS, you can capitalize on the app for file transferring wirelessly.
The main features of AirDroid are as follows:
- File transferring and sharing remotely
- Cross-platform compatibility
- Hyper-fast technology for file transfer and syncing
- Share all formats of files, be it photos, videos, documents, audio, contacts, messages, etc.
Here is how to transfer photos from iPhone to an SD card wirelessly:
- Install the AirDroid Personal app on your iPhone and Android device(having an SD card).
- Change device storage on your Android device to an SD card.
- Launch the app and tap on Transfer to see the list of available devices. Select the device to which you want to share photos.
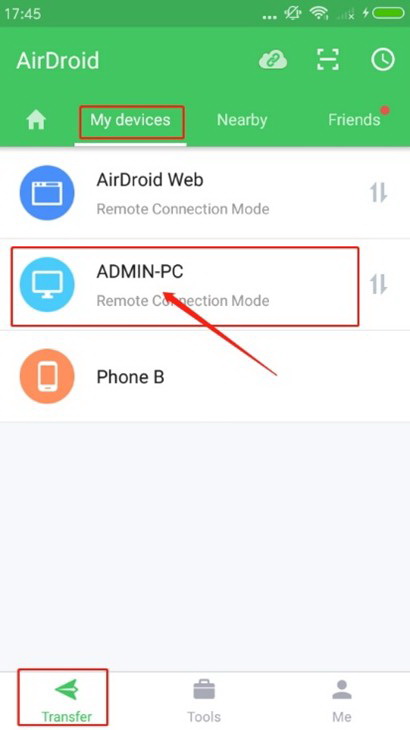
- Once selected, tap on the attachment icon in a chat and choose the photos you want to transfer.
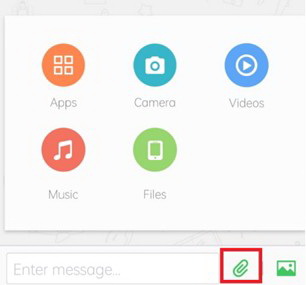
- After choosing the photos, tap on Send to transfer files to the SD card on your Android device.
Conclusion
We have shared different methods you can capitalize on when looking for a solution to transfer photos to SD card from your phone's internal storage. For Android smartphones, it is easier to complete the photo transfer. However, you can overcome the restrictions of iOS by relying on AirDroid Personal, a mobile management and file transfer tool. It is easy to transfer as many photos as you want from an iPhone to an SD card with AirDroid.
FAQs






Leave a Reply.