iCloud Backup is Not Working: How to Fix
iCloud is a spectacular feature that allows users to back up photos, videos, documents, and other data securely, ensuring its safety and accessibility across Apple devices. However, there are times when iCloud doesn’t function as expected, leaving users frustrated.
If you’re also encountering the issue of “iCloud backup not working on iPhone,” fret not. It is a common problem that is often triggered by a range of factors, primarily storage issues.
Let us discuss why iCloud backup is not working and how to troubleshoot it to get your backups running smoothly again.
Part 1: Why iCloud Backup on iPhone Not Working
The issue of iCloud backup on iPhone not working can manifest in a range of ways. Users can get a notification that reads, "iPhone Backup Failed: You do not have enough space to backup this iPhone" or similar pop-ups. Mostly, the backup process doesn’t seem to progress no matter what you do.
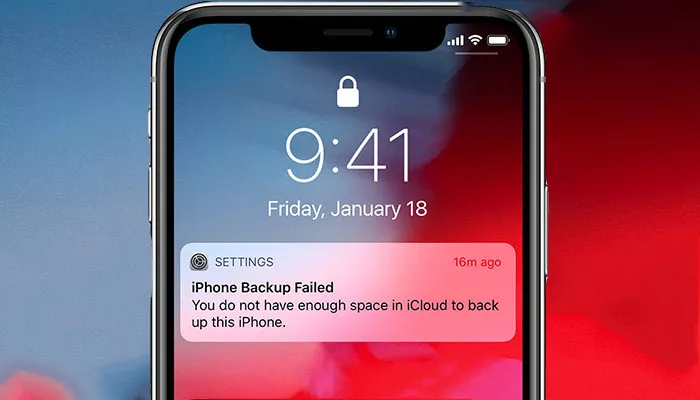
Some of the major reasons contributing to the iPhone back up not working problem include:
Case 1: iCloud comes with only 5GB of free storage. It’s likely that the iCloud backup size exceeds the total free space available.
Case 2: An issue in iCloud settings.
Case 3: Temporary glitches in the iPhone software.
Case 4: Problems with your Apple ID can cause iCloud backing up issues.
Now that you know the possible reasons, it’s easy to resolve the iCloud not backing up problem using the right solution.
Part 2: How to Fix iCloud Backup Not Working
Quick Tips to Fix iCloud Backup Not Working
1. Check Internet Connectivity: Make sure your iPhone is connected to a stable Wi-Fi connection.
2. Charge the iPhone: If your iPhone has a low battery, connect it to the power adapter.
3. Restart Your iPhone: Restart the iOS device and try backing it up again. This removes any minor bug in the system software that might be interrupting the iCloud backup process.
4. Update iOS: Head to Settings > General > Software Update. Tap Download & Install if new updates are available.
| Solutions | Quick Steps |
|---|---|
Manage iCloud storage | Check the available storage in Settings > Your Name > iCloud > Manage Storage. |
Disable large apps | Under iCloud, toggle off the apps eating up the maximum space. Else, buy the additional iCloud storage. |
Delete old backups | Go to Settings iCloud > iCloud backup > Manage Storage, and delete the old backup files. |
Remove iMessage files | From Settings > iCloud Storage > Messages, tap Review Large Attachments, and delete the unnecessary files. |
Sign out/in iCloud | Go to Settings > Your Name > iCloud > iCloud Backup. Turn it off and on. |
Reset network settings | Clear the network settings in Settings > General > Reset iPhone > Reset > Reset Network Settings |
Let us dive into the step-by-step guide of each solution.
Solution 1. Manage iCloud Storage
If the iPhone backup not working,the first thing you should confirm is the available iCloud storage. Not having enough free storage is the leading reason why iPhone backups fail.
Each iCloud account holder gets free 5GB space, but it’s often too little if you’re backing up a lot of apps, including Photos. Here are the steps you need to follow:
Step 1: Go to your iPhone Settings and tap Your Name > iCloud. At the top, it will show the available storage.
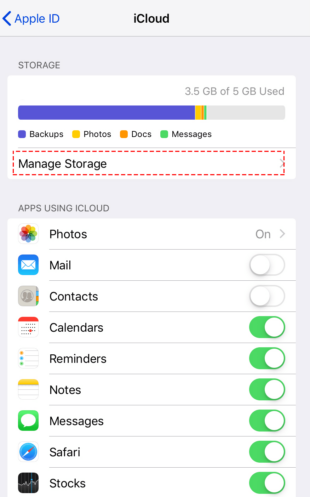
Step 2: If the storage is maxed out, the iPhone will not back up further data.
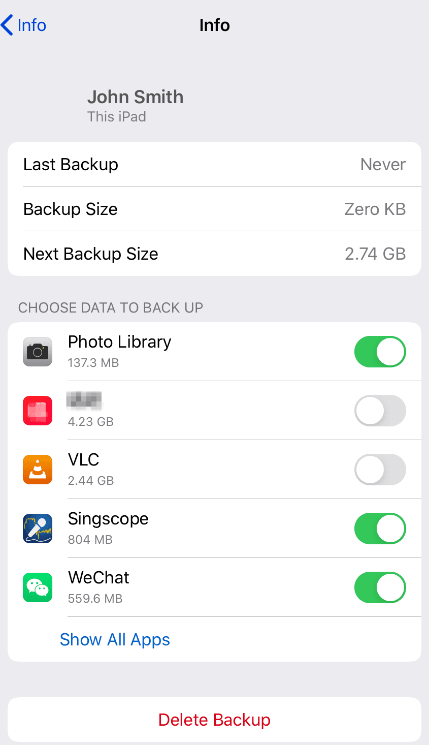
Step 2: Now, tap Manage Account Storage or Manage Storage. Tap Backups and select the device you’re using currently.
Step 4: Check the size of the Next Backup under Last Backup. It should be less than the free space available.
Solution 2: Toggle Off Heavy Apps
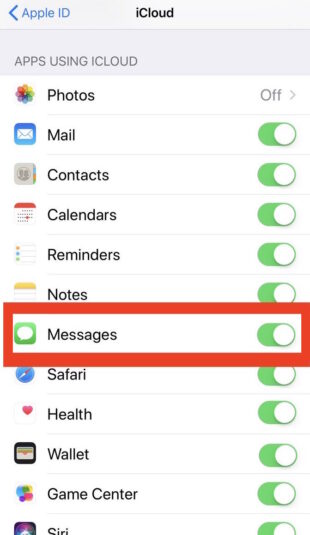
After checking the iCloud storage, you need to clear the space on your iCloud account. The easiest way is to toggle off the apps that consume the maximum iCloud space, like Photos and Messages. For that:
Head to Settings > iCloud, and disable Photos, Messages, and other apps that are consuming a lot of space. Note that iMessage can include large video files, eating up the iCloud storage quickly.
Get Extra iCloud Storage
If you believe you need more than 5GB of data, buy the additional iCloud storage depending on your needs. This serves best if you want to back up a lot of iPhone data.
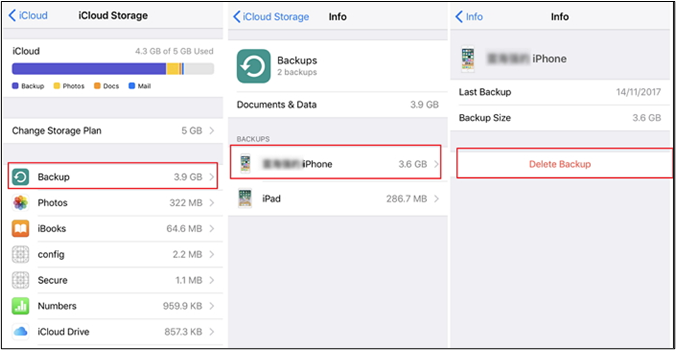
Solution 3: Delete Old Backups
Another simple way to remove the backlog from your iCloud account is to get rid of the old backups. Not only it makes way for new data in iCloud but also removes the possible bugs in old files.
Thus, if the iCloud backup on iPhone not working,try deleting the previous backups as shown below:
Step 1: Head to Settings > Your Name > iCloud > Manage Storage.
Step 2: Tap Backup and select the device you’re using.
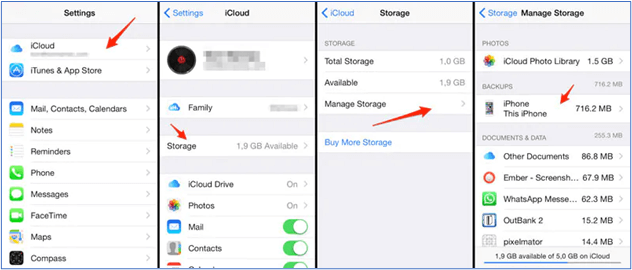
Step 3: You’ll see the details of the backup including its size.
Step 4: Scroll down and hit Delete Backup On the pop-up screen, click Turn Off & Delete to confirm the action
Solution 4: Delete Large Files in Messages
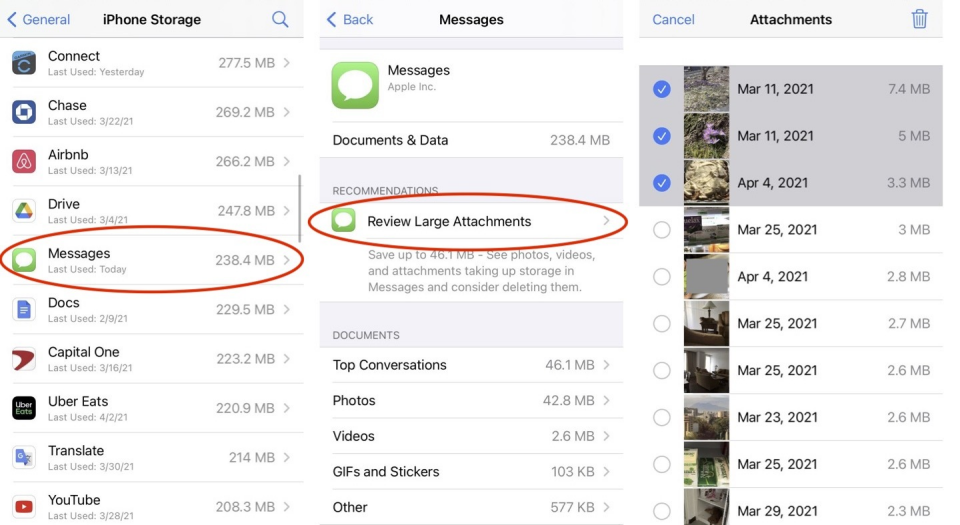
Many users of Reddit have claimed that deleting the large videos present in the Messages app can fix this issue. This happens as iCloud sometimes automatically detects and starts backing up the Messages data, even if you have toggled it off.
Luckily, you don’t need to go through each conversation to find and delete the large files. Instead, you can do it directly as demonstrated in the steps below:
Step 1: Open Settings and navigate to iPhone Storage.
Step 2: Find and tap Messages and click the “Review Large Attachments” option.
Step 3: Click Edit at the top and select all the images and videos you want to remove.
Solution 5. Toggle Off/On iCloud
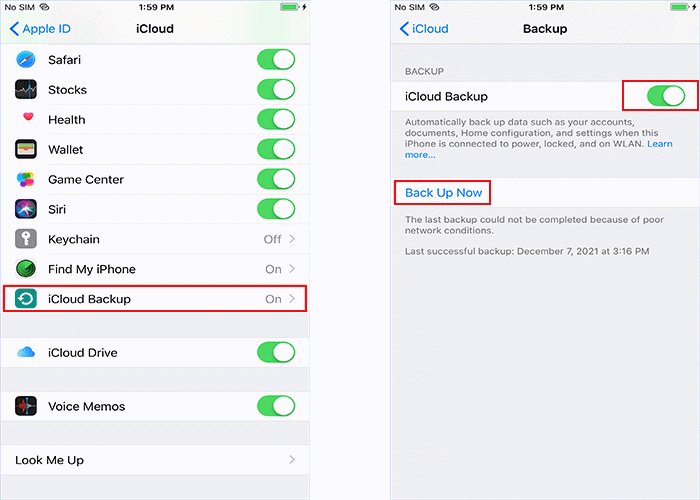
If iCloud backup not working even though enough storage, the issue can be due to a technical glitch in iCloud account. You can troubleshoot it by refreshing the iCloud account settings.
To do that:
Step 1: Go to Settings > Your Name > iCloud > iCloud Backup.
Step 2: Turn off its toggle. After a few seconds, turn it on again
Step 3: Then, tap Back Up Now and wait for the process to finish.
Solution 6: Reset All Network Settings
If you’re still facing the "iCloud backup failed with enough storage" issue, try resetting the network settings of your device. It will reset the saved settings of your Wi-fi, Bluetooth, and other cellular connections.
Unlike factory reset, it doesn’t remove the iPhone data. Here are the steps to follow to reset your iPhone to resolve iCloud not backing up:
Step 1: Head to Settings > General > Reset iPhone.
Step 2: Tap Reset > Reset Network Settings and enter your passcode to confirm the action.
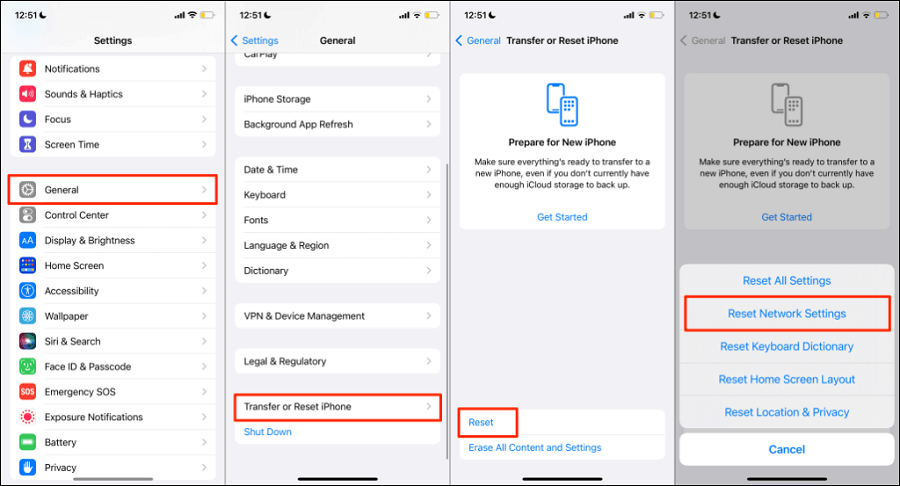
When it restarts, connect to the Wi-Fi again and start the iCloud backup process.
Bonus Tip: Transfer Photos and Videos from iPhone to PC Wirelessly
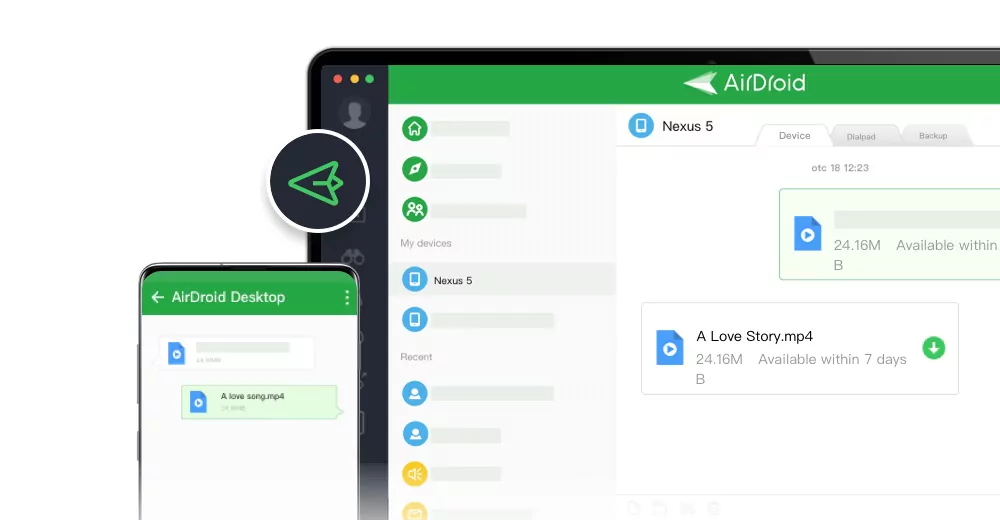
Backing up photos and videos on iCloud can take a lot of space. As an alternative, you can use AirDroid Personal to move the iPhone media to a PC to keep it safe. This tool takes just a few minutes to transfer GBs of data across the devices – all wirelessly.
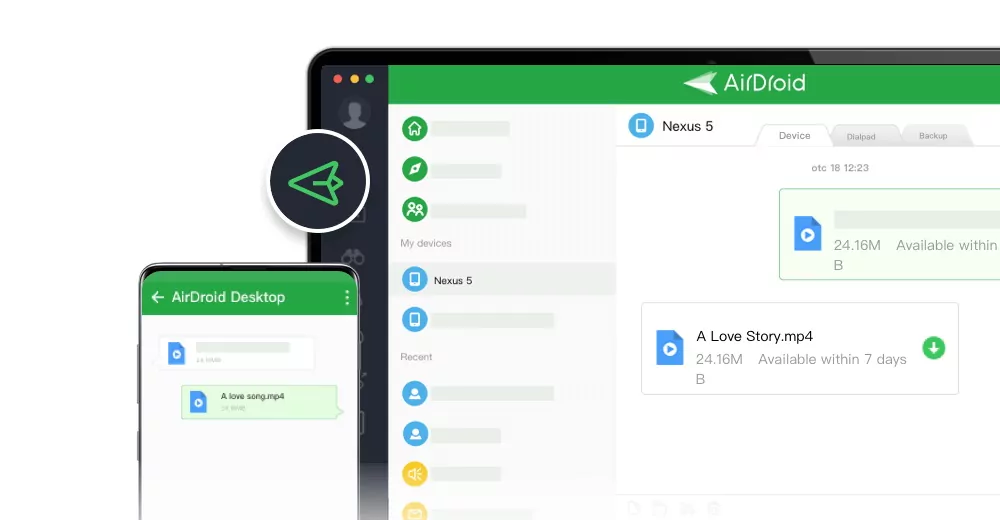
Besides, you can leverage its “Automatic Backup” feature to quickly move the new photos in the iPhone’s gallery to the PC after connecting the devices. This way, you never have to worry about losing your precious memories.
Download AirDroid for free to test its stellar remote device management features.
FAQs
Q1: What's included in the iCloud backup?
An iCloud backup stores photos, videos, contacts, notes, and the data of apps that you have downloaded like WhatsApp.
Q2: How long do iCloud backups take?
Depending on the size of the backup and your internet speed, an iCloud backup can take up to 30 minutes to 2 hours to complete the process.
Q3: Why WhatsApp iCloud backup not working
If WhatsApp not backed up to iCloud, check the available iCloud storage. Make sure the WhatsApp backup size in Settings > Chats > Chat backup, is less than the free iCloud space. Moreover, you must have a stable internet connection for WhatsApp to back up your data.
Final Remarks
Hopefully, you managed to fix the “iPhone not backing up to iCloud” problem without trouble. As it occurs mostly due to storage and internet connectivity issues, be sure to implement the first 2 solutions carefully.
In addition, you can rely on a third-party app like AirDroid Personal to safely transfer all your photos and videos to a PC. It guarantees super-fast wireless file transfer as well as intuitive file management and remote screen capabilities.
Let us know which solution has worked for you. Thanks
