How to Change iTunes backup location on Windows/Mac?
Using iTunes for backing up your iPhone data may have caught your attention with its default storage location on your computer's main hard drive. This could present challenges if your storage space is limited and also if you aim to enhance the organization of your backups.
Fortunately, there exists a solution to alter the iTunes backup location to any folder or external drive of your preference. Here in this article, we embark on a journey to unveil the intricacies of shifting the iTunes backup location on Windows 11/10/8/7, delving into the benefits that accompany such a modification.
Moreover, we extend our discourse to demonstrate how you can seamlessly back up your iPhone files to a PC, leveraging the functionalities of AirDroid Web to streamline your data management endeavors.
Where to Find the Default iTunes Backup Directory
- Windows 11/10/8 : C:\Users\Your username\AppData\Roaming\Apple Computer\MobileSync\Backup.
- Windows 7: C:\Users\Your username\AppData\Roaming\Apple Computer\MobileSync\Backup
- On Mac: Go to Finder>Option>"Library: ~/Library/Application Support/MobileSync/Backup/
What to Know Before You Change iTunes Backup Location
If you want to free up some space on your computer or store your iTunes backups in a different location, you can change the default backup folder using a simple trick. This trick involves creating a symbolic link, or symlink, which is a shortcut that points to another folder.
By creating a symlink, you can fool iTunes into thinking that the backup folder is still in its original location, while storing the files elsewhere. Here is how to change the iTunes backup location:
Key Takeaway
- Ensure you have a current backup of your data before you make any changes.
- Be precise in entering the new backup path, as errors can cause issues.
- Make sure the new location has sufficient storage for your backups.
- Verify that iTunes can access and write to the new location.
FAQs About iTunes Backup Location
Is it safe to change my iTunes backup location?
Yes, if done correctly using the symlink method. However, ensure you back up your existing folder beforehand.
Any other useful tool to help me manage my iPhone files?
AirDroid is a wireless file transfer tool that allows you to manage your iPhone files from your computer without iTunes.
How can I change the default backup location for iPhone backups in iTunes?
You cannot change the backup location for iPhone backups directly within iTunes. However, you can manually move the backup folder to a new location after each backup is complete.
How to Change the iTunes Backup Location on Windows 11/10/8?
To change the iTunes backup location on Windows 11/10/8, you will need to use the Windows Command Prompt.
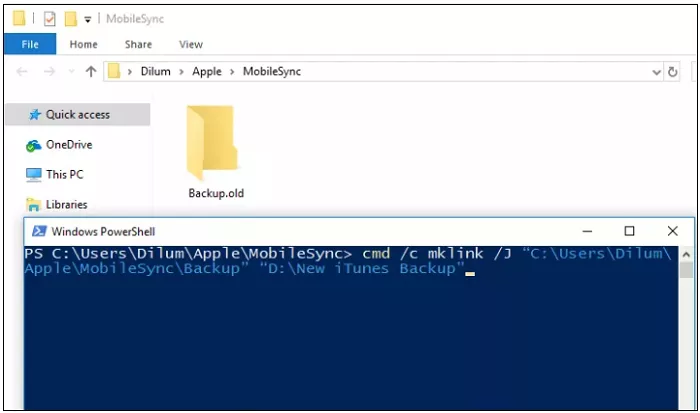
Don't worry, it's not as complicated as it sounds. Just follow these steps carefully and you'll be able to change the iTunes backup location on Windows 11/10/8 in no time.
Step 1: Create a new folder where you want to store your iTunes backups. For example, you can create a folder called "iTunes backup" in the C:\ drive.
Step 2: Open the Command Prompt. You can do this by typing "cmd" in the Windows search box and hitting Enter.
Step 3: Navigate to the new folder using the "cd" command. For example, if you created the folder in the C:\ drive, type "cd c:\itunesbackup" and hit Enter.
Step 4: Delete the original backup folder and everything inside it using File Explorer. You can do this by right-clicking on the folder and choosing "Delete".
Step 5: Create a symlink using the "mklink" command. This command will create a shortcut from the original backup folder to the new folder. Type the following command and hit Enter: "mklink /J "%APPDATA%\Apple Computer\MobileSync\Backup" "c:\itunesbackup"". Make sure to replace "c:\itunesbackup" with the actual path of your new folder.
You can now choose any folder you want for your iTunes backups, such as "c:\itunesbackup".
How to Change the iTunes Backup Location on Windows 7?
To create a symlink in Windows 7, you will also need to use the Windows Command Prompt. Like on windows 11/10/8. Follow these steps carefully and you'll be able to change the iTune backup location Windows 7 easily:
Step 1: Create a new folder where you want to store your iTunes backups. For example, you can create a folder called "itunesbackup" in the C:\ drive.
Step 2: Open the Command Prompt. You can do this by typing "cmd" in the Windows search box and hitting Enter. Navigate to the new folder using the "cd" command. For example, if you created the folder in the C:\ drive, type "cd c:\itunesbackup" and hit Enter.
Step 3: Delete the original backup folder and everything inside it using File Explorer. You can do this by right-clicking on the folder and choosing "Delete".
Step 4: Create a symlink using the "mklink" command. This command will create a shortcut from the original backup folder to the new folder. Type the following command and hit Enter: "mklink /J "%APPDATA%\Apple Computer\MobileSync\Backup" "c:\itunesbackup". Make sure to replace "c:\itunesbackup" with the actual path of your new folder.
That's it! You can now choose any folder you want for your iTunes backups, such as "c:\itunesbackup".
How to Change the iTunes Backup Location on Mac?
If you'd like to change your iTunes backup location on Mac without additional software, you can facilitate this manually:
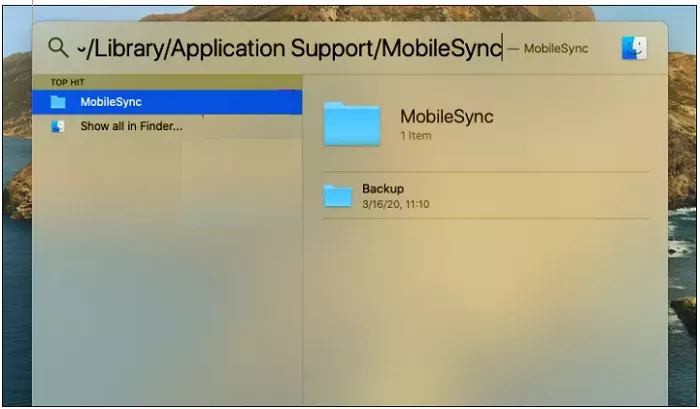
Fist you need to locate the iTunes Media Folder, to do this:
Step 1: Attach your external hard drive to your Mac.
Step 2: Navigate to Finder > Select your username > Click iTunes. This will take you to the default location of the iTunes folder.
Note :
If the iTunes folder isn't in the default location, open iTunes.
- Navigate to Preference > Advanced. Note the path listed under 'iTunes Media folder location'.
- Make sure the option 'Copy files to iTunes Media folder when adding to library' is checked.
- Click 'OK'.
Step 3: Go to File > Library > Organize Library.
Step 4:Choose 'Consolidate Files' to centralize all library files for backup.
Step 5: If available, select 'Reorganize files in the folder iTunes Media'. Confirm the settings by clicking 'OK'.
Step 6: Close iTunes and go to Finder to open your external hard drive.
Step 7: Locate your iTunes folder either at its default location or the one you noted earlier. Drag this folder over to your external hard drive to start the transfer.
Step 8: Once the transfer is complete, you can delete the original iTunes backups from your Mac to free up space.
Now you've successfully changed your iTunes backup location on your Mac.
Why You May Need to Change iTunes Backup Location?
By default, iTunes saves backups on your computer's main hard drive, which can quickly fill up your storage space.
If you want to save more space or organize your backups better, you can change where iTunes stores them. Here are some reasons why you should change backup iTunes location:
Save More Space
You can free up more space on your computer's hard drive by moving your iTunes backup location. Apple devices store more and more data as they get more advanced.
This means that backups can take up a lot of disk space, sometimes several gigabytes or more.
Improve Performance
You can make your computer run faster and avoid backup overload by moving your iTunes backups to another location. This way, you can prevent disk overflow and boost system performance.
Manage And Organize
You can also manage and organize your device backups better by changing your iTunes backup location. If you have multiple Apple devices, it can be hard to keep track of all the backups.
By moving backups to different folders or external drives with the device names, you can easily find and access the backup you need.
Protect Your Data
Even though iTunes backups are usually safe on your computer's main hard drive, you can still lose data from accidents like virus attacks, disk failures, and system crashes. You can protect your data better by storing your backups on an external disk or in another location.
This way, you can have peace of mind that you have a secure backup copy of your main disk, even if something happens to it.
Share And Transfer
You can also share and transfer your backups more easily if you change the backup location for iTunes. The iTunes backup folder is easy to move to a new device or another computer.
This is very useful if you want to share backups with another user or if you are switching computers.
How to Backup Your iPhone Files to a PC with AirDroid?
AirDroid Web is a powerful tool that can meet all your mobile needs. You can do many things on your smartphone with it. You can also access your iPhone files easily with the AirDroid website.
With AirDroid online, you can access your files from anywhere and anytime, without any limits. Here are some benefits of using AirDroid online to access your iPhone files.
AirDroid empowers you with -
Key features of AirDroid Personal
- Selective and Secure Backups: Choose specific files or folders to backup, ensuring your valuable data remains protected on your PC.
- Wireless Convenience: Eliminate the hassle of cables. AirDroid's wireless connectivity frees you from the constraints of physical connections.
- Lightning-Fast Transfers: Experience high-speed file downloads, regardless of file size, saving you precious time.
- Universal Compatibility: AirDroid transcends operating systems, seamlessly connecting your iPhone to Macs, Windows PCs, Linux machines, and Chromebooks.
- Web-Based Simplicity: No software installation is needed. Access AirDroid directly from your web browser for instant functionality.
Backup Your Important Files Quickly
Here is a quick guide on how to back up your important files with AirDroid Personal, even if you don't have your computer with you. Make sure you download AirDroid first before you back up your data.
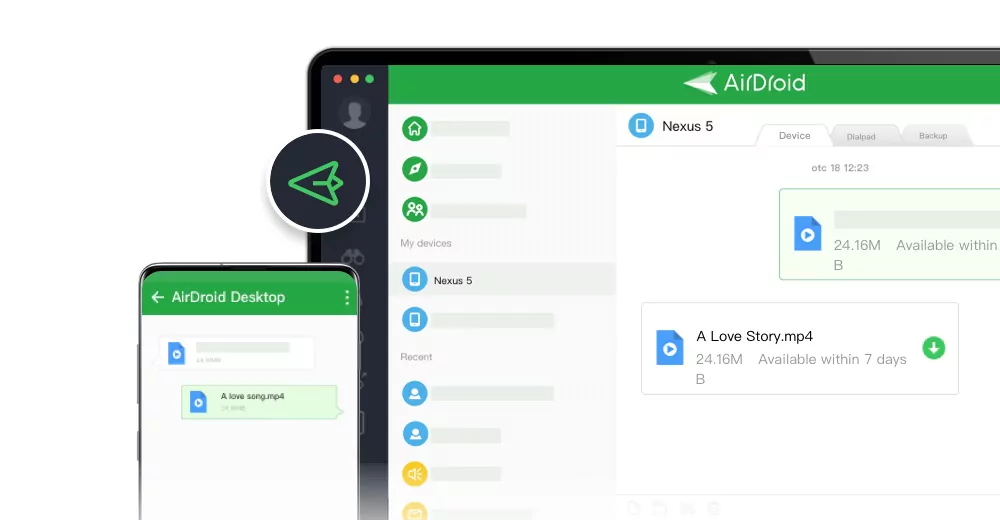
Step 1: Log in to your PC and iPhone with the same AirDroid account. After you connect your device to your PC, you can transfer your files offline whenever and wherever you want.
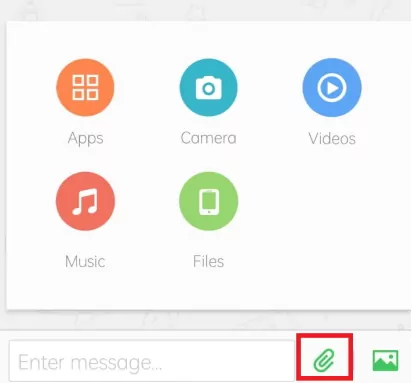
Step 2: On your phone, tap the Transfer button. Then, pick the device you want to back up from the list.
Step 3: Choose the file icon or the backup type you want, and then tap Send.
Backup Your Photos And Videos In Bulk
Follow these steps to learn how to backup your photos and videos from your iPhone to your PC or Mac.
Step 1: Download the AirDroid iOS app from the App Store on your iPhone. Then, sign up for an account on the AirDroid official website. Enter your login details and access your account.
Step 2: Go to https://web.airdroid.com on your computer and log in with the same details as your AirDroid account. You will use the same account to connect your PC and iPhone.
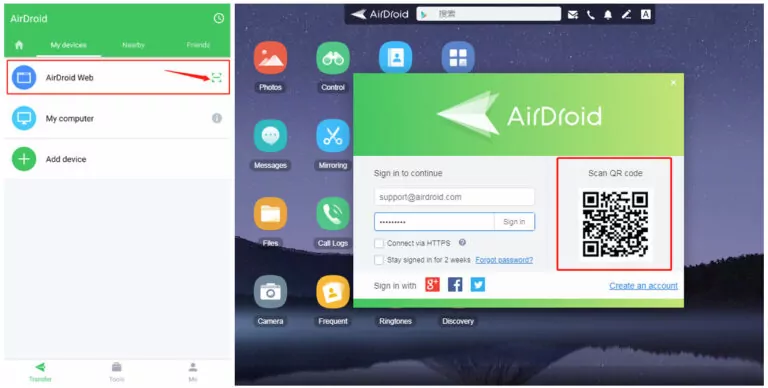
You can use your PC to check the media files from your iPhone and start transferring them to your computer for later use. Also, you can easily view, delete, and copy iPhone files with your PC.
You don't need any other tools like iCloud or iTunes. With an AirDroid account, you can control your iPhone files wirelessly from your PC.
If you want to save space, enhance performance, better manage and protect your data, and share or transfer your backups with ease, changing the iTunes backup location can be a wise decision. We've broken down the process of altering the iTunes backup location above.
Additionally, we've gone over how to back up your iPhone files to your PC using AirDroid Web. This robust tool allows for effortless, wireless access to your iPhone files. If you want to try AirDroid Web, you can download the AirDroid iOS app from the App Store and sign up for an account on the AirDroid official website.




Leave a Reply.