How to Share Files Between Mac and PC
When you work with Windows and Mac systems, you will encounter practical issues to transfer files between the devices. Since they work in unique platforms with different levels of compatibility compels the users to hunt for better techniques in the transfer process. Here, in this article, you will learn the best ways to transfer files from Windows to Mac.
Choosing the correct technique and tools is essential to ensure successful transfer from one device to another. Migration of data seems to be a tedious process while handling a large number of files in the transfer. Connecting with sophisticated tools enhances the transfer procedure. There are in-built features and third-party applications to move the data from Windows and Mac systems effortlessly.
- Method 1 : Migrate Data from Windows PC to a New Mac
- Method 2 : Enable and Set Up File Sharing on Windows and Mac - Without Software
- Method 3 : Easy Share Files between Mac and Windows wirelessly – AirDroid Personal
- Method 4 : Via Cloud Service
- Method 5 : Via Email
- Method 6 : Copy Files from PC to Mac
1Migrate Data from Windows PC to a New Mac
Soon after you purchase a Mac system, the next step is to migrate the data from your old Windows to the new laptop for future access. Moving the data files in this cross-platform is quite challenging but you can perform it using the Migration Assistant application provided by the Apple store. Follow up the below instructions carefully to migrate data from Windows to Mac precisely.
- Step 1: Place the Windows and Mac laptops nearby and configure the Mac system. First, choose your country from the dropdown list and select your keyboard.
- Step 2: Next, choose a Wi-Fi network like that of the Windows PC. Ensure Windows and Mac systems are connected to the same network.
- Step 3: Proceed with the Data and privacy module and then choose the option 'transfer data from Windows PC' from the list. Then, tap the 'Continue' button.
- Step 4: The Mac system automatically searches for the sources in the connected device. You must wait for a few minutes until the Mac discovers the Windows PC. Ensure there is adequate power in both the systems and uninterrupted network connectivity.
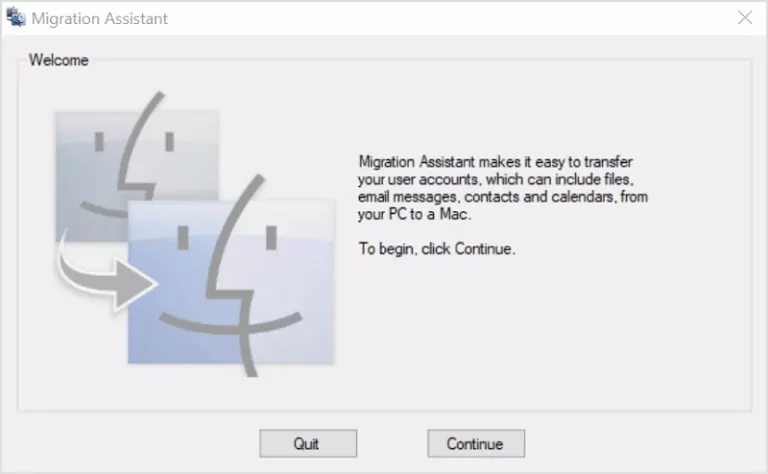
- Step 5: Now, download the migration assistant app from the Apple website on the Windows PC. Next, launch the migration assistant app and close the applications running in the background if any. Tap the Continue button in the Migration Assistant window to establish a connection between the Mac and Windows PC.
- Step 6: Select the Windows PC name on the Mac screen and pair it with the generated passcode. Then, hit the Continue button on the Windows PC to proceed with the data transfer process.
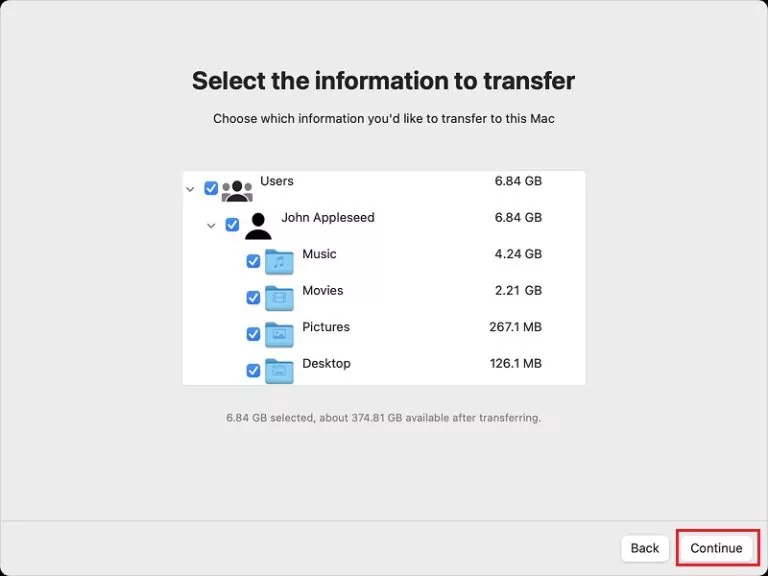
- Step 7: The Mac displays the data files that are available on the Windows PC. Select the desired data from the list and proceed by tapping the Continue button.
The chosen data starts to transfer from Windows to macOS and you must wait until the process completes successfully. Then, sign into your Apple account in the macOS to finish the basic settings. Finally, check the transferred files in the macOS and ensure it is received without any data loss.
2Enable and Set Up File Sharing on Windows and Mac - Without Software
Try the in-built file-sharing modules in the PC to trigger the data transfer between devices. Enabling this module assists in file transfer without any third-party software.
- Step 1: Go to the macOS, hit the Apple menu, and then tap System Settings, next press General which appears in the side panel of the screen. Then, scroll down and press Sharing option from the displayed list.
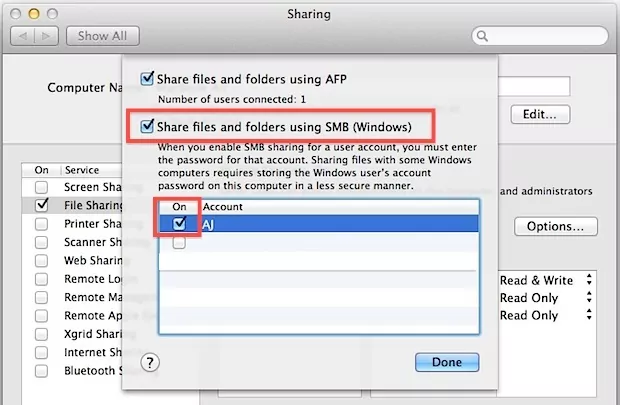
- Step 2: Enable the File Sharing item and hit the info button available at the right. Then, press Options and choose 'Share File and Folders using SMB'.
- Step 3: Now, choose the user account listed in the Windows File Sharing module and type in the password followed by the OK button. Finally, hit the Done option.
- Step 4: Select View -> Network and choose the active connection to ensure both devices are connected to the same network.
- Step 5: Press WINS on the side panel of the screen and type in the Windows PC-created workgroup name.
Lastly, click the OK button to complete the file-sharing setup process successfully. Some of the newbie users do not know how to handle this setup efficiently. Changes in the settings affect the successful transfer of the files.
3Easy Share Files between Mac and Windows wirelessly – AirDroid Personal
The third-party applications ease the file-sharing process between macOS and Windows wirelessly. It is the perfect method for both novices and professionals to carry out the file transfer process between devices. The AirDroid Personal is a stunning tool with loads of features that enhances file transfers cross-platform. It has surplus functionalities and serves as a complete solution for your needs.
The additional features of the AirDroid Personal application
- Monitor the other gadgets remotely
- Use this app to remote control other devices effortlessly.
- Screen mirror the device display to get bigger images.
- Manage SMS and Notifications on your device professionally.
- Lossless file transfers at a faster rate despite file size.
These are the salient functionalities of the AirDroid Personal tool that makes it stand unique from the crowd.

3.1 Via File Transfer (local network and Remote network)
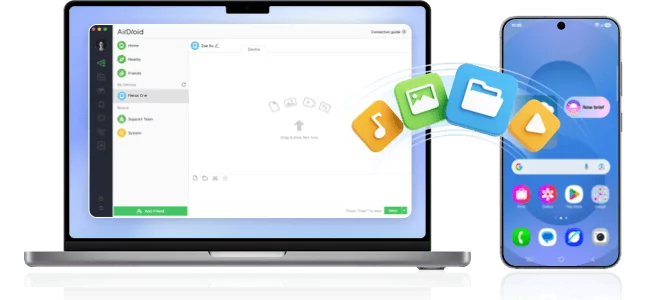
To meet both the requirements of the local network and remote file-sharing process, AirDroid Personal tool provides users with a File Transfer module. This feature permits the users to carry out file transfers flawlessly despite the device's location. Initial setup in both devices is essential to perform the file transfers. For the local network, ensure both devices are connected to the same Wi-Fi network. In case of remote file transfers, enable the remote features in the receiver device. During the setup process, log into the same AirDroid account on both devices to avoid unnecessary interruptions. After completing the initial setup process successfully, follow the below instructions.
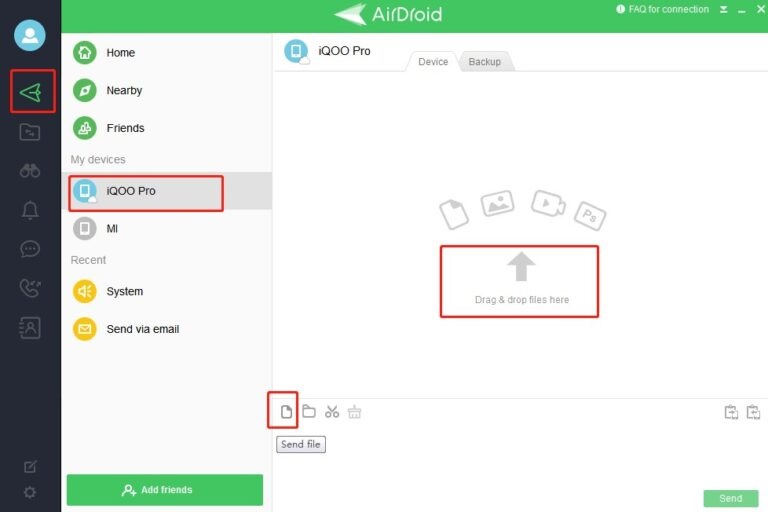
- Step 1: In the sender device, launch the AirDroid Personal Desktop client app and sign into your AirDroid account. In the dashboard, tap the File Transfer icon in the left menu of the screen.
- Step 2: Select the receiver device name from the displayed list under the My Devices section.
- Step 3: Then, navigate the folders and choose the desired files. Drag and drop into the right side of the screen of the AirDroid Personal interface. Finally, hit the Send button to start the file-sharing procedure.
The above steps explain the file-sharing process satisfying both the local and remote networks using the incredible application AirDroid Personal application.
3.2 Nearby Share (local network)
The Nearby Share method is applicable when both devices are separated a few meters. Like Bluetooth connectivity, this feature works only when both devices are placed in the same environment for a flawless transfer process.
- Step 1: Download the AirDroid Personal app on both devices and proceed with the installation and setup process. Tap the Nearby tab and hit the Search button on the right side of the sender device's screen.
- Step 2: Turn on the location settings in the receiver device and hit the receiver device name on the sender device's screen after the scanning process of the AirDroid Personal app completes.
- Step 3: Now, accept the process and start transferring the desired files by navigating to the folders of the sender device.

4Via Cloud Service
Cloud services play a vital role in the storage and file-sharing operations. It serves as a virtual space for the files to stay in a protected format even for decades hassle-free. The Android platform opts for Google Drives as its cloud service. You can also go for other third-party applications like Dropbox to store and access the files based on the requirements. Excellent access control highlights the Cloud Service despite its downfalls related to security features. The Cloud Service platforms provide users with high-end compatibility so that they can use any gadgets and devices to access the stored files flawlessly. It supports cross-platform operations and enables a smooth flow of data between devices.
5Via Email
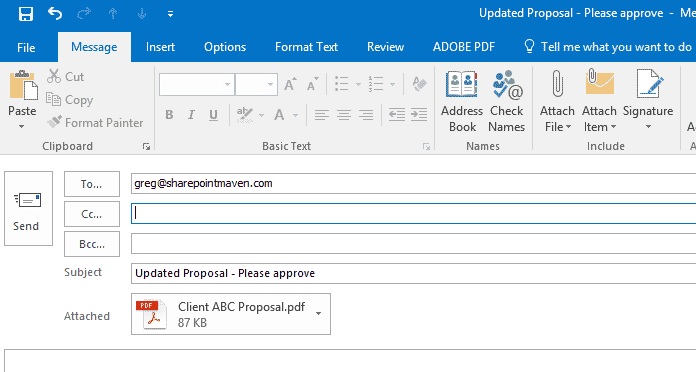
Another storage space with good accessibility features is widely used by many users globally. You can send the required files to your email and move them to the respective folders for better access. Use your email and structure it by creating folders for quick access to the desired data. The Email platform allows the users to organize their data and connect to it by simple login. The major drawback of this method is that it has restrictions on memory space allocations. Limited memory space is available and you can store and access only a few files and data.
6Copy Files from PC to Mac
There are different versions of copying files from PC to Mac using a USB stick, cable, and external hard drives.
6.1 Via USB Stick
Connect the USB device to any one of the ports of Windows and copy the files into this external storage. Then, unplug it from the PC and plug it in with the macOS. Next, copy the files from the USB to the Mac system. Wait until all the files copy into the desired storage drives in Mac and finally remove the USB from the macOS.
6.2 Via External Hard Drive
Use an external hard drive to copy the files from the PC to Mac. Connect the drive to the system and then navigate the folders to copy the files into the hard drive. Remove the hard drive and connect it with macOS to get those copied files into this system.
Conclusion
Thus, you had an enlightening discussion about how to transfer files from Windows to Mac. Choose the best method that suits your needs efficiently. Connect with the AirDroid Personal application to satisfy your device requirements beyond expectations. Stay tuned to discover more about file transfer techniques between devices.
FAQs





Leave a Reply.