How to Record FaceTime with Audio on Apple Devices
Ever found yourself in a FaceTime call, sharing a laugh with a friend or discussing important details, and thought, "I wish I could capture this moment"? Recording FaceTime calls with audio can be incredibly useful; however, it's not as simple as pressing a button.
Apple's built-in tools offer some recording capabilities, but they come with limitations, especially when capturing both sides of the conversation.
➡️Key Takeaways
- FaceTime’s Built-in Limitations: Apple's built-in screen recording don't capture both sides of a FaceTime call's audio due to privacy restrictions.
- Device-Specific Solutions: iPhones with iOS 18 or later have a built-in call recording feature with participant notifications, while older iOS versions require third-party apps.
- Alternative Methods: Mac users can record FaceTime with audio using OBS Studio, third-party apps, or external devices, each with different setup complexity and cost.
- Recording on Android and Windows: FaceTime isn't natively available on these platforms, but users joining via a web link can use screen recording apps like OBS Studio to capture calls.
- Legal and Ethical Considerations: Recording FaceTime calls may be illegal in some regions without consent. Users should understand native laws and inform participants before recording.
Can You Screen Record Facetime with Sound?
No. The native screen recording feature on Apple devices does not capture audio for FaceTime calls on iPhone and iPad. While it only record the user’s voice on Mac. This is because macOS does not allow internal system audio recording through these methods.
Even if you enable the microphone and speaker, it doesn’t work due to privacy restrictions. You can use an external recording device or another phone to record FaceTime audio and video.
How to Record Facetime with Audio on iPhone and iPad
1For Devices with iOS 18 or later: Built-in Call Recording
iPhones and iPads running iOS 18 or later have a built-in call recording feature that works with FaceTime. Participants will hear an audio notice when the recording starts and stops.
- Open the FaceTime app and start a call.
- Tap the Record button on the call screen (if available).
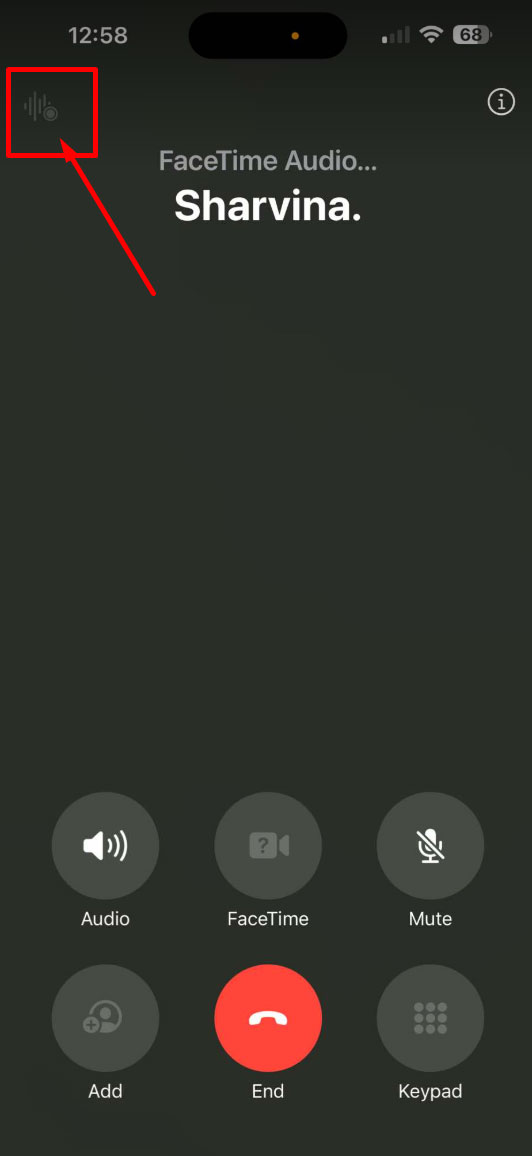

- A notification or prompt will inform all participants that the recording has started.
- To stop recording, just click the Stop Recording button.
- The recording is saved in the Call Recordings folder within the Notes app.
Please also not available in all regions. Call recording is unavailable in Russia, Saudi Arabia, South Africa, and more. You may check available language and unavailable countries.
If you need to save important details, use the transcript feature if it is available for you (Have a check).
2For Devices with Other iOS Versions or iPadOS: Use Third-Party Apps
If your device doesn’t support built-in call recording, third-party apps can help. Some third-party apps may require a subscription or in-app purchases. Here are the general steps.
- Install or download a call recording app (e.g., TapeACall, Rev)from the App Store.
- Follow the app’s setup instructions.
- Start your FaceTime call.
- Use the app’s recording function to capture the call with audio.
- Save or share the recorded file as needed.
Some apps require merging calls or using VoIP services. Legal restrictions still apply in certain regions.
How to Record Facetime with Audio on Mac
For now, Apple doesn’t add the call recording feature for Mac either. Alternative methods like OBS Studio and third-party apps are required to capture FaceTime audio fully. Below are three ways to record FaceTime with audio on Mac, each with its own setup, limitations, and best-use cases.
1Using OBS Studio (Reliable and Free, but Setup is Complex)
OBS Studio is a free, open-source recording tool that allows users to capture FaceTime with audio. However, setting it up requires additional software and configurations. Since macOS doesn’t allow direct internal audio recording, users need a virtual audio driver like BlackHole to route FaceTime audio into OBS. Here are the detailed steps:
- Download and install OBS Studio from obsproject.com.
- Install BlackHole (virtual audio driver) to enable system audio recording.
- Open OBS Studio and click "+" under Sources > Select Mac OS Screen Capture > Click OK.
- Click "+" again under Sources > Select Mac OS Audio Capture > Choose "Desktop Audio" > Click OK.
- In the Audio Mixer, enable the Mac OS Screen Capture Audio Mixer and adjust volume levels.
- Click Start Recording in OBS and begin the FaceTime call.
- Click Stop Recording when finished and access the saved file in the OBS recording folder.
While the setup can be complex, this method offers the most control over video and audio settings. One limitation is that improper setup can lead to no audio or distorted sound. To avoid this, use the correct audio source in OBS and test the recording before starting a FaceTime call.
2Using Third-Party Apps (Easier to Use, but Often Paid)
Third-party apps provide a more user-friendly way to record FaceTime with both audio and video. Popular options like Ecamm Call Recorder, Audio Hijack, and Movavi Screen Recorder allow full conversation capture without complicated configurations. Most of these apps are paid but offer a straightforward setup and additional features like built-in editing tools.
Users should check compatibility with their macOS version and grant the necessary system permissions for screen and microphone access. Some apps may have recording time limits in free trials, so testing before important calls is recommended. Here are general steps:
- Download and install a third-party app (e.g., Ecamm Call Recorder, Audio Hijack, Movavi Screen Recorder).
- Open the app and grant the necessary permissions for screen recording and microphone access in System Settings.
- Launch FaceTime and start a call.
- Click the record button in the third-party app to begin recording.
- End the call and save the recorded file in the preferred format.
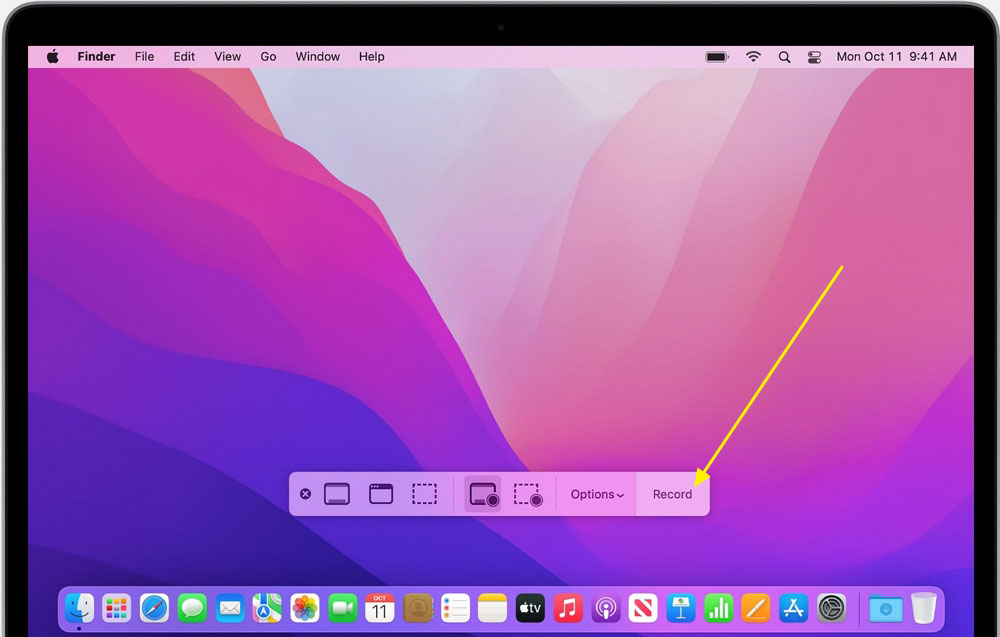
3Using QuickTime Player / Cmd + Shift + 5 (Built-in, but Captures Only Your Voice)
macOS provides built-in screen recording tools like QuickTime Player and Shift + Cmd + 5, but they can only capture your voice, not the other person’s. If you don't mind, here are the steps:
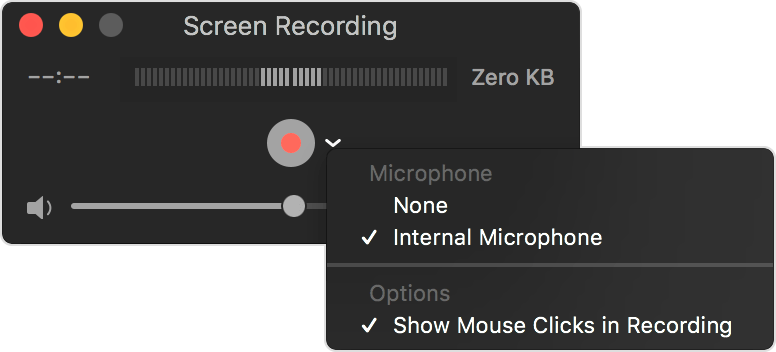
- Open QuickTime Player and go to File > New Screen Recording.
- Tap the drop-down arrow next to the record button and select Internal Microphone.

- Start FaceTime and begin the call.
- Click Record to capture the screen and your voice.

- Click Stop Recording when finished and save the file.
While this option is quick and requires no additional downloads, it is not ideal for recording FaceTime conversations with full audio. To improve sound quality, use headphones and position the microphone close to your mouth.
Can You Record Facetime on Android and Windows?
If you join a FaceTime call via a web link on a browser, you can use third-party screen recording apps like OBS Studio, Bandicam, or AZ Screen Recorder on Windows or Android to capture or record the call. Keep in mind that FaceTime’s web version may have limitations on audio recording, so you may need to enable microphone access or use external recording tools for better results.
Ethical and Legal Concerns for Facetime Recording
Recording a FaceTime call isn’t just about hitting the record button—it also comes with ethical and legal responsibilities. Before you start recording, understand the laws in your area and respect everyone involved in the conversation.
Is It Legal to Record a FaceTime Call?
The rules regarding FaceTime call recordings differ per location. Some places allow it as long as one person in the call knows about the recording, while others require everyone’s consent.
- One-Party Consent: In some states and countries, you can legally record a call conversation as long as at least one participant (which could be you) is aware of it.
- Two-Party (All-Party) Consent: Other regions require permission from everyone on the call before recording.
Recording private conversations when consent is absent leads to possible legal consequences that might result in financial penalties together with prosecution. So, before you hit record, make sure you know the rules in your area. You may check the rule from Wikipedia.
Why Ethics Matter in FaceTime Recording?
Even if it’s legal, recording a FaceTime call isn’t always the right thing to do. Ethics play a big role in keeping things fair and respectful. Here’s what to consider:
- Always let people know you’re recording. It’s not just about legality—it’s about trust.
- Record only when necessary, and don’t share the recording without permission.
- If you save a recording, keep it secure to prevent unauthorised access.
At the end of the day, balancing your need to record with the privacy of others is key. A simple heads-up before hitting a record can go a long way in keeping things ethical and legal.
Final Thoughts
Recording FaceTime with audio isn’t as simple as pressing a button, but with the right tools and setup, it’s definitely possible. The key is finding the one that works best for your needs.
Just remember, privacy and legal considerations matter. Always check your local laws and make sure everyone on the call is aware if you’re recording. With that in mind, you can confidently capture those important conversations, special moments, or work meetings without hassle.


Leave a Reply.