Block Contacts on Android: Methods for Personal and Business
There could be numerous reasons for call blocking on Android, whether in personal or business settings. For example, a person may want to avoid getting unnecessary spam or telemarketing calls. On the other hand, a business may want to avoid potentially malicious calls to have data security and avoid time wastage.
To make the most out of this block contact feature, this article explores the methods to block contacts on Android devices using phone settings and MDM functionalities.
How to Block Contact on an Android Phone?
This section covers the steps of blocking a contact on your mobile device. The steps use Samsung devices as a reference; however, they stand quite similar for other devices as well. You can block a contact through Phone and the Messages applications.
To block a contact via Phone application, follow the steps below:
- Step 1.
- Open the Phone app.
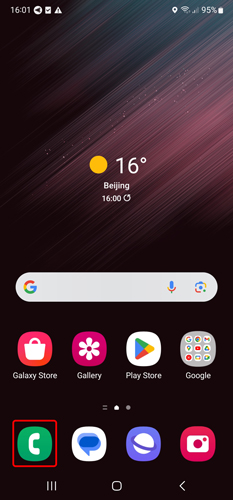
- Step 2.
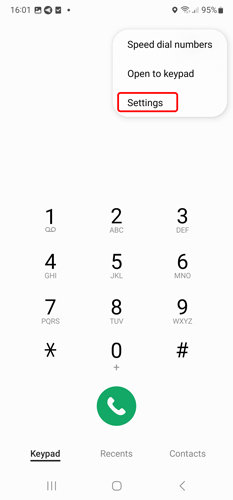
- Tap on the three-dots icon in the top-right corner of the screen.
- Step 3.
- Tap on Settingsfrom the dropdown menu.
- Step 4.
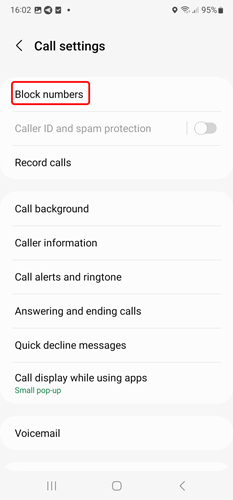
- Tap on the Block numbers.
- Step 5.
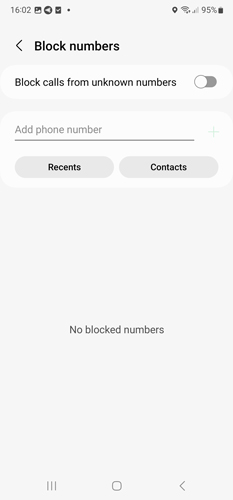
- Enter the numbers you want to block by tapping on the+ icon to set the list.
To block a contact via the Messages application, follow the steps below:
- Step 1.
- Open Messages. And then click the conversation icon.
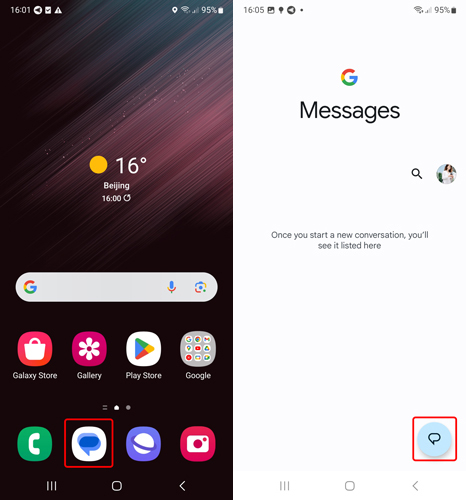
- Step 2.
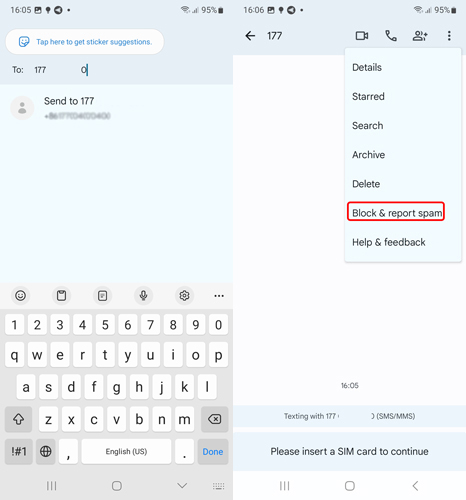
- Enter a new phone number or you can choose an existing contact.
- Step 3.
- Tap on the three dots. Then tap the Block numbers and Spam option.
How to Block Contacts for Corporate Android Devices?
Blocking contact from the built-in device features is effective for a limited number of contacts. However, if you aim to block a list of contacts on bulk Android devices, especially in business settings, MDM (Mobile Device Management) stands as an efficient choice.
To set your block call list on Android, follow the steps below:
- Step 1.Enroll devices and bind them to MDM.
- Before managing and controlling the corporate devices, it's important to enroll them in your MDM platform. After binding devices with the MDM, the IT team will have access to the functionality of blocking calls.
- Step 2.Create a policy config file to set up a block call list.
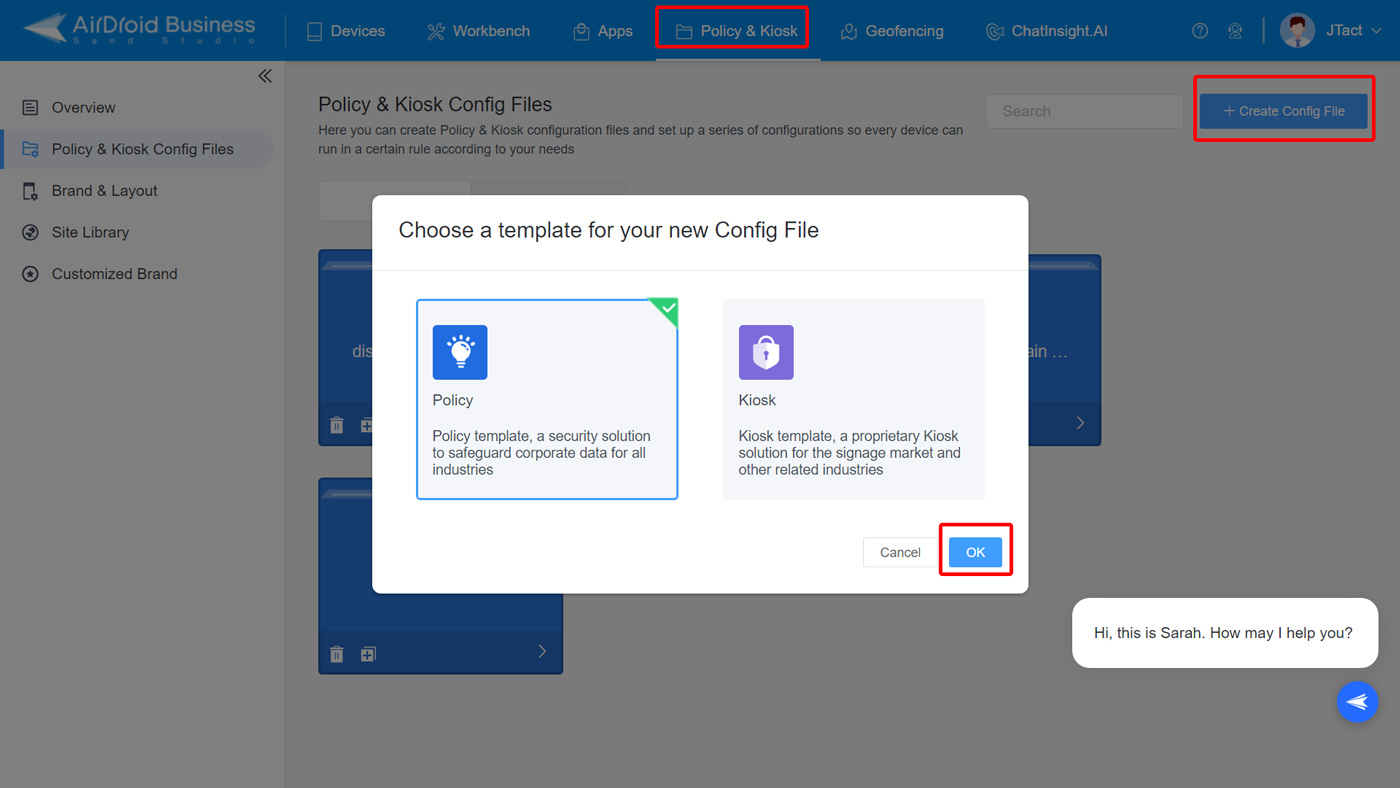
- Now that you have your devices enrolled, you can create a policy to enforce across all the devices. To do so, you need to create a policy config file and add your configurations to it. For that, follow the steps below:
- 1) Go to Admin Console > Policy & Kiosk > Policy & Kiosk Config Files.
- 2) Click on + Create Config File.
- 3) Choose Policy and click OK.
- Step 3.Choose restrict incoming calls.
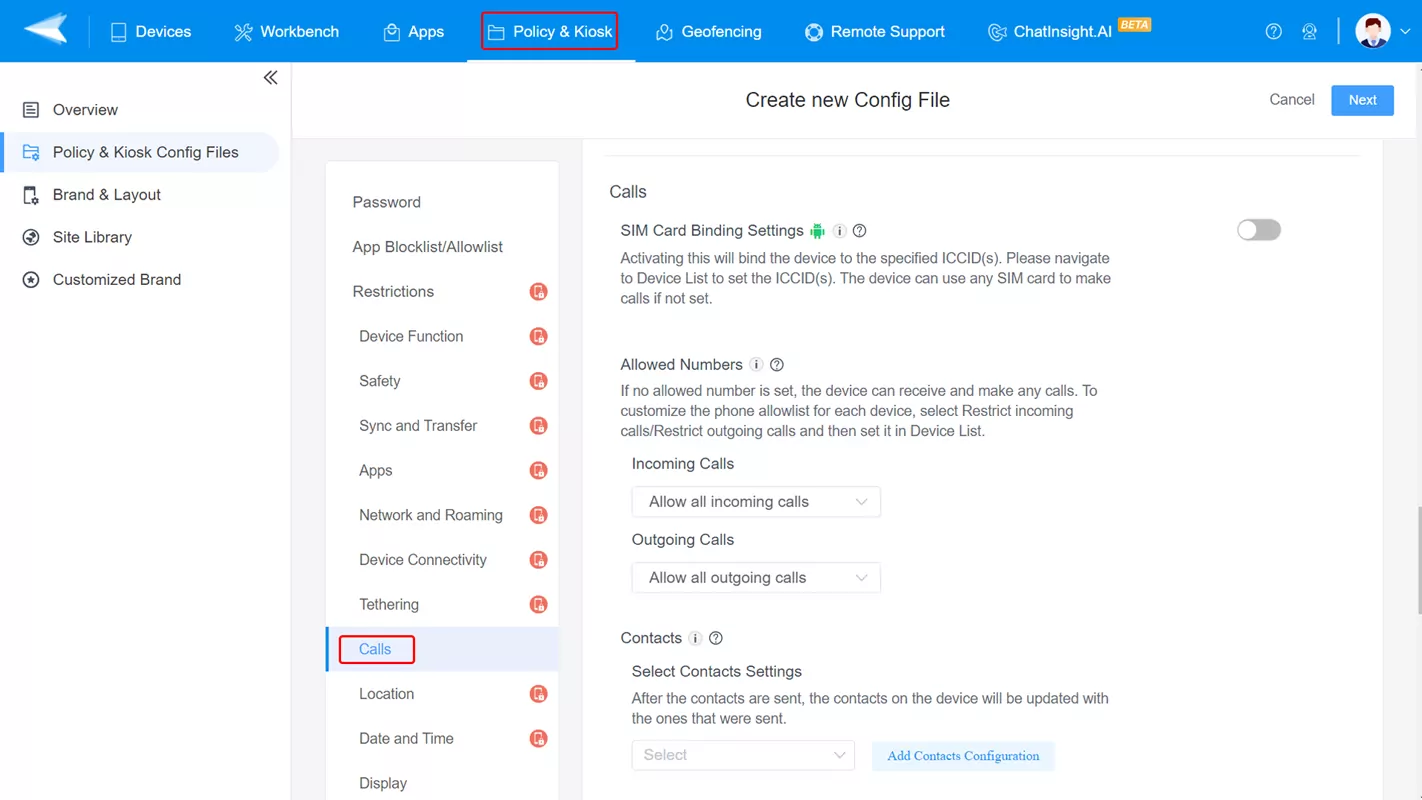
- Go to Restrictions - Call first.
- Both incoming calls and outgoing calls are available for Android call-blocking settings. Just select the "restrict" option in the drop-down box.
- Step 4.Apply the setting to managed Android devices.
- After completing your policy setup, the last step is to apply the file to the target Android devices. This enables the Android call-blocking settings for the managed devices.
There are numerous benefits associated with the usage of MDM when it comes to blocking contacts on Android. Some of them include:
- Ensure the compliance of devices.
- Have better control of employee devices.
- Manage and update contacts in bulk devices with ease.
Why AirDroid Business?
- Handle bulk devices with ease.
- Import contacts quickly and smoothly.
- Update the contact list across all the connected devices with a few clicks.
- Keep the security at the core of your business infrastructure.
- Monitor devices from a centralized dashboard.
Common Questions
- Open the Settings
- Tap on the Notifications
- Tap on the Do not disturb
- Enable the Do not disturb
- Under the Exceptions, tap on Calls, messages, and conversations
- Select Noneto restrict incoming calls from all numbers irrespective of whether they are your contacts or not.
Bringing it all together, blocking contacts on Android devices is an easier process. You can make use of the built-in settings of your phone for personal usage and opt for an MDM solution for business usage.


Leave a Reply.