What is Device Provisioning for Android? How Does it Work?

Figuring out how to set up Android devices can be a real challenge, particularly with the wide variety of devices and manufacturers in the market. If not done correctly, it can create serious hold-ups in operations, causing a major hit to a company's productivity.
That's why more and more organizations are adopting automated device provisioning. It's a way to save time and resources.
So, what exactly is device provisioning? What are the key steps, and how does it tackle the operational challenges of managing Android devices? In this article, we'll provide clear answers to these questions and more.
- Part 1: What is Device Provisioning?

- Part 2: Key Steps in the Device Provisioning Process
- Part 3: Challenges of Traditional Device Provisioning
- Part 4: Common Device Provisioning Methods
- Part 5: Details to Watch for During Device Provisioning
- Part 6: Simplify Your Device Provisioning with AirDroid Business
- Part 7: FAQs
1What is Device Provisioning?
Device provisioning is like the foundation for establishing a business's digital system. It's all about carefully setting up and managing a variety of devices, including mobile phones, tablets, kiosks, tough equipment, and digital displays.
Just as a solid foundation is crucial for a building's stability, provisioning ensures that devices work together seamlessly within a network.
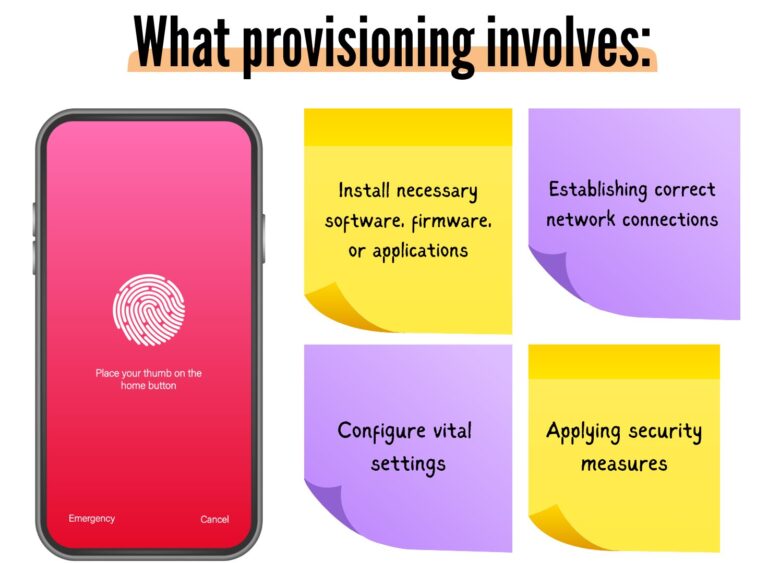
Provisioning involves several crucial tasks, including:
- Installing necessary software, firmware, or applications to ensure devices function optimally.
- Configuring vital settings like device name, time zone, and language.
- Establishing correct network connections by configuring settings like IP addresses, gateway addresses, and subnet masks.
- Applying security measures, which can encompass encryption, password protection, and secure communication protocols.

2Key Steps in the Device Provisioning Process
Device provisioning is a multi-step process that seamlessly incorporates devices into a business's digital framework.
Here's a breakdown of the 10 key steps involved:
- 1️⃣ Device Registration:
- Initiate the process by registering the device within the system or network, capturing essential details like its unique ID or serial number.
- 2️⃣ Authentication:
- Verify the device's identity using robust methods such as security certificates, API keys, passwords, or tokens to guarantee secure access.
- 3️⃣ Configuration Profiling:
- Tailor a configuration profile specific to the device's role, encompassing network preferences, user access levels, software configurations, and other pertinent settings.
- 4️⃣ Software Installation and Firmware Update:
- Load necessary software or applications for the device's intended function, and ensure the device's firmware is updated to the latest version for optimal performance.
- 5️⃣ Implementing Security Measures:
- Integrate vital security features such as encryption, firewalls, or VPNs. Add any required security certificates or credentials to facilitate secure communications.
- 6️⃣ Network Setup:
- Designate IP addresses, adjust DNS settings, and configure other network-specific elements to ensure seamless connectivity and interaction with the network and other devices.
- 7️⃣ Remote Management Tools:
- If applicable, initialize tools or protocols for remote oversight, management, or diagnostics to enhance the device's monitoring capabilities.
- 8️⃣ Testing and Security Confirmation:
- Conduct thorough trials to confirm the device's optimal functionality within its designated environment. Ensure that all security measures are effectively implemented and functional.
- 9️⃣ Deployment:
- Position the fully provisioned device in its designated setting or role, ensuring it seamlessly integrates with the broader ecosystem.
- 🔟 Ongoing Monitoring and Adjustment:
- Finally, institute a routine oversight process to monitor the device's functionality and condition. Modify configurations, update software, or adjust security parameters as necessary to adapt to changing circumstances.
3Challenges of Traditional Device Provisioning
Using traditional methods for device provisioning, which heavily depend on manual processes, comes with various business challenges.
The laborious and manual nature of these conventional methods can lead to a range of issues, including delays in deployment and a higher risk of errors, as outlined below:
• Security Concerns:
When provisioning is done manually, there's a risk of missing crucial security steps like two-factor authentication and safe data transmission.
Without strong authentication, encryption, or secure channels for transferring data, devices can become open to vulnerabilities. This puts the business at serious security risks, including data breaches, unauthorized access, and potential loss of sensitive information.
• Diverse Device Landscape:
Businesses often have a range of Android devices, each with its own specific setup needs. This variety makes the provisioning process more complex, requiring a tailored approach for each type of device, which can use up a lot of resources.
• Overwhelming Scale of Deployment:
Rolling out a large number of devices, like thousands of self-checkout kiosks in a retail network, comes with substantial logistical hurdles.
For example, manually setting up each kiosk for an hour would require over two months for a thousand units. This underscores the crucial need for efficiency in widespread deployments.
• Tedious Manual Provisioning:
Traditional provisioning, with its manual approach, can be quite demanding and time-consuming. It involves giving individual attention to each device to make sure it's set up correctly.
As you add more devices, this process becomes even more burdensome.
4Common Device Provisioning Methods
When it comes to integrating your digital devices into business operations, there are several methods available for device provisioning.
These methods aim to simplify and secure the process. One commonly used method is Mobile Device Management (MDM), which we will explore in-depth using AirDroid Business.
Mobile Device Management (MDM) - AirDroid Business:
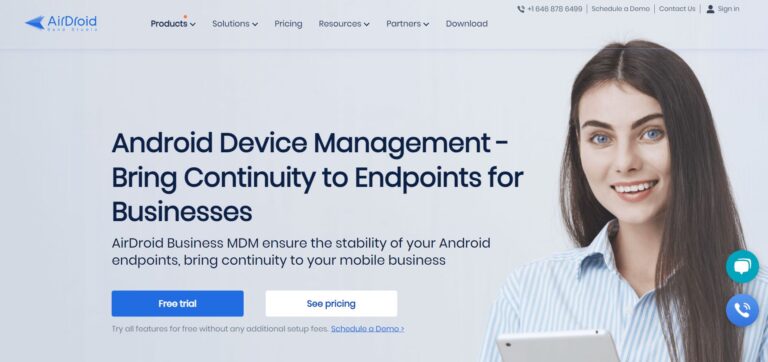
AirDroid Business is an enterprise grade MDM solution for Android devices that simplifies and secures the provisioning process.
It offers various provisioning methods to cater to different operational requirements, providing flexibility while maintaining a streamlined setup process.

Here are the provisioning methods supported by AirDroid Business:
6 Times Tap QR Code
This method is simple and user-friendly. By tapping on the device six times, a QR code is generated, which, upon scanning, initiates the provisioning process.
It's a quick, intuitive method that minimizes the steps required to kickstart the provisioning.
Enrollment via USB
A more traditional approach, enrollment via USB, involves connecting the device to a system using a USB cable.
This method allows for a direct interface for provisioning, providing a secure and straightforward setup.
Android Enterprise Enrollment (afw#setup)
Leveraging a specific code (afw#setup), this method initiates the Android Enterprise provisioning process.
It offers businesses a streamlined device setup, uniform configurations, and enhanced security. Notably, it integrates with managed Google Play, allowing administrators to deploy and manage applications on enrolled devices.
Android Enterprise also allows for distinct work and personal profiles on devices, enabling IT teams to manage work-related aspects without compromising employee privacy, thus harmonizing device security with personal boundaries.
Zero-Touch Enrollment
As the name suggests, Zero-Touch Enrollment enables automatic device provisioning right out of the box. This method significantly reduces manual intervention, making it a highly efficient option for large-scale deployments.
AirDroid Business has been designed to streamline the provisioning journey by making sure that each device is meticulously configured and ready for deployment.
Its range of provisioning methods offers a perfect blend of simplicity, security, and efficiency, making it a highly attractive option for modern businesses within sectors such as retail or hospitality.
If you are unsure about which device provisioning method is right for your business, please feel free to reach out to our sales team or schedule a demo.
👉 Other common provisioning methods
Near Field Communication (NFC)
NFC simplifies on-site device provisioning, especially in environments like offices or controlled access areas where physical proximity is crucial.
By allowing devices to connect quickly through contactless communication, employees can tap their devices to an NFC-enabled reader to initiate the enrollment process. This approach is particularly beneficial in situations where rapid deployment is essential.
Knox Mobile Enrollment
A solution specific to Samsung, Knox Mobile Enrollment streamlines configuring devices in bulk, ensuring accurate and consistent setup, particularly useful for large-scale deployments.
Over-The-Air (OTA)
OTA provisioning is a method that allows businesses with dispersed operations to set up and configure devices remotely, and it's especially widespread in the world of IoT devices.
This process speeds up the deployment process by minimizing the requirement of physical device interaction. By using OTA provisioning, businesses can save time and resources.
Businesses can choose from various modern provisioning methods (such as those above) to simplify their device provisioning process. The selection of the most suitable way would depend on the business's specific requirements, the deployment scale, and the types of devices in use.
5Details to Watch for During Device Provisioning
Device provisioning is a nuanced process where attention to detail can significantly impact the operational efficiency and security of the deployed devices. Here are some critical factors to consider during this process:
1) Standardizing Device Configuration: Establish a standardized configuration template to maintain consistency across all devices. This streamlines the provisioning and assures uniformity in device behavior, simplifying management and troubleshooting.
2) Performing Device Authentication: Incorporate strong authentication, such as complex passwords, PINs, and biometric authentication, to enhance device security during provisioning. This is critical to prevent unauthorized access and potential security threats.
3) Monitoring Device Activity: Continuous monitoring of device activity is crucial for optimal performance and security. Real-time monitoring provides valuable insights into device health and usage, enabling timely interventions.
6Simplify Your Device Provisioning with AirDroid Business
AirDroid Business is transforming the device provisioning landscape, harmoniously merging simplicity with heightened security. Here's a snapshot of its standout features:
🔷 Remote Access & Control
Provides administrators with capabilities to monitor and manage device activities in real-time. This assures that devices operate as intended and are secured from potential external threats or malfunctions.
🔷 Device Enrollment
Allows for the utilization of pre-configured provisioning templates. This feature makes sure consistent device configurations, particularly when integrating multiple devices of varying types and specifications into a single network.
Consistency in setup can facilitate smoother device management and troubleshooting procedures.
🔷 Advanced Encryption
AirDroid Business emphasizes data security by employing advanced encryption techniques such as RSA public/private keys.
These methods protect the data in transit between the device and management platforms and the data stored on them.
🔷 Automated Device Provisioning
A feature designed to simplify and speed up the deployment of devices within an organization.
Rather than configuring each device manually, administrators can leverage this feature to apply standardized setups across multiple devices simultaneously. This automation reduces potential human errors and makes certain devices are quickly ready for deployment.
Getting started with device provisioning can be confusing. Here are some FAQs to guide you:


Leave a Reply.