How to Add a Device to Google Play (Android, PC, Chromebook)
1 Adding Personal Devices
Adding your personal devices to Google Play Store is straightforward. Whether it's an Android phone or laptop/PC, the process is a matter of a few clicks.
1.1 How to Add Android to Google Play
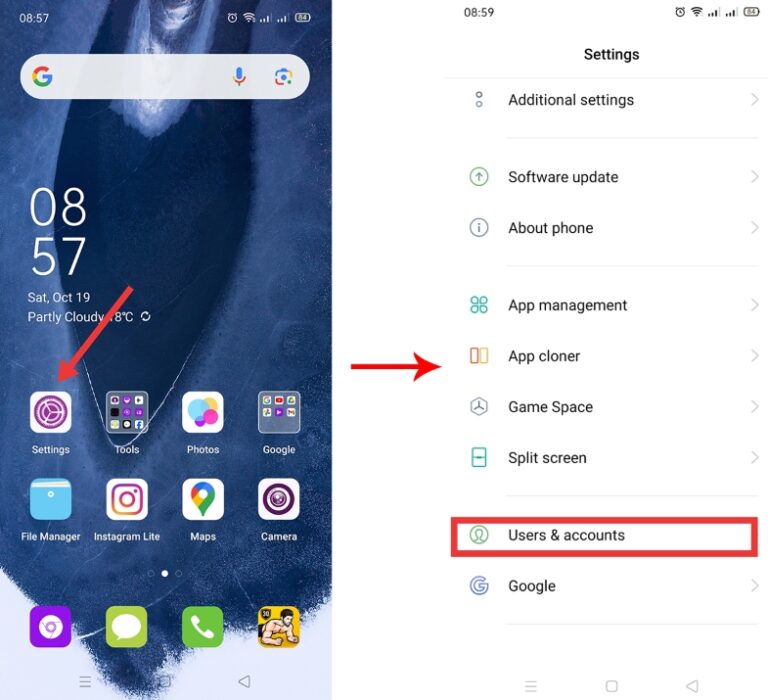
- Open the **Settings** app on your Android device.
- Scroll and tap on **Users & accounts** (or **Accounts**).
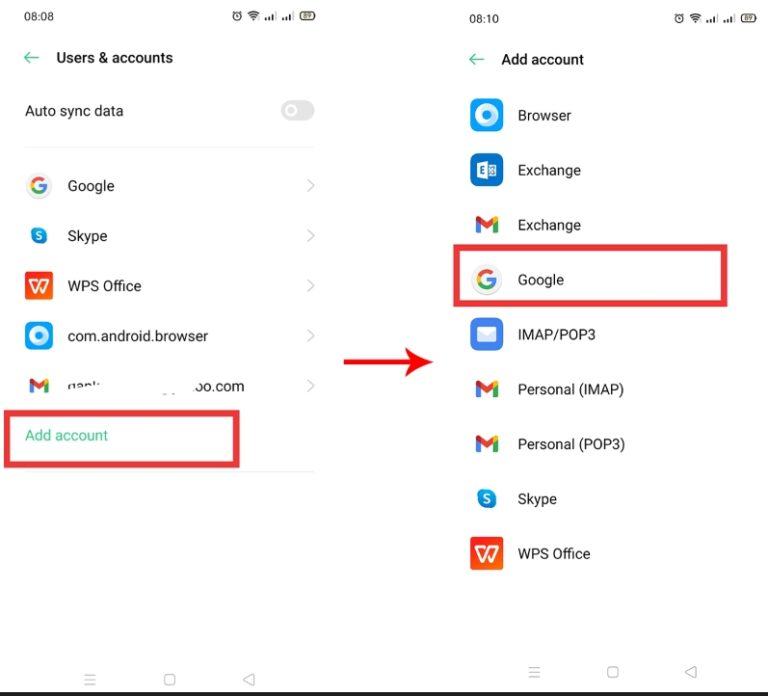
- Tap **Add account** and select **Google**.
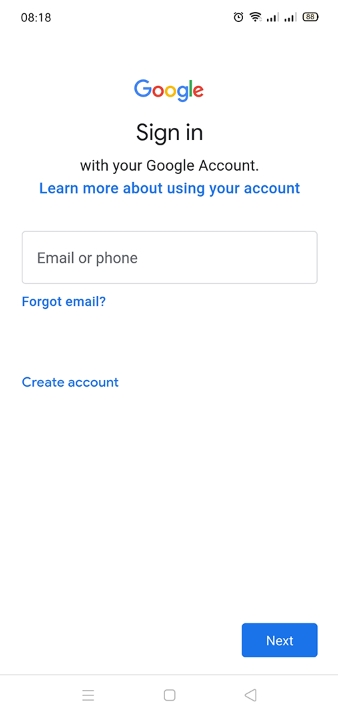
- Sign in with your Google account credentials.
To add an Android device to the Google Play Store, you simply need to link your Google Account to it. This automatically registers the device. Here are the essential steps:
Once signed in, your device will be successfully added to your Google Play account.
Follow these steps to link your Android devices to Google Play and install the apps you want:
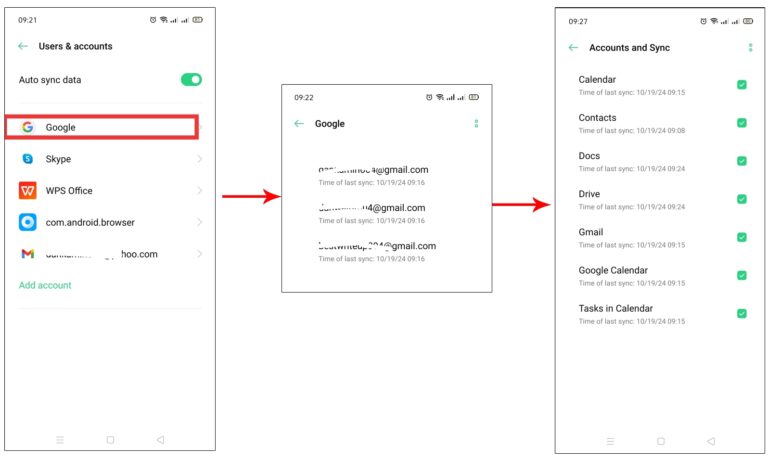
Step 1. Go to your Android phone's Settings. Scroll down, then tap Users & accounts or simply Accounts. The option you find depends on your Android version.
Step 2. Click on Add account and select Google from the list. Again, depending on the Android version, you may need to tap Manage Accounts first to reveal this option.
Step 3. Sign in with your login details for the Google account to which you wish to link this device. When you’re signed in, your Android phone will be connected to the Play Store.
How to sync with your Google account?
Now that you know how to link device to Google Play, suppose you want to transfer data from your old Android to a new one. In that case, you can set the backup on your old device and sync with your Google account on the new phone.
Here are the simple steps for syncing with your Google account:
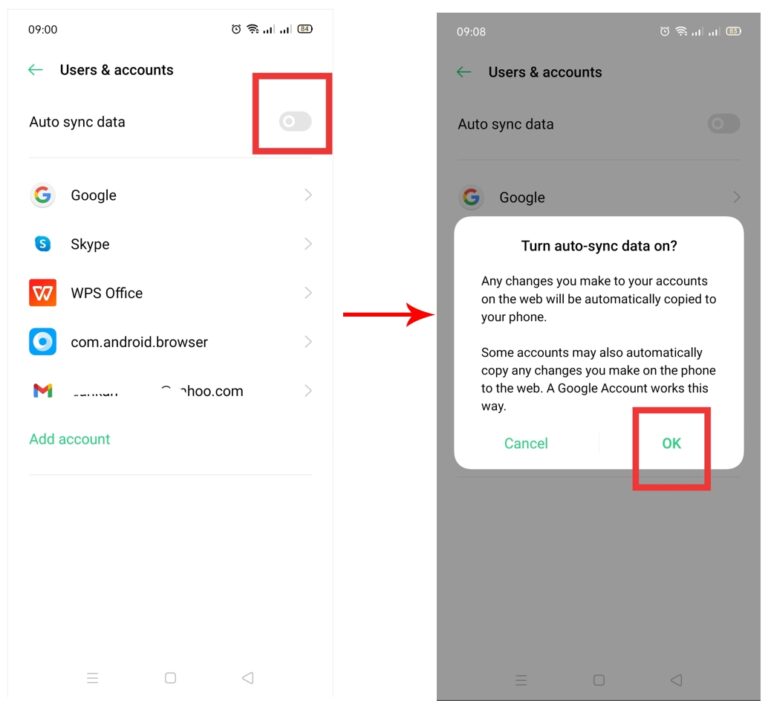
Step 1. Go to Settings, then tap Users & accounts.
Step 2. Tap Auto sync data.
Step 3. Hit the OK button to enable the function.
1.2 How to Add Laptop/PC to Google Play (Windows and Chrome OS)
Google Play Store is designed only for Android and Chrome OS. However, you can still access the platform on your Windows PC by using an Android emulator.
An emulator is a software that creates an Android environment on a Windows computer. This allows you to run Android applications on the PC.
Follow these easy steps to access Google Play on Windows using an emulator:
1. Select an ideal emulator; there are many out there. But for the sake of this guide, let's use BlueStacks and show you how to associate a device with Google Play.
2. Download the BlueStacks installer and run it on your Windows PC. Follow the on-screen instructions to complete the installation process.
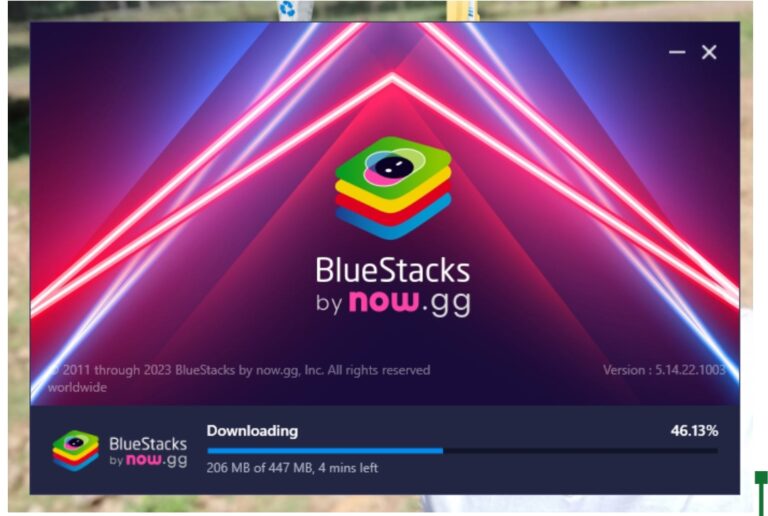
Note: The installation process can take several minutes. Please be patient to connect a device to Google Play successfully.
3. Click to open the emulator from your Start menu or desktop.
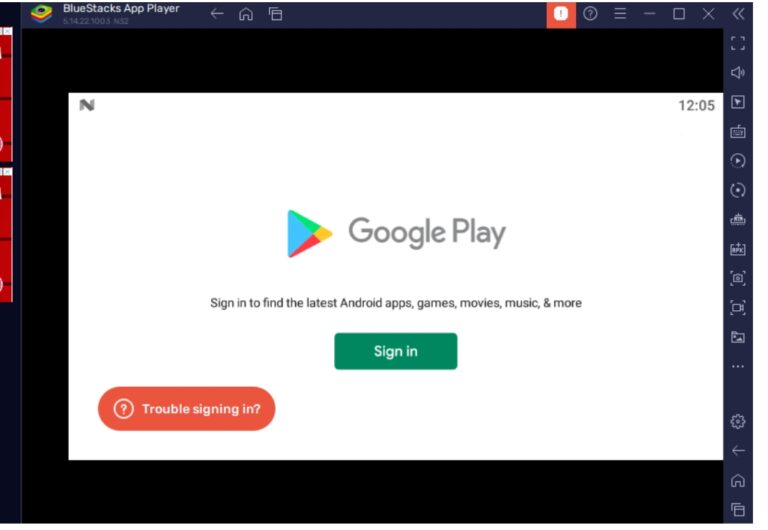
4. Sign in with your Google account or create a new one - much like setting up a new Android phone.
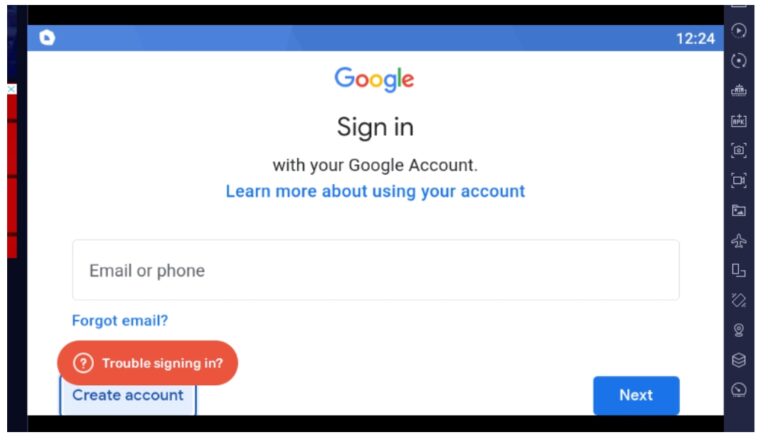
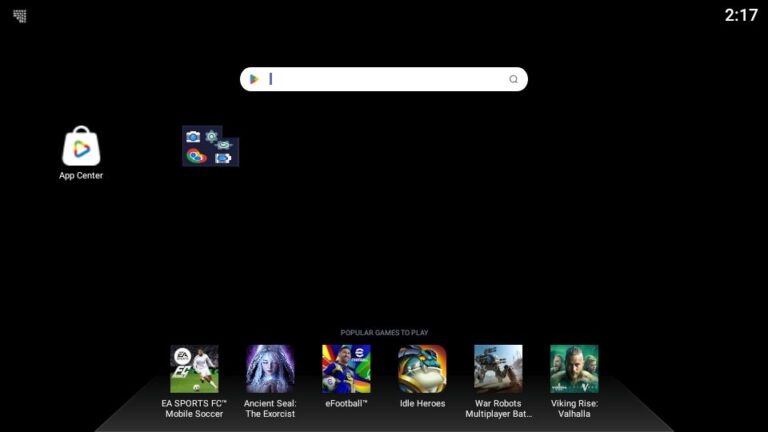
5. Once you're signed in, find the Play Store icon on the emulator’s screen and tap on it. Now you have access to the Play Store on your PC. You can browse and install apps!
How to add Chrome OS devices to the Play Store?
If you’re using a Chromebook, the process is also quick. Check these steps to add Chrome OS devices to the Play Store:
1. Log in to your Chromebook with the same Google account you use to access the Play Store.
Note: Not all Chrome OS devices can be added to the Play Store. Here's a list of Play Store-supported devices
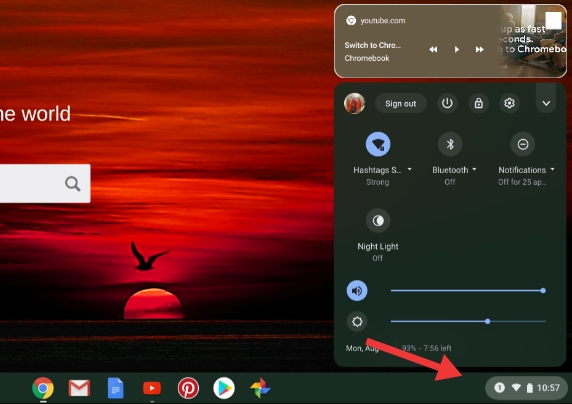
2. Click the clock at the bottom-right section of the screen.
Source: Google Support
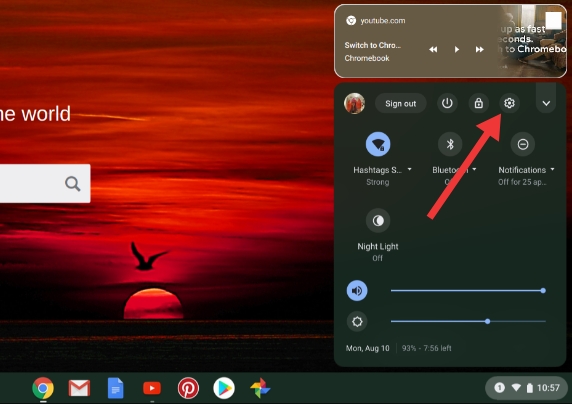
3. Tap the Settings icon - the gear at the top of the Quick Settings panel.
Source: Google Support
4. Scroll down, then click the TURN ON button next to Google Play Store.

Source: Controlaltachieve
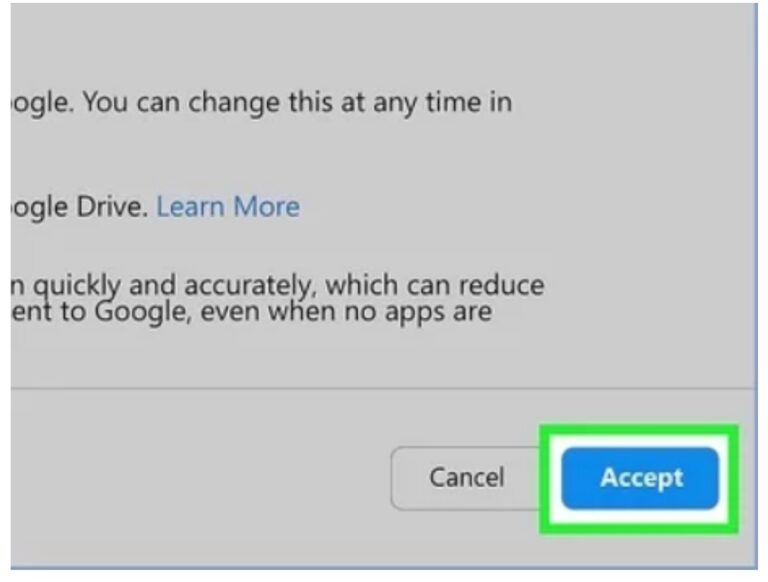
5. Accept the terms of service. Your Chromebook is now added to the Play Store's device list.
Source: WikiHow
1.3 How to Remove Devices from Google Play
After using Android for a long time, your Google Play Store account may list all the phones your account was associated with. Some of these phones could be lost, sold, or trashed, so you might want to remove them from the list. Below are the steps to unlink a device from your Google Play account.
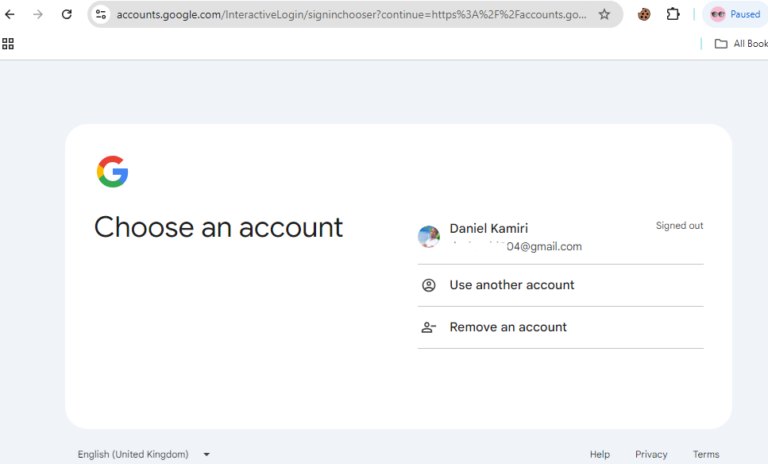
1. Open a browser on your PC and go to myaccount.google.com.
2. Sign in with your Google account.
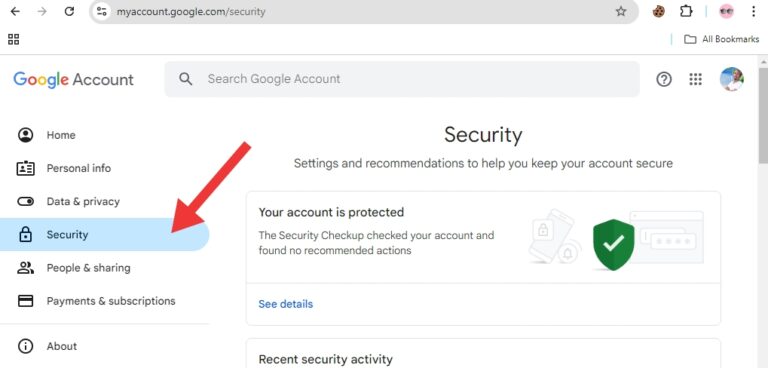
3. Once you’re signed in, click on Security.
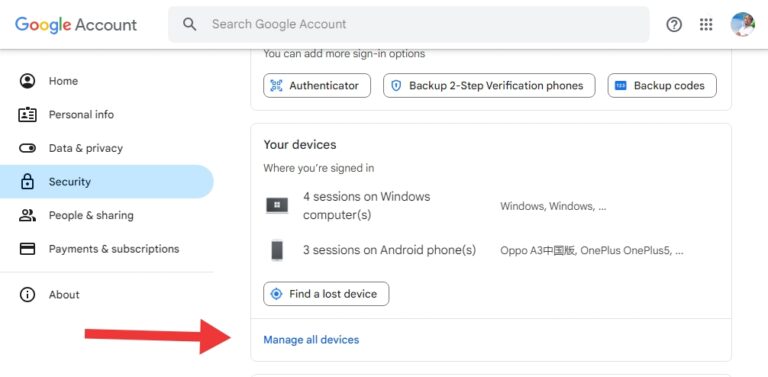
4. Scroll down and stop at the Your Devices option. Click Manage all devices.
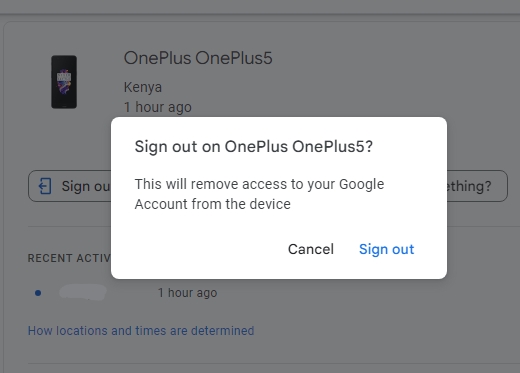
5. Scroll down your list of devices and click on the one you wish to remove. Choose Sign out to remove the device.
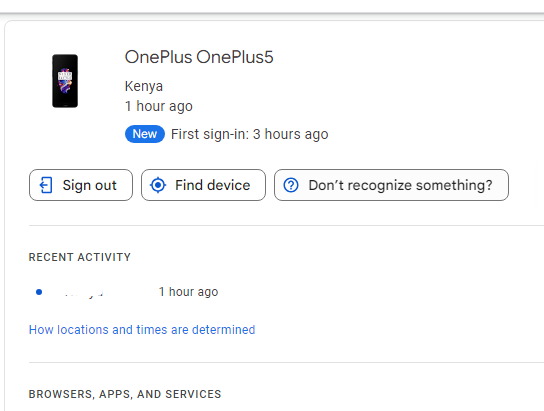
6. Click Sign Out again to confirm your action. The device is now removed.
2 Add Devices All at Once: Quicker Steps
Managed Google Play user accounts are another effective way to add a device to the Google Play Store in a corporate environment. This section covers what a Managed Google Play Account is and how to set one up.
What is a Managed Google Play Account?
Managed Google Play Account is part of Google's Android Enterprise, which securely separates personal and corporate data. It gives organizations full control over their company-owned Android devices. They can deploy and manage enterprise apps on these devices, giving end-users access to a curated Google Play Store.
One outstanding benefit of the Android fully managed device is security and control. Enterprises can implement security measures for their managed gadgets to control app usage, access permissions, and, most importantly, allow only reliable apps to be deployed. That greatly reduces security threats.
How can you set up Managed Google Play and add devices? It’s straightforward. Keep reading to find out.
You can set up a Managed Google Play account and add devices to Google Play Store with the help of a mobile device management (MDM) solution. AirDroid Business is one of the best MDM solutions for enterprises. It's equipped with all the features to enable businesses to fully manage their devices remotely from one central point. With it, you can complete the setup in two simple steps, as discussed below:
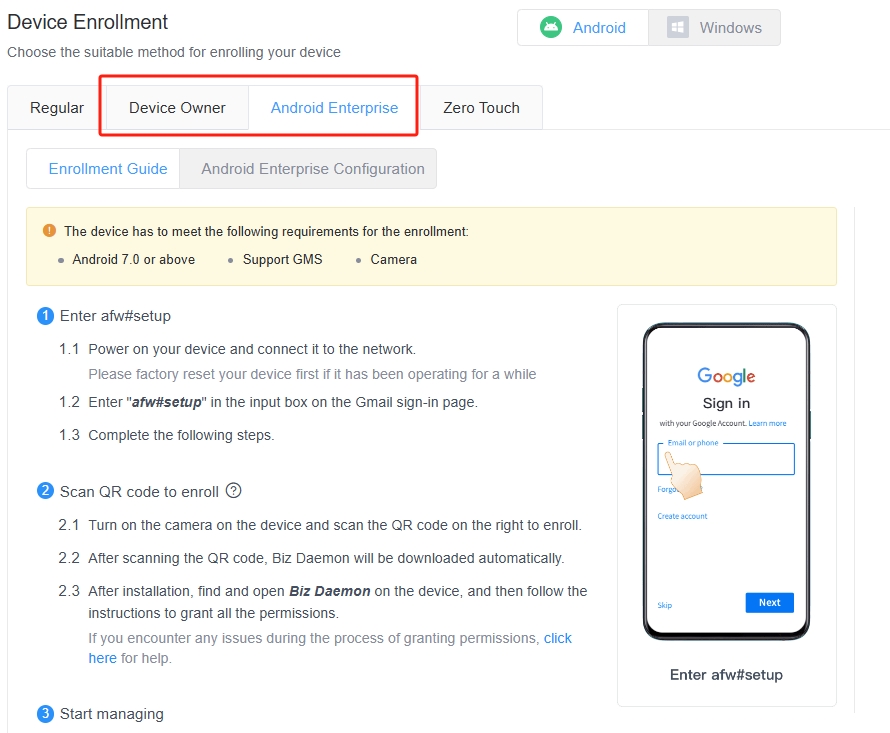
Step 1: Enroll the work devices using the Android Enterprise or Zero Touch method.
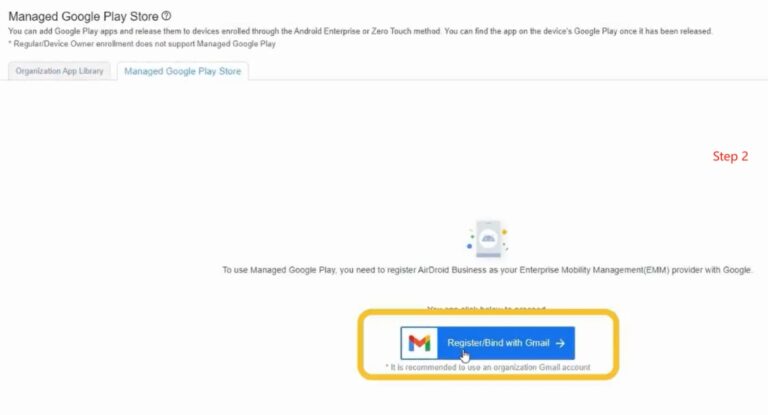
Step 2: Go to App Library> Managed Google Play Store and click “Register and bind with Gmail” to link your Google account. Then, all devices enrolled through Android Enterprise or Zero Touch will then be added to your Managed Google Play Store.
Once the Managed Google Play Store is set up, you can add and configure apps and permissions to deploy via your Android Business to their managed users. It’s even possible to add extra admins to the Managed Play Store to help with various tasks. As a result, organizations find it very easy to manage enterprise devices added to the Google Play account.
How to Restrict Access to Google Play Store
Final Words
You now know how to link a device to Google Play using two methods. One is adding personal devices—Android phones or PCs (Windows or Chrome OS)—which involves adding your Google account to the device.
The other method is Managed Google Play Accounts, which is ideal for corporate environments. With it, enterprises can supervise their corporate-owned Android devices and manage app usage for reduced security threats. Choose one of these methods depending on your needs and link your devices like a pro!
FAQs


Leave a Reply.