What is Provisioning Mode in Android & How to Access
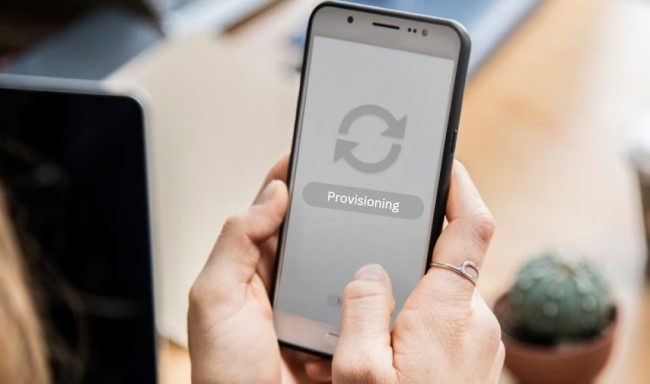
Android Provisioning Mode is built for enterprises to pre-configure Android devices based on business needs and integrate them into an MDM system for comprehensive management. After the provisioning is completed, the device will be assigned to employees, thus saving setup time and ensuring compliance. Generally, provisioning is implemented during the registration process.
1 What Can Be Configured When Provisioning Devices?
Work Profile or Work Use Only
"Work profile" is used to create a separate space to store work-related applications, files and data, while other parts of the devices can still be freely used by employees.
Under "Work use only" mode, devices are fully managed by the enterprise. The device usage is lockdown to work purposes only.
Organization can decide configure devices into which modes.
Pre-installed Applications
To quickly engage devices onto business operations, pre-install applications is needed during Android device provisioning. Admins can choose required apps, finish configuration and push them into provisioning list. This ensure the application is installed correctly and properly.

Provisioning Android devices into Kiosk Mode
If your company wants to build dedicated devices or restrict device access, you can pre-set kiosk mode. The settings primarily include application and website whitelists, single or multi-app modes, and branding options to customize the device interface. Additionally, limitations such as disabling hardware buttons help create a secure device environment for your business.
Policy & General Settings
Policy can be regarded as a set of device usage rules, the main purpose of which is to ensure safety and compliance. On Android devices, you can enable or disable functions such as camera, screen capture, hotspot and location services to maintain control and protect privacy. Additional advanced security policies are available for exploration.
2 Methods to Implement Provisioning Mode in Android
There are multiple enrollment methods supported by Android MDM solutions. However, only four methods offer provisioning mode: Android Enterprise (Android for Work), Zero-touch enrollment, Knox Mobile Enrollment, and Device Owner. Each method provides distinct ways to add and provision devices. Detailed information is provided below.
At first, you need to create a provisioning template in your MDM dashboard, which will be applied to device groups during the enrollment process.
Method 1. Android Enterprise - afw#setup
The device has to meet the requirements for the enrollment: Android 7.0 or above, support GMS, Camera.
Android provisioning with AE enrollment method
Begin by performing a factory reset on your device to ensure a clean start.
Turn on device and connect it to the network.
In the Google sign-in box, enter afw#setup to begin the Android Enterprise setup process.
Access your MDM dashboard and select the desired provisioning template. Use the provided QR code to enroll the device.
Once enrolled, grant the necessary permissions to your managed applications.
Devices will proceed with the provisioning according to your templates.
Pros
- Managed Google Play is avaliable to distribute, configure and deploy applications.
- Management modes are allowed to choose(work profile, fully managed or dedicated modes).
Cons
- Low compatibility.
- Setup process is a bit comlexity.
Video Guide: How to Implement Android Enterprise Enrollment
Method 2. Zero-touch Enrollment
Zero-touch enrollment is an efficient method for provisioning Android devices for enterprise management, enabling IT to deploy corporate devices in bulk without requiring manual setup.
Your device is required to be compatible with Zero-Touch Enrollment (GMS supported and Android 9.0 or above) and purchased from authorized zero-touch reseller partners. They will help you configure your Zero-Touch portal account.
Although zero-touch automates the process of device configuration, the preparation is omplicated. We recommend reading this detailed guide or watching the video tutorial:
Pros
- Consistent configuration reduces human errors.
- Enroll devices in bulk; no need for device user's intervention.
Cons
- Low compatibility.
- It may take some time for the initial setup.
Method 3. Knox Mobile Enrollment
Knox Mobile Enrollment, designed for the Samsung ecosystem, is similar to zero-touch that automates the enrollment and setup process.
Requirements
Samsung devices running Android 8.0 or higher, and running an appropriate Knox version.
Devices must be purchased from a reseller participating in the Knox Deployment Program.
Click here to learn how to implement KME enrollment and provisioning Android.
Pros
- Automated enrollment in large scale of devices.
- With Samsung Knox, it comes with advanced security layers to protect devices.
Cons
- Only avaliable for Samsung Knox devices.
- Some MDM/EMM solution doesn't intergrate with Knox enrollment service.
Method 4. Device Owner Provisioning(QR code, USB, NFC)
As the name implies, using this method to enroll devices will grant the organization the permission of "device owner", thus enabling enterprise to have the highest level of control over device.
Requirements
6 tap QR code: Android 7.0 or above, support GMS, Camera.
Enrollment via USB: USB connection, Android 5.0 or above, no GMS needed, AOSP devices supported.
NFC: NFC capability, Android 5.0(Lollipop) or above.
Click here to access the text and video tutorial.
Pros
- Compared to other enrollment methods, it offers comprehensive management functions, such as strict security policies, that others lack.
- High compatibility for Android devices.
Cons
- The enrollment process must be completed manually (but it only takes one click to complete the Android provisioning) for multiple devices.
3 Quickly Start Your Business by Bulk Provisioning Android Devices
Android provisioning offers numerous advantages for enterprise device management. Let's explore some excellent examples and see how bulk provisioning can benefit your business.
Emart24, initiated in Malaysia in 2021, represents Korea's rapidly expanding convenience store chain. Emart 24 faces the challenge of managing a growing number of POS devices across 50 cities. They require a solution for bulk configuration of these devices. The AirDroid Business MDM solution serves as a remote provisioner for Android, enabling Emart 24 to automate app deployment during device enrollment. This allows for remote installation of apps on POS devices within 5 minutes, significantly reducing the need for manual installation.
Read More: Emart24 enhances the management efficiency of POS devices across stores
Libera, established in 1995, is dedicated to fostering communities free from mafia influence and corruption. They use Android devices to display stories of mafia victims in public spaces. AirDroid Business MDM solution streamlines device enrollment and provisioning. They find the provisioning template effective for automating device setup and quickly deploying the devices.
Read More: Empowering Anti-Mafia Exhibitions through Remote Device Management
4 Troubleshooting: Common Issues with Android Provisioning
Android provisioning is an evolving feature that still has a few bugs. Many known issues get fixed with newer versions, but some problems can pop up from time to time. But a lot of the cases are actually caused by the end-users. Here are some issues that many people find with Android provisioning mode:
1) Device Is Currently Not in Provisioning Mode
Some devices will lose the provisioning mode once you restart. It will then show the warning “Device is currently not in provisioning mode.” You can fix this problem by manually re-enabling the mobile device provision through the setup wizard.

2) Get Stuck in the Provisioning Process
Sometimes the Android device can get stuck in the provisioning process, usually in the setup wizard. It can happen if you try registering a new user profile or installing a brand-new device.
The main reason why this happens is that your device isn't compatible with your provisioning method. It can also be due to a poorly configured MDM profile.
3) Device Might Not Save the Settings Configured during the Provisioning Mode
Android devices not saving the provisioning mode settings is a common issue that usually shows up if you don't have the necessary features in the policy. You should recheck your policy for inconsistencies that may be causing the issues. Use this API to check what's causing the problem.
4) Unable to Add New User Profiles
You may face an issue where you can't add new user profiles to your MDM, and any newly connected device stops doing anything. Such cases can happen due to two reasons. The first reason is that your device policy is invalid. Installing a device without a valid policy will put the device into quarantine.
The other issue could be that your device version is incompatible with your provisioning mode. Some devices are also specifically blocked from specific provisioning modes due to software incompatibilities.
5 Key Takeaways
We hope this article enhances your understanding of Android provisioning. To ensure a safe and smooth provisioning process, we recommend you test a small number of devices before initiating the formal provision, helping to avoid compatibility and configuration errors. Additionally, for data security, enterprises can disable unnecessary device functions (e.g developer mode) in the policy section. Click the button below to explore how MDM simplifies device configuration with its powerful features.


Leave a Reply.