Fix Gmail Notifications Not Working on Any Device (2023)
With the launch of Gmail, it quickly became the world's most popular email service provider. It has seen tremendous growth, a fact that cannot be denied. Since it is a web-based email service, you can use it from anywhere. If you're a Gmail user, you're probably familiar with the importance of the notifications feature.
- Part 1: Common Reasons for Gmail Notifications Not Working
- Part 2: How to Fix Gmail Notifications Not Working iPhone?
- Part 3: How to Fix Gmail Notifications Not Working Android?
- Part 4: Gmail Notifications Not Working on Windows 10 Solutions
- Part 5: Fix Gmail Notifications Not Working on Google Chrome
- Part 6: Bonus Tool to See Synced Gmail Notifications

1Common Reasons for Gmail Notifications Not Working
If you are not receiving any Gmail notifications, you can check a few things to get the usual notifications. Make sure that you have the latest version of the Gmail app installed on your device. Secondly, open the app and check that your notifications are turned on. You can do this by going to the Settings menu and selecting 'Notifications.' If they are turned off, simply turn them back on.
If you are still not getting Gmail notifications, it's possible that your device is not set up correctly. To fix this, go to the Settings menu in the Gmail app and select 'Accounts.' From there, select the account you're having trouble with and make sure that 'Sync Gmail' is turned on.
2How to Fix Gmail Notifications Not Working iPhone?
Assuming you are having problems receiving push notifications from Gmail on your iPhone. Don't worry; applications don't have to be perfect. Such issues are pretty common for users. Bringing back email notifications on iPhone is not hard. We've discussed the common reasons for not being able to receive alerts for Gmail. Let's take a look at what could be done to fix it.
1Check iPhone Notification Settings
A good place to start is with an essential device configuration that could probably solve the notification problem.
Step 1: Open the iPhone Settings.
Step 2: Navigate to "Notification."
Step 3: In the "Notification style," Find the Gmail app.
Step 4: Cross check "Allow notification" is enabled for Gmail.
Be sure to check all three options: Lock Screen, Notification Center, and Banners.
2Enable Gmail Notification Settings
One of the most common reasons for Gmail notifications not appearing on your iPhone is that the notifications feature has been disabled in Gmail settings. To check if this is the case,
Step 1: Open Gmail and click on the gear icon in the top-right corner.
Step 2: Then, click on "Settings" and scroll down to the "Notifications" section.
Step 3: If the "Notifications" section is set to "Disabled," that's likely the reason why you're not receiving notifications. To fix the problem, simply change the setting to "Enabled" and save your changes.
3Enable IMAP
If you want to get Gmail notifications on your iPhone, you'll need to enable IMAP. The IMAP protocol allows email messages to be synchronized between a server and a client. By enabling IMAP on your iPhone, you'll be able to access your Gmail messages in the Mail app and receive notifications for new messages. Here's how to enable IMAP on your iPhone:
Step 1: Visit the official Gmail site from the safari browser & Login.
Step 2: Click on settings and select all settings.
Step 3: Now you need to click on the Forwarding and POP/IMAP tab.
Step 4: Scroll until you see the "IMAP Access" section, > Enable IMAP. Be sure to save the recent change.
4Change Settings for Labels Sync
Step 1: Launch the Gmail app > Settings.
Step 2: Click on the Gmail address the tap Manage labels.
Step 3: Configure any that aren't synced for 'Last 30 days. Restart your iPhone.
5Check your Wi-Fi Connection or Mobile Data
Ensure your Wi-Fi connection is stable and you have a strong signal. If you are using mobile data, verify that you have a good signal and have not reached your monthly data limit.
Step 1: Open iPhone Settings.
Step 2: Turn on Wi-Fi and check the network to which your device is connected.
Step 3: Alternatively, open iPhone Control Center and turn on Mobile data.
Your phone needs to be connected to the internet by Wi-Fi or mobile data to receive Gmail notifications.
6Update or Reinstall Gmail App
If you've updated to iOS 11 and notifications from the Gmail app are not appearing, you may need to update or reinstall the application to fix the issue. To update the Gmail app, open the App Store and tap the Updates tab. If an update for Gmail is available, tap Update.
If updating doesn't fix the issue, try uninstalling and reinstalling the app. To do this, press the Gmail app icon until it jiggles. Click on the "x" that appears, then tap Delete to confirm. To reinstall the app, open the App Store and search for "Gmail." Tap Get, then Install.
7Update or Restart Your iPhone
Update iPhone: It is always advisable to keep the iPhone update, and users should check for the latest updates because they often fix minor glitches, bugs, and errors. Follow simple steps to turn on Automatic updates for iPhone.
Step 1: Open Settings and select General.
Step 2: Tap on Software Update.
Step 3: Select Automatic Updates, and start Download iOS Updates. Turn the toggle next to Install iOS Updates.
Your device will be automatically updated whenever your iPhone or iPad is updated to the latest iOS version.
Restart iPhone: If you are still not receiving Gmail notifications, restart your iPhone. This will refresh the connection between your device and the Gmail servers and may resolve the issue.
Step 1: Press and Hold the power button.
Step 2: Once the power slider pops up, drag it to the right side, and the phone will turn off.
Step 3: Hold down the power button again when you want to turn your iPhone back on.
3How to Fix Gmail Notifications Not Working Android?
The Gmail notifications issue on your Android device is apparently preventing you from staying up to date. Almost all Android users experience this issue for a variety of reasons. We have done our research and gathered all the possible solutions you can use to get Gmail notifications working on your Android device.
1Check System Notification Settings
Probably the best way to solve the notification problem is, to begin with, the most basic device configuration.
Step 1: Open settings and scroll down to the Notifications section.
Step 2: Click on Gmail from the apps.
Step 3: Confirm that system notifications are enabled.
2Enable Label Syncing
As soon as the system notifications are turned on, proceed with enabling Label Syncing.
Step 1: As soon as the system notifications are turned on, proceed with enabling Label Syncing.
Step 2: Navigate to the Gmail address. Visit Manage Labels.
Step 3: Change labels that are not synched for 'Past 30 days and restart your device.
3Enable Notifications from Gmail
Step 1: Open the Gmail application on your android device.
Step 2: Tap on the menu opposite your profile icon.
Step 3: Scroll down and click on settings > General Settings.
Step 4: Tap on manage notifications and configure settings according to your preference .
4Disable Do Not Disturb Mode or Airplane Mode
You will surely miss important email alerts if the Airplane mode or Do Not Disturb (DND) mode is enabled. It may be the case that you have accidentally turned on Do Not Disturb mode, which needs to be disabled if you want to get Gmail notifications.
Step 1: Launch the Settings app.
Step 2: Scroll down and select "Sound & Vibration."
Step 3: There is an option Do Not Disturb. Make sure the DND mode is turned off.
Step 4: Tap on manage notifications and configure settings according to your preference .
A plane icon on top of your screen indicates Airplane mode is active, and you won't receive notifications.
Step 5: Simply Scroll down the notification panel and disable Airplane mode.
5Turn Off Battery Saver or Data Saver
In case you have enabled Power Saver Mode, or Data Saver Mode will prevent or block notifications from appearing as intended. A Power saver mode on Android improves battery life by reducing background activities, network usage, and syncing.
Step 1: Launch the Settings app on your Android phone. Navigate to Connections.
Step 2: Click on Data Usage settings > Data saver.
Step 3: Finally, turn off the Data saver.
Here's how to turn off the Power Saving Mode:
Step 1: Open Settings, and click on Battery.
Step 2: Set Power Saving Mode off.
Step 3: Or, disable Power Saver from the notification bar.
6Clear the Gmail App Cache and Data
If the Gmail notification issue persists, it is often suggested that you must clear the Gmail app cache since excessive data may be causing the notification not to display correctly. Remember, before you proceed with clear data instead of clear cache, The application data will be permanently deleted, including file settings and database.
Step 1: Go to your Android phone's Settings app.
Step 2: Tap on Apps & notifications. Click on Gmail > App info.
Step 3: Select one option from Clear cache or Clear data.
7Whitelist Gmail from System Optimization
Many OEMs have created battery-saving system utilities that tend to kill background applications due to the battery life race. While it is useful to some extent, still it prevents the notification from appearing as expected.
Step 1: Open Settings, then select Connections and tap on Data usage.
Step 2: From the Mobile section, tap Mobile data usage.
Step 3: Find and select Gmail. Turn on "Allow background data usage."
8Setup Network Provided Time & Time Zone
Step 1: Open your Android device settings.
Step 2: Navigate to date and time settings.
Step 3: Verify that you use network-provided time & Network-provided time zone.
9Grant All Necessary Permissions
There's no doubt that privacy is a big concern, but you can trust Google's official application and allow necessary permissions to get instant notifications from Gmail.
Step 1: Open settings > Applications.
Step 2: Scroll down and click on Gmail from the list of applications.
Step 3: There are different sections for permission click on Allow All.
10Re-log Into Your Google Account
Step 1: Open Gmail settings > Accounts.
Step 2: Select the Gmail account you are using.
Step 3: Log out of the account.
Step 4: Then Log into your account .
11Update Your Gmail App or the System's Software
The latest software updates are crucial to fixing glitches, improving the device, and adding supported features. Open the Google play store to check for any updates for the Gmail application. Moreover, Check your device settings and turn on automatic updates for the operating system. With these updates, you'll get all kinds of bug fixes, improvements, and new features for your android device.
4Gmail Notifications Not Working on Windows 10 Solutions
Gmail is one of the most popular email service providers, and most Google users love to use this email service for personal and professional reasons. Most users are facing troubles with windows 10 Gmail. Recently Windows users have reported that Gmail notifications are not working after upgrading to Windows 10.
If you're also facing a similar issue with Gmail notifications on your Windows 10, here are a few things you can try:
- Check your Gmail desktop notification settings.
- Make sure the Windows 10 Action Center is working.
- Add the Gmail website to your Windows 10 notification list.
- Check your firewall and antivirus settings.
- Restart your computer .
5Fix Gmail Notifications Not Working on Google Chrome
If you're using Gmail in Google Chrome and not receiving notifications for new messages, there are a few things you can do to fix the problem. You will need to configure your browser for Gmail notifications differently depending on your browser, including Chrome.
Key Takeaway
- Enable Notifications in Chrome
- Open Browser Settings
- Clear Chrome Cookies and Cache
- Try a Different Browser
1. Enable Notifications in Chrome
First and foremost, ensure notifications are enabled for Gmail in Chrome. To do this, open the Chrome browser and follow simple steps.
Step 1: On your Chrome browser, open Gmail.
Step 2: In the top right, Tap on Settings and then view all settings.
Step 3: Navigate to the "Desktop notifications" section.
Step 4: Hit on New mail notifications, Important mail alerts, or Mail notifications off. Available at the bottom of the screen. Save Changes.
2. Open Browser Settings
In Google Chrome, notifications must be enabled in both Gmail and browser settings. To check your browser settings,
Step 1: Open Chrome and click on the three dots in the top-right corner. Then, click on "Settings."
Step 2: Scroll down to the "Privacy and security" section, and click on "Site Settings."
Step 3: Scroll down to the "Notifications" section and make sure that notifications are not blocked for Gmail. If they are, click on the three dots next to Gmail and select "Allow."
3. Clear Chrome Cookies and Cache
If that doesn't work, try clearing your cookies and cache.
Step 1: Open your Chrome menu under More Tools .
Step 2: Tap on clear Browsing Data.
Step 3: Select "Cookies and other site data" and "Cached images and files."
4. Try a Different Browser
If your notifications are already turned on, the next step is to check your browser. It is noted different browsers handle notifications differently; some may not show instant alerts. It may be your browser's fault if your Gmail notifications aren't appearing even after you've tried everything you can think of. To fix this, try using a different browser or contact customer support.
6Bonus Tool to See Synced Gmail Notifications
If you are experiencing any issues with your Gmail notifications, AirDroid Parental Control is a resourceful application and extremely helpful in troubleshooting the problem. It can access and sync all Gmail notifications. It allows you to see all your synced Gmail notifications in one place.
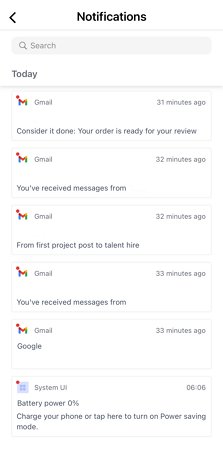
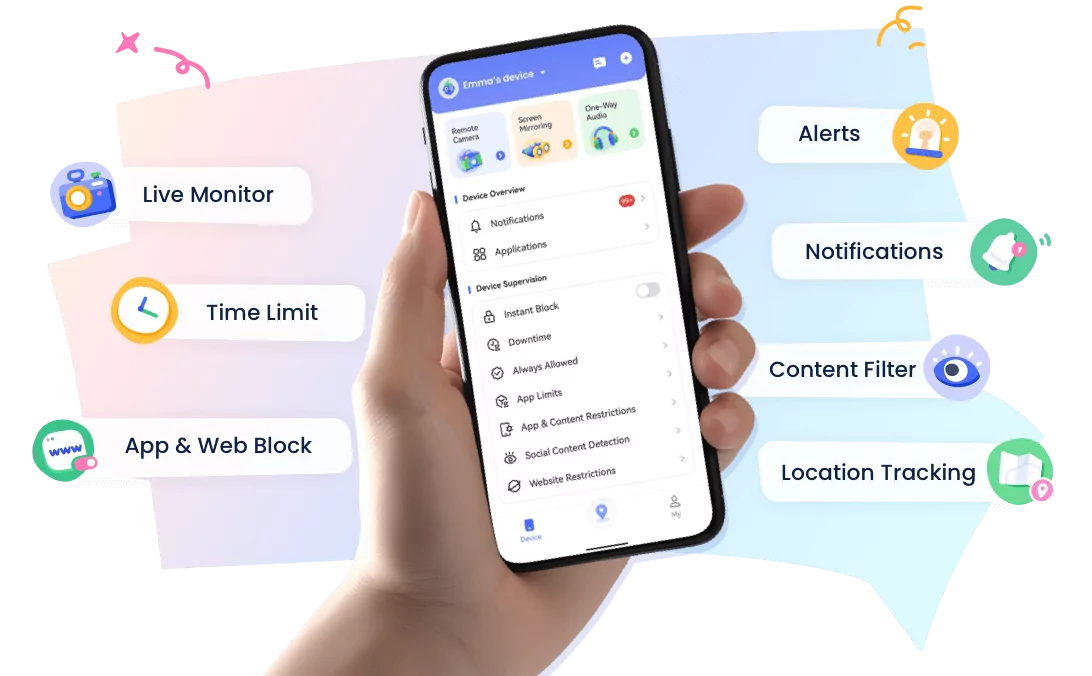
You can monitor each activity on your child's device while getting instant notifications on your phone using the AirDroid Parental Control. It's extremely easy to use and can be a lifesaver when checking on their phone and monitoring child activity. It is possible to get a real-time report of their phone use their behavior, take mandatory action, and block spam emails based on the usage notifications you receive.
To use it on your device, follow these steps:
Step 1. Install the AirDroid Parental Control App on your device.
Step 2. As soon as you launch AirDroid Parental Control, You will be redirected to the signup page. Sign up for an account and then log in.
Step 3. Get AirDroid Kids and install it on the target device. Install it and set up some necessary settings on the phone after it has been installed. Bind the device by entering the pairing code.
Wrapping Up
This article covers nearly all methods for retrieving Gmail notifications on iOS, Android, and desktop. If you're still not seeing any notifications from Gmail, there may be an issue with your device or application itself. If you want an ultimate solution to get the Gmail notifications working again, try AirDroid Parental Control application. You can easily sync your Gmail notifications so you'll never miss an important update again.





Leave a Reply.