How to Sync Messages from iPhone to Mac (And Vice Versa)
Apple makes syncing straightforward. Whether you need to transfer messages from iPhone to Mac or just want to continue conversations seamlessly across devices, syncing is helpful. Now, explore how to sync messages from iPhone to Mac so your conversations can be available on these devices.
How to Sync Messages Between iPhone and Mac with iCloud
The easiest way to sync messages between iPhone and Mac is to use iCloud. With this, all your iMessages, as well as SMS/MMS, can be easily viewed on both iPhone and Mac, provided that they are logged in under the same Apple ID. Here's a detailed step-by-step guide:
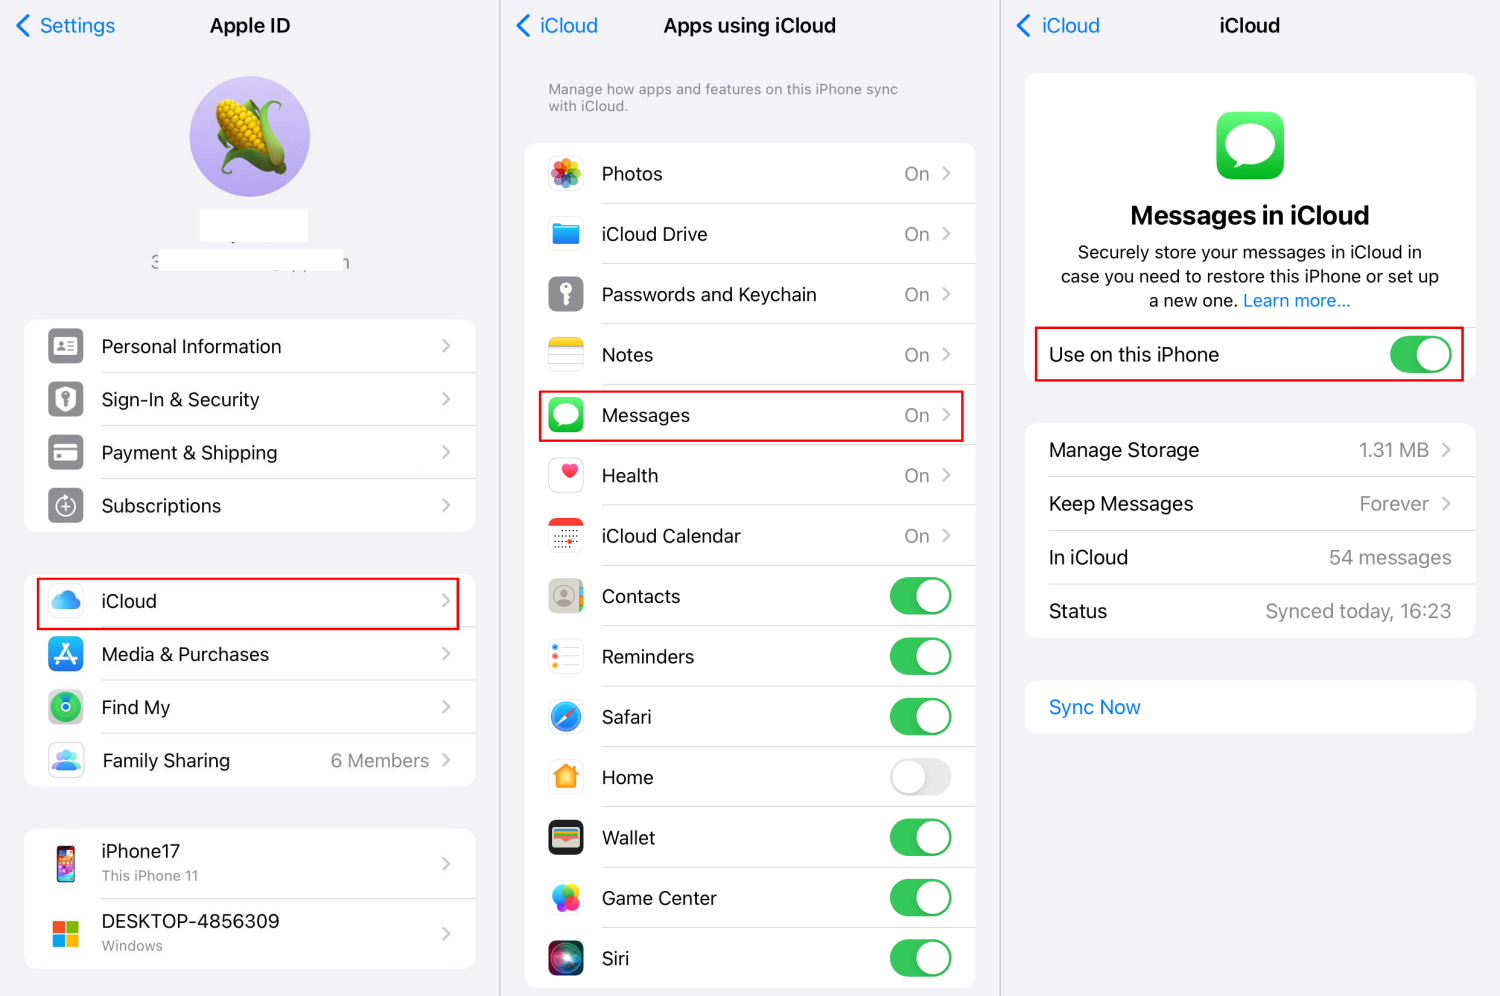
- Step 1.Set up iCloud for Messages (iPhone)
- 1) Navigate to "Settings," tap on your name, and then "iCloud."
- 2) Select "Show All" > "Messages."
- 3) Toggle on "Sync this iPhone" or "Use on this iPhone."
- Step 2.Enable Messages in iCloud (Mac)
- 1) Open the Messages app on your Mac.
- 2) From the menu bar, click on "Settings" or "Preferences."
- 3) Switch to iMessage. Confirm that the Apple ID you're logged into matches the one used on your iPhone.
- 4) Check the boxes for "Enable Messages in iCloud." And then choose the correct address for messages sending and receiving.
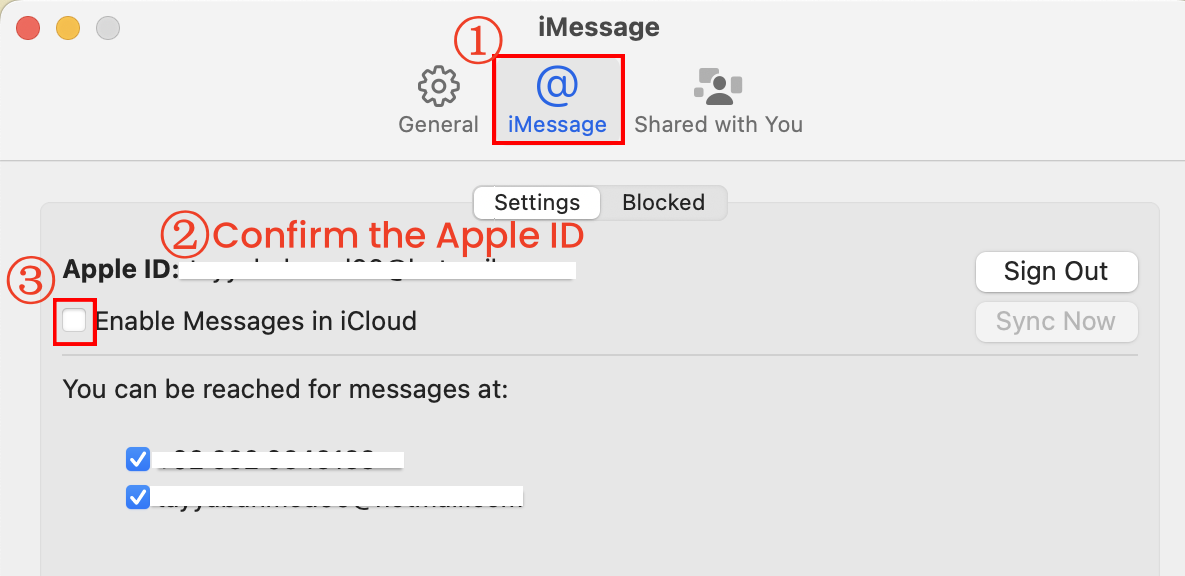
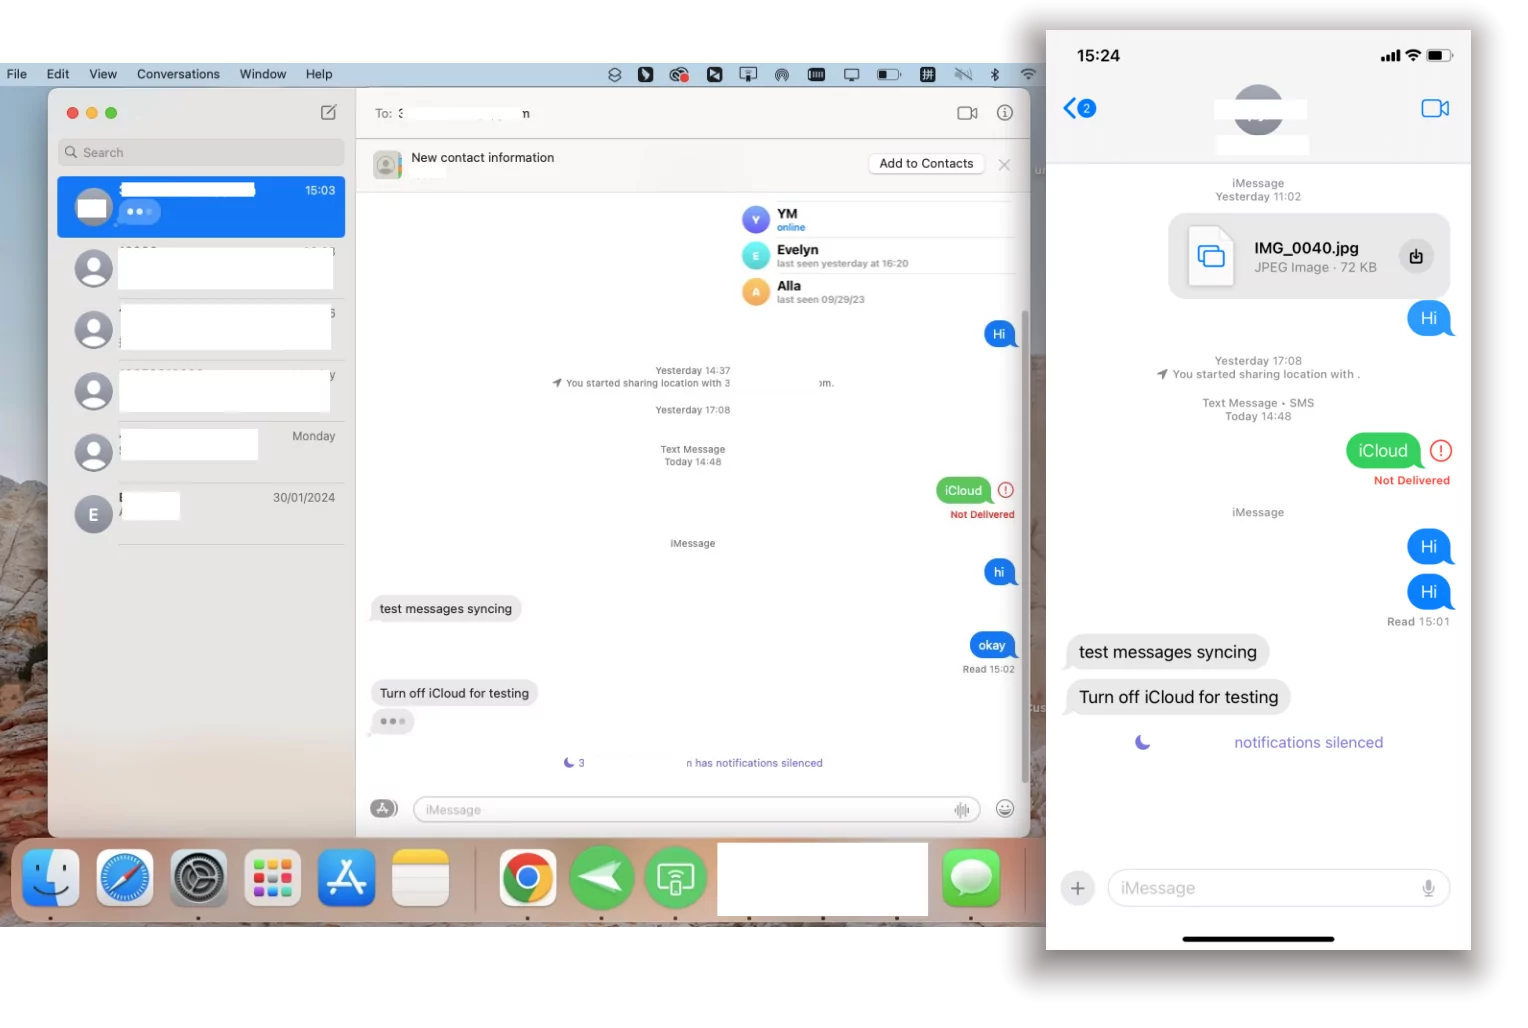
Now, back to the Messages app, you can see all messages from your iPhone.
How to Sync Messages from iPhone to Mac without iCloud
There are times when your iCloud storage is too full to sync messages; you might seek ways to sync messages from iPhone to Mac without iCloud. No problems; the built-in Text Message Forwarding setting comes to assist!
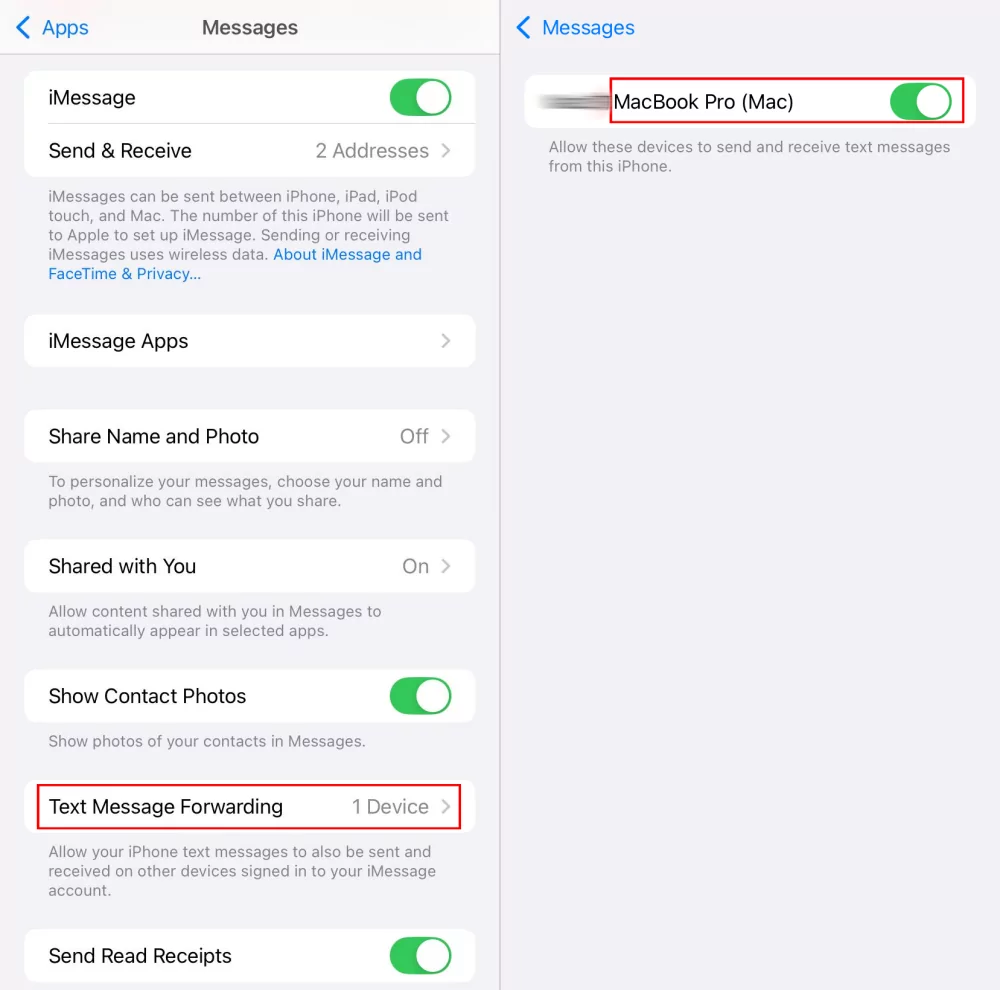
- Step 1.Open "Settings" and locate the "Messages" app.
- Step 2.Scroll down to tap "Text Message Forwarding."
- Step 3.Turn on your Mac from the list of devices shown. If you cannot see your Mac, then sign into Mac with your Apple ID.
- Step 4.Now, when the messages are received on your iPhone, they are available on Mac too.
📌Note: During testing, I found even though I could receive SMS from my Mac, I was not able to track the received ones on my iPhone.
Sync Your Kids' Messages with Your Device
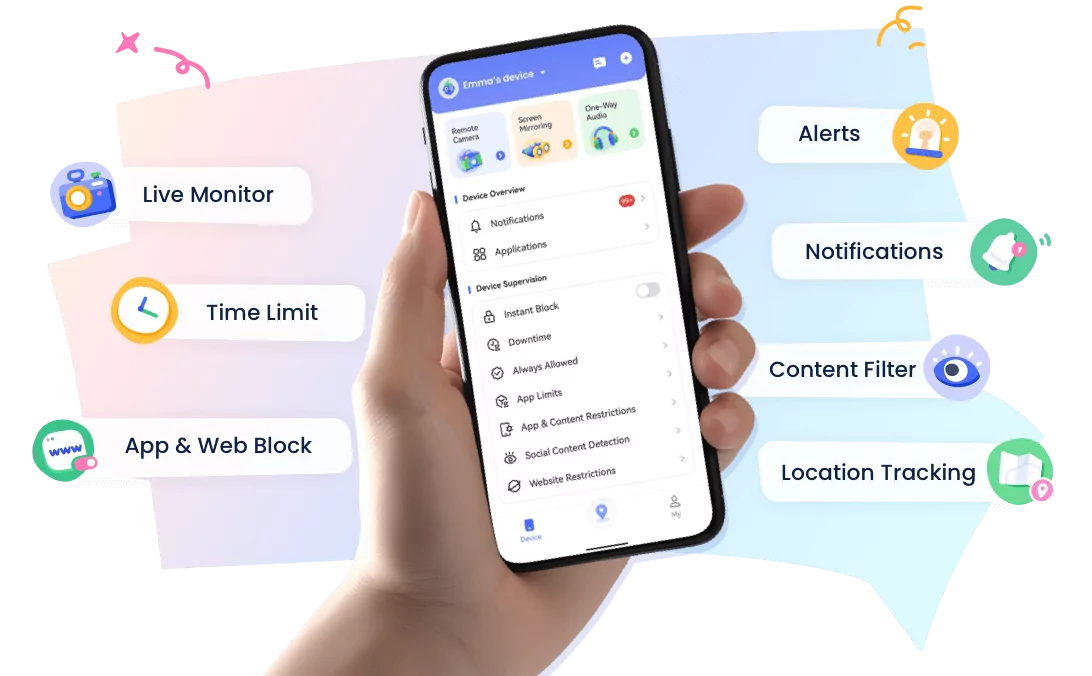
The "notification syncing" feature within AirDroid Parental Control helps you know the details of SMS and messages from social media your child received.
Solved: iPhone and Mac Messages Not Syncing
When researching this topic, I found some Apple users complained that "iPhone and Mac messages don't sync." If you also get stuck in this trouble, here are some fixes you can try.
First of all, it is necessary to check that both devices connect to a stable internet connection to avoid this issue. Then, use other solutions for this problem:
Verify That You Are Signed-in
To ensure your messages sync properly, verify you're signed in with the same Apple ID on your Mac, not only in Mac Messages, otherwise, this may cause iCloud syncing not to work.
Sync Messages Manually
Sometimes, your iCloud cannot backup and sync your messages with a note saying "iCloud Syncing Paused." This time, you can try to sync messages manually.
On iPhone: Open Settings > Apple ID > iCloud > Show All > Messages > Sync Now.
On Mac: Click on Settings under the Message menu. Then, select "Sync Now" under the iMessage tab.
Confirm the Correct Receive Source
No matter which method you choose above, make sure you have chosen the correct email or number for receiving messages or selected the correct device.
If you synced messages between iPhone and Mac using iCloud, open Messages Settings > iMessage on Mac. Then, select the email or number under "You can be reached for messages at."
If you select the syncing way without iCloud, go to iPhone Settings > Messages > Text Message Forwarding. Then, toggle on the correct device you want to sync the messages.
Check iCloud Storage Space
When the iCloud storage is full, nothing can be backed up from your iPhone. Therefore, opt for clearing your iCloud storage, upgrading your iCloud plan, or syncing messages with the text forwarding feature.
FAQs about Syncing Message
On Mac, select Settings under Messages. Switch to iMessage and then toggle off "Enable Message in iCloud."






Leave a Reply.