
How to Disable Network Sharing on Windows 10?

Filed to: Quick Guides

If you are looking for an easy and proper guide to disable network sharing on Windows 10, follow the below steps:
Step 1
Open Control Panel on Windows 10
To get started, the first step is to open the control panel on your Windows. You can do by:
1. Pressing Windows key + S.
2. Typing and then clicking the control panel option.
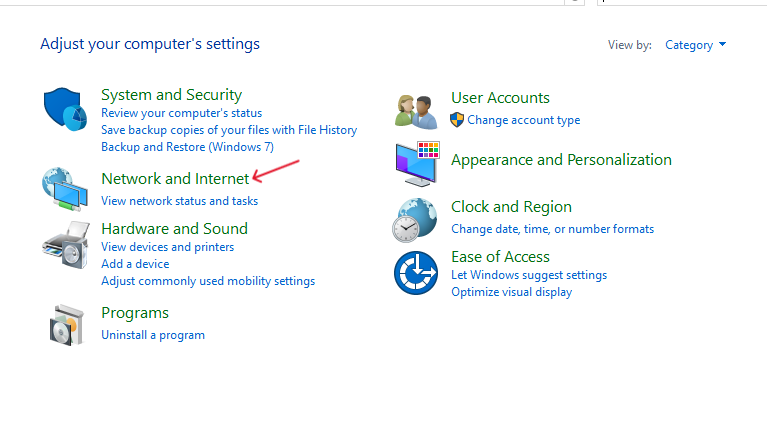
3. Click on the Network and Internet option. If you don’t find it on the interface, click on the top right menu and tap on “Category”, you will see it then.
Step 2
Change Advanced Sharing Settings
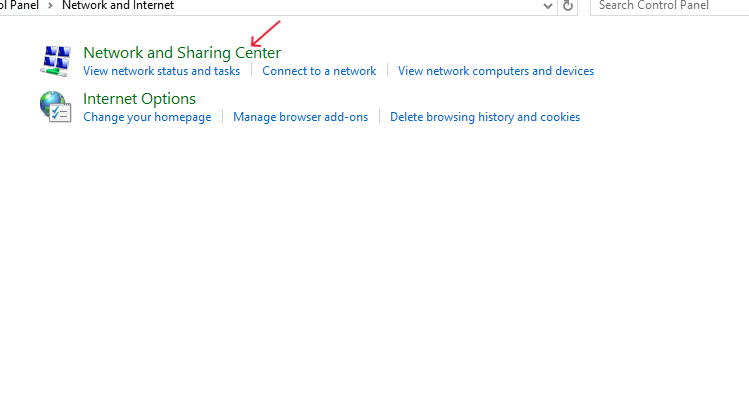
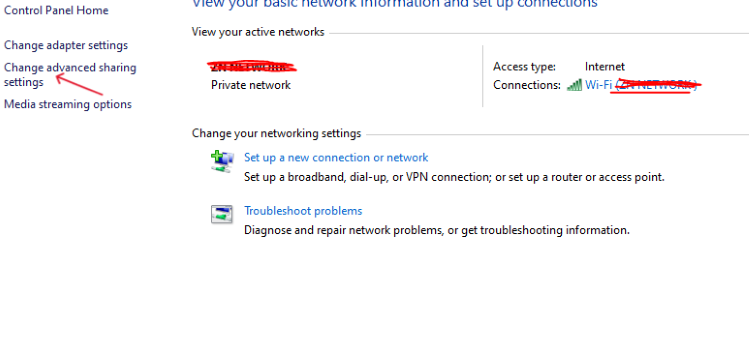
Once you select the Network and Internet, get on the “network and sharing center”, click on “Change advanced sharing setting” on the left menu.
Step 3
Turn Off Network Sharing on Windows 10
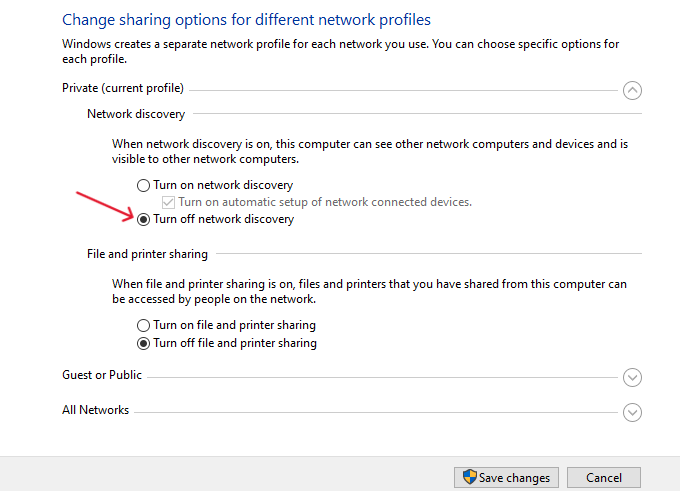
Select the “Current Profile”, click on “Turn off file and printer sharing” as well as “Turn off network discovery” and save the changes so you can make it happen.


Leave a Reply.