Like
Dislike

How to Enable PowerShell Scripts on Windows 10

Filed to: Quick Guides

Today, we're going to guide you through the process of enabling PowerShell scripts on your Windows 10 system.
Step 1
Open PowerShell as Administrator
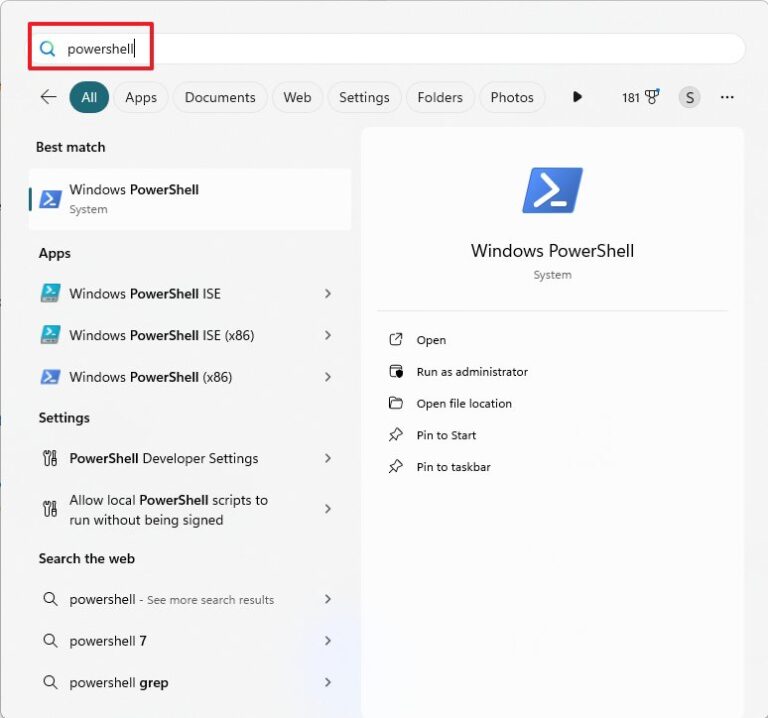
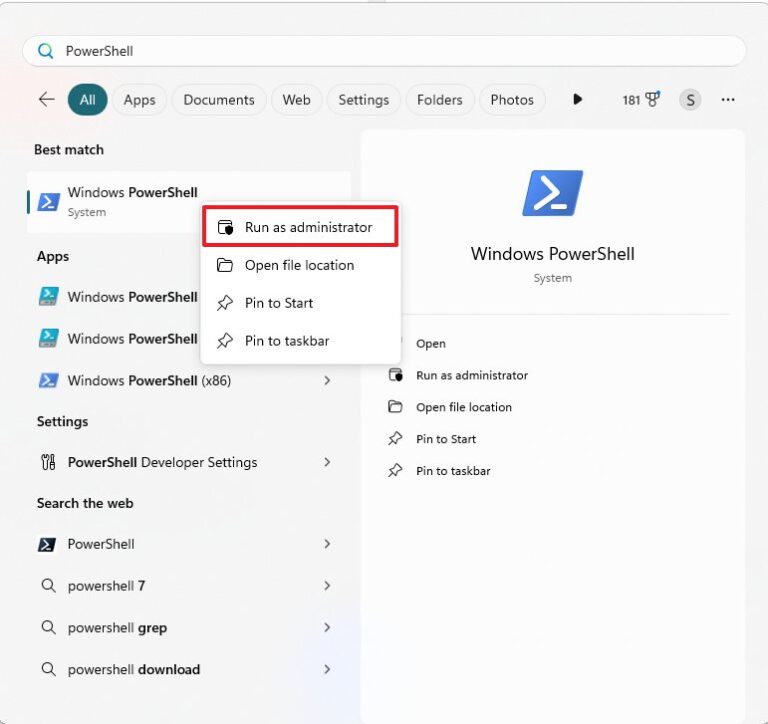
Start by clicking on the "Start" button, type "PowerShell" in the search bar, right-click on "Windows PowerShell," and select "Run as administrator."
Step 2
Check Current Execution Policy
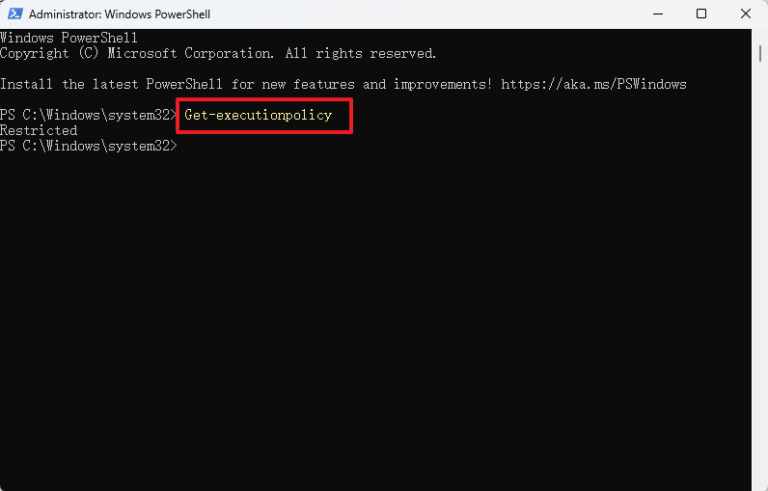
In the PowerShell window, type `Get-ExecutionPolicy` and press Enter. This command will display the current execution policy.
Step 3
Change the Execution Policy
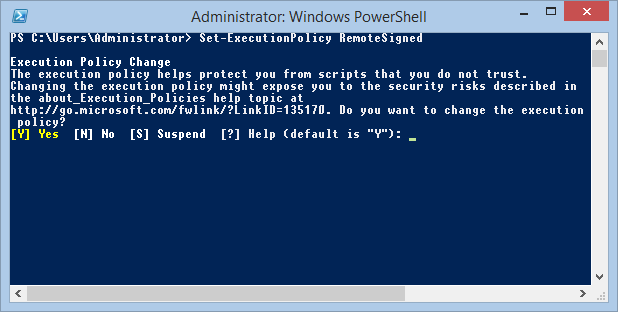
To enable PowerShell scripts, type `Set-ExecutionPolicy RemoteSigned` and press Enter. This policy allows scripts to run if they are signed by a trusted publisher..
Step 4
Confirm the Change
You will be prompted to confirm the change. Type `Y` and press Enter to proceed..
Step 5
Verify the New Execution Policy
To ensure the change was successful, type `Get-ExecutionPolicy` again and press Enter. It should now display "RemoteSigned.".

Step 6
Close PowerShell
Once you've verified the new execution policy, you can close the PowerShell window..
Free Try Mobile Device Management Solution


Discussion
The discussion and share your voice here.
Product-related questions?Contact Our Support Team to Get a Quick Solution>
Leave a Reply.