Home > Quick Guides > How to Schedule Posts on LinkedIn
Like
Dislike

How to Schedule Posts on LinkedIn
Filed to: Quick Guides

If you want to schedule a post on LinkedIn, please check this quick guide below.
1
Launch your Chrome to visit LinkedIn and login to your account.
2
Begin by selecting 'Start a post' located at the top of your LinkedIn homepage. This action will trigger a 'Create a post' pop-up window.

3
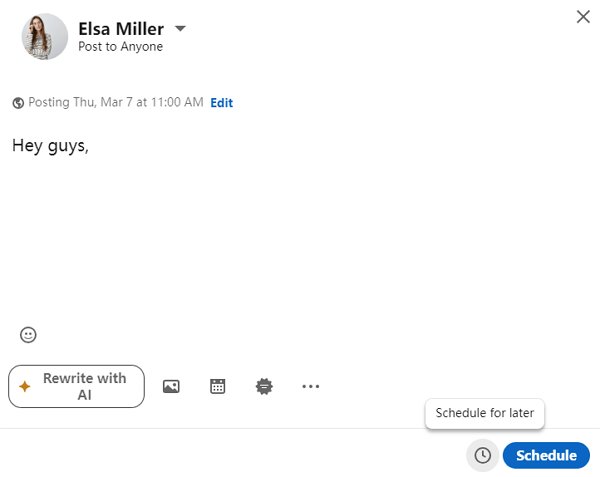
Proceed by clicking on the Clock icon situated in the lower-right corner to arrange a schedule for your post.
4
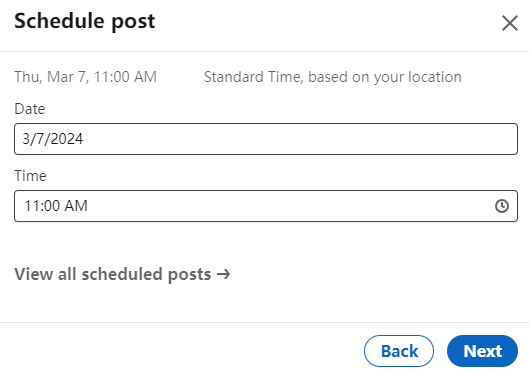
In the 'Schedule post' pop-up window, choose a specific date and time for your post to be published, then click 'Next'.

5
Finalize the process by clicking 'Schedule'. A confirmation pop-up titled 'Post scheduled' will appear at the lower left corner of the page.

Note: The scheduled time will be automatically adjusted to UTC based on the time zone settings of your device.
AirDroid Parental Control - Keep Your Kids Safe Online
Discussion
The discussion and share your voice here.
Product-related questions?Contact Our Support Team to Get a Quick Solution>


Leave a Reply.