Everything You Should Know about Apple Remote Desktop
When you need to manage several Mac computers, it can be rather time-consuming as you will need to manage each one of them separately. Some of the tasks are quick and easy, while others require more time and effort. When you need to remotely access and control another one or more Mac computer, your best option is to use the Apple Remote Desktop app.
In this article, we are going to get into more detail about the Apple Remote Access software and what you need to do to start using it on your Mac.
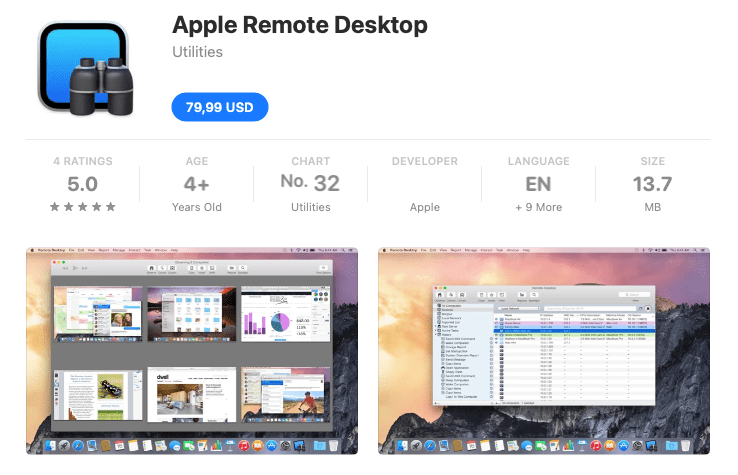
1What Is Apple Remote Desktop
Apple Remote Desktop, also referred to as ARD, is a program that grants remote access to a Mac computer. Version 1 was first released in 2002, and since then it has become one of the most widely used Apple to Apple remote desktop apps.
Users of the Apple Remote Access software can enjoy these features:
- Observe the screen of a Mac
- Control the keyboard, trackpad, and mouse of a Mac
- Share control of the Mac with the user
- Capture the screen to a separate file
- Transfer data between the clipboards
- View multiple displays from the same Mac
- Lock and unlock a screen
- Send files to the Mac computer
- Update settings
- Execute commands
- Automate administration tasks
- Create a computer list that you can observe as a group
2How Does Apple Remote Desktop Work?
The Apple to Apple remote desktop app can be used to connect and manage several other Mac computers on the same network, either LAN or WAN. To be able to use Apple Remote Desktop, the device needs to run macOS Ventura 13.6 or later. The latest version 3.9.7 has also implemented a high-performance connection to devices with macOS Sonoma.
In reality, Apple Remote Desktop works by installing the app on a Mac computer that will function as the control station for all other Macs. After the initial setup, you can add as many clients as you need, which can be desktops, laptops, Mac minis, or iOS devices. Once configured, you gain remote access to all the devices that you have added.
3How to Set Up and Use Apple Remote Desktop
As you may already understand, Apple Remote Desktop is a game-changer for administrators who need to manage several devices. In this section, we will show you how to set it up and use it.
To use the Apple Remote Access software, both administrator and clients are required to:
- run OS X 10.10.5 or later
- use Remote Desktop version 3.6
- have VNC–compatible software, in the case of non-Mac clients
Here is how to set it up so that you can start using it:
- Step 1.Go to the Mac App Store and get the Remote Desktop app. It is important to note that this isn’t a free app.

- Step 2.If you have already set up a Task Server, type the server address and click the Continue button. If not, then you can skip this step.
- Step 3.Prepare all clients that you want to add. The good news is that the Remote Desktop client app is preinstalled in macOS.
- Step 4.Find and select Scanner in the sidebar to add clients.
When you click on the Scanner, you will see several options for adding clients. Below, we will explain in more detail how to complete each one:
Using Bonjour
- 1.Choose Bonjour from the scanner pop-up window,
- 2.Connect your iPhone to computer using a USB cord. Next click Start to Unlock to let the process begin.
- 3.Type the username and password of the Remote Desktop administrator to authenticate the connection.
Using a directory server
- 1.Choose Directory Server from the scanner pop-up window
- 2.Drag the computer you want to add to the computer list
- 3.Type the username and password of the Remote Desktop administrator
By importing a file
- 1.Choose File Import from the scanner pop-up window
- 2.Click the Open File button to browse for the file, or drag and drop it
- 3.Drag all computers you wish to add to the computer list
- 4.Type the username and password of the Remote Desktop administrator
Using network addresses
- 1.Choose Network Address from the scanner pop-up window
- 2.Enter the IP address on the address bar and click the Refresh button
- 3.Drag the device into the computer list
- 4.Type the username and password of the Task Server
Using IP addresses
- 1.Click on a computer list on Remote Desktop and go to File > Add by Address
- 2.Enter the IP address on the address bar and click on the Advanced Options triangle,
- 3.If the client uses Network Address Translation (NAT), type the public ports that you will find in Remote Management Port and Screen Sharing Port.
- 4.Click the Add button.
Using a local network
- 1.Choose Local Network from the scanner pop-up window.
- 2.Drag all computers to the computer list.
- 3.Authenticate by providing the administrator username and password.
Using a network range
- 1.Choose Network Range from the scanner pop-up window.
- 2.Type both the beginning and ending IP address and click the Refresh button.
- 3.Drag the devices to the computer list.
- 4.Type the administrator username and password to authenticate it.
By the Task Server
- 1.Choose Task Server from the scanner pop-up window.
- 2.Drag the computers to the computer list,.
- 3.Type the username and password of the administrator.
After this process, all client computers you have added will appear in the selected computer list, such as All Computers. To access any device from that list, click on it and simply type the administrator credentials.
Finally, these are the steps that you must follow to allow Apple Remote Desktop to access your Mac computer:
- 1.Go to Apple > System Settings and click General on the sidebar.
- 2.Then, click Sharing.
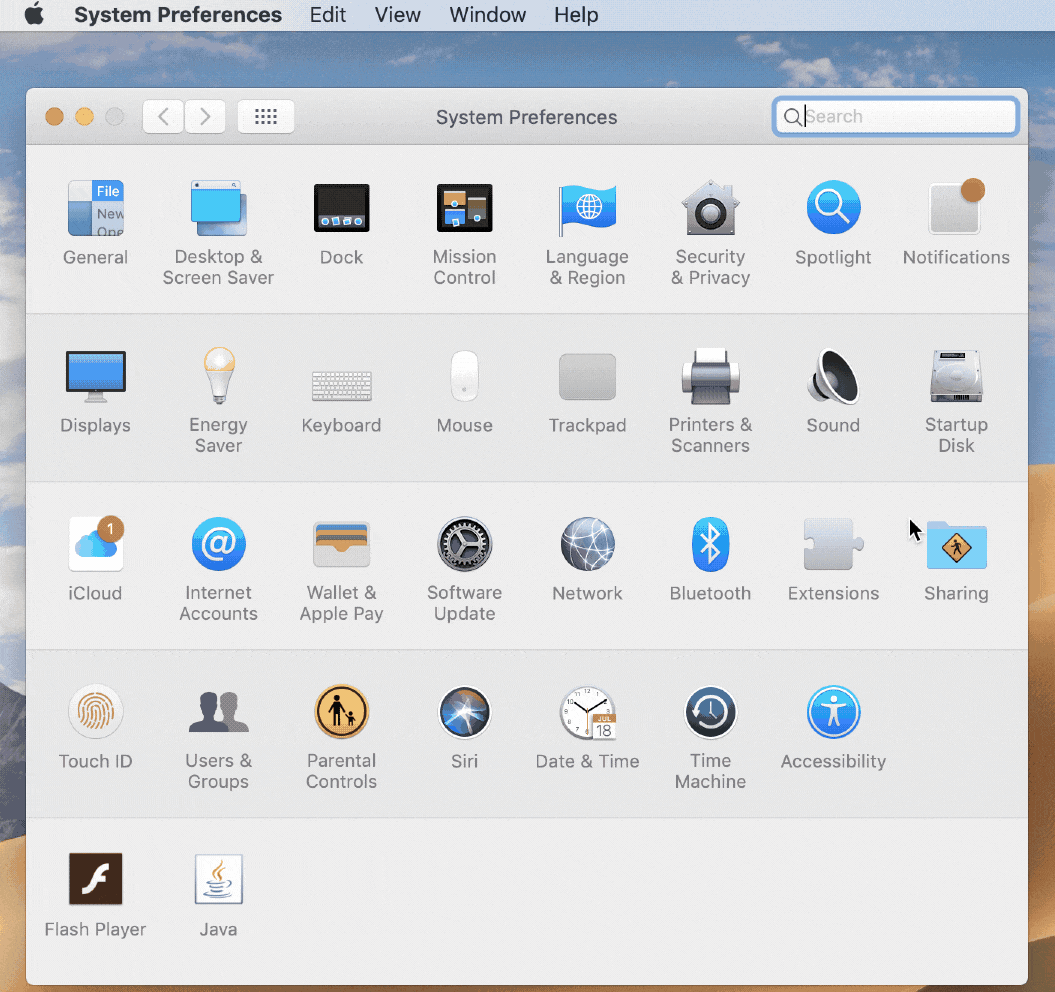
- 3.Turn Remote Management on, and click the info button to set your preferences. For instance, you can select to always show Remote Management status in your menu bar.
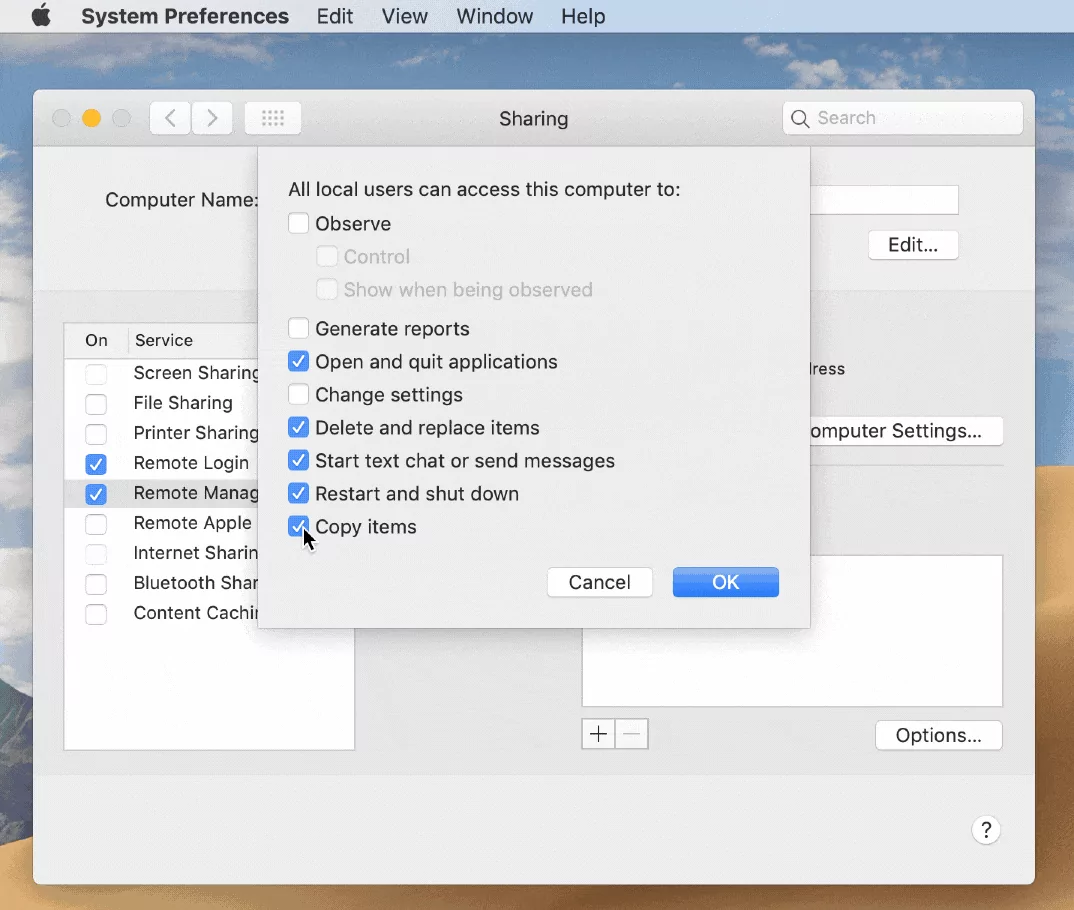
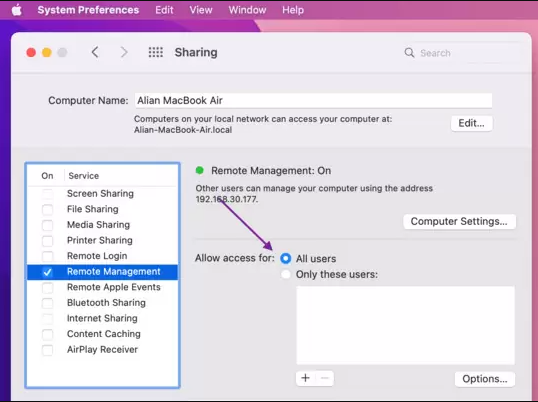
- 4.Click Allow Access for and select either All Users or Only These Users. If the latter, select which users can access your Mac.
- 5.Type the information that will be displayed in the System Overview Report, under the Computer Information section.
- 6.6.Once you’re ready, click the Done button.
4Ratings and Reviews of Apple Remote Desktop
If you browse the Mac App Store, you might notice that the user reviews of the Apple Remote Desktop app are concerning. This showcases that users have found issues with the app. Namely, the majority of users who have left a negative review state that the latest versions have many bugs, preventing them from using the app to its full potential. Additionally, some have experienced authentication errors, while others are unable to observe or control a screen.
On the flipside, some users have absolutely loved the Apple Remote Access software. These users state that the application works as expected and is even great for small businesses that need to manage a small number of devices.
5Best Alternative for Apple Remote Desktop
If you are concerned about the negative reviews, we have some good news for you. In the market, you will find a variety of remote support apps that you can use on your macOS and iOS devices. The best ones are AnyDesk, TeamViewer, Zoho Assist, VNC Connect, and Chrome Remote Desktop among others.
Most of these tools are super easy to use and work on all operating systems. TeamViewer, for instance, allows multi-platform support and intra-platform connections, making it very versatile. Furthermore, it has many additional functions, such as file sharing, hardware control, and multi-session support.
The Bottom Line
Apple Remote Desktop is a great solution to connect and manage macOS and iOS devices. However, it has some drawbacks that you need to consider before getting the app as it is not available for free. Hope this guide will help you make sure if the Apple Remote Desktop software is for your need.




Leave a Reply.