[Step-by-step Guide] How to Connect to RDP from Mac
Remote Desktop Protocol, or RDP for short, allows users to access and control a Windows PC remotely. This powerful tool is very convenient for both professionals and individual users. One of its advantages is that you can also use it across different operating systems, such as macOS and Windows.
In this guide, we‘ll guide you through the process you need to follow to connect to RDP from Mac. Follow these instructions to gain access to a useful tool in your daily life.
Step 1. Get RDP on Mac
Before connecting to a Windows PC via RDP, ensure that your Mac computer meets the necessary requirements. First of all, RDP supports a Mac client running a macOS 10.10 or later. However, we recommend that you update your macOS to the latest version for better compatibility, and for gaining access to the latest features.
Apart from your Mac computer, you also need to ensure that your Windows PC supports Remote Desktop. In more detail, if you’re using a Home edition of Windows, you won’t be able to enable Remote Desktop. For this reason, use a PC that uses the Professional or Enterprise version of Windows 10 and Windows 11.
Once you satisfy these requirements, you can connect to RDP from Mac by following the steps below.
How to Download and Install the macOS Client
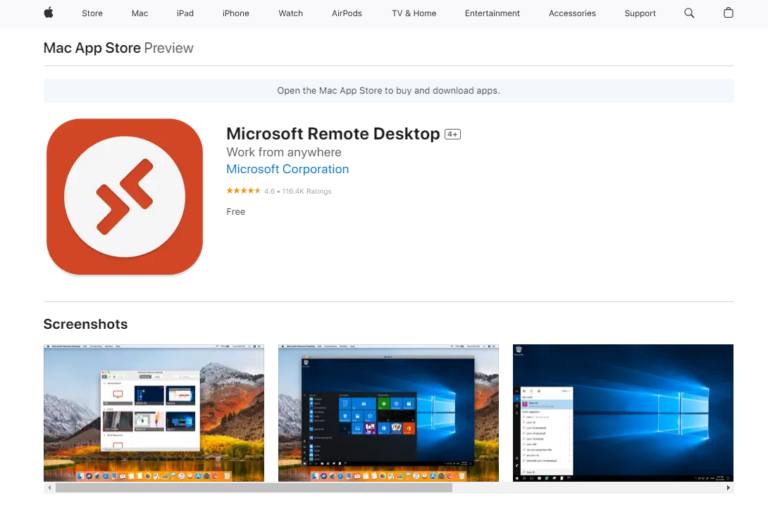
- Step 1.On your Mac computer, launch the App Store to get the RDP app.
- Step 2.Type "Microsoft Remote Desktop 10" in the search bar to find the app.
- Step 3.Click on the app and select Get or Install to download it.
- Step 4.Once downloaded and installed, you can open the app from your Applications folder or the Launchpad.
Step 2. Configure Remote Desktop Connection
Now that you've installed the RDP client, you must configure it to connect to RDP from Mac. Here is what you need to do:
Steps to Add a New Connection
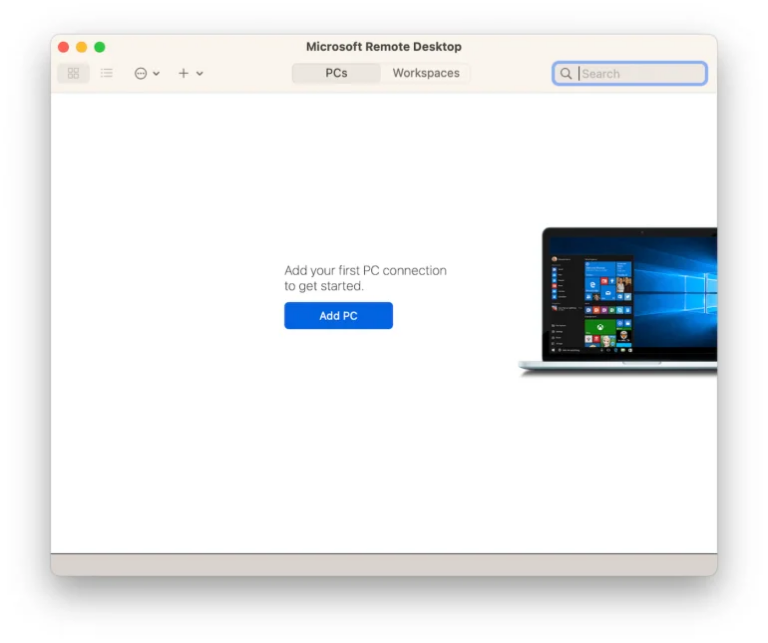
- Step 1.Launch Microsoft Remote Desktop on your Mac, click the + button at the top and select the Desktop option.
- Step 2.Enter the name or IP address of the Windows PC you want to connect to.
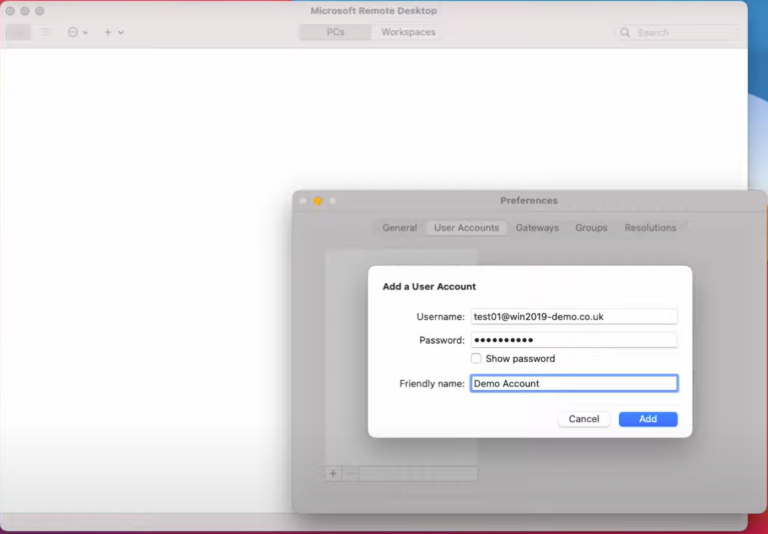
- Step 3.Enter the username and password for the Windows account. If your PC is part of a domain, include the domain name.
- Step 4.This is an optional step, but you can also add a user so that you don’t have to type your credentials every time you wish to connect. To do that select the "Add user account" option.
Steps to Adjust the Settings
Along with the above configurations, there are some other adjustments that you can make to make the most of your remote connections:
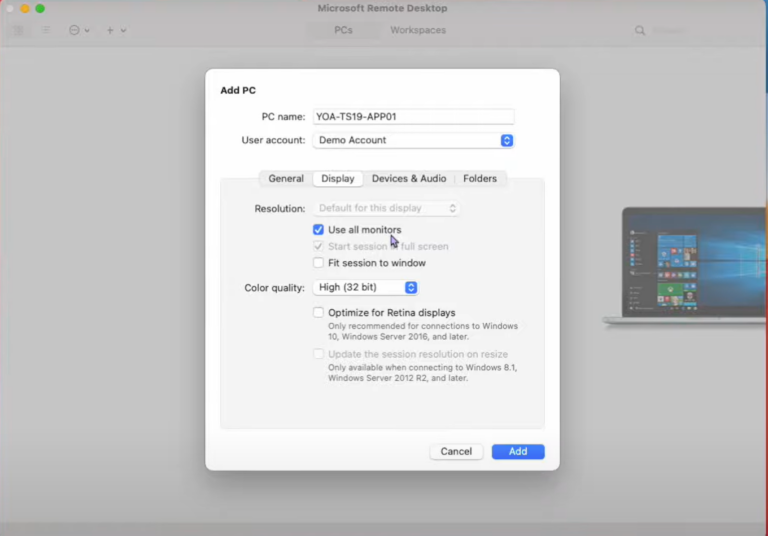
- Friendly Name: In this section, you can assign a name to your connection. This will help you identify it more easily.
- Display Settings: Click the "Display" tab to choose the screen resolution and color depth that suits your needs.
- Enable Local Resources: Go to the "Devices & Audio" tab and select options like printers, microphones, and clipboard sharing.
- Once you are ready, save your configurations by clicking the "Save" button.
Step 3. Connect to a Windows PC
Once you have configured your remote connection, you're ready to connect to RDP from Mac. Here are the steps to do that:
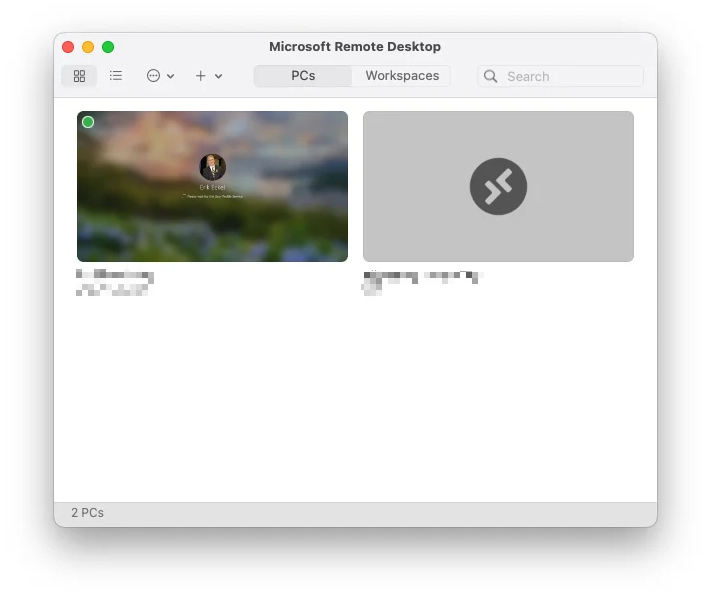
- Step 1.In the Microsoft Remote Desktop app on your Mac client, choose the saved connection from the list.
- Step 2.Double-click on the connection icon, and the app will attempt to establish a remote connection with your Windows PC.
- Step 3.When prompted, enter your credentials.
Step 4. Use the Remote Control Feature
With the remote connection established, you can start using your Windows computer as if you were sitting in front of it. This means that you can use all remote control features to complete your tasks.
During your connection, you can use your keyboard, mouse, and trackpad as normal. RDP also supports file sharing and clipboard syncing. The Mac keyboard maps most keys to their Windows equivalents, so you won't face much trouble. However, there are a few shortcuts that will make your session much easier.
Keyboard Controls You Need to Know
- The Command key acts as the Windows key.
- Actions that use the Command key on Mac, use the Control key on Windows.
- To use any function keys, you must also press the FN key.
- The Alt key located on the right of the space bar on Mac, acts as the Alt Gr/right Alt key in Windows.
- To switch between apps on your Mac while connected to a Windows PC use the shortcut Command + Tab.
- To take a screenshot of the RDP connection use the shortcut Command + Shift + 4.
- To load the Windows Task Manager during the session use the shortcut Ctrl + Alt + End.
How to Enable and Use File Transfer
To transfer files between your devices, you must first enable the feature. Here is what you need to do:
- Step 1.Go to the RDP app settings, and check both the Clipboard and File Transfer options under Local Resources.
- Step 2.Drag the files you wish to transfer from your Mac and drop them into the RDP window.
- Step 3.You can also copy your files from one device and paste them into the other.
Step 5. End the Remote Connection
When you're done, you simply need to terminate the remote session. The steps for doing that are the following:
- Step 1.On your Windows PC, click the Start button, and select the Sign Out option.
- Step 2.On your Mac, close the Microsoft Remote Desktop app window.
Bonus Part: A Stable and Easy Remote Access Solution from Mac to Windows
While Microsoft Remote Desktop is a robust solution, there are simpler and more stable alternatives like AirDroid Remote Support. This tool is ideal for all types of users who want a straightforward and versatile remote support tool.
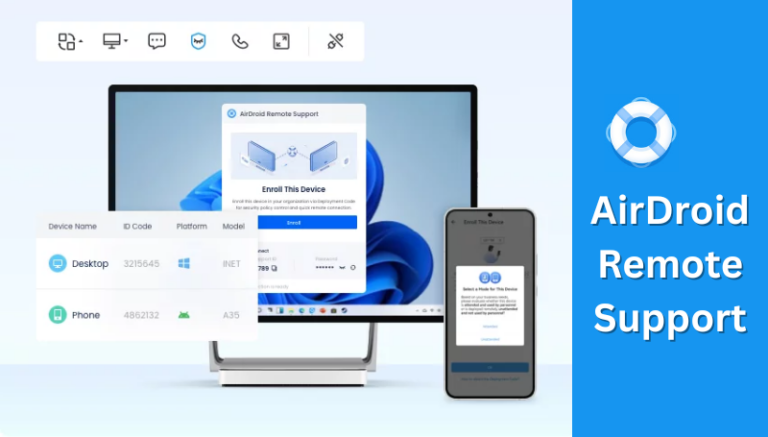
AirDroid Remote Support is a user-friendly app designed for cross-platform remote connections. It works seamlessly between macOS and Windows without the need for complex configurations. Therefore, it is a great solution for users who don't want to limit themselves to specific operating systems.
How to remote control android using Airdroid
- Always-on Unattended Access: Set up your devices for unattended access to connect to them remotely without needing another user to accept the connection.
- Black screen mode: The screen can be set as black when there is nobody on the remote device to protect your privacy.
- Controllable Clipboard and Keyboard: Copy and paste text and use the remote device’s keyboard.
- Text and voice communication You can send text or voice messages and make a call when providing/accepting remote support.
How to remote control android using Airdroid
- Step 1.Get the AirDroid installers from the app’s official website.
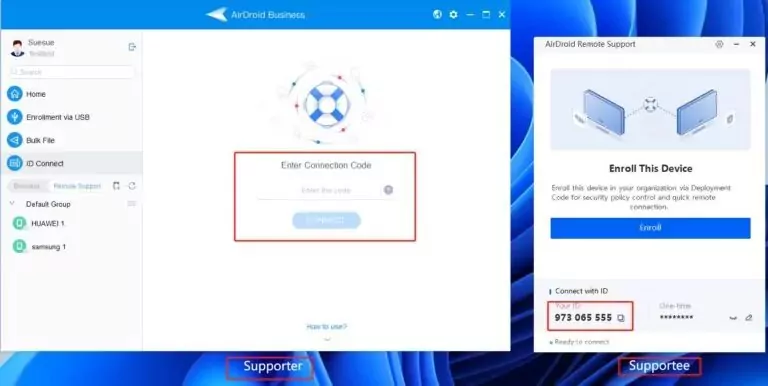
- Step 2.Launch AirDroid Remote Support on your Windows computer. Go to the Connect with ID section and note the 9-digit ID code.
- Step 3.Launch AirDroid Business on your Mac. Click ID Connect on the sidebar, enter the 9-digit ID from AirDroid Remote Support, and click the Connect button.
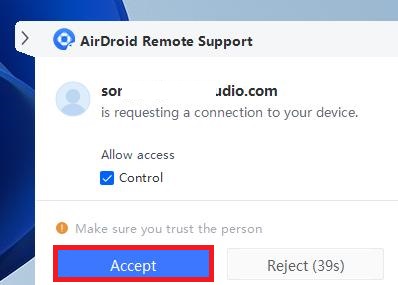
- Step 4.Click Accept on the remote PC to establish remote connection.
In Conclusion
Knowing how to connect to RDP from Mac opens up possibilities for efficient cross-platform work. In this guide, you have learned all the steps you need to take to establish a remote connection from your Mac computer. However, if you are seeking an even simpler solution, AirDroid Remote Support offers a stable and user-friendly alternative. Download AirDroid Remote Support today and experience effortless remote access.




Leave a Reply.