[3 Ways] Create a Remote Desktop Shortcut
If you are using Remote Desktop Protocol a lot, then you will probably save a lot of time with a shortcut. Even if you have no idea how to create a remote desktop shortcut, you can learn how to do it by following our step-by-step guides.
In this article, we present you 4 ways in which you can create RDP shortcut that will streamline your remote connectivity.
Part 1. How Do I Create a Shortcut for Remote Desktop?
First, we are going to show you how to make a remote desktop shortcut in 3 different ways. By completing them, you will be able to access the RDP client with just one click.
Method 1: Create an RDP Shortcut by Saving it as a File
The first method to make remote desktop shortcut is to save your remote desktop connection settings as an RDP file. Once you save that file, you will be able to easily establish a connection.
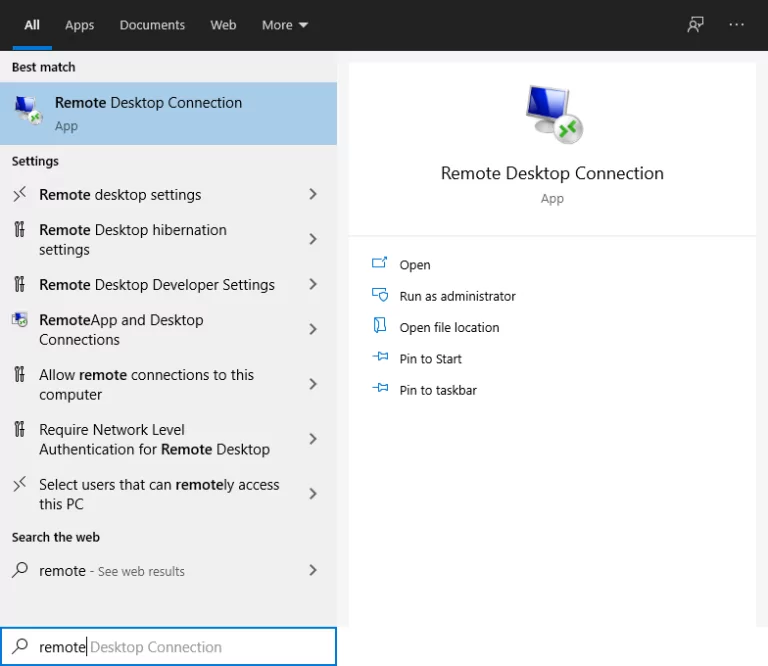
- Step 1.Search and open the Remote Desktop Connection client. You can find it by typing it on the search bar.
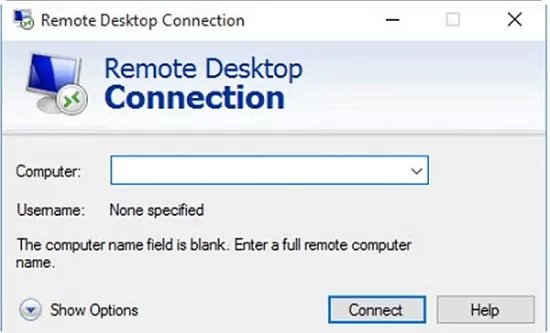
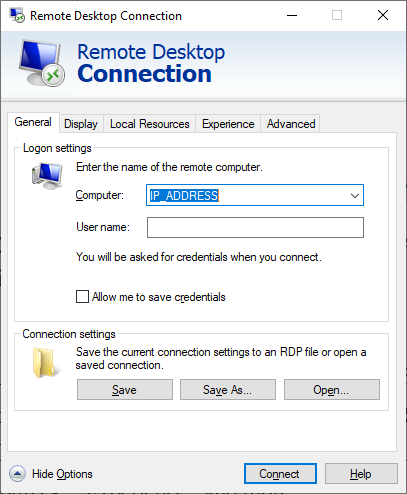
- Step 2.Configure your connection settings, such as the IP address, computer name, and any other configurations you deem necessary for the remote connection.
- Step 3.Click on the Show Options button to expand the window. Check the Allow me to save credentials option.
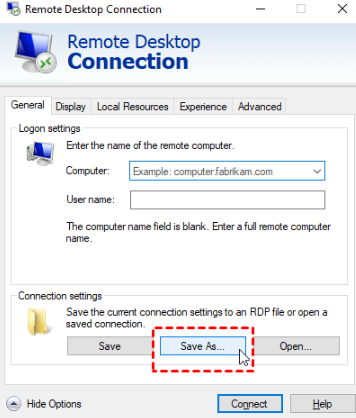
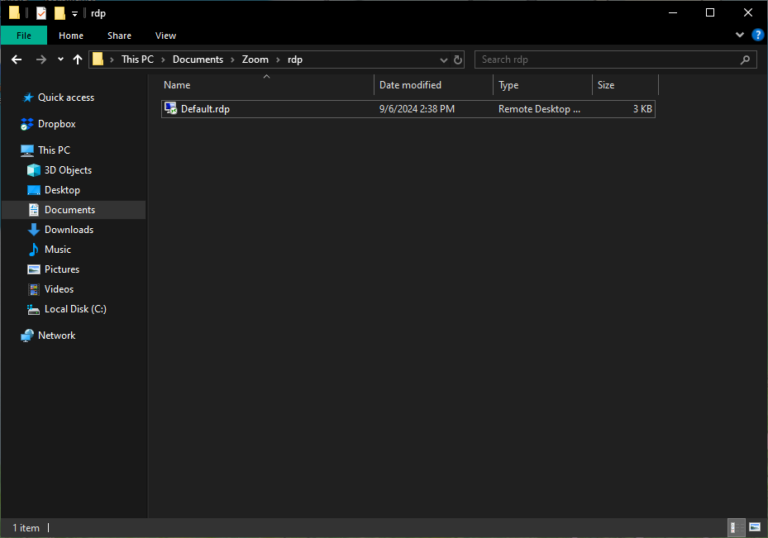
- Step 4.Click the Save As button to save the connection as an RDP file. Select a location to save the RDP file and click Save.
- Step 5.Go to the location where you’ve saved the RDP file and drag it to move it to your desktop. From there, you simply have to double-click it to launch the remote desktop connection with your specified settings.
Method 2: Create an RDP Shortcut from Desktop
The following to create a remote desktop shortcut involves creating a new shortcut directly on your desktop. The steps for completing this are the following:
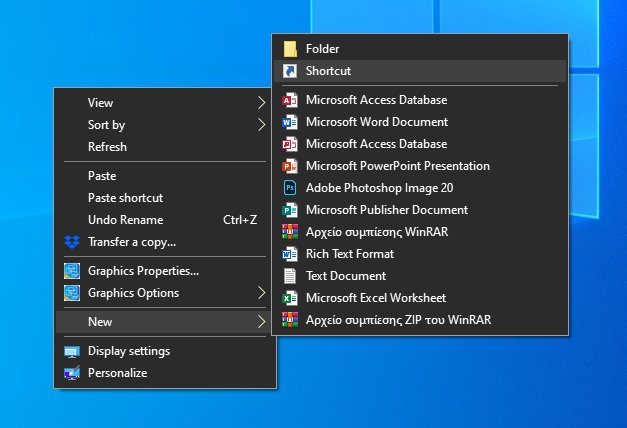
- Step 1.Right-click on an empty space on your desktop, hover on New, and click Shortcut.
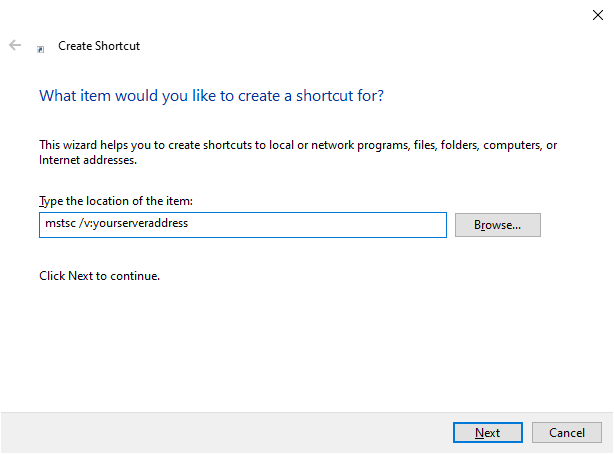
- Step 2.Type the command: mstsc /v:yourserveraddress on the wizard. Replace “yourserveraddress” with the name or IP address of the computer you wish to connect to remotely. Click Next.
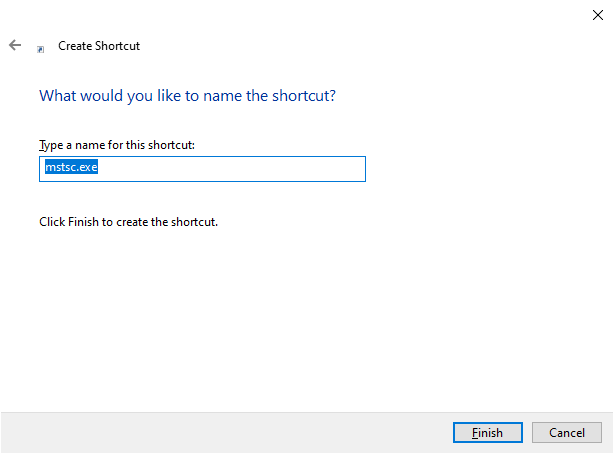
- Step 3.Give your shortcut an appropriate and recognizable name and click Finish. After you do that, you will find a new shortcut on your desktop. When you wish to connect remotely, double-click on it.
Method 3. Create an RDP Shortcut from the Start Menu
The following method to make remote desktop shortcut utilizes the Start Menu. Here are the steps to do it:
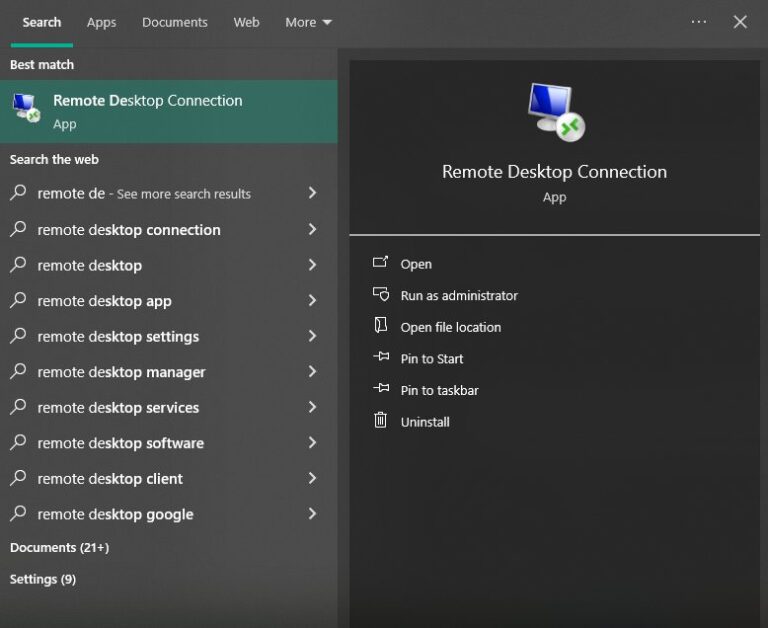
- Step 1.Click the Start Menu and type Remote Desktop Connection in the search bar.
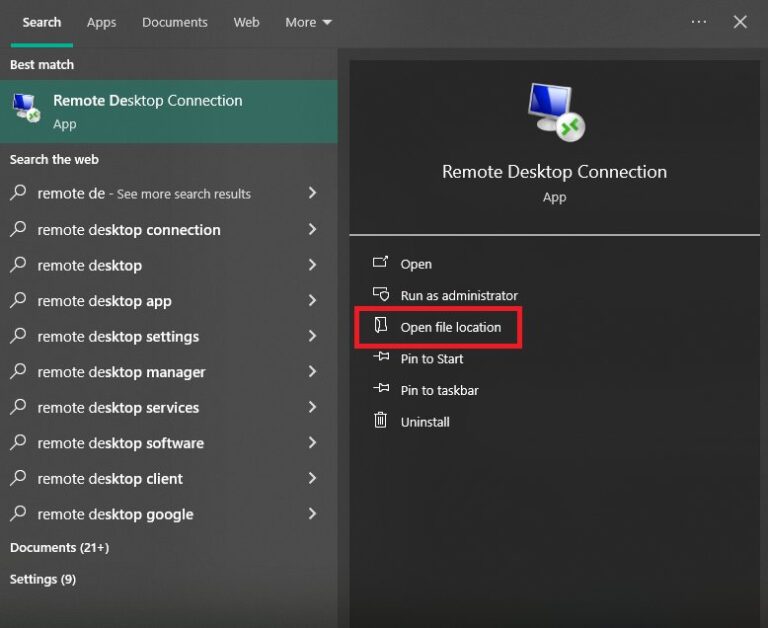
- Step 2.When the Remote Desktop Connection appears in the search results, right-click on it and select Open file location. Alternatively, simply click on this option. You will be redirected to the location where the Remote Desktop Connection Shortcut is saved.
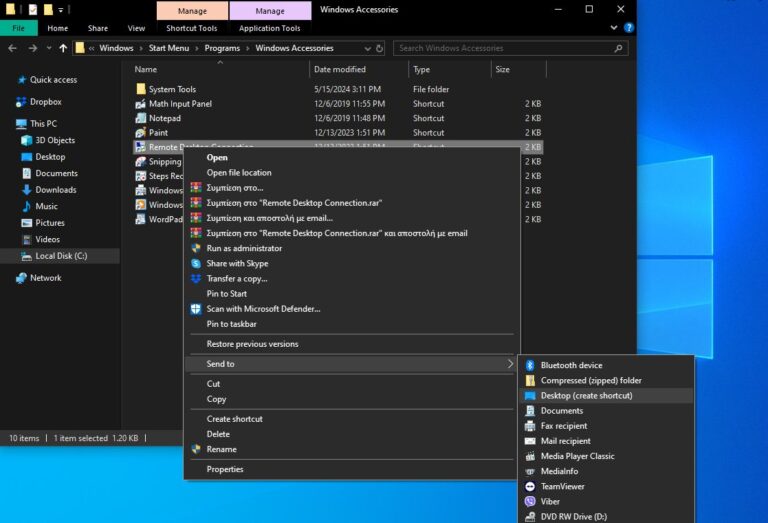
- Step 3.Right-click on it, hover over Send to, and then choose Desktop (create shortcut). This option will make a remote desktop shortcut on your desktop.
Part 2. How to Create a Remote Desktop Shortcut for a Specific PC
In addition to the above general shortcuts, you might also want to create an RDP shortcut for a specific PC. This will benefit you a lot if you are constantly using remote desktop to connect to the same device since you will save a lot of time. Here is what you need to do:
- Step 1.Right-click on your desktop and click New > Shortcut.
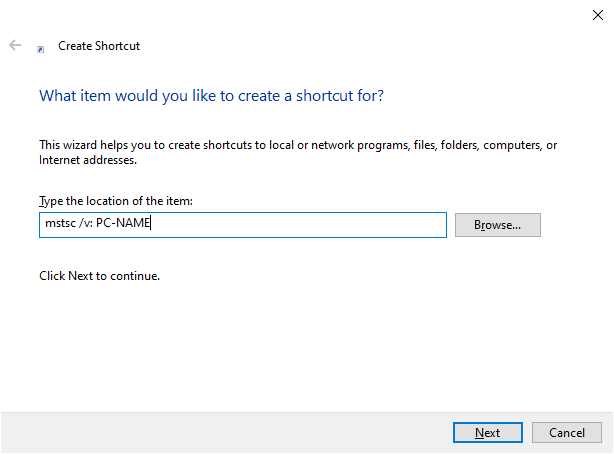
- Step 2.On the wizard, type the command: mstsc /v: PC-NAME, where “PC-NAME” is the actual name of the particular device you want to connect to. Furthermore, you can also use the IP address of the remote device here. Click Next to continue.
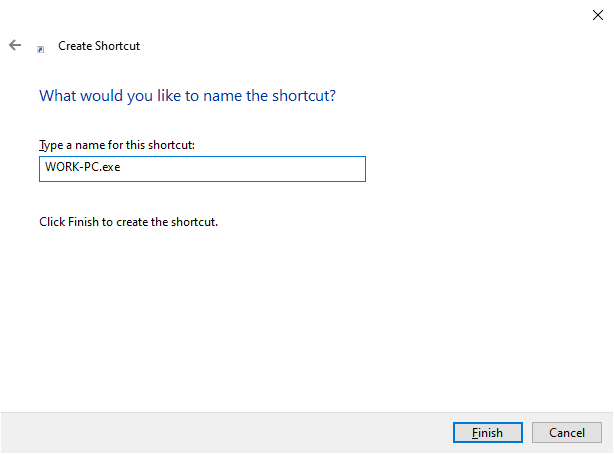
- Step 3.Name your shortcut appropriately so that you instantly recognize to which device you are connecting. Click Finish to create the shortcut on your desktop. The next time you want to connect to that specific PC, just double-click on it and wait for the connection to be established.

Part 3. A More Convenient Remote Desktop Solution
As you can see, it is fairly easy to create a remote desktop shortcut. However, Remote Desktop Connection might limit you with its functionalities. If you are looking for a more advanced tool, then AirDroid Remote Support is an outstanding option.
AirDroid Remote Support provides a comprehensive remote access and management solution that makes the process quick, reliable, and effortless. And what's best is that it has incorporated various advanced features that enhance your remote experience and your overall productivity.
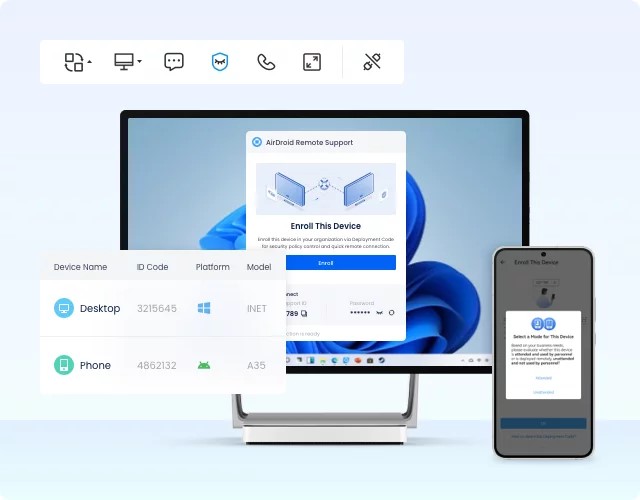
Some of the key features of AirDroid Remote Support include:
- Real-Time Screen Sharing: Share your screen or view the remote screen in real-time, making it easy to provide or receive support.
- Attended and Unattended Access: Set up your devices for attended and unattended access, giving you the flexibility you require.
- Voice and Text Chat: Communicate directly within the app via voice or text chat.
- Black Screen Mode: When using unattended mode, take advantage of the patented black screen mode to enhance your privacy.
- File Sharing, Clipboard, and Keyboard Control: Quickly share files between your device, as well as manage the clipboard and keyboard of the remote device.
To better understand how easy it is to use AirDroid Remote Support, here is a detailed step-by-step guide:
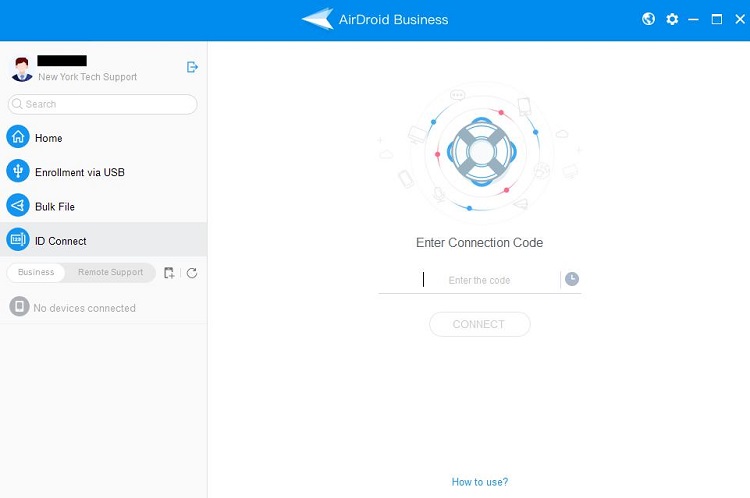
- Step 1.Install AirDroid Business on the local computer. Install AirDroid Remote Support on the remote computer.
- Step 2.Note down the 9-digit code on remote computer. Then launch AirDroid Business on the local PC, go to ID Connect tab. Enter the connection code and click Connect.
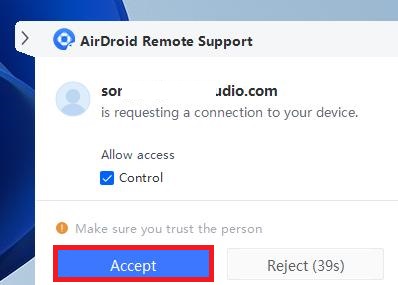
- Step 3.On the remote PC, click Accept to establish the remote session.
Conclusion
With these methods, you can go on to create a remote desktop shortcut to make your daily work quicker. However, if you want something more from your remote support tool, install AirDroid Remote Support. This versatile solution is ideal for any type of work you need to accomplish remotely. Try AirDroid Remote Support for free today to discover its advanced features that streamline your remote connections.




Leave a Reply.