[Step-by-step Guide] How to Change Remote Desktop Port
In recent years, RDP has become an invaluable tool for users who want to connect to their devices from remote locations, especially with the rise of remote and hybrid jobs. However, many malicious users try to take advantage of these connections, thus targeting the default RDP port, which is 3389. For this reason, knowing how to change Remote Desktop port will enhance your security, as you will make it harder for hackers to find and exploit your remote access.
In this article, we will walk you through this process. Apart from learning how to change RDP port, you will also discover the things you need to consider before doing that.
Part 1. What Is the Remote Desktop Port
If you're not familiar with the term, it is crucial that you first learn what it is. In reality, the Remote Desktop Port is the network port that the RDP service uses to listen for and accept connections. To make things clearer, when you are trying to connect to a remote computer via RDP, your request will be sent to this port. This is what allows the RDP to handle and complete the connection. By default, RDP uses port 3389.
Changing the default port is an essential process if you are concerned about your safety. If you learn how to change the RDP port, you can improve security by obscuring the service from potential cyber-attackers. It has been noticed that many automated attacks specifically target port 3389.
Part 2. How to Change Remote Desktop Port
In this section, we will show you how to change Remote Desktop port in a detailed guide. Follow these steps to complete the task successfully and enhance your security. But before we get into how to change RDP port, here are the requirements:
- You need to have administrative access to the computer,
- You will need to use Windows Registry Editor,
- You can follow this guide for your Windows Server 2022, Windows 11, Windows 10, Windows Server 2019, and Windows Server 2016.
Now that we have covered the basic requirements, here are the steps to change the RDP port.
Step 1 – Backup the Registry
Before making any changes to the Windows Registry, we recommend that you back it up to prevent data loss if something goes wrong. To do that:
- 1.Press Win + R, type regedit, and click OK to open the Registry Editor.
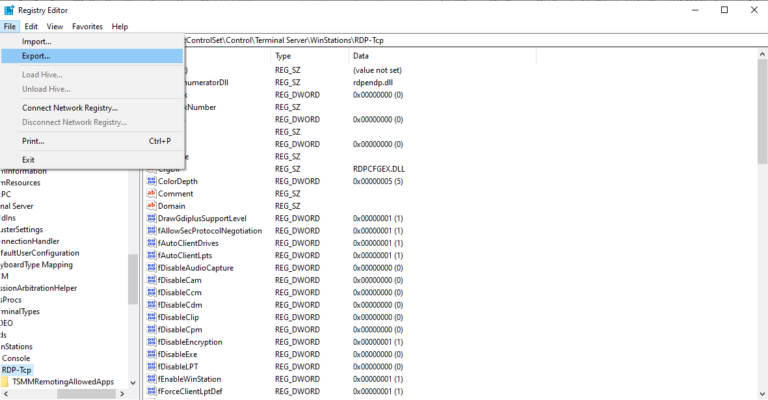
- 2.In the Registry Editor, click on File and select Export.
- 3.Choose a location to save the backup file and click the Save button.

Step 2 – Locate the RDP-Tcp Registry Key
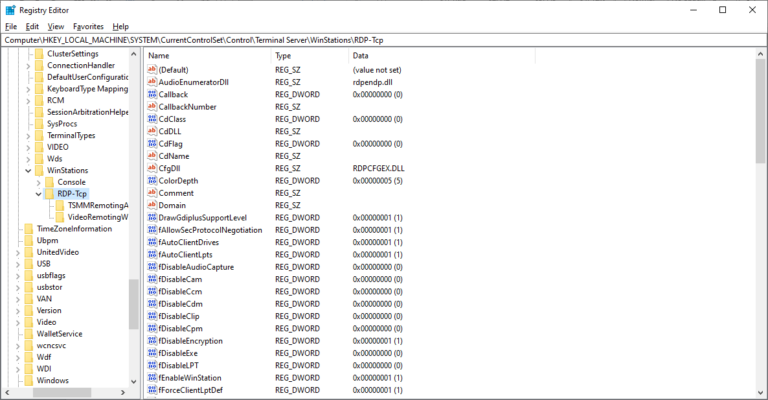
While still in the Registry Editor, go to the following path:
"HKEY_LOCAL_MACHINE\System\CurrentControlSet\Control\Terminal Server\WinStations\RDP-Tcp". This registry key contains various Remote Desktop Protocol settings, including the RDP port.
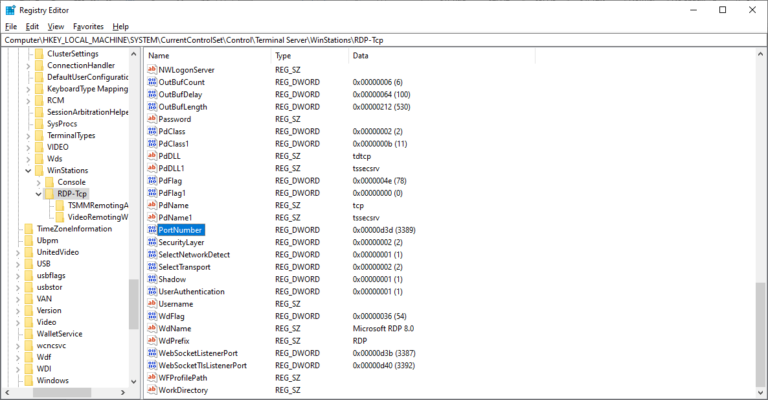
In this step, you will change the RDP port. To do that, follow these steps:
- 1.Scroll down until you find the entry PortNumber and double-click on it to open its properties.
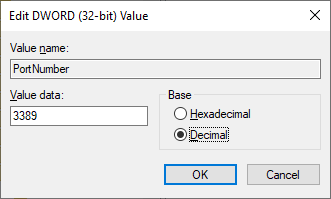
- 2.Select Decimal under the Base section. When you do that, you will see that the Value data becomes automatically 3389. Change the value to your desired port number. Remember that you can select a number between 1025 and 65535, and avoid ports that are known to be used by other services.
- 3.Click OK to save the changes.
Step 4 – Allow the New Port in Windows Firewall
In the previous step, you have discovered how to change the RDP port. However, before you try to establish a remote connection, it would be useful to allow the new port in your firewall.
This way, you will ensure that Windows Defender won't flag the connection. Here is how to do that:
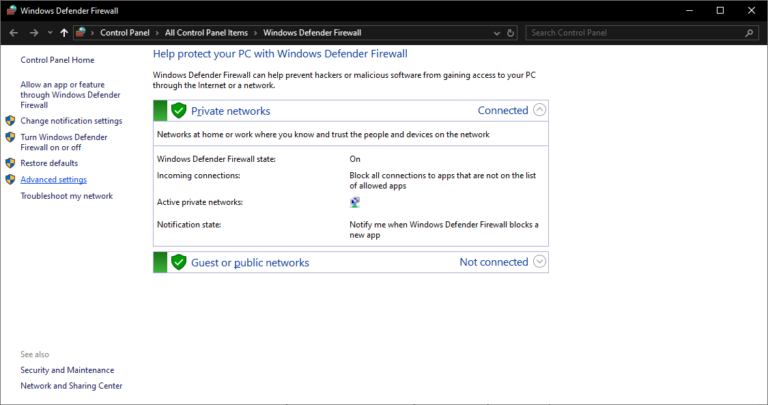
- 1.Open Windows Defender Firewall and click the Advanced settings option on the sidebar.
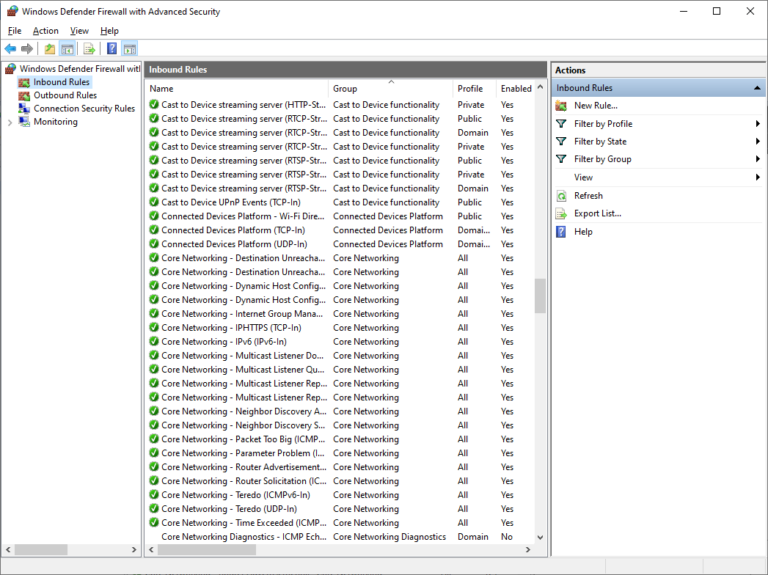
- 2.Click Inbound Rules on the left sidebar, and then, click New Rules on the right sidebar. Select Port and click Next.
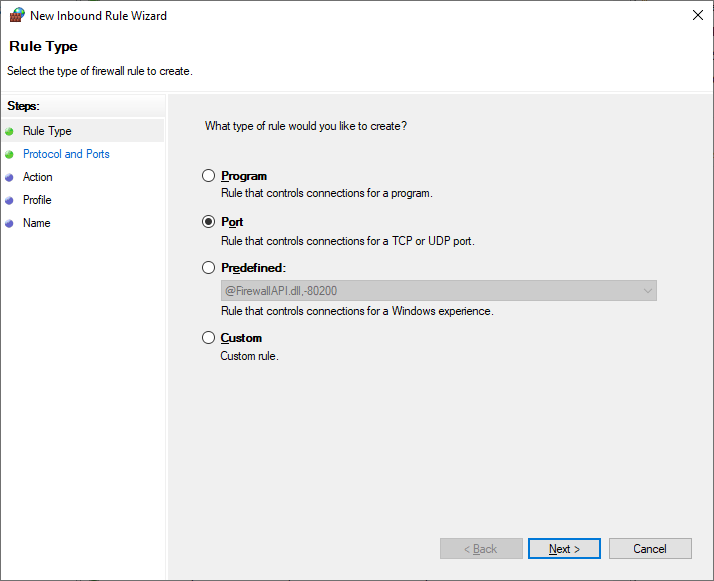
- 3.Select the option Port and click Next to continue.
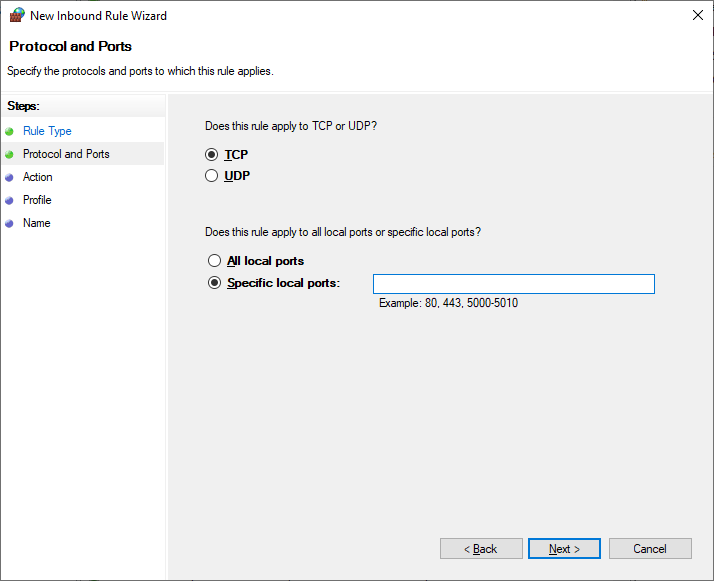
- 4.Select TCP, and then type your new RDP port that you have created in the previous step.
- 5.Select when the rule applies, type its name, and click Finish.
Step 5 – Restart the Remote Desktop Service
For all the changes to take effect, you need to restart RDP. To do that:
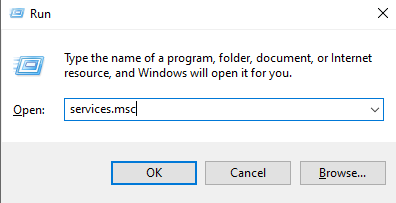
- 1.Press Win + R, type services.msc, and click OK to open the Services console.
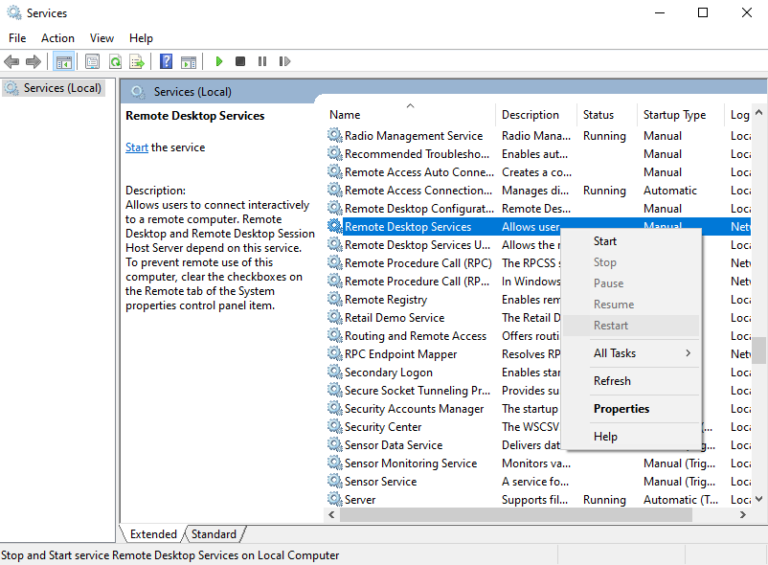
- 2.Scroll down to find Remote Desktop Services, right-click on it, and click the Restart option.
Step 6 – Establish a Remote Connection with the New Port
Now you are ready to connect to this device remotely using your new port. Here is how to do that:
- 1.From another computer, open Remote Desktop Connection.
- 2.Type the IP address, followed by a colon and the new port number.
- 3.Click Connect to establish the remote connection.
Part 3. Things to Note When Changing RDP Port
In the previous part, we have shown you how to change RDP port in a few simple steps. Nevertheless, there are some considerations that you need to keep in mind while doing so. The main things that you need to consider are the following:
- Firewall and Router Configuration – it is important that your firewall and router settings allow traffic on the new port. In the guide, we have included a step on how to create rules to permit the connection. Therefore, ensure that you follow its steps carefully.
- Security Considerations – while changing the RDP port is an effective practice against some cyber-attacks, it’s not a substitute for robust security practices. Use it alongside your other strategies for better and more enhanced security.
- Network Compatibility – it is essential that your new RDP port doesn’t conflict with other services on your network. For this reason, you need to avoid using common ports that are used by other services.
- Documentation – when you make such a significant change as this, it is crucial to document the port change and communicate it to all users in your network. This will ensure a smooth collaboration with your team members.
The Bottom Line
WKnowing how to change Remote Desktop port is essential for making your remote connections as secure as possible. This simple, yet effective, practice adds an additional layer of protection to your system. However, if you are looking for an alternative to RDP that prioritizes your safety, consider AirDroid Remote Support This tool provides a secure and user-friendly way to access and support remote devices, making it an excellent choice for both personal and professional use.


Leave a Reply.