[4 Easy Ways] How to Install Software Remotely
In an era when remote working has become the norm, the need to install software remotely is also emerging. In the corporate world, employees may want the software installed remotely instead of taking their laptops to the IT personnel. Similarly, individuals may want to install software on their home computer remotely.
It is easier than ever to install software remotely. There are now multiple built-in ways to perform remote software installation. In this guide, we discuss four easy ways to install software remotely. So, let's get right to it!
Way 1. Use Group Policy
Group Policy is a Windows tool that allows administrators to manage OS, software, and user settings in the Active Directory environment. It is useful for installing software remotely.
There are two ways of distributing software using Group Policy, as follows:
Assigning Software
You can designate the program distribution to computers or users. In case you assign to the computers, the software is installed when the computer turns on and is accessible to all users using that computer. Alternatively, if you assign to the users, the software is installed when the user logs on to the computer.
Publishing Software
You can publish the program distribution to users. The published software will display in the dialog box of Add or Remove Programs when the user logs on to the computer. From there, it can be installed.
Here are the detailed steps on how to install software remotely on another computer via Group Policy:
Step 1. Create a Distribution Point
The first step is to create a distribution point to assign/publish the software. To do so:
- 1.Log on as an administrator to the server.
- 2.Set up a shared folder on the network where you will place the Windows Installer package (.msi file). This shared location will serve as the distribution point for the software.
- 3.Set up the permissions on the shared folder to let all target computers and users access the installation package.
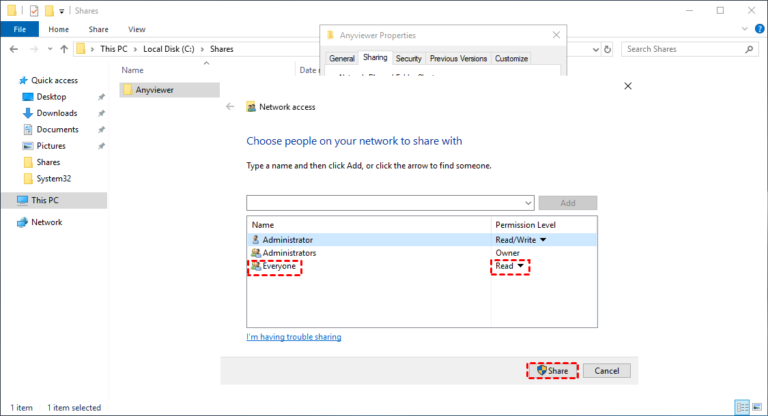
- 4.Install or copy the Windows Installer package (.msi file) to the shared folder.
- 5.Transfer the Windows Installer package (.msi file) to the shared folder. You can use the administrative installation option ("setup.exe /a") to extract and copy the necessary files to the distribution point.
Step 2. Create a Group Policy Object
Next, you have to create a Group Policy Object (GPO) to distribute the software. To do so:
- 1.Open Active Directory Users and Computers by navigating to Start > Administrative Tools > Active Directory Users and Computers.
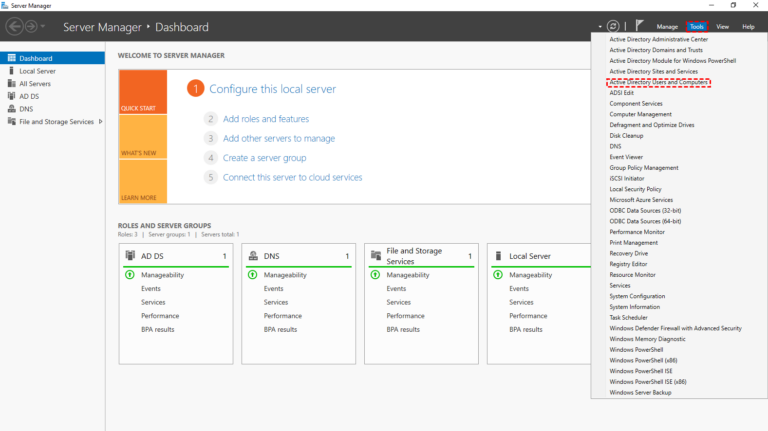
- 2.Access domain properties from the console tree by right-clicking your domain and selecting Properties.
- 3.Under the Group Policy tab, click New.
- 4.Enter a name for the new policy and press Enter.
- 5.Select the newly created GPO, click Properties, and go to the Security tab.
- 6.Uncheck the Apply Group Policy box for any security groups that should not be affected by this policy.
- 7.Tick the Apply Group Policy check box for the groups that should receive the policy.
- 8.Click OK.
Step 3. Assign a Package
Now, you have to assign a package to users or computers by following the below steps:
- 1.Open Active Directory Users and Computers by navigating to Start > Administrative Tools > Active Directory Users and Computers.
- 2.Access domain properties from the console tree by right-clicking your domain and selecting Properties.
- 3.Under the Group Policy tab, click Edit next to the policy you want.
- 4.Look for Computer Configuration and open out Software Settings.
- 5.Right-click Software installation and tap New > Package.
- 6. Type the complete Universal Naming Convention (UNC) location of the shared installer package (e.g., \\<file server>\<share>\<file name>.msi) in the Open dialog box and click Open.
- 7.Select Assigned and tap OK. The package will now appear on the right side of the Group Policy interface.
- 8.Close the Group Policy window and the Active Directory Users and Computers window.
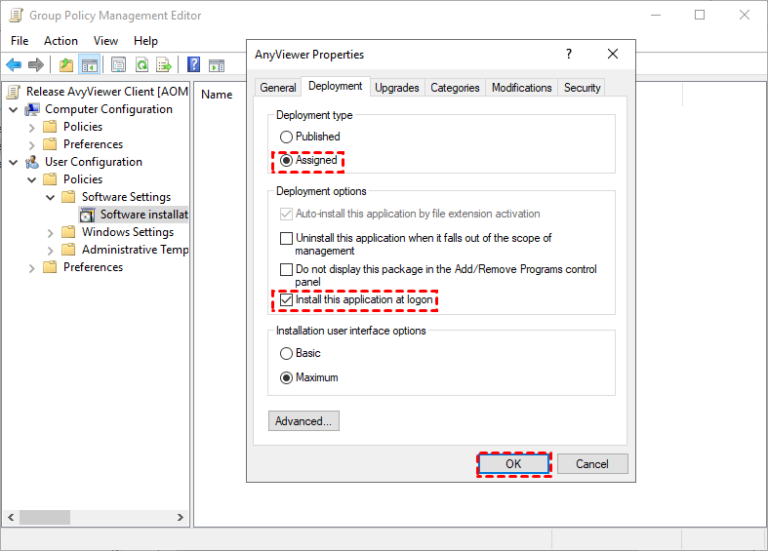
Once completed, the software package will install automatically when the client computer starts. This allows you to install software remotely using Group Policy.
Way 2. Use Command Line
Windows Management Instrumentation Command-Line (WMIC) utility offers a command-line interface to work with WMI. WMI assists administrators in managing various Windows operating environments. This implies that you can also use WMIC to install software remotely, as follows:
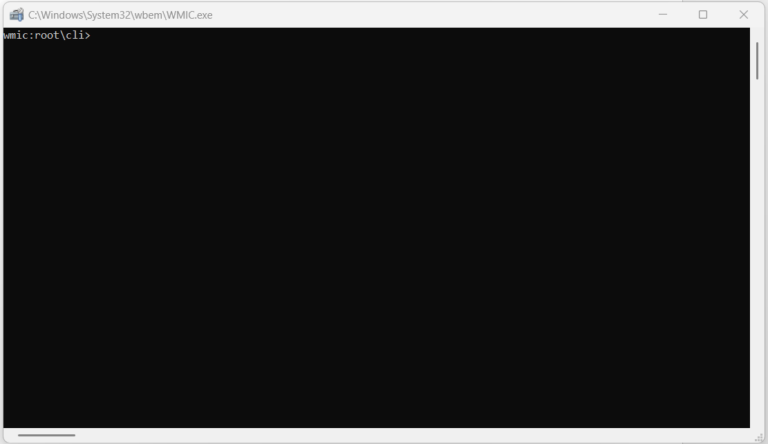
- Step 1.Load the WMIC Command Shell
- Press Windows + R and type WMIC. It will launch the command line interface.
- Step 2.Call the Installation (for One PC)
- Let's assume you want to install the MSI that requires no options. So, the installation call (command) to enter is: > /node:exampleremotemachine product call install true,“” , “c:\PathToYour\File.msi” Afterward, you will see the below approval prompt: Execute (Win32_Product)⇨Install() (Y/N)? So, you have to reply with Y. If the installation is successful, you will get the below reply: Method execution successful Out Parameters: instance of __PARAMETERS { ReturnValue = 0; };
- Step 3.Call the Installation (for Multiple PCs)
- To install software on multiple machines using WMIC, you can process a flat text file as input to the nodes in order to complete the installation on the target machines. Let's assume the text file is stored in C:\computers.txt on the local administrator's hard drive. Type the below command to perform the installation: > /node::@“c:\computers.txt” product call install true,“” , “c:\PathToYour\File.msi This command will go over through the list of machines specified in computers.txt. It will attempt to install the software on each machine, skipping any invalid nodes (like machines that are turned off). The command will prompt for confirmation before installing on each machine.
This way, you can install software remotely on a single or multiple computers using WMIC.
Way 3. Via PowerShell
PowerShell is another built-in program for administrators to deploy programs, automate tasks, and manage configurations. It serves as another effective way to install software remotely.
Follow the below steps to use PowerShell for remote-based software installation:
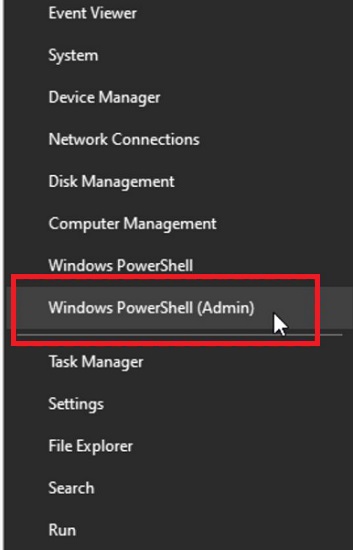
- Step 1.Right-click Start and select Windows PowerShell (Admin).
- Step 2.Enable PowerShell remoting on the remote computer using the below command: Enable-PSRemoting - Force
- Step 3.Next, you can use the Invoke-Command to execute the installation command on the remote computer. Before that, make sure that the software installation file is present in the remote computer or accessible through the shared network folder. Afterward, execute the below command: Invoke-Command -ComputerName server01 -ScriptBlock { c:\software\installer.exe /silent}
Way 4. AirDroid Remote Support
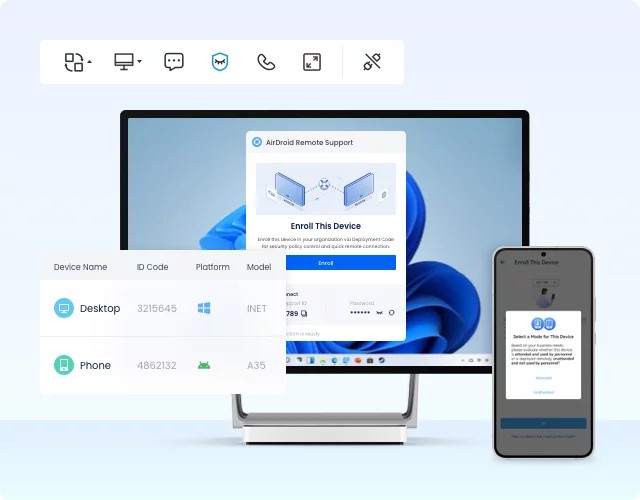
All the above three methods can help install software remotely. However, none of them provide an easy-to-use, click-based interface. That's where AirDroid Remote Support makes an exception by offering the easiest way to install software remotely.
AirDroid Remote Support is remote control software that allows users to control another desktop or mobile device as if they were sitting in front of it. Simply put, this tool allows you to control a remote computer from your desktop and easily install and access software.
- Click-based interface to access and control remote computers.
- Easily transfer software files to the remote computer and then install them as if you were sitting in front of the PC.
- Complete visibility of all computers from a central dashboard, which is best for handling software installation on multiple computers.
- Voice chat with the remote computer.
- Controllable clipboard and keyboard.
- Patented black screen mode on the hose device to secure confidential contents.
In short, AirDroid Remote Support is a perfect remote access tool for businesses who want to remotely install software on employees' and customers' computers effortlessly.
Feel impressed? Here's how to install software remotely with AirDroid Remote Support:
- Step 1.Install AirDroid Business and AirDroid Remote Support software on the host and remote computers, respectively.
- Step 2.Open AirDroid Remote Support and enroll the device in your organization by following the on-screen instructions.
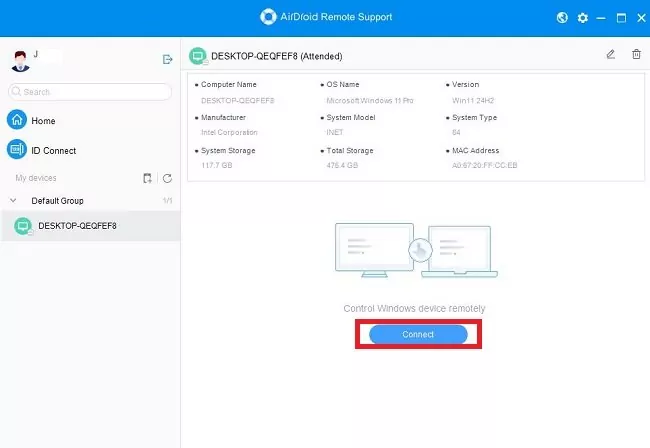
- Step 3.Open AirDroid Business, select the remote device from the left sidebar, and click Connect.
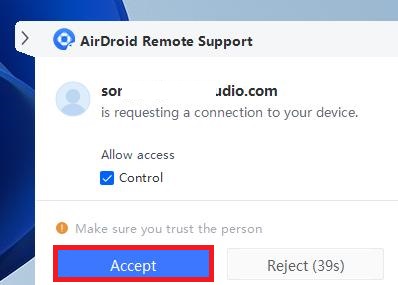
- Step 4.Confirm the remote connection access request from the remote computer.
- Step 5.Once the remote connection is made, you can now remotely control the other computer and install software.
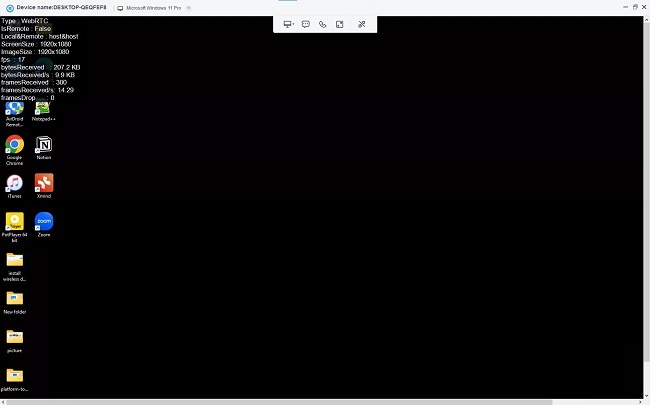
That's it! This way, you can install software remotely with AirDroid Remote Support without any hassle.
Conclusion
Installing software remotely is in demand for both corporate and individual users. Above, we have discussed multiple ways to install software remotely. You can use any of the above tools and remotely install software on a single or multiple computers. However, we have seen AirDroid Remote Support as the most powerful and easiest way among all others. Therefore, why struggle with complicated configurations? Simply try AirDroid Remote Support and install software remotely effortlessly.


Leave a Reply.