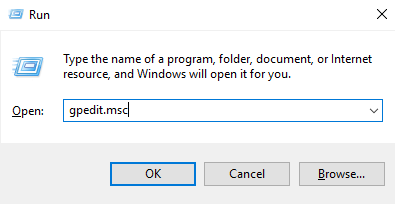
- Click Win + R to launch Run. Input gpedit.msc and click OK.
- Navigate to Computer Configuration > Administrative Templates > Windows Components > Remote Desktop Services > Remote Desktop Session Host > Connections.
- Double tap the Restrict Remote Desktop Services user to a single Remote Desktop Services session option.
- Select the Enable box and click OK.
[2024 Guide] How to Enable Multiple Remote Desktop Sessions on Windows 10
Many personal and professional scenarios urge the need to enable multiple RDP sessions on Windows 10. For instance, an IT support agent may want to troubleshoot or update multiple systems at once. Similarly, a graphic designer may want to run resource-hungry software separately on multiple desktops but access them from a single computer. So, how to enable multiple RDP Windows 10 sessions?
This is what this guide is all about. In this guide, we will first explore the possibility of running multiple RDP sessions in Windows 10 and then present the simple steps to follow. So, let's get started!
Part 1. Can Windows 10 have Multiple RDP Sessions?
Windows 10 natively does not support multiple RDP sessions. It is designed to only allow one remote user session at a time. However, there are other ways to enable multiple RDP Windows 10 sessions, i.e., you can either change a few configurations in the "Group Policy" or use a third-party tool.
On the other hand, Windows 10 Enterprise and Azure Virtual Desktop support multiple concurrent RDP sessions. However, you must install Windows Server Remote Desktop Services (RDS) to have multiple RDP sessions.
Simply put, it is possible to have multiple RDP sessions on Windows 10 if you play your cards right. The next part (Part 2) discusses how to enable multiple RDP sessions on Windows Server, while Part 3 covers how to enable multiple RDP sessions on Windows 10 using a third-party tool.
Part 2. Enable Multiple RDP Sessions on Windows Server
You can enable multiple RDP sessions through Remote Desktop Services (RDP). This is typically used for servers (Windows Server editions). For non-server editions of Windows, please refer to the next part (Part 3).
Follow the below steps to enable multiple RDP Sessions on Windows Server:
- Step 1.Log into the server where the Remote Desktop Services (RDP) is installed.
- Step 2.Press Win + R to launch Run. Input gpedit.msc and click OK.
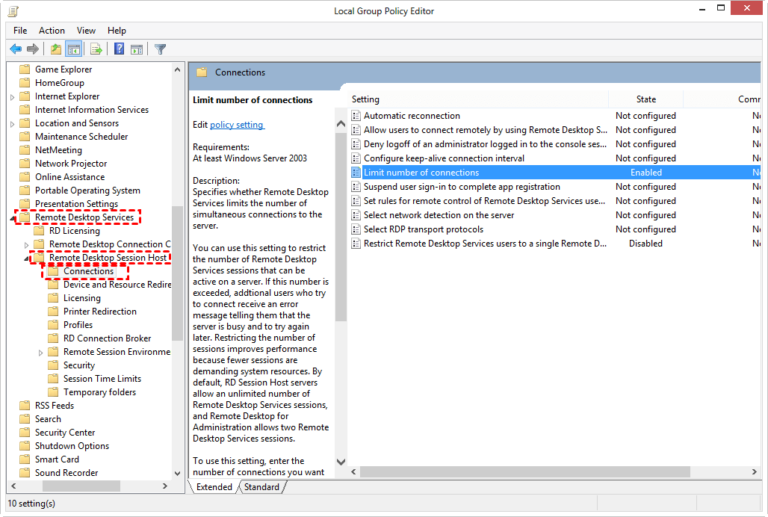
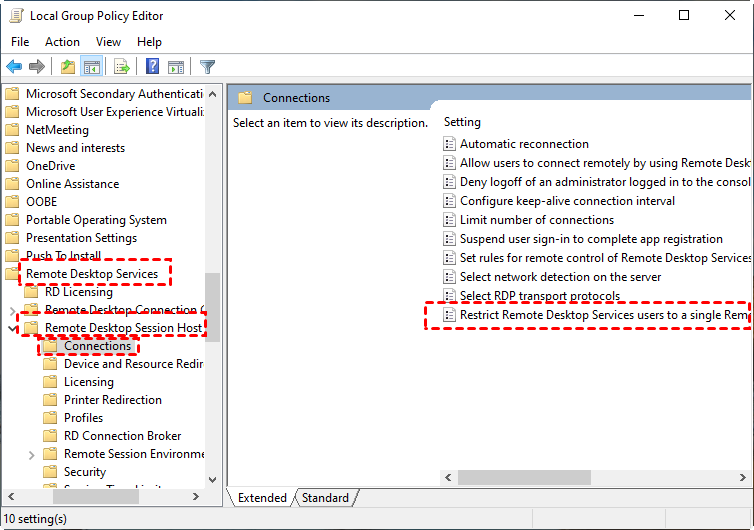
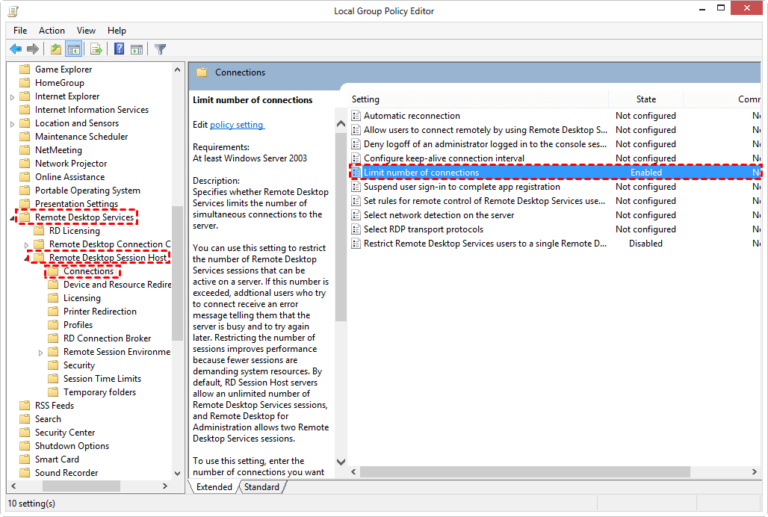
- Step 3.Navigate to Computer Configuration > Administrative Templates > Windows Components > Remote Desktop Services > Remote Desktop Session Host > Connections.
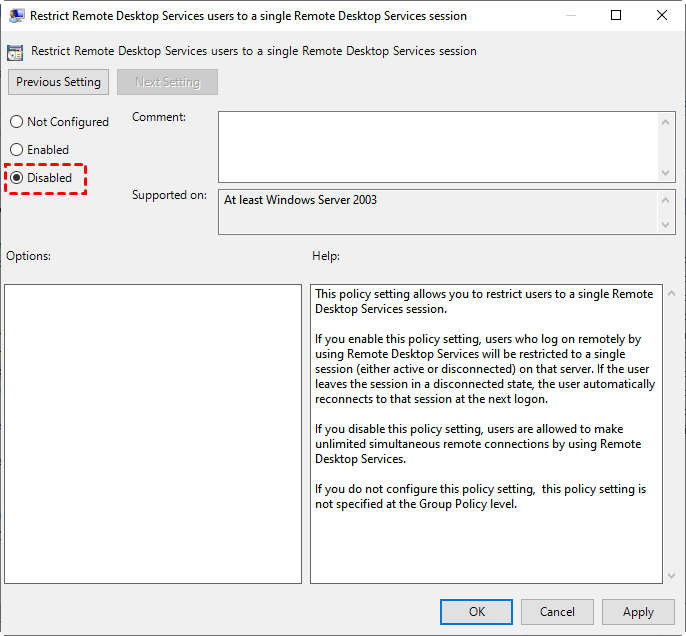
- Step 4.Double tap the Restrict Remote Desktop Services user to a single Remote Desktop Services session option.
- Step 5.Select the Disable box and click OK.
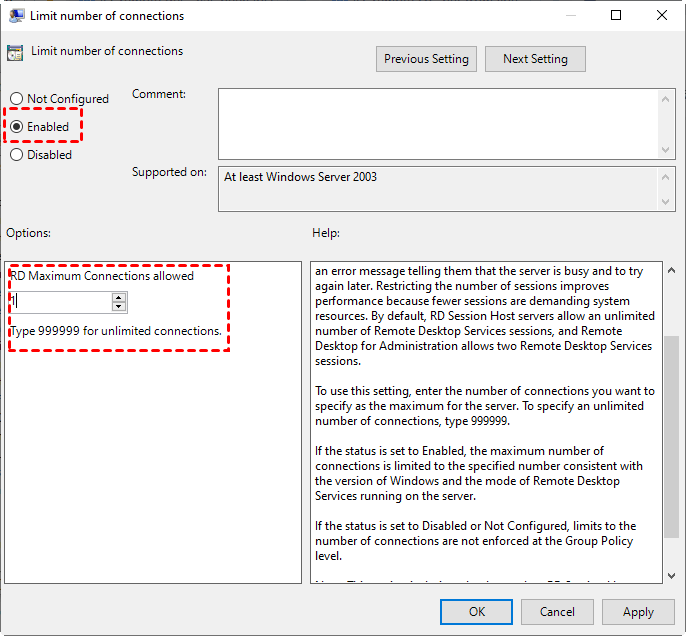
- Step 6.Double-tap the Limit number of connections option.
- Step 7.Under RD Maximum Connections allowed change the value to 999999. Once done, click Apply > OK.
- Step 8.Lastly, use the Microsoft Remote Desktop to connect to multiple RDP sessions from a single Windows screen.
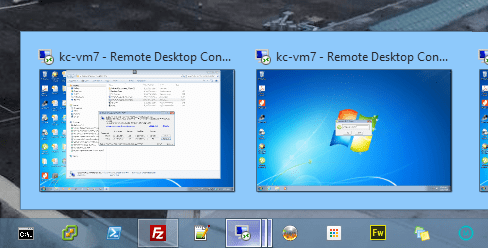
This way, you can enable multiple RDP sessions and handle multiple systems from a single computer.
Part 3. Easiest Solution to Enable Multiple RDP Sessions on Windows 10 with Third-Party Tool
Instead of struggling with tough configurations and system checks, there is a straightforward way to access Windows 10 RDP multiple users session. That's possible with third-party remote desktop software. There are now many remote desktop software you can use to remotely access and control multiple systems from a single computer.
Let's take AnyDesk as an example and discuss the steps to enable multiple RDP Windows 10 sessions with it:
- Step 1.Download and install AnyDesk software on all the computers you want to access, including the host computer.
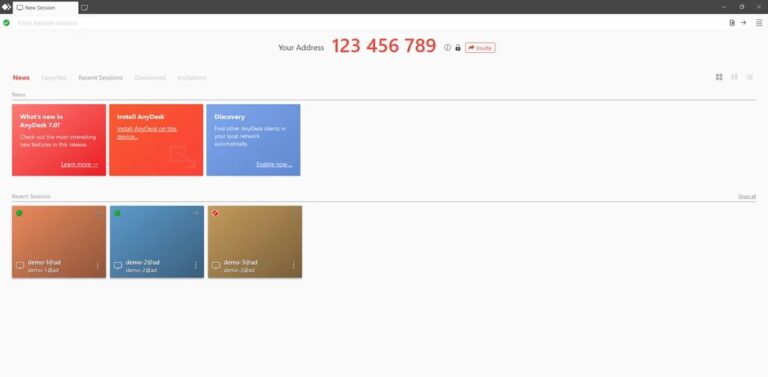
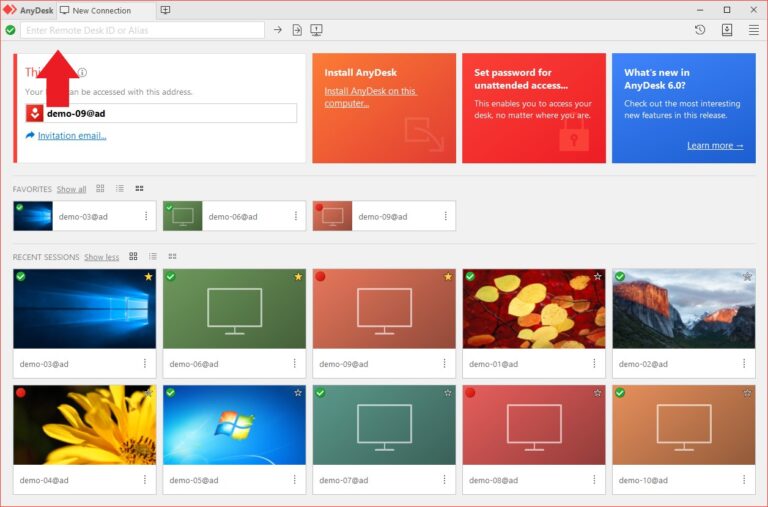
- Step 2.Launch the AnyDesk software on all computers and note down their unique IDs displayed on the home screen.
- Step 3.From the AnyDesk software on the host computer, enter the ID of the first computer in the search bar that you want to remotely access and hit Enter. It will create a remote connection instantly.
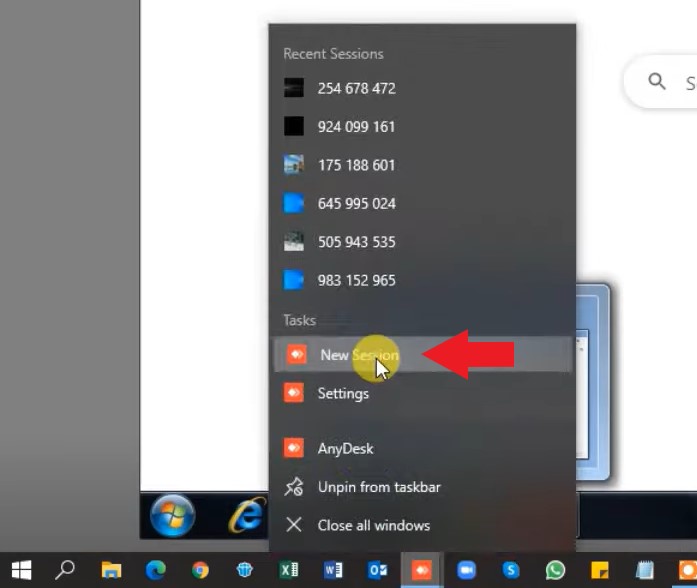
- Step 4.To connect the second computer, right-click the AnyDesk icon from the taskbar and tap New Session. Enter the second computer's ID and create the connection.
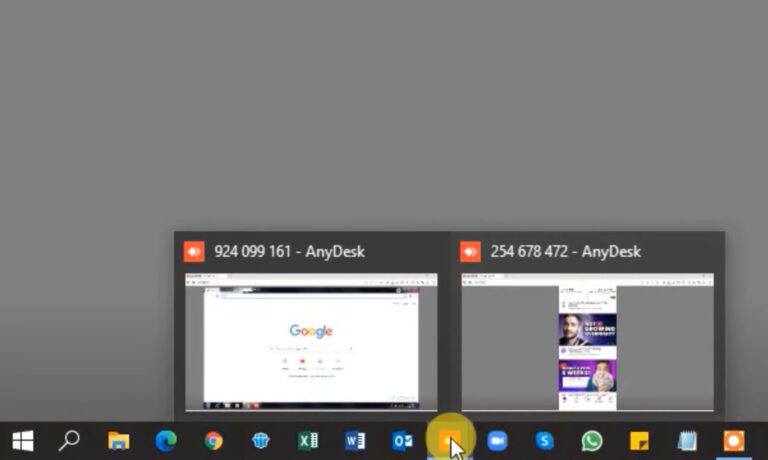
- Step 5.Repeat step 4 until all the computers are connected. Once done, you can access each one with a separate tab on your host computer.
That's it! This way, you can easily have multiple RDP sessions on Windows 10 without any complicated steps.
Conclusion
Remote desktop connections have become a new norm today. In fact, the usability is now shifting from a single RDP session to multiple ones. Above, we have discussed in detail how to enable multiple RDP sessions on Windows 10. So, you can now use the method that aligns with your system specifications. However, if your priority is to use a hassle-free approach, then third-party remote desktop software is the best pick. In short, it's time for action. Pick your approach and access multiple RDP Windows 10 sessions right away.
FAQs about Multiple RDP Sessions on Windows 10
- Click Win + R to launch Run. Input gpedit.msc and click OK.
- Navigate to Computer Configuration > Administrative Templates > Windows Components > Remote Desktop Services > Remote Desktop Session Host > Connections.
- Double tap the Set rules for remote control of Remote Desktop Services user sessions option.
- Select the Enable box and set the rules under the Options section.
- Click Apply > OK and close Group Policy Editor.
- Click Win + R to launch Run. Input gpedit.msc and click OK.
- Navigate to Computer Configuration > Administrative Templates > Windows Components > Remote Desktop Services > Remote Desktop Session Host > Connections.
- Double tap the Restrict Remote Desktop Services user to a single Remote Desktop Services session option.
- Select the Enable box and click OK.


Leave a Reply.