RDP Error: Outdated Entry in the DNS Cache
The "Outdated Entry in the DNS Cache" error is one of the issues you might encounter when attempting to connect to a remote session through Remote Desktop Protocol (RDP). This error can be frustrating, as it interrupts your remote connection and puts an abrupt stop to your work.
In this article, we will cover every aspect of this error, and provide you with methods to troubleshoot it.
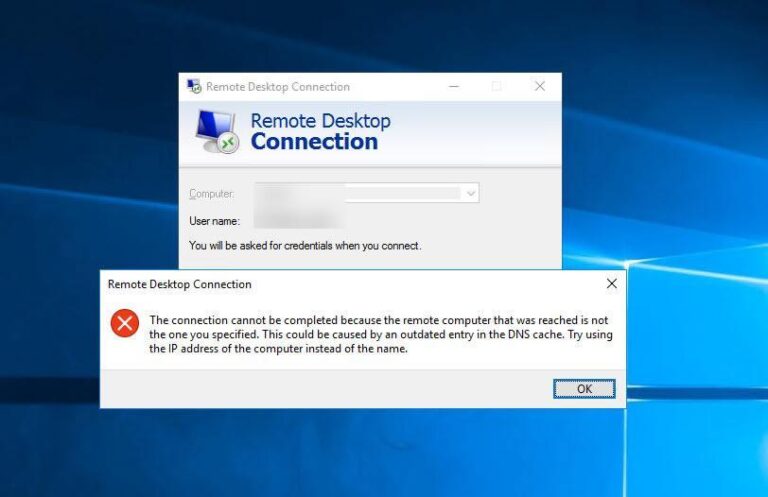
Part 1. What Does the "Outdated Entry in the DNS Cache" Error Mean?
The "Outdated Entry in the DNS Cache" error is an alert that you will typically see when you are trying to connect to a remote computer. DNS cache stores information about websites and remote servers that you have already visited to speed up the connection process. However, when an entry becomes outdated, it can prevent the connection altogether. In reality, this error signifies that a stored DNS entry is no longer valid or updated.
This error often occurs in scenarios such as:
- Attempting to connect to a remote server that has recently changed IP addresses.
- After network configuration changes, such as updates to routers or DNS settings.
- When the DNS cache on your device has not been cleared in a while, thus stores outdated entries.
Part 2. What Causes the "Outdated Entry in the DNS Cache" Error?
Delving a bit deeper into the "Outdated Entry in the DNS Cache" error, we will now uncover the most common causes for its triggering. The truth is that there are several factors that can contribute to its appearance. The most common ones are the following:
- Changes in the IP Address: If the IP address of the target computer changes, which is quite common in dynamic IP networks, an outdated DNS entry in the cache might still refer to the old IP. Therefore, when the system tries to connect to the remote device, it is unable to establish the connection.
- Network Configuration Changes: Any changes in the network configuration can lead to outdated DNS information. These changes include updating the DNS servers and changing the default gateway among others.
- DNS Server Issues: The DNS server used by your computer could be down or experiencing issues.
- ISP Cache and DNS Delays: Sometimes, your Internet Service Provider caches DNS entries on their servers. If this cache is outdated, or if it hasn’t yet updated with the recent IP changes, this could lead to that particular error.
- Device-Specific DNS Issues: In many cases, the issue arises from specific DNS settings on your device. For example, they might have been configured manually or haven’t been refreshed in quite some time.
Part 3. How to Fix the "Outdated Entry in the DNS Cache" Error?
Now that you understand the reasons why this error might occur, you can try to fix it. In this section, we have gathered some effective methods to troubleshoot the outdated DNS cache error.
1Clear DNS Cache
The first and most common solution to this error is to clear your DNS cache. Here's how to do that:
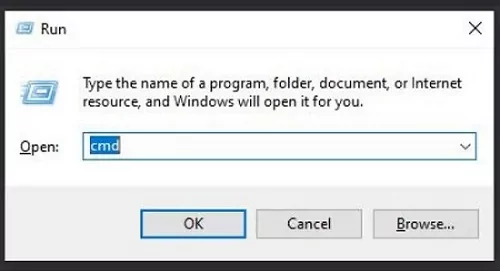
- Step 1.Tap Win + R and type cmd to launch the Command Prompt.
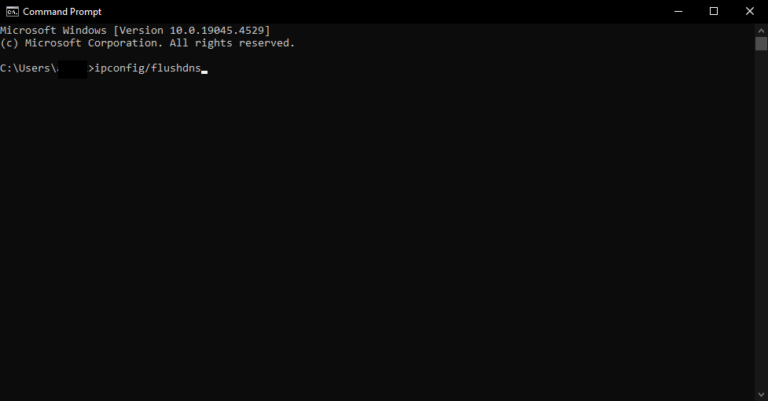
- Step 2.In the Command Prompt, type the command ipconfig /flushdns
- Step 3.Press Enter, and wait until you see a message confirming that the DNS Resolver Cache has been successfully flushed.
2Change DNS Server Settings
Another method that you can try to resolve this issue is to switch to a public DNS server, such as Google or Cloudflare. This solution is ideal if you are encountering this issue due to an ISP's DNS delay. Here are the steps you need to take to complete it:
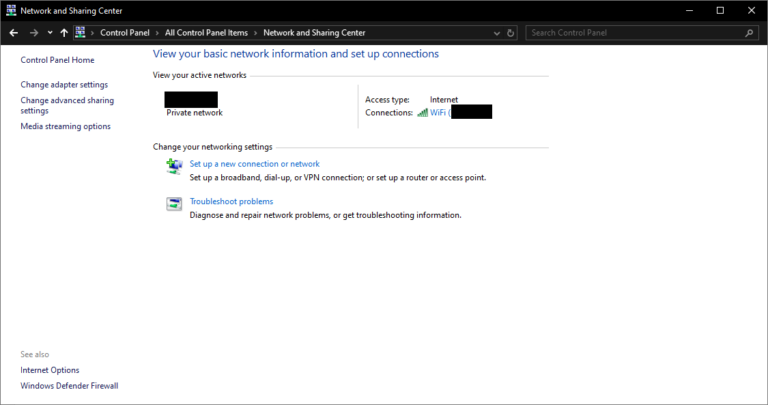
- Step 1.Go to Control Panel > Network and Internet > Network and Sharing Center.
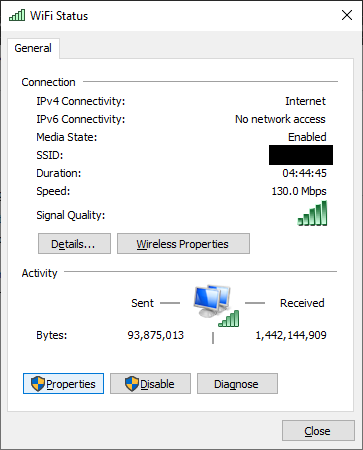
- Step 2.Click on your current connection and then, click Properties on the popup window.
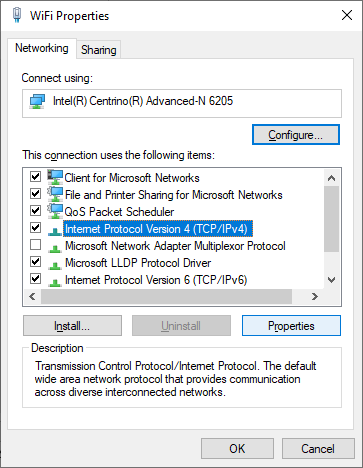
- Step 3.Locate Internet Protocol Version 4 (TCP/IPv4) on the list, click on it, and select Properties.
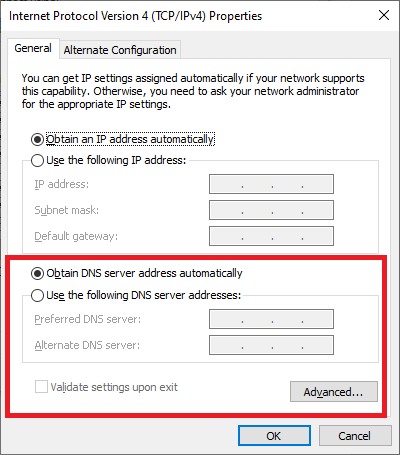
- Step 4.Check the box Use the following DNS server addresses and enter the following:
For Google DNS: 8.8.8.8 and 8.8.4.4
For Cloudflare DNS: 1.1.1.1 and 1.0.0.1 - Step 5.Click OK to save the new settings.
3Release and Renew IP in Command Prompt
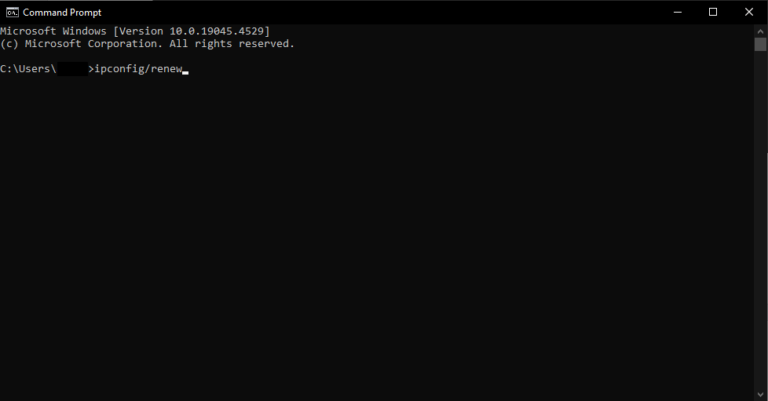
Another method that is often very effective is to use the "ipconfig" commands on Command Prompt. These commands will help reset your IP configuration, which in turn, can resolve the DNS issues you are experiencing. Here is what you need to do:
- Step 1.Launch Command Prompt on your computer.
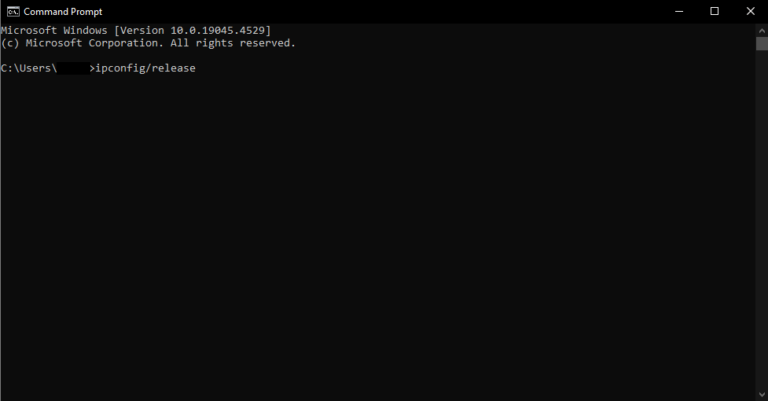
- Step 2.Type the command ipconfig /release and press Enter.
- Step 3.Then, type the command ipconfig /renew and press Enter again.
- Step 4.Finally, type the commands ipconfig /flushdns and ipconfig /registerdns to clear any remaining cache.
4Check the Time Synchronization of Your Devices
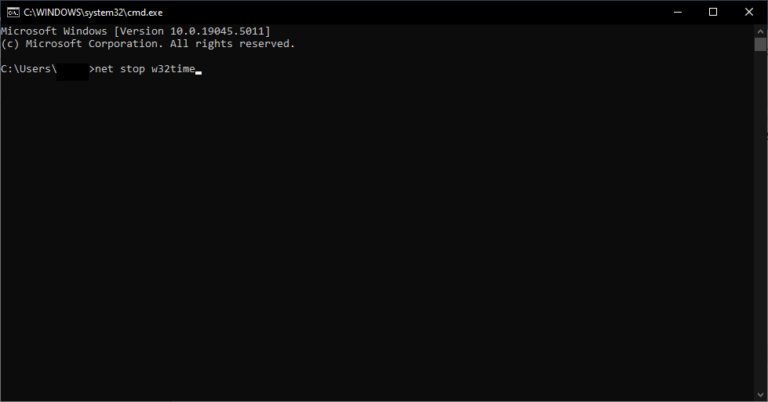
Finally, one method to resolve this error is to address and fix any time synchronization issues that might exist. Here are the steps you must complete:
- Step 1.Launch Command Prompt as an administrator.
- Step 2.Type the commands net stop w32time and net start w32time and press Enter.
Part 4. Secure and Stable Remote Desktop Solution to Try
While fixing the "Outdated Entry in the DNS Cache" will restore your RDP functionality, this doesn't mean that it won't happen again in the future. If you want a more stable and reliable alternative, then we recommend AirDroid Remote Support. This tool offers an effective solution for stable remote access without these common DNS and network-related issues.

The key features that you will enjoy in AirDroid Remote Support include:
- Quick Connection: The tool eliminates the need for extensive network configurations, allowing you to quickly set it up and start using it.
- Screen Sharing and Chat Features: Enhances collaboration by allowing real-time screen sharing and communication.
- Secure Sessions: The platform uses advanced end-to-end encryption to ensure that your remote sessions are secure and protected.
- Cross-Platform Compatibility: Supports various devices and operating systems, making it easy for you to access and manage all of your devices.
Steps to Use AirDroid Remote Support
- Step 1.Find the AirDroid installers on the AirDroid Remote Support official website.
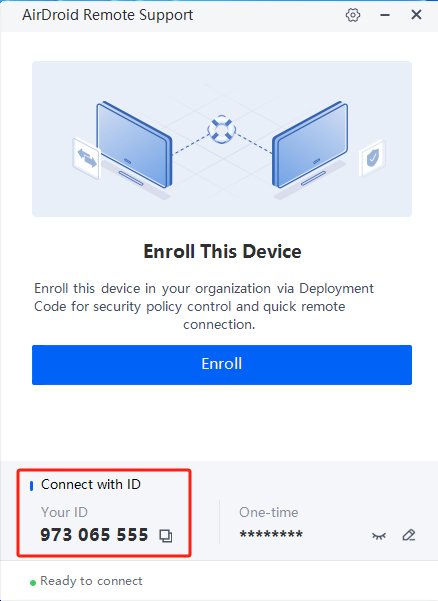
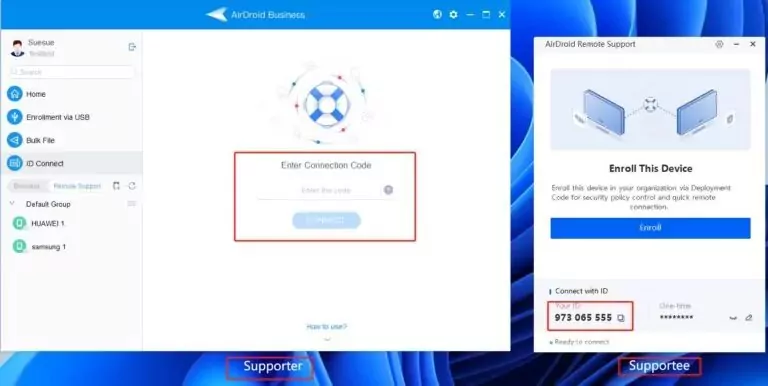
- Step 2.Go to the remote device and launch the AirDroid Remote Support client. Find and note the 9-digit ID code in the Connect with ID section.
- Step 3.Launch AirDroid Business on your local computer. If you haven’t already, sign in to your AirDroid account. Then, go to the ID Connect section, type the 9-digit ID, and click the Connect button. Wait for AirDroid to establish the connection.
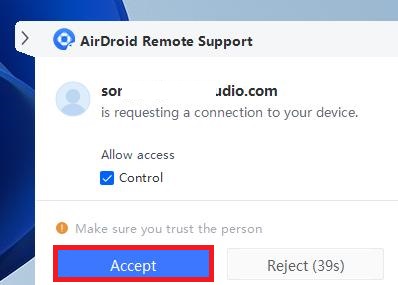
- Step 4.On the remote PC, click Accept on the pop-up window to establish the remote connection.
In Conclusion
Encountering the "Outdated Entry in the DNS Cache" error can interrupt your workday and put a stop to your productivity. However, with the right steps and methods, it’s manageable. If you are looking for another, more stable remote desktop experience, consider getting AirDroid Remote Support. This versatile tool eliminates many DNS and connectivity issues, ensuring a smooth and secure remote experience. Give AirDroid Remote Support a try and enjoy effortless, reliable remote connections!


Leave a Reply.