What is the Quick Assist Shortcut?
The rise of hybrid and remote work in recent years has highlighted the importance of remote assistance for both personal and professional use.
Windows Quick Assist is a particularly useful tool that makes the process fast and easy. You can launch it quickly using the shortcut Ctrl + Windows key + Q.
In this guide, we will explore the Quick Assist shortcut, how to open it step-by-step with different ways, and common issues you might encounter.
Part 1. What is the Quick Assist Shortcut?
Quick Assist is built-in in Windows, which allows you to remotely receive or provide assistance. Since you can easily connect and control another user's computer, it has quickly become a popular tool in IT. Namely, you can use it for troubleshooting, offering guided support, or even training purposes.
Like many tools in the Windows environment, it has a default shortcut of its own. Therefore, you can press the Windows Key + Ctrl + Q to launch the app. However, the Quick Assist shortcut might not satisfy your needs. In the following section, we will show you how to create a custom shortcut according to your requirements.
Part 2. How to Create a Quick Assist Shortcut?
There are multiple methods to create a shortcut got Quick Assist. In this section, you will find step-by-step guides to complete them.
Method 1: Create a Desktop Shortcut for Quick Assist
- Step 1.Right-click on an empty space on your desktop. Go to New and click the Shortcut option.
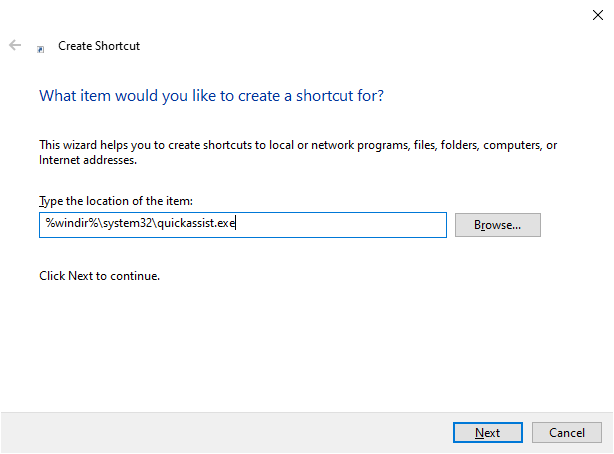
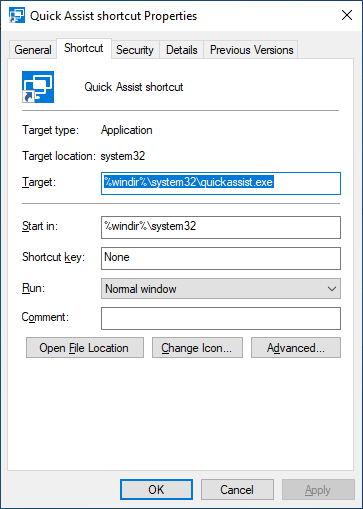
- Step 2.On the popup window, type %windir%\system32\quickassist.exe and click the Next button.
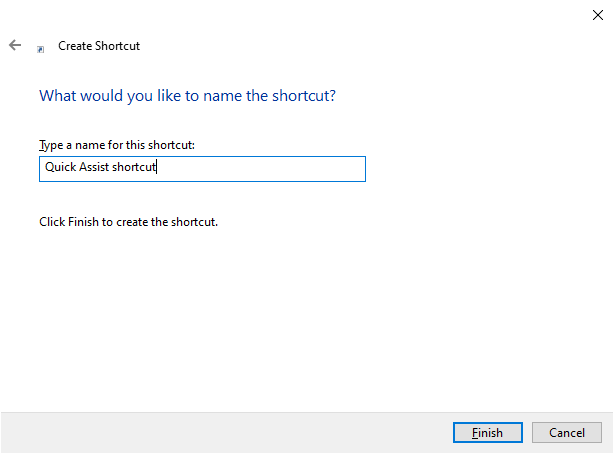
- Step 3.Type an appropriate name on the field and click the Finish button to create the shortcut.
- Step 4.A new icon for Quick Assist will now appear on your desktop.
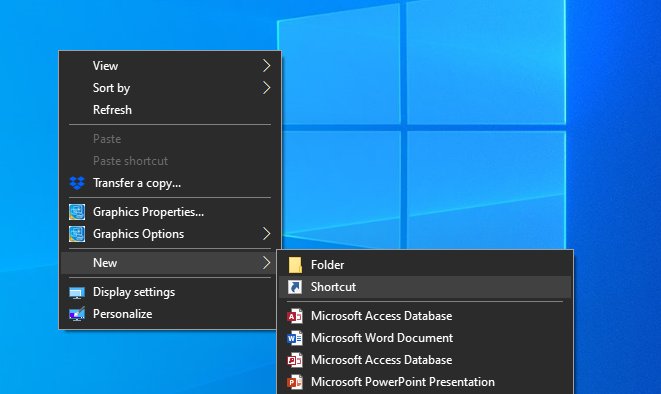
Method 2: Pin Quick Assist to the Taskbar
- Step 1.Type Quick Assist on the search bar.
- Step 2.When it appears, select either the Pin to taskbar or the Pin to Start option, depending on where you want the shortcut to appear.
- Step 3.The Quick Assist icon will get pinned to the selected location.
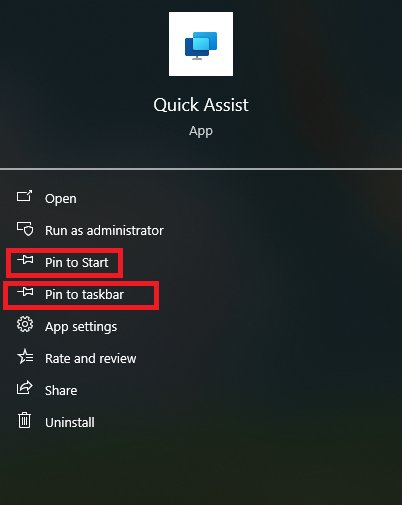
Method 3: Assign a Custom Keyboard Shortcut for Quick Assist
Apart from the default Win + Ctrl + Q shortcut, you can create a custom Quick Assist shortcut that you will remember more easily. To do that, follow these steps:
- Step 1.Follow the steps to create a desktop shortcut from Method 1.
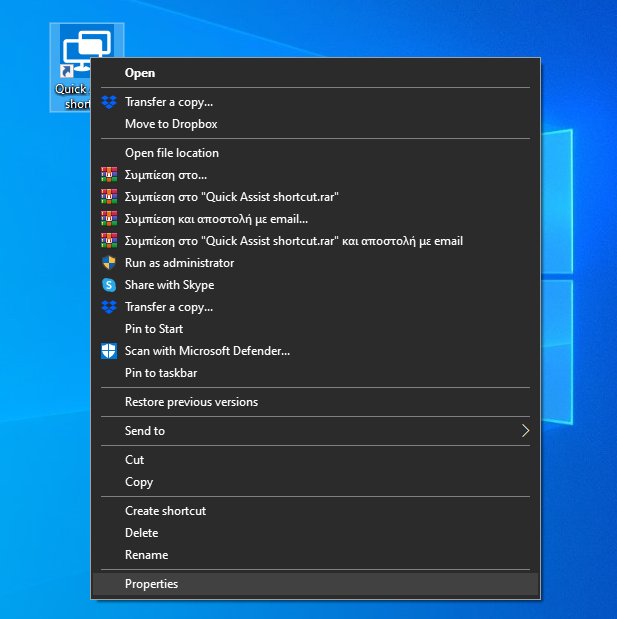
- Step 2.Right-click on the new icon and click Properties.
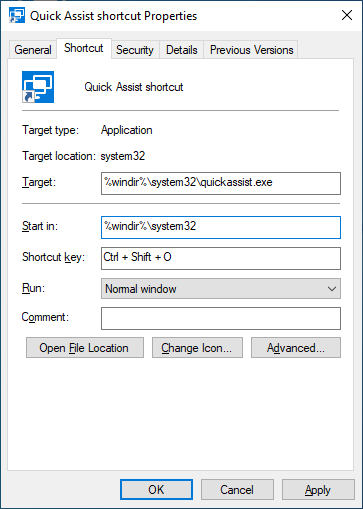
- Step 3.Go to the Shortcut tab and find the field Shortcut Key.
- Step 4.Click into this field and press the key combination you would like to assign. Click OK to save the custom shortcut.
Part 3. Common Issues with Quick Assist Shortcut
While the Quick Assist shortcut is generally reliable, there are times when it might not function properly. Here are some common issues associated with it:
Issue 1: The Shortcut Doesn't Work
If pressing Win Key + Ctrl + Q or your custom shortcut doesn't work, it could be due to:
- Windows Version: The shortcut for Quick Assist works on Windows 10 or 11. Furthermore, check if your Windows version includes Quick Assist or if you have to download it from the Store.
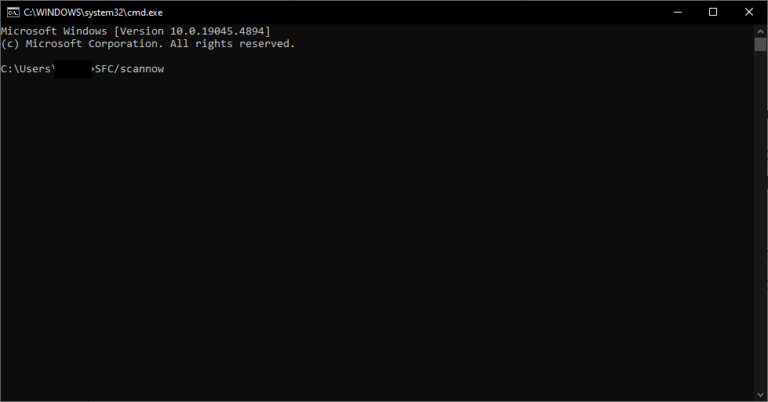
- Corrupt Files: The Quick Assist tool might have become corrupted. In this case, you can repair it by launching Command Prompt and using the command "SFC/scannow".
Issue 2: Quick Assist Won't Launch
If Quick Assist won't open at all, you should ensure that you have installed all available Windows updates. If the issue persists, you can try uninstalling and reinstalling Quick Assist on your device.
Issue 3: Network or Connection Problems
Quick Assist requires a stable network connection to function properly. Therefore, your shortcut might not be working due to network or firewall problems. To solve this issue, make sure that both devices have a stable internet connection and that Quick Assist isn't blocked by their firewalls.
Can You Enable/Disable Quick Assist?
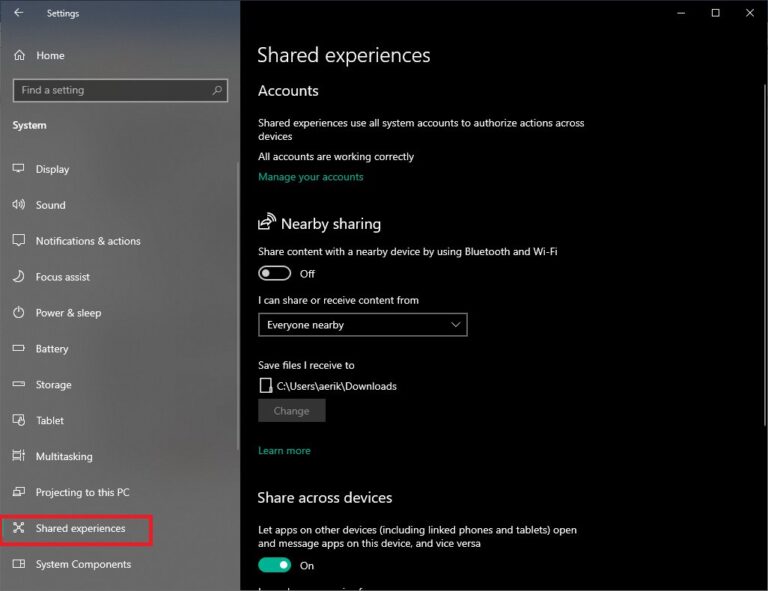
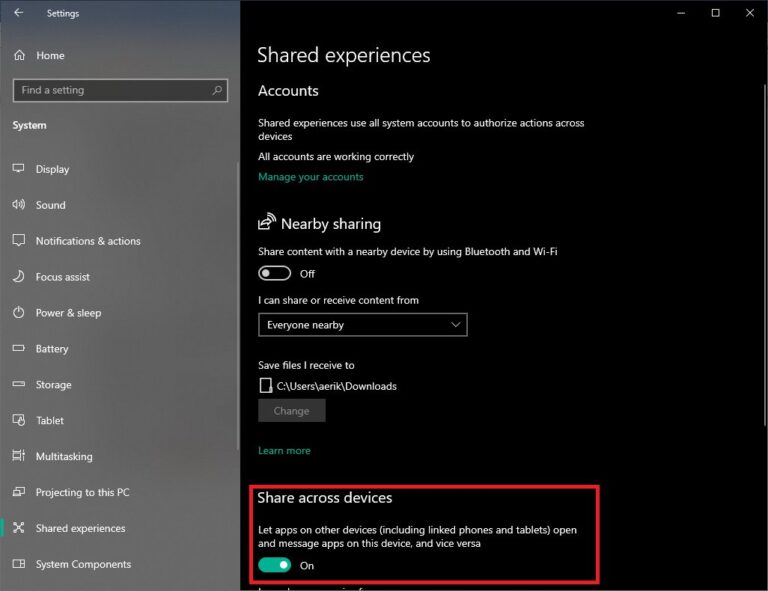
To avoid any such issues, you can always choose to enable/disable Quick Assist on your computer. You can easily achieve that from your System Settings. To do so, follow these steps:
- Step 1.Go to Settings > Shared Experiences.
- Step 2.Location the Share across devices section and toggle the switch to disable it.
Part 4. A Better Remote Support Tool Than Quick Assist
While Quick Assist is a convenient built-in tool in Windows, it has certain limitations that you need to be aware of. For example, it only works on Windows, which limits the devices you can use it on. Moreover, it offers limited features compared to more advanced remote support tools as it has been developed only for remote support. If you looking for more flexibility, cross-platform compatibility, and advanced features, then you should get an alternative tool.
AirDroid Remote Support is a versatile and feature-rich tool that offers you more than just remote support capabilities. Its advanced features are perfect for any professional or individual that wants to easily connect to their devices and complete their work effortlessly. What makes AirDroid Remote Support such a great remote desktop tool is the following:
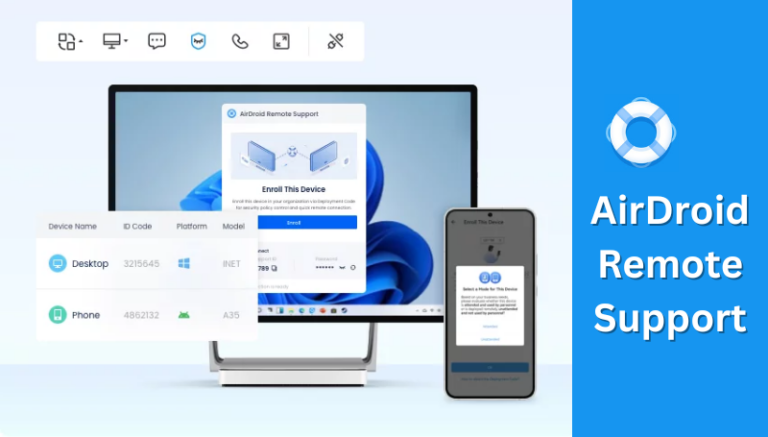
- Screen Sharing and Full Remote Control: AirDroid offers real-time screen sharing options, as well as taking full control of the remote device. This way, you can enhance your productivity.
- Text and Voice Communication: In any remote support session, you need a reliable way to communicate. In AirDroid Remote Support, you can do that through instant messaging or voice during the support session.
- File Transfer: With this tool, you can share files between devices, which makes it perfect for your daily tasks.
- No Installation Required for Client: The installer for AirDroid Remote Support is available for free on the official website. Get it for all of your remote devices and start using it without installation.
Steps to Use AirDroid Remote Support
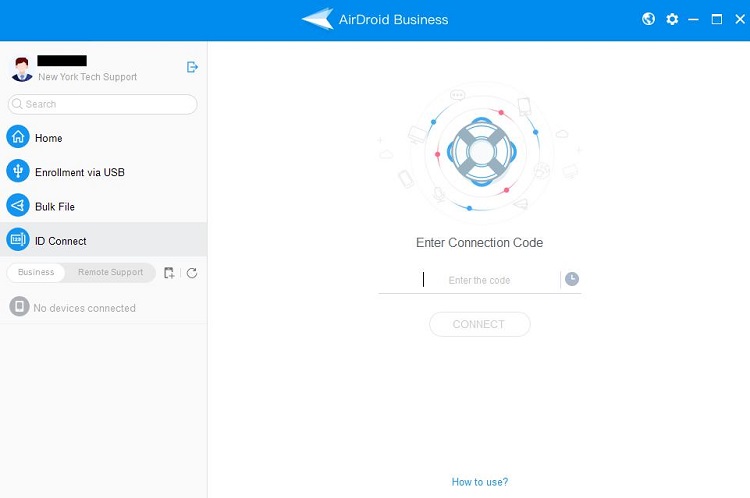
- Step 1.Get the installers for AirDroid Remote Support from the official website. AirDroid Business is the tool for your supporter devices and AirDroid Remote Support is the tool for the supportee.
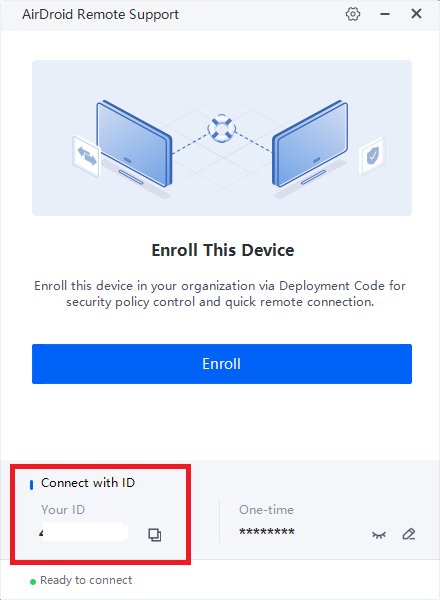
- Step 2.Open AirDroid Remote Support in the remote computer and copy the 9-digit ID. You can find it in the Connect with ID section near the bottom of the window.
- Step 3.Type the 9-digit ID you copied from AirDroid Remote Support and click Connect. Wait for the remote device to accept the connection.
The Bottom Line
The Quick Assist shortcut offers you a quick and easy way to launch the app whenever you need it. However, Quick Assist has certain limitations that might hinder your work. In this case, you can find a reliable alternative with a robust set of features. Try AirDroid Remote Support for free to discover a superior alternative.


Leave a Reply.