[Answered] Can I Enable Remote Desktop for Windows 10 Home
Remote Desktop is a powerful feature in Windows, which allows users to access and control any device they want remotely. However, you might find it difficult to use Remote Desktop for Windows 10 Home as this edition of the operating system has limitations.
In this article, we will explore all of your options so that you know what to do when you want to use Remote Desktop with Windows 10 Home.
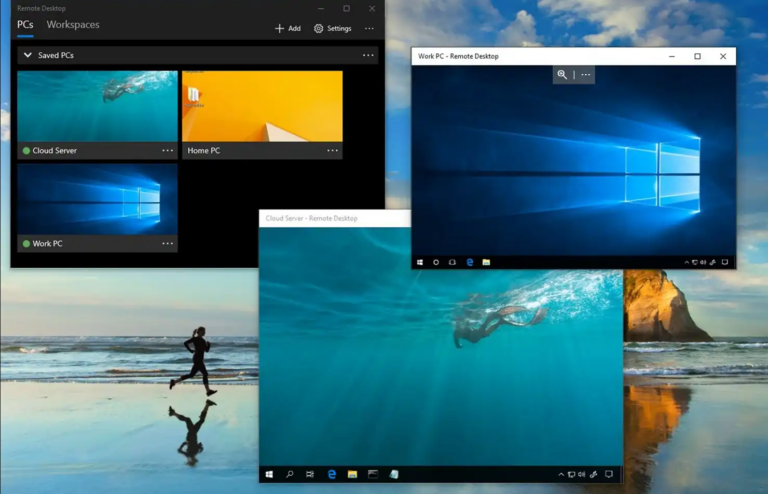
Part 1. What Version of Windows 10 Supports Remote Desktop?
Windows 10 comes in several editions, each targeting different users. For this reason, every edition has distinct capabilities, as well as different features. For example, many users would want to have RDP Windows 10 Home, even though this Windows version limits what they can do with it.
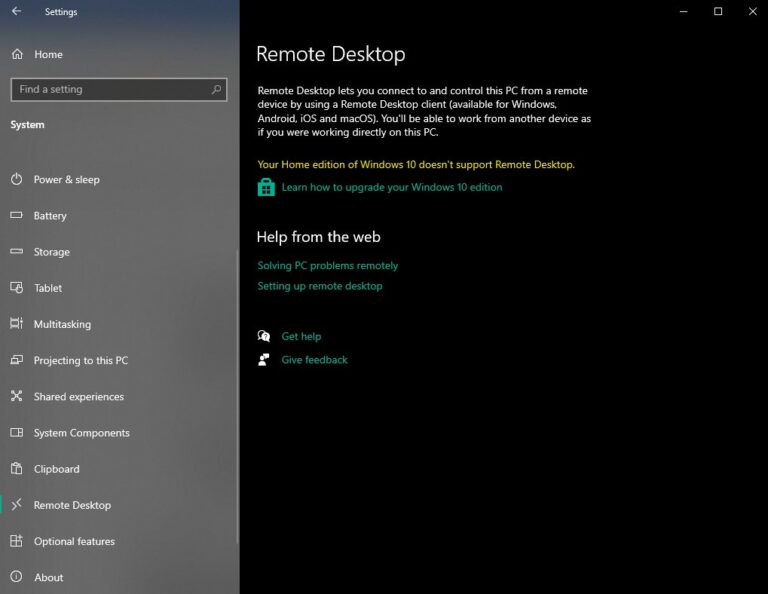
In more detail, your Windows 10 Home computer can function as a Remote Desktop client. This practically means that you can use it to connect to other computers. On the other hand, a Windows 10 Pro or Windows 10 Enterprise computer includes both client and server capabilities. In essence, you can use it to connect to other computers and at the same time allow other devices to connect to it.
Nevertheless, there are still ways to make your Windows 10 Home computer act as a Remote Desktop server. In the following sections, we are going to show you what you need to do to use Remote Desktop for Windows 10 Home.
Part 2. How to Setup Remote Desktop for Windows 10 Home?
Since Remote Desktop with Windows 10 Home is available only as a client, you can use the app to gain remote access to other devices. However, it is important to note that the remote device needs to have Remote Desktop enabled, an option that is available only on the Windows 10 Pro or Windows 10 Enterprise editions.
Here is how to set up as a Remote Desktop client on your Windows 10 Home computer:
- Step 1.Check for Updates: All Windows computers have the Remote Desktop Connection app already installed. Therefore, the first thing that you should do is to ensure that your computer and app are up to date. Go to Settings > Update & Security > Windows Update and check for updates. If the system detects an available update, download and install it.
- Step 2.Enable Remote Desktop on the remote PC: as we have already highlighted, it is important that the remote computer has Remote Desktop enabled. To do that, go to Settings > System > Remote Desktop and toggle the switch to enable it. Here, you will also see if your Windows version supports it.
- Step 3.Note the remote computer’s name: when you are in the Remote Desktop settings on the remote computer, remember to note the name of the PC as you will need it to establish the connection.
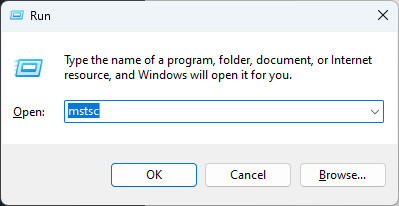
- Step 4.Launch the Remote Desktop Connection app on your Windows 10 Home computer: press Windows + R to open the Run dialog box, type mstsc, and press Enter to open RDP Windows 10 Home.
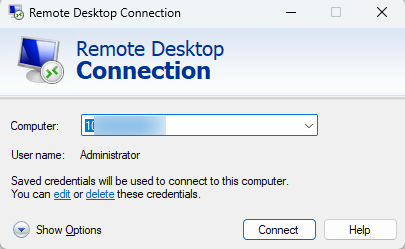
- Step 5.Connect to the remote PC: type the name of the remote computer, which you have noted during step 3. Configure the settings and click Connect. Finally, you will be asked to enter the username and password for the target PC.
Part 3. How to Setup Remote Desktop for Windows 10 Home as Server?
Since Windows 10 Home does not support acting as a Remote Desktop server natively, you will have to find some way to bypass it. The first solution is to upgrade your Windows version and get Windows 10 Pro. The other way is to use some third-party software that allows you to establish a remote connection. One of your most reliable options is AirDroid Remote Support, which is the best Remote Desktop for Windows 10 Home alternative.
AirDroid Remote Support is a comprehensive tool designed to offer remote support, control, and management capabilities. This tool proves to be invaluable for users who have Windows 10 Home and want to take full advantage of a remote connection. Some key features that make AirDroid Remote Support such a great option are the following:
Key Features of AirDroid Remote Support
- Cross-Platform Support: with this tool, you won’t just access your Windows 10 Home computer but all types of devices, including macOS, Android, and iOS.
- Real-Time Screen Sharing: you have the option to share your screen in real time to make support even easier and more efficient.
- File Transfer: with AirDroid Remote Support, you can also transfer files between your devices without limitations and delays.
- Voice and Text Chat: it also includes built-in communication tools, like a chat box and voice chat.
Here are the steps to set up AirDroid Remote Support and start using Remote Desktop with Windows 10 Home:
- Step 1.Install AirDroid Remote Support on the remote computer and AirDroid Business on the host computer.
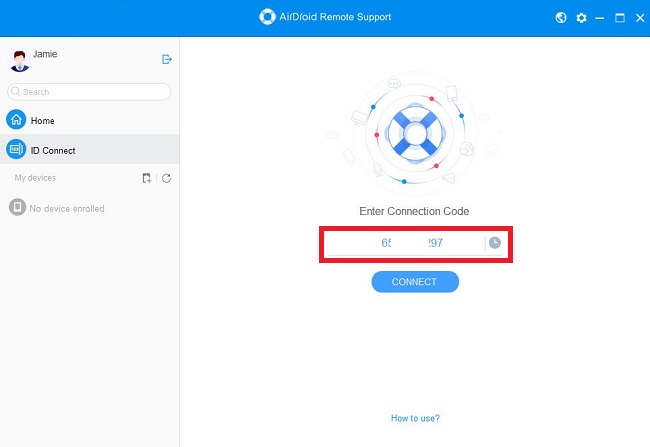
- Step 2.From the remote computer, launch AirDroid Remote Support. Note down the ID you see on the home screen.
- Step 3.From the host computer, launch AirDroid Business. Enter the remote desktop ID and tap Connect.
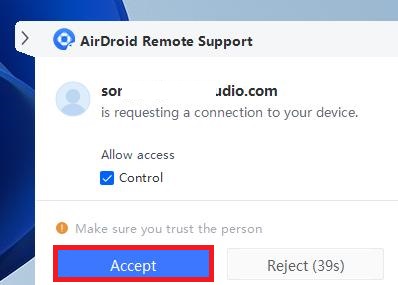
- Step 4.Click Accept from the remote computer to make the connection.
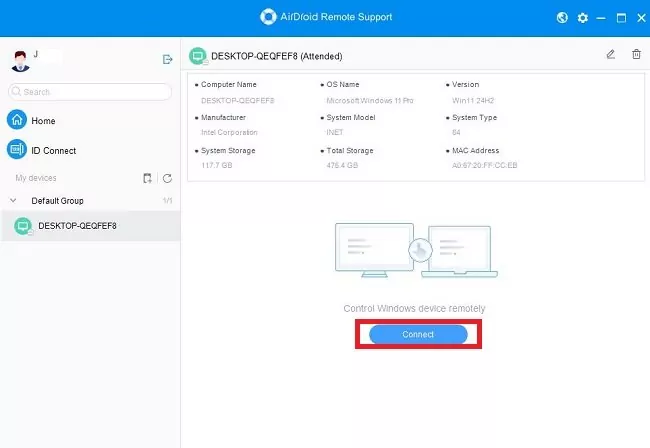
- Step 5.Lastly, select the remote computer name from AirDroid Business and click Connect to access it remotely.
Wrapping Up
Even though you can’t make the most out of Remote Desktop for Windows 10 Home, there are still ways to access your device remotely. Download AirDroid Remote Support today on your Windows 10 Home PC to discover its full capabilities.


Leave a Reply.