4 Methods to Enable Remote Desktop on Windows 10
Remote control of computers is becoming increasingly popular for both personal and professional use. Whether it is to access the home computer or troubleshoot IT issues remotely, you need to configure a remote desktop connection. However, you can only control a remote computer if it has enabled "Remote Desktop".
In this article, we'll walk you through how to enable Remote Desktop on Windows 10 by presenting four built-in methods.
- Method 1: Enable Remote Desktop via System Settings
- Method 2: Enable Remote Desktop via Control Panel
- Method 3: Enable Remote Desktop via Command Prompt or PowerShell
- Method 4: Enable Remote Desktop via Group Policy
- Bonus Part: Best Remote Desktop Software You Should Try
- FAQs about Remote Desktop Windows 10
Method 1: Enable Remote Desktop via System Settings
The straightforward way to enable remote desktop on Windows 10 is through system settings. But first, make sure the remote PC is running Windows 10 Pro or Windows 10 Enterprise. To check that, go to Settings > System > About > check the Edition.
If the remote PC is running Windows 10 Pro or Windows 10 Enterprise, follow the below steps to enable the Remote Desktop:
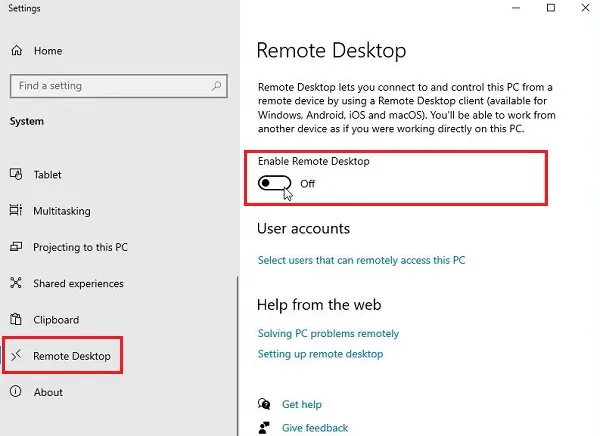
- Step 1.Open Settings and click System > Remote Desktop.
- Step 2.Toggle on Enable Remote Desktop.
- Step 3.Click Confirm to verify enabling the remote desktop.

Method 2: Enable Remote Desktop via Control Panel
You can also enable Remote Desktop on Windows 10 from the control panel, as follows:
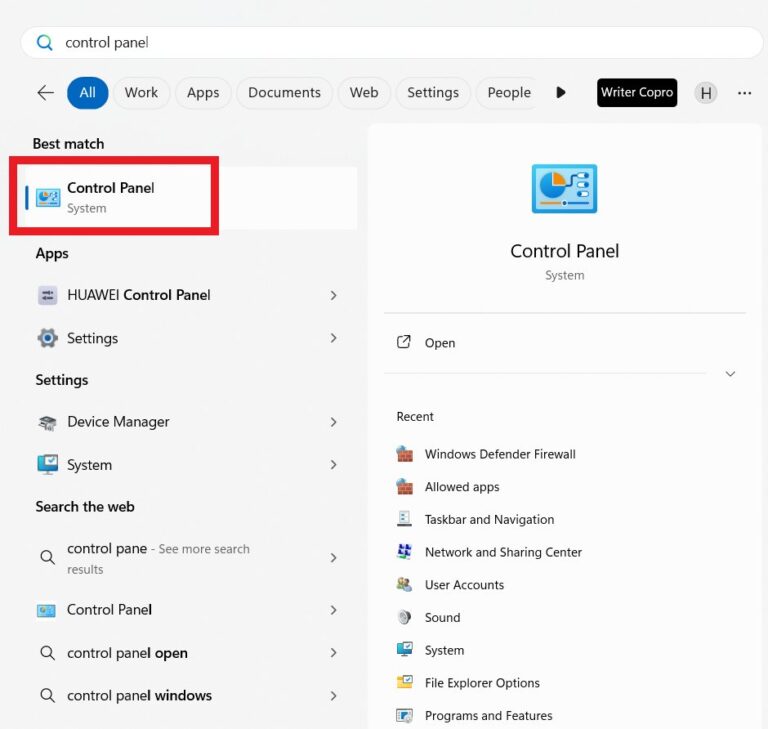
- Step 1.Open the Start menu, search for the Control Panel, and open it.
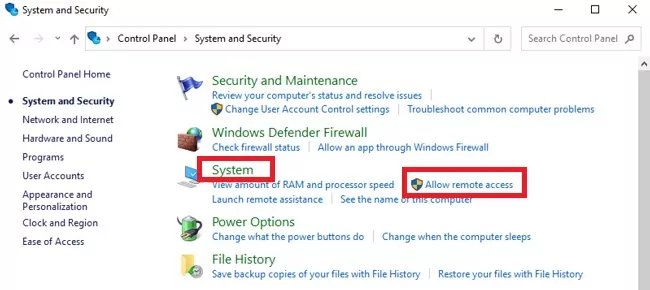
- Step 2.Click System and Security.
- Step 3.Under the System option, click Allow remote access.
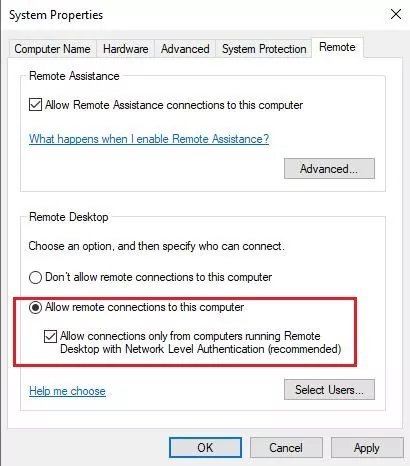
- Step 4.Click the Remote tab and select Allow remote connections to this computer. Also, tick the Allow connections only from computers running Remote Desktop with Network Level Authentication checkbox to enhance security.
- Step 5.Click OK to save the settings.
Method 3: Enable Remote Desktop via Command Prompt or PowerShell
If you are someone who likes command-line tools, you can also enable Remote Desktop on Windows 11 through Command Prompt or PowerShell. The steps are as follows:
For Command Prompt
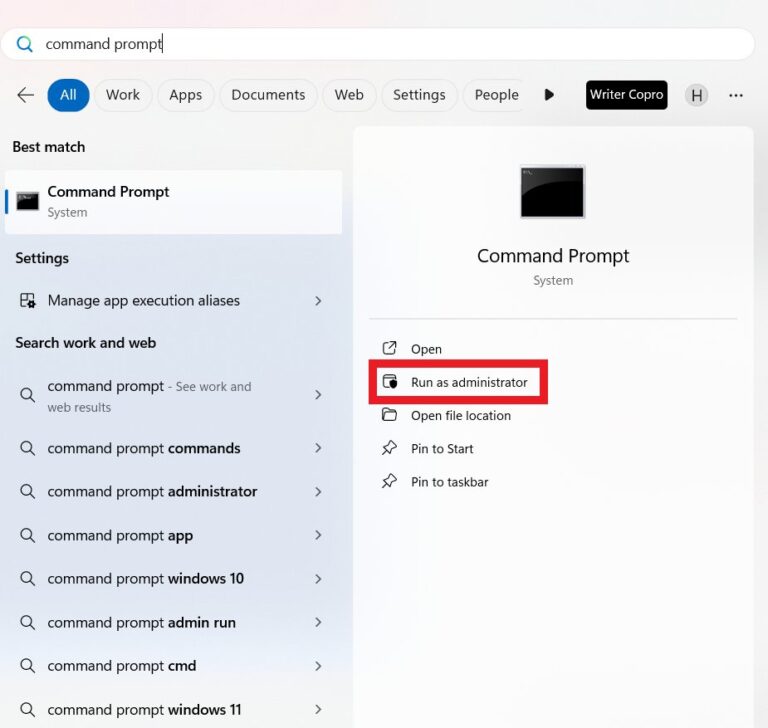
- Step 1.Open the Start menu, search for Command Prompt, and select Run as administrator.
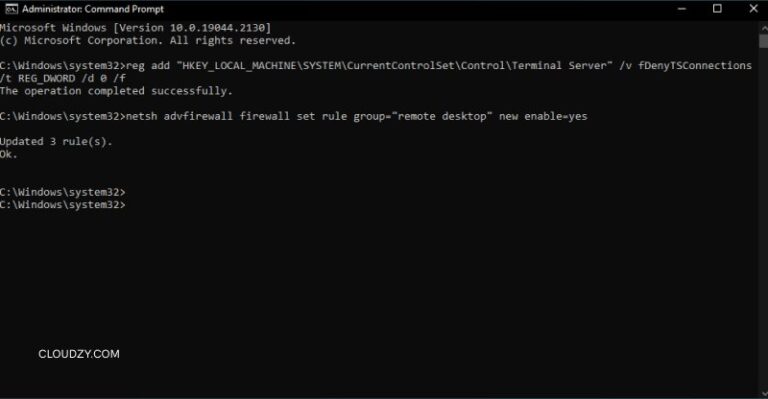
- Step 2.Type the below command and hit Enter
reg add "HKEY_LOCAL_MACHINE\SYSTEM\CurrentControlSet\Control\Terminal Server" /v fDenyTSConnections /t REG_DWORD /d 0 /f
This command will enable Remote Desktop by altering the system registry. - Step 3.Sometimes, the firewall may still block remote connections. To tackle that, use the below command to enable remote connection from the firewall:
netsh advfirewall firewall set rule group="remote desktop" new enable=Yes
For PowerShell
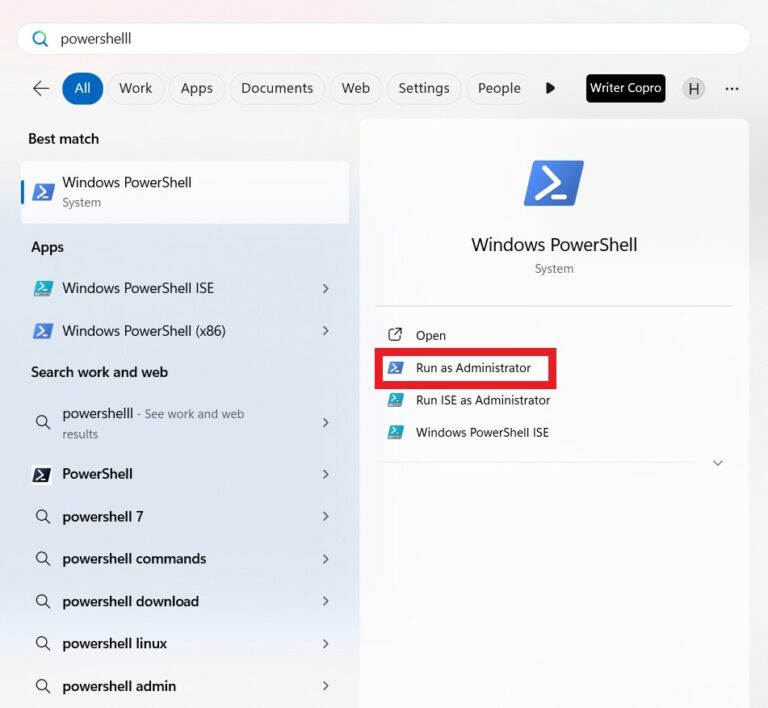
- Step 1.Open the Start menu, search for PowerShell, and select Run as administrator.
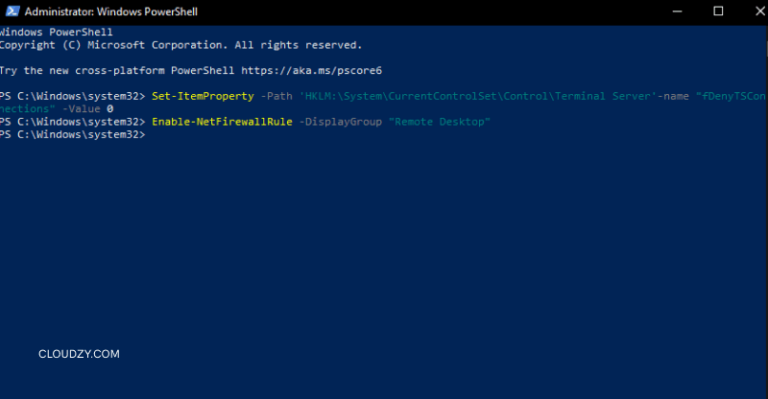
- Step 2.Type the below command and hit Enter
Set-ItemProperty -Path 'HKLM:\System\CurrentControlSet\Control\Terminal Server' -name "fDenyTSConnections" -value 0
This command will enable Remote Desktop by altering the system registry. - Step 3.To allow the connection through the firewall, use the below command:
Enable-NetFirewallRule -DisplayGroup “Remote Desktop”
Method 4: Enable Remote Desktop via Group Policy
Group Policy is a built-in feature in Windows that empowers administrators to manage the working environment of computers/users within the network. It is best to manage system settings from a centralized approach. So you can also use it to enable Remote Desktop on Windows 10, as follows:
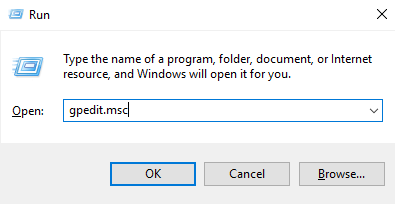
- Step 1.Press Win + R, type gpedit.msc, and press Enter.
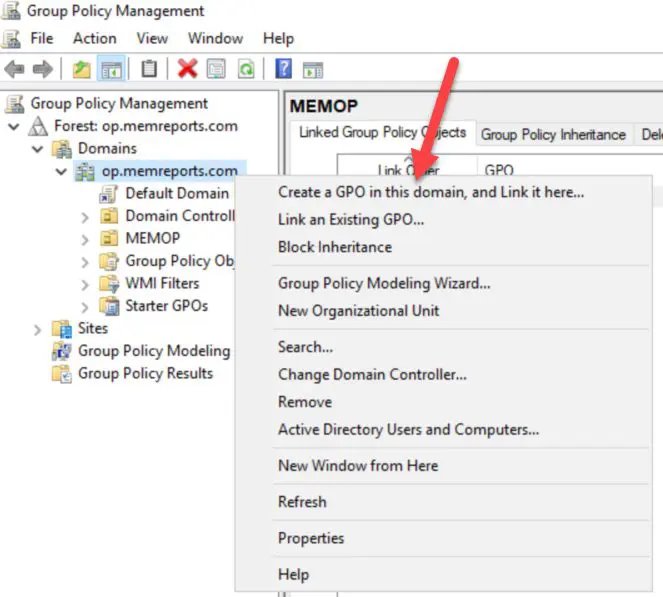
- Step 2.Right-click your Domain and select Create a GPO in this domain, and Link it here...
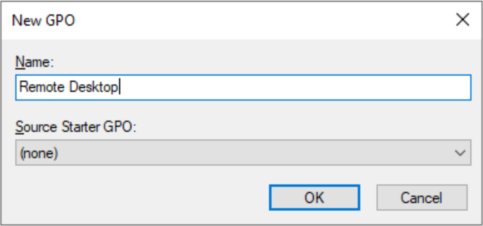
- Step 3.Give the GPO a name and click OK.
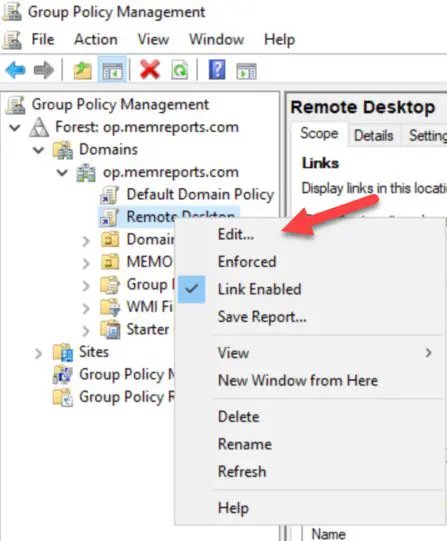
- Step 4.Right-click the newly created GPO and click Edit.
- Step 5.In the Group Policy Editor, navigate to Computer Configuration > Administrative Templates > Windows Components > Remote Desktop Services > Remote Desktop Session Host > Connections..
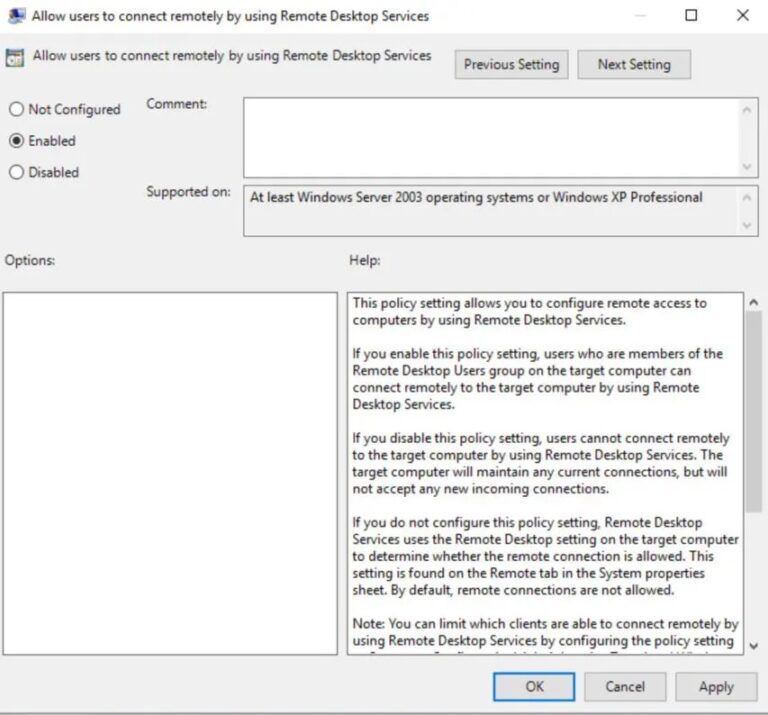
- Step 6.Double-click Allow users to connect remotely by using Remote Desktop Services, select Enabled, and click OK.
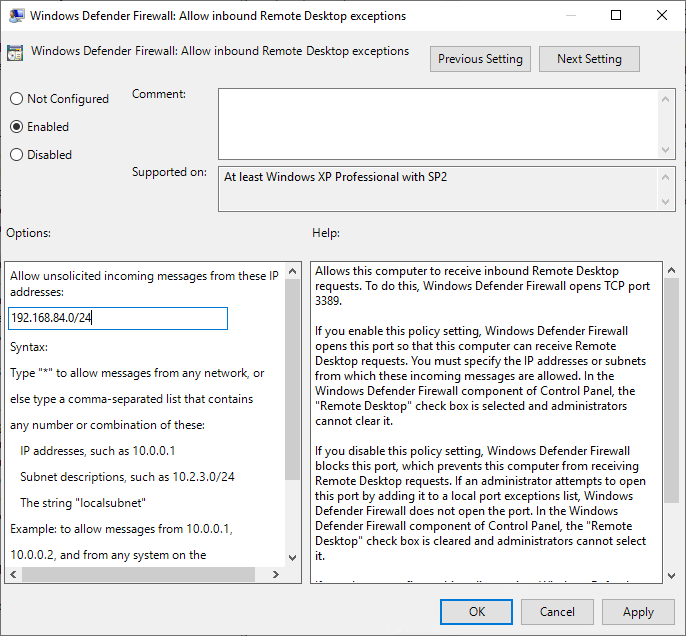
- Step 7.Now, you have to enable Remote Desktop on the firewall. Go to Computer Configuration > Administrative Templates > Network > Network Connections > Windows Defender Firewall > Domain Profile.
- Step 8.Double-click Windows Defender Firewall: Allow inbound Remote Desktop connections, select Enabled, and click OK.
- Step 9.Restart the computer to apply the policy changes.
Bonus Part: Best Remote Desktop Software You Should Try
Enabling a Remote Desktop is just one step to accessing a remote PC. You also need remote desktop software that can facilitate the connection. One option is to use Microsoft Remote Desktop. However, we have even better alternative software that eradicates the need to enable Remote Desktop and use Windows 10 Pro or Enterprise. This tool is known as AirDroid Remote Support.
AirDroid Remote Support is a top-notch remote desktop software that offers instant remote access and control of a desktop from another desktop or mobile device. Regardless of the Windows version, it uses an internet connection and simple clicks to set up a secure remote connection.
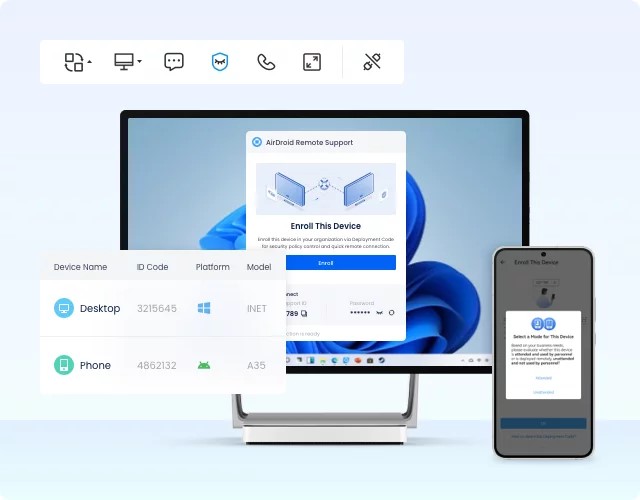
- Real-time remote control of Windows and Android devices.
- Always on unattended access.
- Text and voice communication during remote sessions.
- Controllable keyboard and clipboard.
- Patented black screen mode to protect confidential contents on the controlled device.
- Log remote session access.
In short, AirDroid Remote Support provides businesses with an all-in-one software solution to remotely control devices. This makes it best for IT support, remote learning, customer service, and other scenarios.
Want to give AirDroid Remote Support a try? Follow the three simple steps:
- Step 1.Install AirDroid Remote Support software on the local and remote Windows PC.
- Step 2.Launch the software on both PCs. Copy the 9-digit code displayed in the supportee device and insert it in the supporter device. Once done, tap Connect.
- Step 3.After the connection, you can easily control the remote desktop and transfer files.
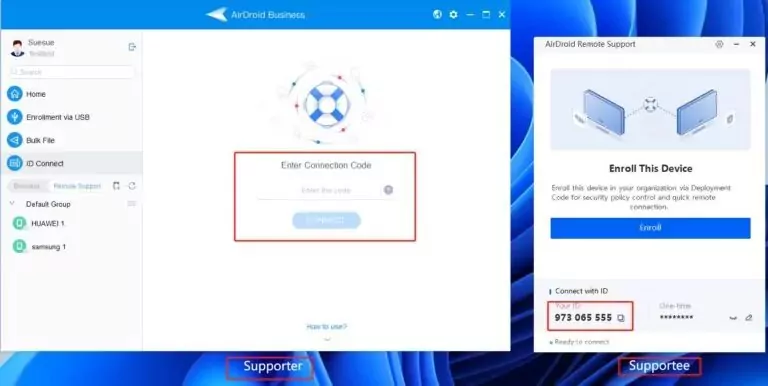
That's all! This way, AirDroid Remote Support eradicates the need to learn how to enable Remote Desktop on Windows 10 and provides a click-based approach to connect to any system.
Conclusion
It is essential to enable Remote Desktop on Windows 10 to remotely control that computer from another computer. Luckily, there are multiple ways to enable Remote Desktop. You can use any of the above methods to enable Remote Desktop right away. Alternatively, you can skip all and get a seamless remote connectivity experience with AirDroid Remote Support – the best and feature-rich remote access software solution.


Leave a Reply.