[2024] How to Run Remote Desktop with Network Level Authentication
Network Level Authentication is a security feature that enhances the safety and security of remote desktop connections. In essence, it requires users to authenticate themselves before a remote session is established. This feature is invaluable when you prioritize privacy since it mitigates the risk of unauthorized access and cyber-attacks.
In this article, we will delve into what NLA is, how to run a remote desktop with Network Level Authentication, as well as how to disable it, and possible fixes for some of its common issues.
Part 1. What Is Network Level Authentication?
Network Level Authentication (NLA) is an authentication method that authenticates the identity of the user to the network before they are able to connect to a device remotely. The main difference between NLA and other authentication methods is that the authentication takes place before a full connection is made, instead of asking for credentials once it has been established. If you prioritize your privacy, you should use remote desktop with Network Level Authentication.
NLA functions as a gatekeeper for Remote Desktop Services, since it verifies the users trying to access the device remotely. In more detail, the key functions of RDP Network Level Authentication are the following:
- Pre-Authentication – NLA ensures that the user is verified even before they can establish a remote desktop session. This pre-authentication process helps prevent unauthorized access to the remote system, giving you an extra layer of protection.
- Reduced Resource Usage – since authentication occurs before creating the connection, it reduces the load on the remote computer. This happens because the device doesn’t have to process unnecessary sessions from users that have the appropriate permission.
- Enhanced Security – of course, NLA protects the remote desktop service from various forms of cyber-attacks, such as DoS attacks.
Part 2. How Do I Run a Remote Desktop with NLA?
Running a remote desktop with Network Level Authentication requires a few setup steps to make sure that both the client and the host devices are configured properly. Here is how you can use RDP Network Level Authentication in a few simple steps:
Step 1 – Ensure that Your System Supports NLA
Before enabling NLA, remember to check that both devices support Network Level Authentication. To be more precise, NLA is supported in Windows Vista and later versions for clients, and Windows Server 2008 and later versions for hosts.
Step 2 – Enable Remote Desktop on the Host Computer
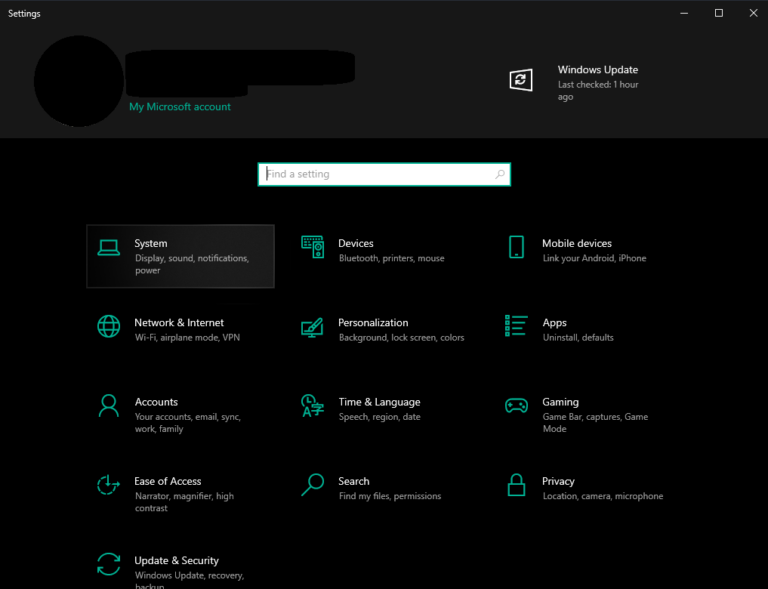
- Click the Start button and go to Settings > System.
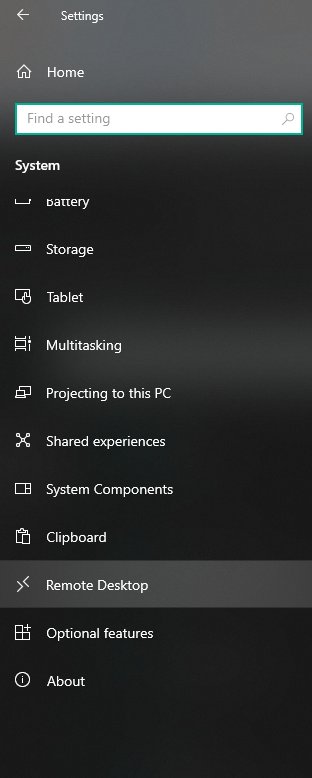
- Find Remote Desktop on the sidebar and click on it.
- Toggle the switch to enable remote desktop.
- Click Confirm.
Step 3 – Enable Network Level Authentication
- Staying on the same window, click Advanced Settings.
- Select the option Require computers to use Network Level Authentication to connect (recommended).
Step 4 – Set Up the Client Computer
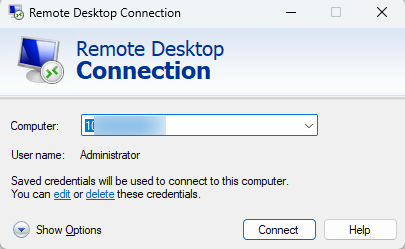
- Open Remote Desktop Connection on your remote device.
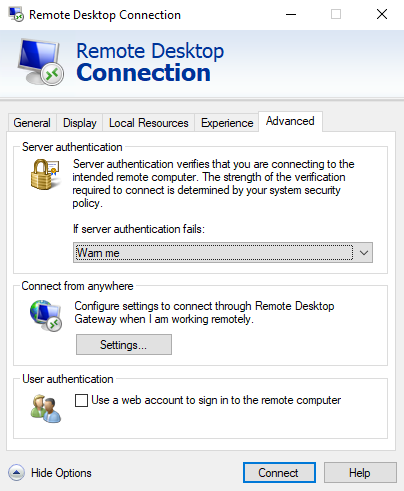
- Before initiating a connection, click Show Options at the bottom left of the window. Go to the Advanced tab.
- Make sure that under Server authentication, you have selected the option Warn me if server authentication fails.
- Go back to the General tab, type the IP of the host computer, and click Connect to start the session.
Part 3. How to Fix the Remote Computer Requires Network Level Authentication?
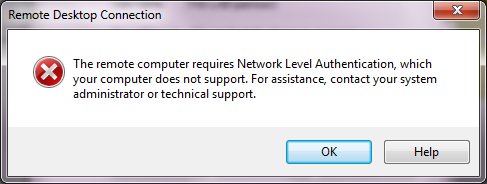
Despite its benefits, you might sometimes encounter issues with NLA. One of the most common error messages you might get is "The remote computer requires Network Level Authentication, which your computer does not support". In this case, there are a couple of possible fixes that you can try:
1Check your Internet Connection and Run a Network Troubleshooter
The first thing you should check when you get this error message is the status of your connection as it affects NLA. Check that the cables are connected correctly, restart your router, and unplug and replug the cables. If the issue persists, then you can also try a network troubleshooter. The steps for running the troubleshooter are the following:
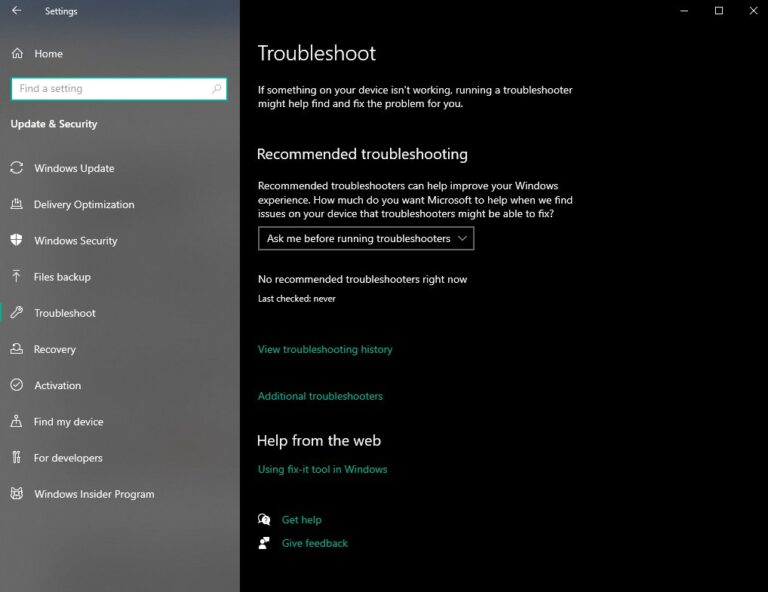
- Step 1.Go to Start > Settings > Update & Security > Troubleshooter and click the Additional troubleshooters option.
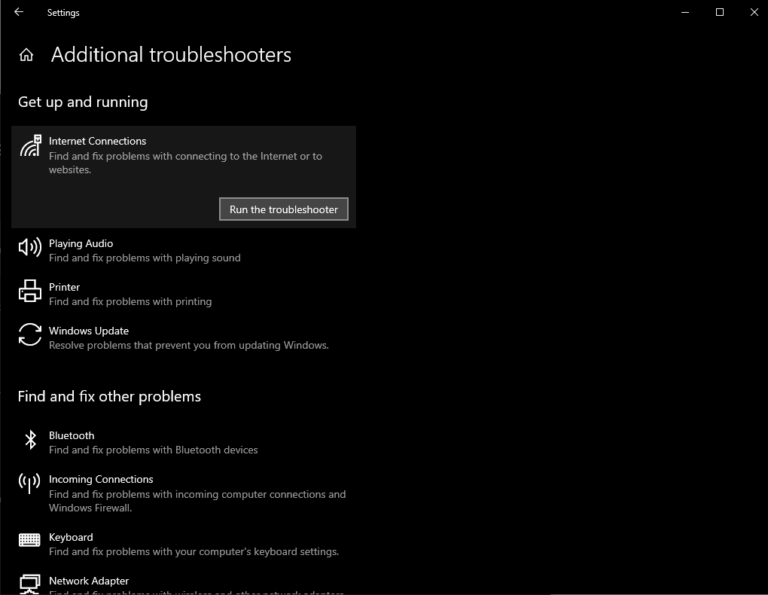
- Step 2.Click on Internet connections and then click the Run the troubleshooter button.
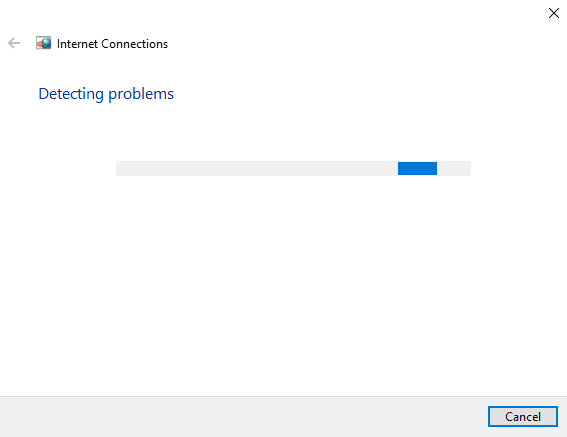
- Step 3.Wait for the troubleshooter to detect potential issues and try the recommended solutions.
2Configure NLA in the Local Group Policy Editor
To solve this error, you might also need to disable NLA using the Group Policy Editor. You can do that by following these steps:
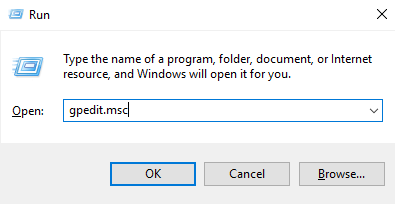
- Step 1.Tap Win + R and type gpedit.msc to open the Group Policy Editor.
- Step 2.Go to Computer Configuration > Administrative Templates > Windows Components > Remote Desktop Services > Remote Desktop Session Host > Security.
- Step 3.Double-click on Require user authentication for remote connections by using Network Level Authentication.
- Step 4.Select Disabled and click Apply to confirm your option.
3Restart your Network Adapters
Another reason why you might get this error message is because your network might not be working properly. Therefore, you can restart your networks to fix it. Here is how to do it:
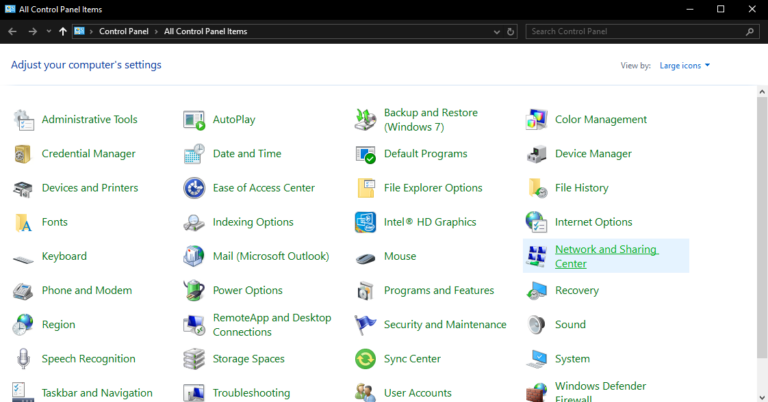
- Step 1.Go to the Control Panel, and click Network and Sharing Center.
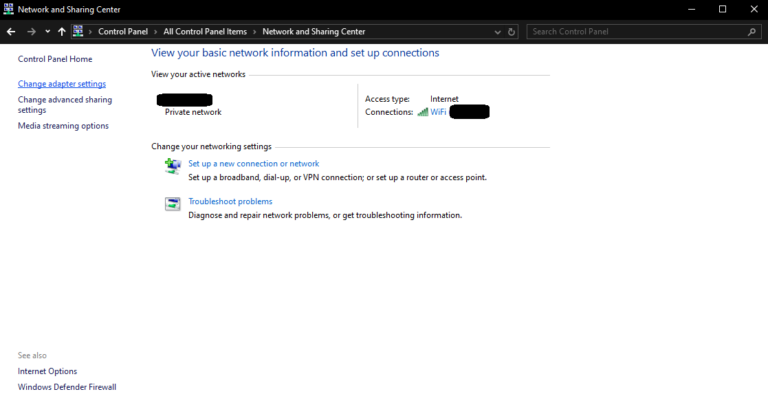
- Step 2.Click Change adapter settings from the sidebar.
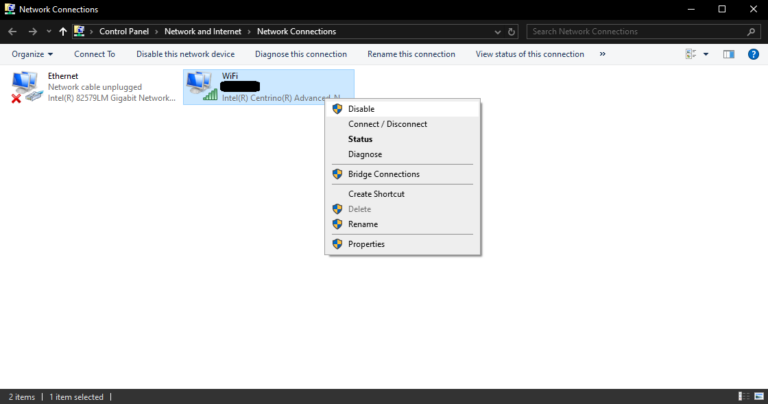
- Step 3.Right-click on your network and click Disable.
- Step 4.Right-click again on your network and click Enable. You can follow this process for both your Wi-Fi and your Ethernet connection.
Part 4. How Do I Turn off Remote Desktop Network Level Authentication?
In the previous section, we have briefly mentioned that disabling RDP Network Level Authentication might solve the error message you are getting. However, there might be other cases, where you may need to disable it. Namely, you might want to do it for compatibility issues or troubleshooting. In this section, we are going to show you more ways to turn off Network Level Authentication, in addition to disabling it with the Local Group Policy Editor we have explained in the previous section.
1Disable NLA via System Properties
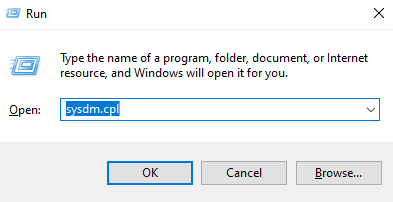
- Step 1.Tap Win + R and type sysdm.cpl to open System Properties.
- Step 2.Go to the Remote tab.
- Step 3.Go under Remote desktop and uncheck the option Allow connections only from computers running Remote Desktop with Network Level Authentication (recommended).
- Step 4.Click Apply and then OK.
2Disable NLA via PowerShell
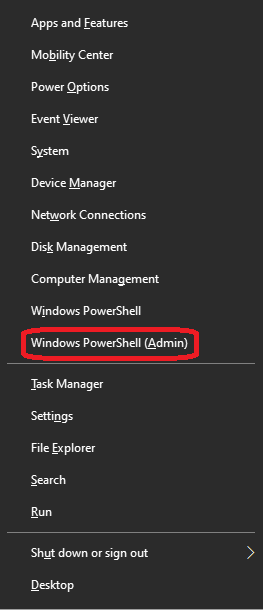
- Step 1.Right-click on the Start button and click on Windows PowerShell (Admin).
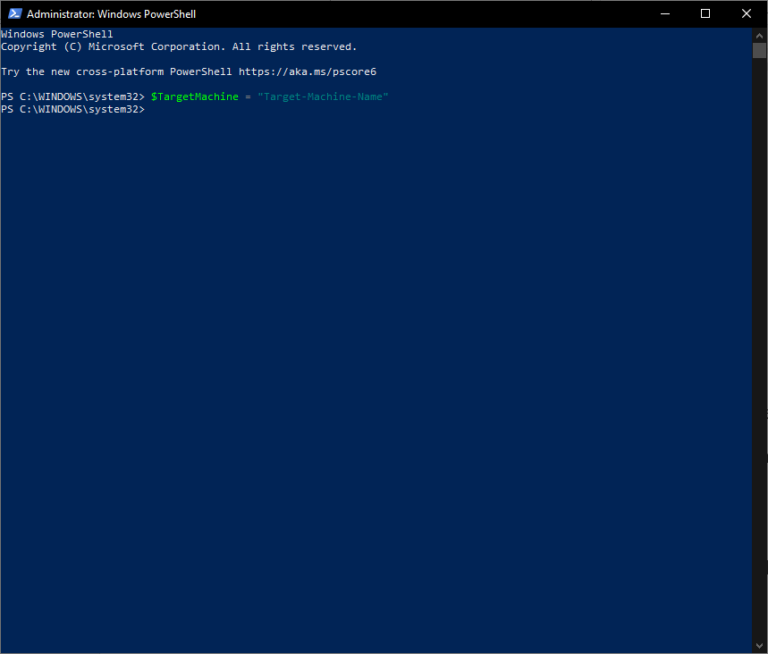
- Step 2.Type $TargetMachine = “Target-Machine-Name” and tap Enter to execute the command.
- Step 3.Type (Get-WmiObject -class Win32_TSGeneralSetting -Namespace root\cimv2\terminalservices -ComputerName $ComputerName -Filter “TerminalName='RDP-tcp'”).SetUserAuthenticationRequired(0) and tap Enter.
- Step 4.Restart your device.
3Disable NLA via Windows Registry
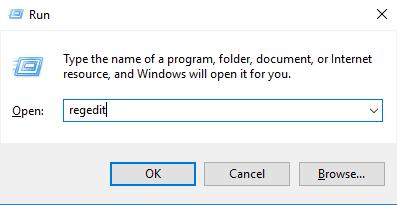
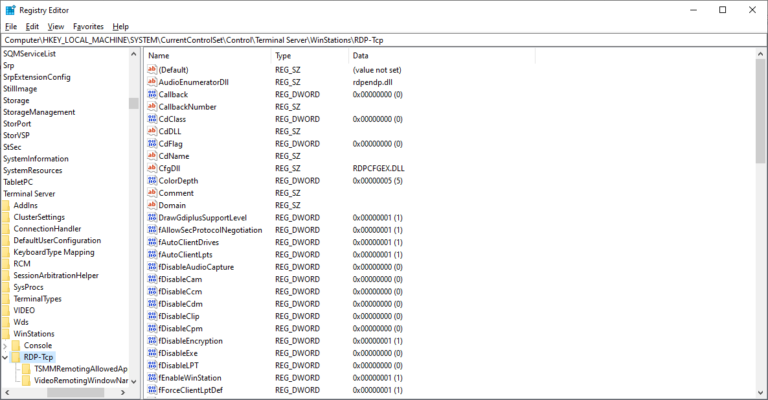
- Step 1.Tap Win + R and type regedit to open the Registry Editor.
- Step 2.Go to HKEY_LOCAL_MACHINE\SYSTEM\CurrentControlSet\Control\Terminal Server\WinStations\RDP-Tcp.
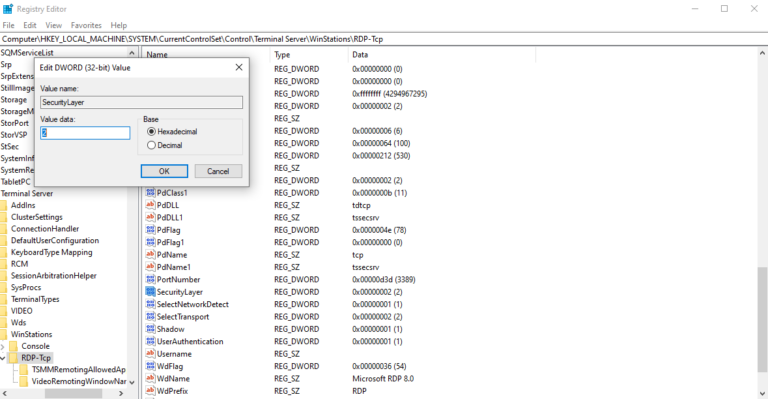
- Step 3.Find SecurityLayer, double-click on it, and set its value data to 0.
- Step 4.Restart your computer to apply the changes.
In Conclusion
Remote desktop with Network Level Authentication (NLA) is a critical feature for securing remote desktop connections. Employ this authentication method to make your remote connections even more secure than ever before. Nevertheless, if you are looking for something more, you can try a tool that gives you access to a robust set of features that make remote support effortless, secure, and efficient. Try AirDroid Remote Support today to discover its amazing set of features to enhance your remote connection experience.


Leave a Reply.