[Full Guide] How to Transfer Files with TeamViewer
In today‘s digital world, transferring files between devices efficiently is crucial for your daily life. For example, you might be working remotely and need a reliable way to send files to a colleague or another device. In these cases, a TeamViewer file transfer becomes a true lifesaver.
In this article, we will show you how to do a file transfer using TeamViewer and give you a great alternative that will make this common task faster than ever before.
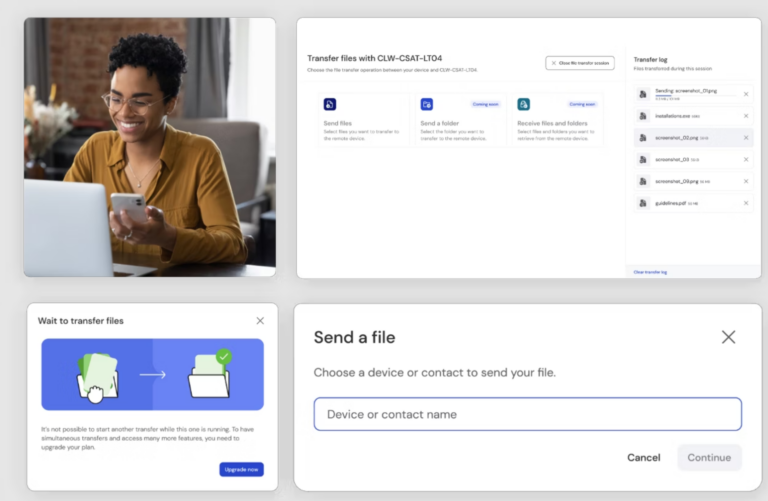
Part 1. Can I Use Teamviewer to Transfer Files?
TeamViewer is one of the most well-known apps for gaining remote access to a device, as well as offering and receiving remote help. In addition to this, the tool has introduced the TeamViewer file transfer feature, which allows you to transfer files quickly and securely between your devices. In fact, the tool has enabled numerous ways to send files to your connected devices. Below, we will see detailed steps on how to perform a file transfer using TeamViewer.
Part 2. How to Transfer Files with TeamViewer?
In this section, we will explain the 5 different methods with which you can transfer files using TeamViewer. Some are available in TeamViewer Classic, while you can achieve others in the new interface that the app has introduced.
1Transfer Files via TeamViewer Classic
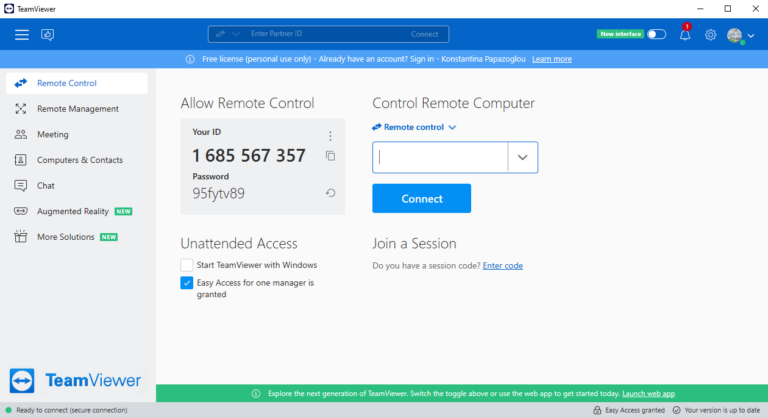
- Step 1.Launch your TeamViewer classic.
- Step 2.Go to the Remote Control tab.
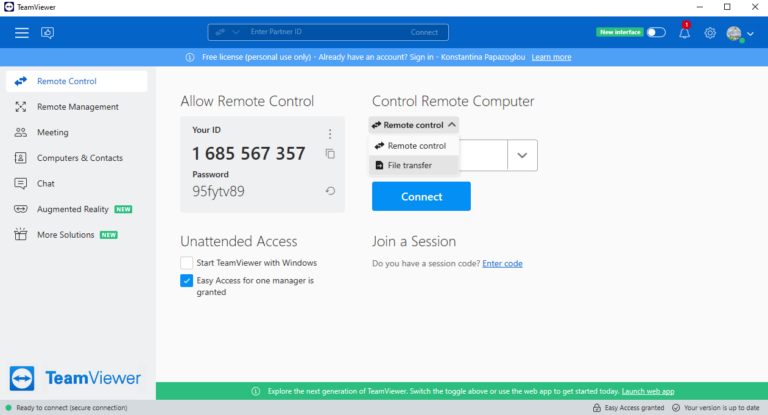
- Step 3.Click the arrow in the Control Remote Computer section and select the File Transfer option.
- Step 4.Type the Partner ID and click the blue Connect button.
- Step 5.Enter the remote device’s password and click the Log On button.
- Step 6.Select the files you wish to transfer.
2Transfer Files in a Remote Session
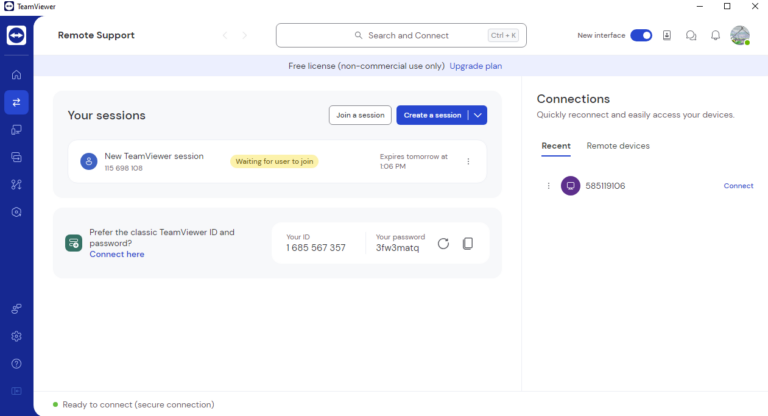
- Step 1.On TeamViewer’s new interface, go to the Remote Support tab.
- Step 2.Click Create a session and share the link to the remote device.
- Step 3.Establish a remote connection.
- Step 4.On the bar above, click Files & Extras.
- Step 5.There, you will find the File Transfer option. Select the files you wish to transfer.
3Transfer Files from Contacts
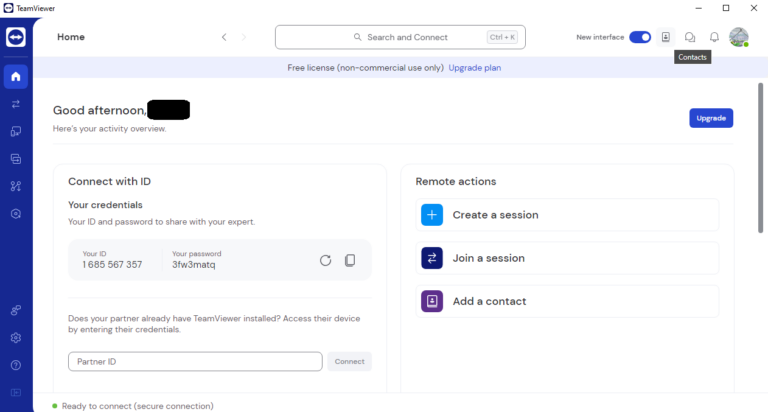
- Step 1.On the new interface, find and click the Contacts icon on the top right corner of the screen.
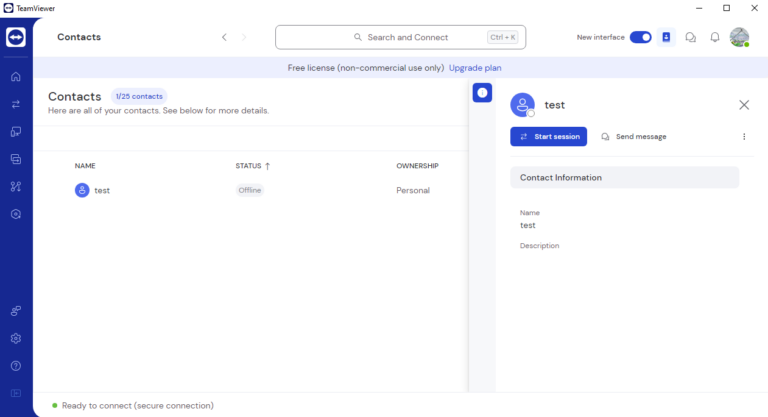
- Step 2.Click on the contact you wish to send files to.
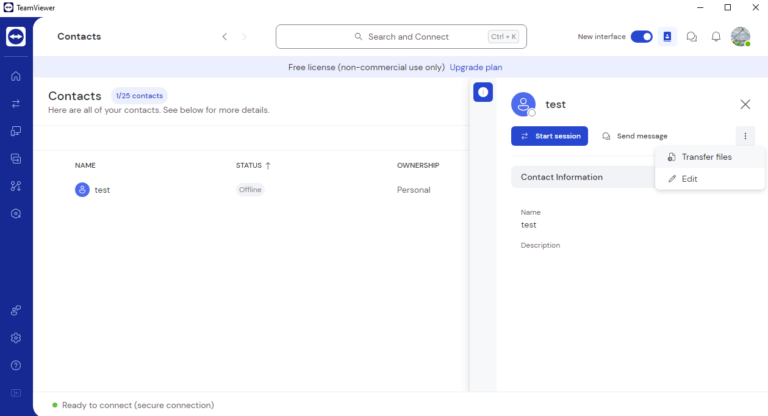
- Step 3.Click on the three-dot icon and select Transfer files.
- Step 4.Establish the remote connection and select the files you want to transfer.
4Transfer Files via Drag-and-Drop (Windows-only)
TeamViewer is also allowing you to drag and drop the files you want to transfer between your devices. However, this feature is only available to Windows devices. To use this function, you simply need to establish a remote connection.
5Transfer Files from Computers & Contacts (Mac-only)
To use the quick TeamViewer file transfer function on a Mac computer, you will have to use Computers & Contacts. Here is how to do it:
- Step 1.Drag and drop files from your Mac computer onto the name of the device that is in your list.
- Step 2.The selected device will get a “Send file” request in a pop-up window. Click “Allow” to complete the transfer.
Part 3. FAQs About TeamViewer File Transfer

For a Windows computer: %USERPROFILE%\Downloads
For a macOS: NSDownloadsDirectory+NSUserDomainMask or ~/Downloads
For an Android device: /storage/emulated/0/Download
For iOS: the internal app container.
Step 1. Launch TeamViewer Classic.
Step 2. Click Settings > Extras > Open Log Files.
Step 3. In the new window, find the file TeamViewerXX_Logfile.log. The XX stands for the TeamViewer version you have installed on the device.
Step 1. Install TeamViewer on your mobile phone,
Step 2.Launch the app, type the Partner ID, and tap the Transfer files option from the home screen.
Step 3.Type the password to establish the remote connection.
Step 4.Select the transfer location on your computer.
Step 5.Select the files you wish to transfer.
Bonus Part: Better Alternative to TeamViewer File Transfer
If you aren’t satisfied with the TeamViewer file transfer, you can find other solutions. An excellent alternative to this app is AirDroid Remote Support, a new tool that promises to satisfy your needs. AirDroid offers an intuitive and efficient way to connect your devices remotely and perform a file transfer quickly and easily.
But there are more reasons to select AirDroid Remote Support. Its most notable features include:
- Cross-Platform Compatibility: the app supports the connections between various operating systems, such as Windows, macOS, Android, and iOS.
- Real-time Support: with AirDroid Remote Support, you benefit from a quick connection without delays. And to make things even easier, you can take advantage of screen sharing, messaging, voice chat, and an innovative AR camera.
- Unattended Remote Access: this tool allows you to access and manage an unattended device remotely. Furthermore, you can do that without worrying about your privacy, since you can activate black screen mode.
Steps to Use AirDroid Remote Support for File Transfer:
- Step 1.Install AirDroid Remote Support on the remote computer and AirDroid Business on the host computer.
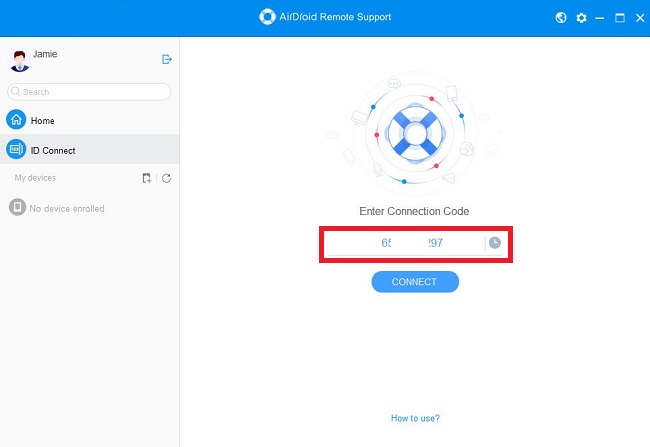
- Step 2.From the remote computer, launch AirDroid Remote Support. Note down the ID you see on the home screen.
- Step 3.From the host computer, launch AirDroid Business. Enter the remote desktop ID and tap Connect.
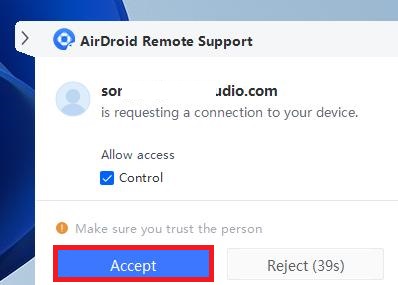
- Step 4.Click Accept from the remote computer to make the connection.
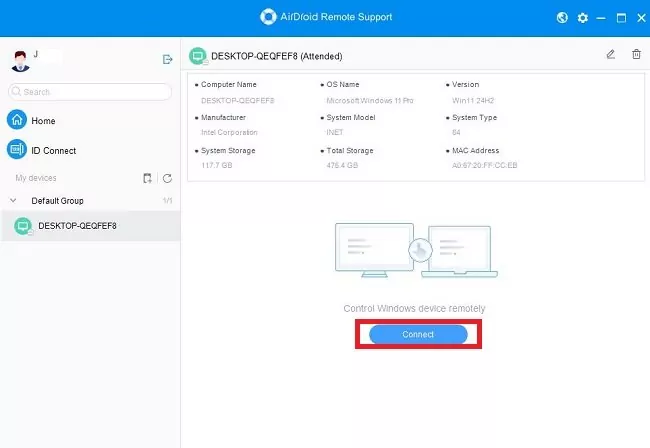
- Step 5.Select the remote computer name from AirDroid Business and click Connect to access it remotely.
- Step 6.Now, you can transfer files in the chatbox.
In Conclusion
Performing a file transfer using TeamViewer is often frustrating, even though it is supposed to be a simple and straightforward process. Therefore, AirDroid Remote Support has become a strong competitor, if you are looking for a reliable and quick solution. Download the app today to try it for free.




Leave a Reply.