6 Quick Fixes for the 'Remote Device or Resource Won't Accept the Connection' Error
Remote device connection issues usually refer to connection failures, disconnections, or inaccessibility when trying to connect to a device, server, or resource remotely. This type of problem can occur between different device types, such as connecting to a company server from a personal computer or accessing a remote work environment through a mobile device.
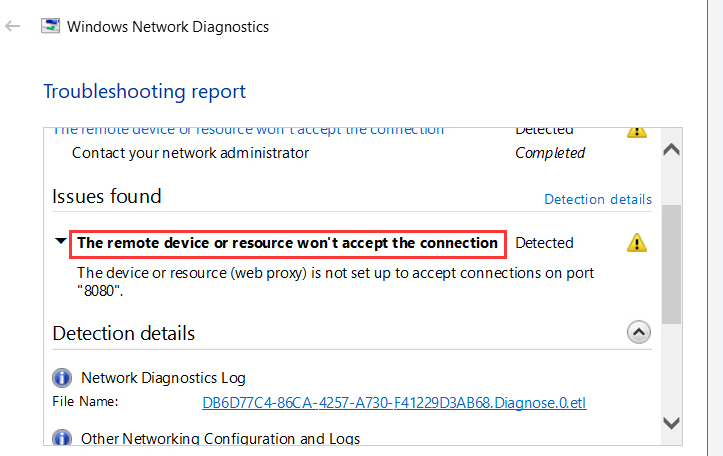
Sometimes, you might see the "remote device or resource won't accept the connection" message.
In this article, we will introduce 6 quick and effective ways to help you solve this problem.
Part 1. Check Network Connections
When you encounter the "remote device won't accept the connection" error, the first step is to check the status of your network connection. If you identify that the issue stems from the network, you can resolve it quickly by resetting your connection settings or running the network.
To check and reset your network, follow these steps:
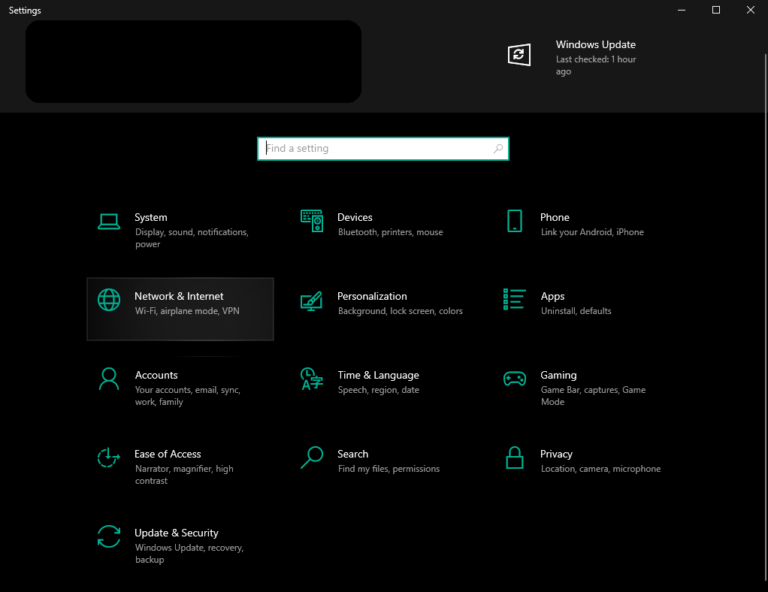
- Step 1.Go to Start > Settings > Network & internet.
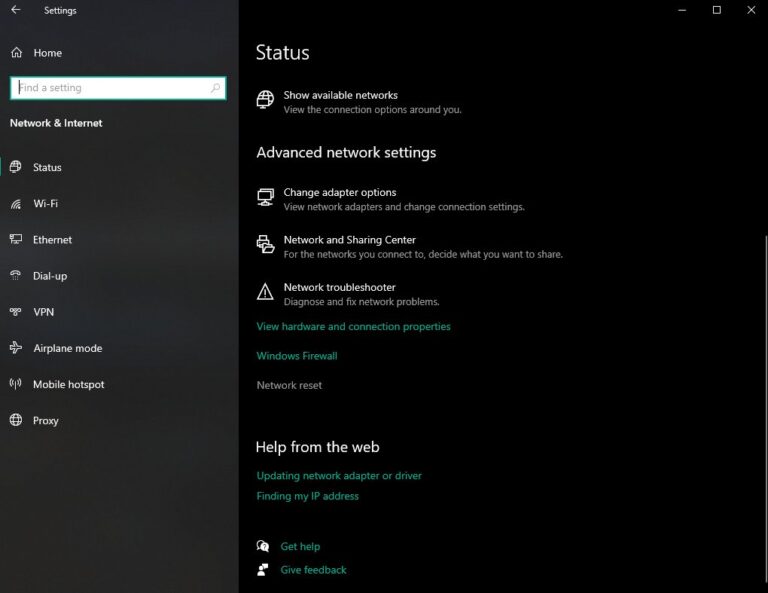
- Step 2.Under Advanced network settings, find and click Network reset.
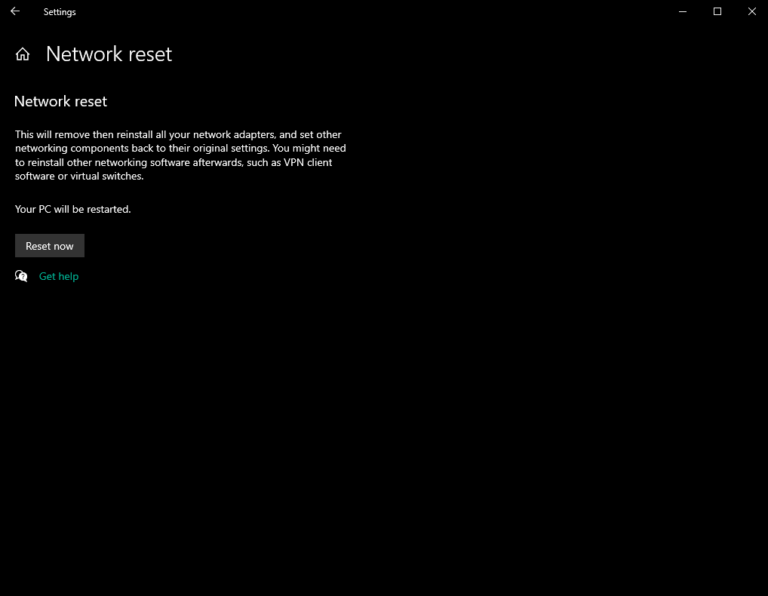
- Step 3.Click the Reset now button and wait until your device has rebooted.
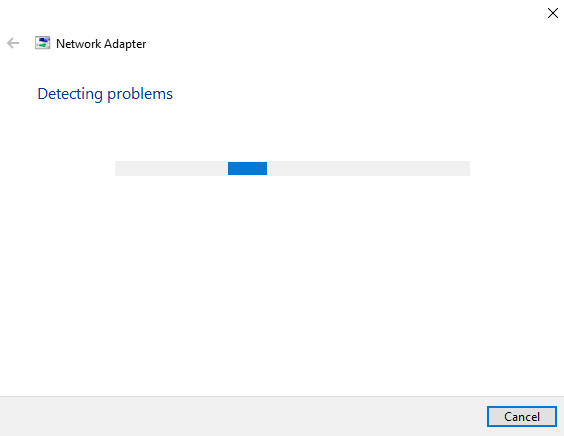
Another possible fix is to run the network troubleshooter. You can do that by following these steps:
- Step 1.Select Start > Settings > Network & internet.
- Step 2.Under Advanced network settings, click Network troubleshooter.
- Step 3.Wait until the troubleshooter has run the diagnostics.
Part 2. Disable Proxy
Checking the proxy settings is a critical step because the proxy server may affect your network connection, causing the remote device or resource to be unable to accept the connection. The proxy is usually used as an intermediary between the client and the target server. It can control network traffic, improve security, or be used to bypass regional restrictions. So if the proxy is not set up properly, it may cause connection failure.
This method is also the most used and effective. Here are the specific steps:
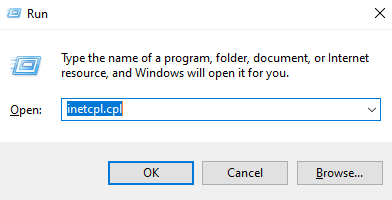
- Step 1.Tap Win + R on your keyboard.
- Step 2.Type inetcpl.cpl and click the OK button to open the Internet Properties window.
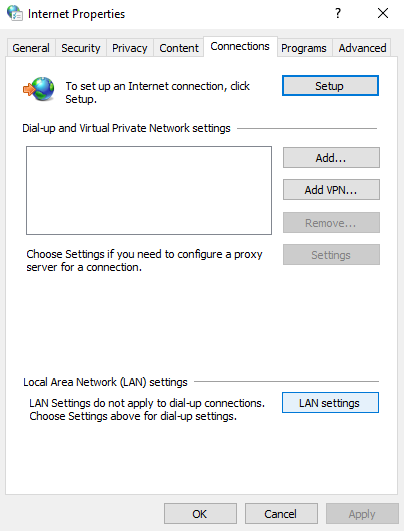
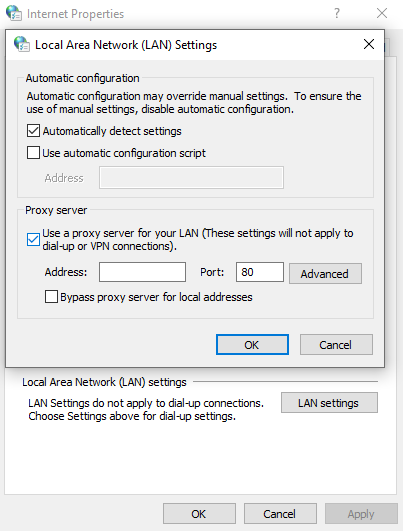
- Step 3.Select the Connections tab and click on LAN settings button.
- Step 4.Uncheck Automatically detect settings . Also, uncheck the option Use a proxy server for your LAN if checked.

- Step 5.Click OK in both windows.
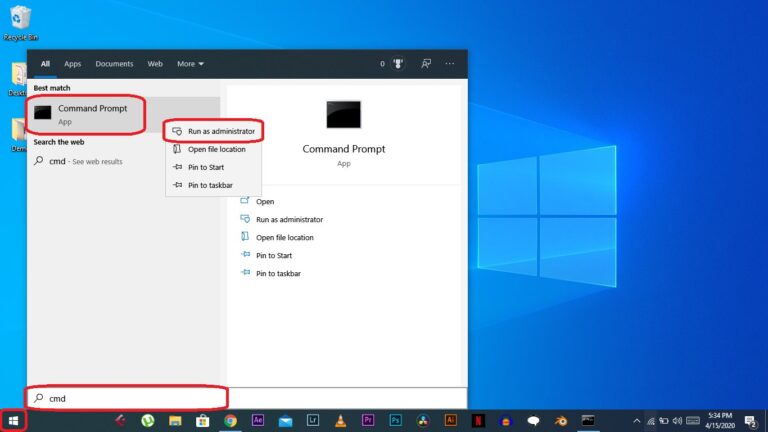
- Step 6. Now open Start and type cmd . Right-click on Command Prompt in the result list and select Run as administrator .
- Step 7.At the Command Prompt, type the following commands one at a time and press Enter:
- Step 8.Finally, restart your computer and check if the problem has been resolved.
After following the above steps, please check whether the problem is solved. If the problem still exists, please reset the network according to the first method just mentioned, and continue to follow the steps below.
netsh int ip reset
netsh winsock reset
ipconfig /release
ipconfig /renew
ipconfig /flushdns
If you try the Disable Proxy method successfully, you may encounter the "impossible to identify the issue" message.
On my computers (Windows 10 and 11), which have the internet working normally, this message is also shown when I run the troubleshooter. This is normal.
So, if you're not having issues accessing the internet, This means that the problem of "remote device or resource won't accept the connection has been solved".
Part 3. AirDroid Remote Support
Check if it is a problem with the remote software, a software failure of the remote connection tool or protocol (such as SSH, RDP, etc.).
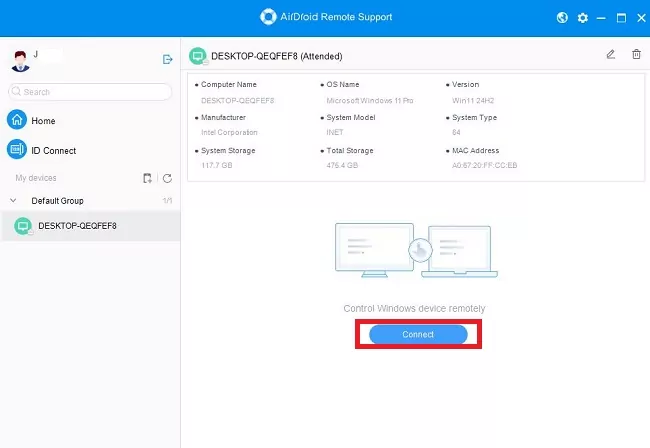
Here I recommend the best remote software AirDroid Remote Support, which allows you to access company devices and applications without leaving your desk. Ensure that you can work anywhere without compromising functionality or security. Support remote control of multiple devices such as android, ios, windows, and mac.
AirDroid uses a variety of technologies and security plus secrets to make your network smoother and reduce sudden problems when using remote functions.
Part 4. Disable Firewall
The next fix requires you to disable your antivirus and firewall as they might interfere with the connection. First of all, we will show you how to disable Windows' built-in antivirus:
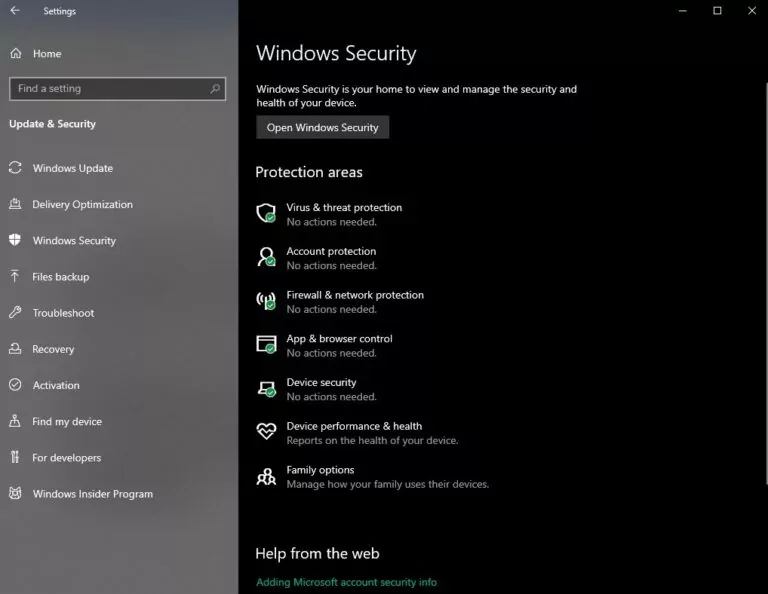
- Step 1.Go to Start > Settings > Update & Security .
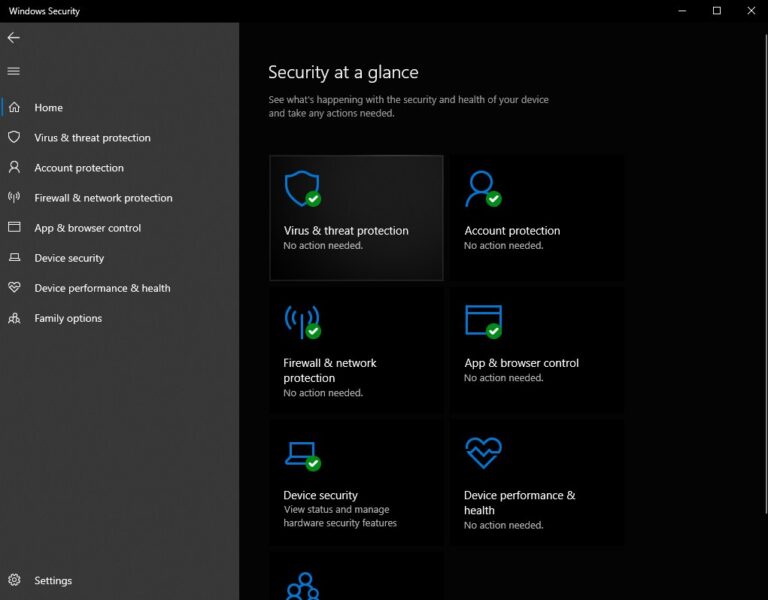
- Step 2.Click the Open Windows Security button.
- Step 3.Click Virus & Threat Protection .
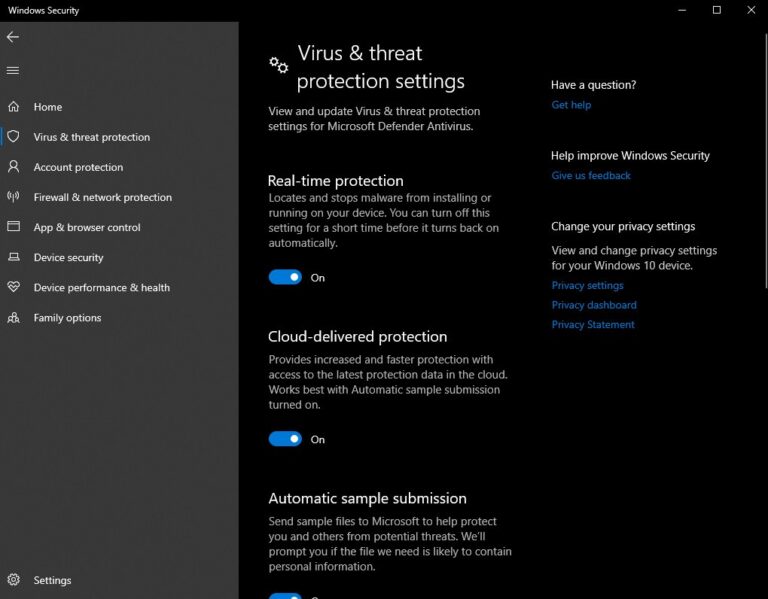
- Step 4.Click the Manage settings option and toggle the switch to turn off real-time protection.
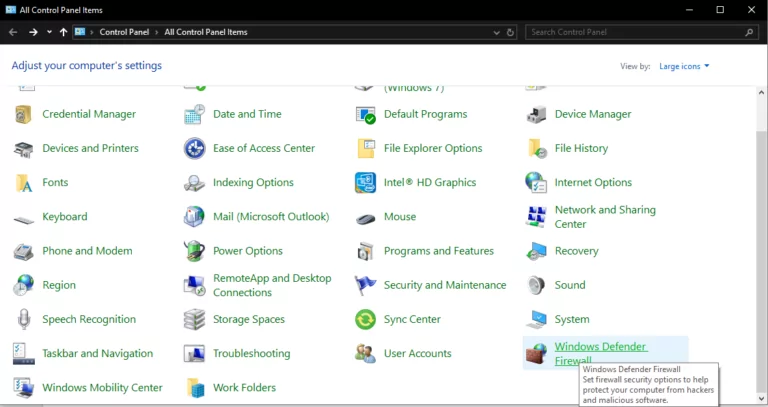
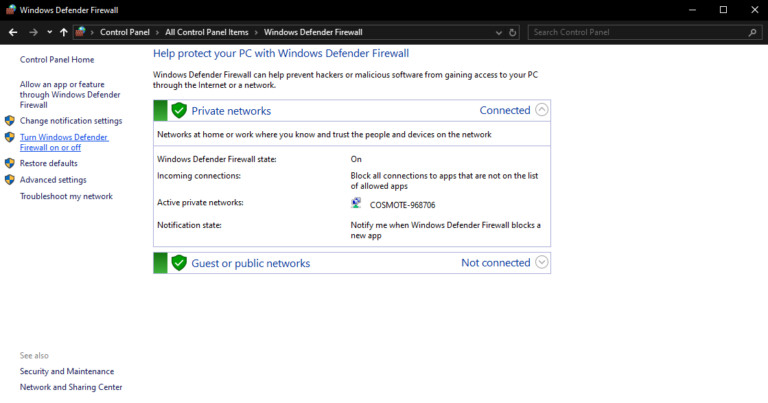
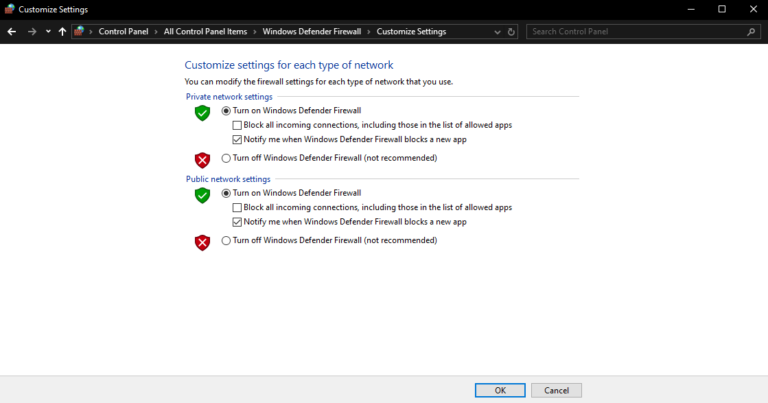
Apart from that, you can also disable the Windows Defender Firewall to fix this error message. The steps to do that are the following:
- Step 1.Open the Control Panel and click on the Windows Defender Firewall icon.
- Step 2.Click the Turn Windows Defender Firewall on or off option from the sidebar.
- Step 3.Customize your settings and click OK to save the changes.
Part 5. Reset IP Address
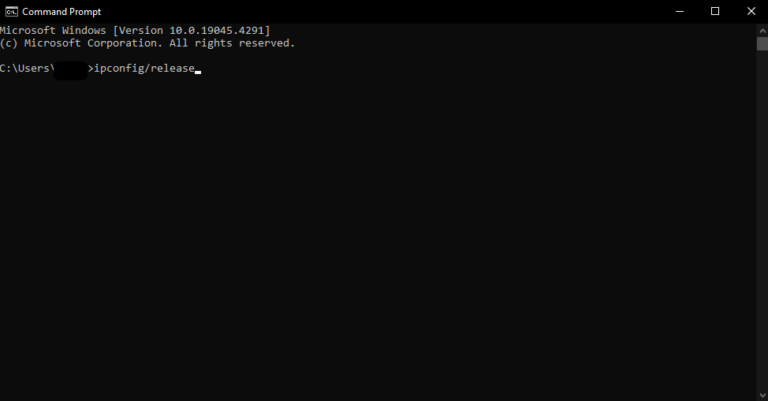
Another possible fix for this error is to reset your IP address. The steps for this method are the following:
- Step 1.Type command prompt or cmd on the search bar and click Run as an administrator.
- Step 2.Type the command ipconfig/release , tap Enter, and wait until the process is completed.
- Step 3.Type the command ipconfig/renew and tap Enter.

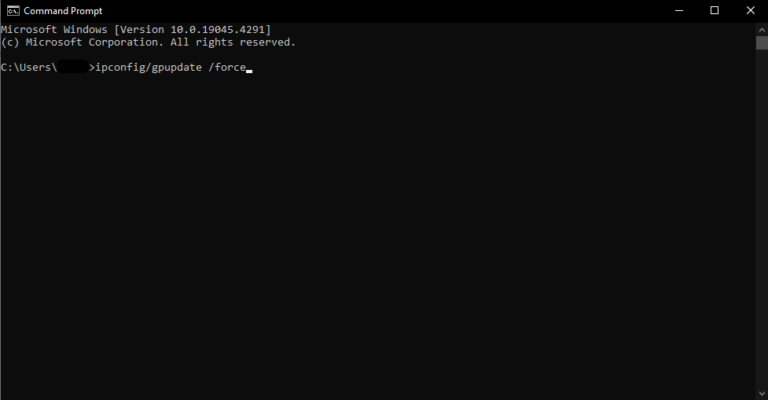
Part 6. Update Group Policy
As we have already mentioned, outdated group policies might be the cause of the error. For this reason, you can solve it by force updating them. The steps to do that are the following:
- Step 1.Run the command prompt as an administrator.
- Step 2.Type the command gpupdate /force and tap Enter.
Conclusion
In conclusion, encountering the "The remote device or resource is not accepting the connection" error can be frustrating, but the above 6 methods can effectively solve the error. By the way, don't forget the best remote work program AirDroid Remote Support. High-end technology + after-sales service anytime, anywhere, it is worth your try.
If you have tried the above methods and it still doesn't work, it is recommended to contact the technical support of the device or service provider for help. and you have any questions about the above content, you can comment below and we will update it as soon as possible.





Leave a Reply.