[Solved] The Requested Session Access Is Denied
There are many errors that you might encounter when trying to establish a connection through Remote Desktop. “The requested session access is denied" error is one of the most frustrating ones since it disrupts your workflow and puts a stop to your tasks. Therefore, it is essential to understand what this error message indicated to find the right fix for it.
In this article, we will take a closer look at the "The requested session access is denied" error and explore its most effective fixes.
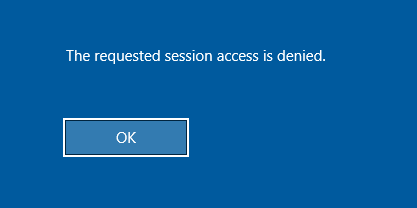
Part 1. What is the "The Requested Session Access Is Denied" Error?
First, let's take a look at what this error message is. "The requested session access is denied" typically appears when your attempt to initiate a remote session has been blocked. In addition to this, it might appear when you are trying to access remote resources. What it indicates is that you have insufficient permissions or there are configuration issues.
In more detail, you can encounter this error in a variety of scenarios. For instance, you might come across it in:
- Remote Desktop Sessions: When you are trying to establish an RDP connection, you may be denied access. This will happen when your user account lacks the necessary permissions or due to certain security policies.
- Accessing Network Resources: When you are trying to access a shared folder or files on a network, you might get this error. This will happen if the permissions are not correctly set.
- System Logins: When you are attempting to log into a system, you might get this error message. This happens when there are restrictions on your account or if the session configurations prohibit you.
Part 2. What Causes the "The Requested Session Access Is Denied" Error?
The nature of "The requested session access is denied" error is a good indication of its possible cause. Here, we will identify the root causes so that you know which approach to take when trying to solve it. Here are the common causes for this error's occurrence:
- Insufficient User Permissions: The most frequent cause of this error is that your user account lacks the necessary permissions. For example, it can happen due to misconfigurations in the account settings or specific restrictions that have been set by your organization’s administrator.
- Conflicting Security Policies: Another common cause of this issue is that some Group Policy settings prevent access. These policies are often set for security reasons and you will need to tweak them before you gain access.
- User Account Control Restrictions: On Windows systems, UAC can be the reason why you get this error message.
- Incorrect Session Configurations: One more cause is misconfigured session settings. These include incorrect RDP configurations and improperly set network shares among others.
Part 3. How to Fix the "The Requested Session Access Is Denied" Error?
Fortunately, there are several methods to troubleshoot "The requested session access is denied" error. In this section, we are going to show you step-by-step guides on how to complete them.
1Check User Permissions
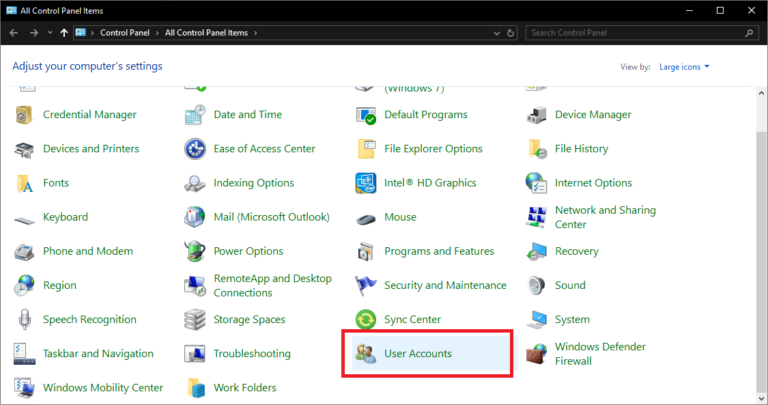
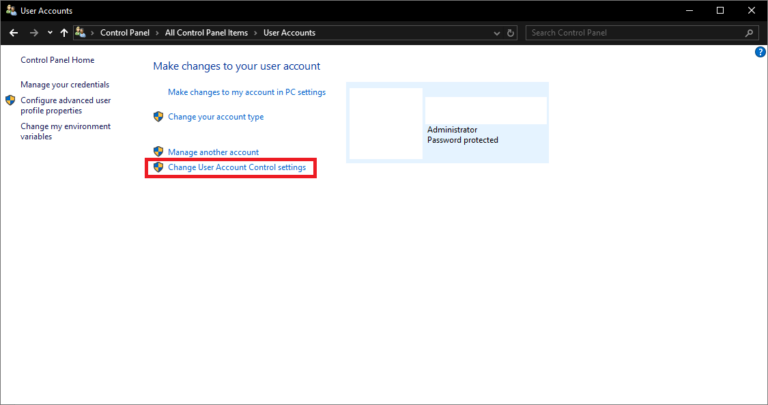
- Step 1.Go to the Control Panel and click User Accounts.
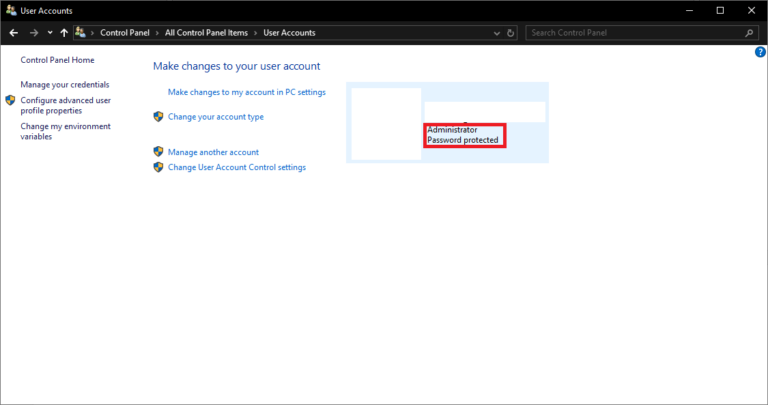
- Step 2.Check if your account is listed as an administrator, which you will see next to the user profile. If not, contact your system administrator to grant the necessary permissions.
`
2Review Security Policies
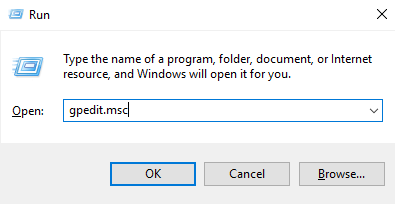
- Step 1.Press Win + R, type gpedit.msc, and click the OK button to open the Local Group Policy Editor.
- Step 2.Go to Computer Configuration > Windows Settings > Security Settings > Local Policies > User Rights Assignment.
- Step 3.Locate the policies Allow log on through Remote Desktop Services and Deny log on through Remote Desktop Services and check if they are enabled.
- Step 4.If not, double-click on each one and set its value data to Enabled.
3Add User to Security Policies
- Step 1.Press Win + R, type gpedit.msc, and press Enter to open the Local Group Policy Editor.
- Step 2.Go to Computer Configuration > Policies > Windows Settings > Security Settings > Restricted Groups.
- Step 3.Right-click on the Restricted Groups folder on the sidebar, and click on Add Group.... Type an appropriate group name and click OK.
- Step 4.Go to the Properties tab and find the Members of this group option. Click Add and then Browse to select which members belong to this group. Click OK to save the changes.
4Adjust User Account Control Settings
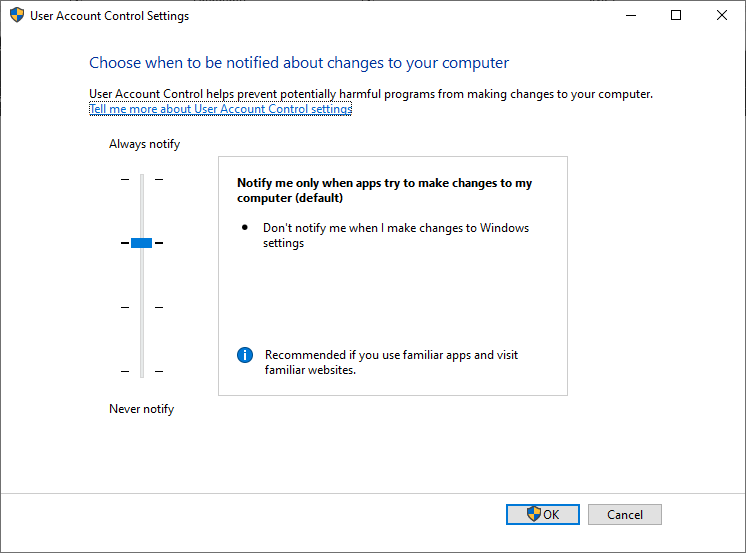
- Step 1.Open the Control Panel and click User Accounts. Then, click the Change User Account Control settings option.
- Step 2.Move the slider to a less restrictive level and click OK to save the changes.
- Step 3.Restart your computer.
5Reconfigure Session Settings
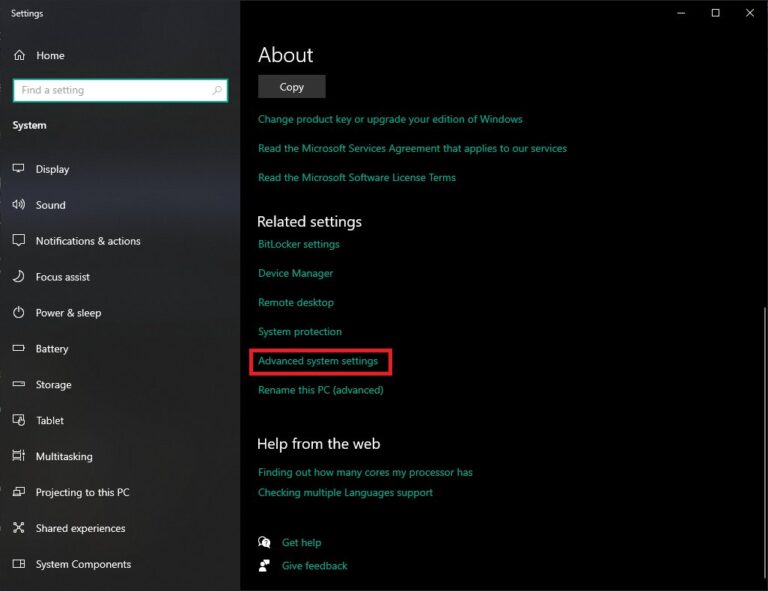
- Step 1.Right-click on the Home button and click System. Scroll down and click the Advanced system settings option to open System Properties.
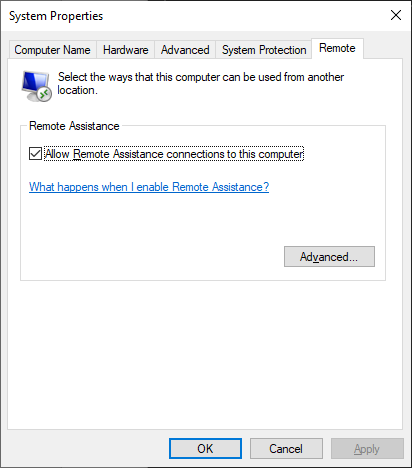
- Step 2.Go to the Remote tab.
- Step 3.Ensure Allow Remote Assistance connections to this computer is checked. If necessary, check the box next to Allow connections only from computers running Remote Desktop with Network Level Authentication.
Part 4. Most Stable Remote Access Solution You Should Know
While all of the above methods can resolve this issue, a more stable and robust remote access solution is better for long-term use. One such solution is AirDroid Remote Support. This powerful tool has been created with the needs of individuals and organizations in mind for seamless remote access and support capabilities. If are looking for a reliable, secure, and user-friendly remote access tool, then this is your no.1 option.
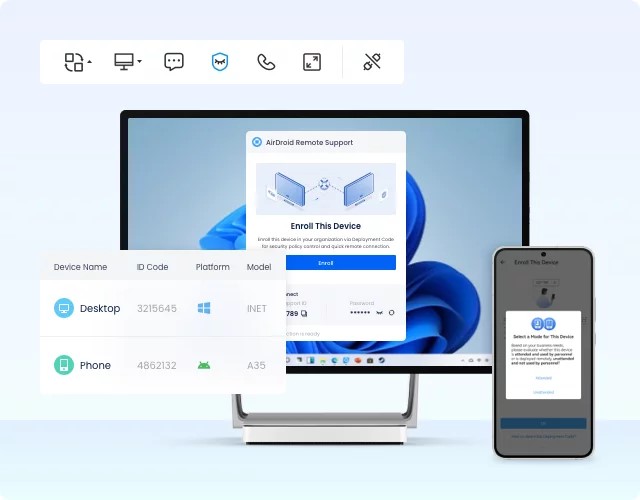
What makes AirDroid Remote Support such a great tool includes:
- Easy Setup: Find and install the installer on your devices in a quick and straightforward setup process.
- Assign Permissions: In this tool, it is very easy to assign permissions on individuals, teams, and devices.
- Full Remote Control and Screen Sharing: Provides smooth and responsive remote control with low latency. Moreover, you can share your screen in real-time for efficient support.
- File Transfer: This tool allows you to transfer files between devices via a built-in chat, which you can also use to communicate with the other device.
Steps to Use AirDroid Remote Support
- Step 1.Download and install AirDroid Remote Support on controlled side and install AirDroid BUsiness on controller side.
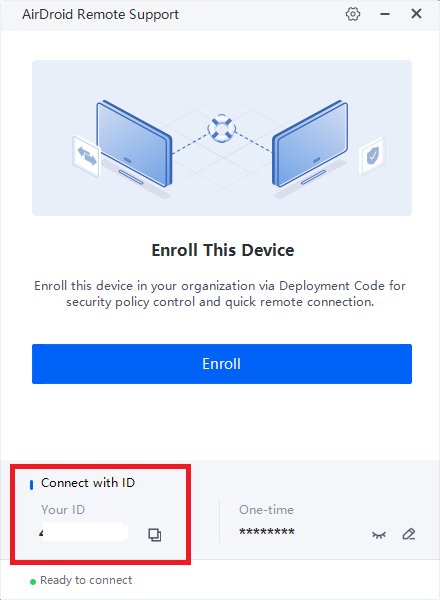
- Step 2.Launch AirDroid Remote Support on the remote device. Find and note the 9-digit code under the Connect with ID section.
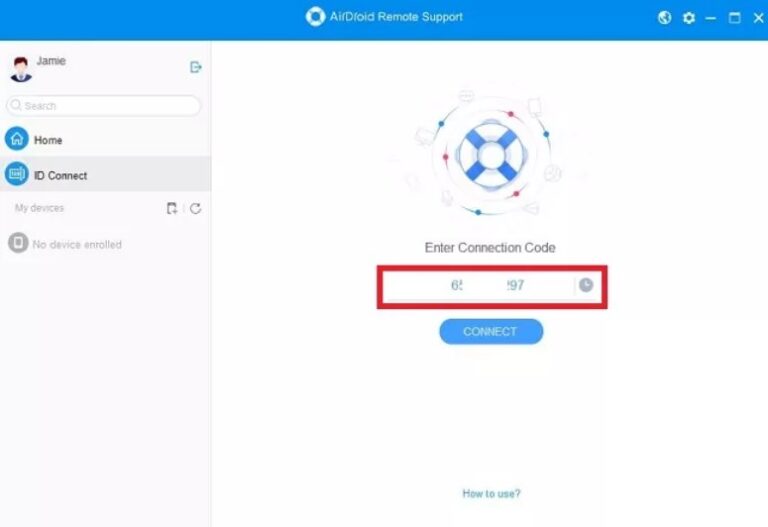
- Step 3.On the local device, launch AirDroid Business. Type the 9-digit code and click Connect to initiate the remote connection.
Wrapping Up
"The requested session access is denied" error is one of the many issues you might encounter when trying to establish a remote connection. The methods we have explained in this piece can help you troubleshoot it in a few steps. However, the right solution might be to use another remote access tool. Try AirDroid Remote Support today to see the difference it can make in your remote access needs!


Leave a Reply.