[Alternatives]Home Edition of Windows 10/11 Doesn't Support Remote Desktop
Struggling with the limitations of Windows 10 Home when it comes to Remote Desktop access? Do you need a way to access your computer remotely without following lengthy steps?
Windows 10 Home is designed to cater to basic user needs. It intentionally omits advanced features like RDP to keep the system streamlined and cost-effective.
However, several alternatives can bridge the gap and provide the functionality you need to stay connected and productive. Let’s explore them in detail to get you back in control!
Reasons for Home Edition of Windows 10/11 Does Not Support Remote Desktop
There is no Remote Desktop and Group Policy Editor feature in Windows 11 and 10 Home Edition. If you go to the Settings > System Remote Desktop, you might face the error: Your Home Edition of Windows 11 Doesn’t Support Remote Desktop

The reasons include:
1. Feature Limitation: Remote Desktop is not included in Home because the feature is reserved for more advanced versions like Windows 10 and 11 Pro. The Home editions are designed to be more streamlined and less complex.
2. Consumer Focus: Windows Home editions are aimed at everyday users and families for general computing, multimedia, and basic productivity. Advanced tools like RDP are deemed unnecessary for the typical home user.
3. Security Considerations: RDP involves potential security risks, as it allows remote access to a computer. By restricting this feature to the Pro and Enterprise editions, Microsoft aims to minimize security vulnerabilities that could arise from less experienced users inadvertently exposing their systems.
4. Resource Allocation: RDP requires additional system resources and infrastructure. By limiting it, Microsoft can optimize performance and support for users who do not need these capabilities.
Alternatives to Remote Desktop on Windows 10/11 Home
If you’re using the home version of Windows and need access to RDP, here are some potential considerations:
1Upgrade to Windows 11/10 Pro
Remote Desktop is exclusively available on Windows Pro versions and Enterprise, allowing users to connect remotely. To upgrade to the Pro edition, follow these steps:
- Step 1.On your Home computer, go to Start> Settings > System > Activation.
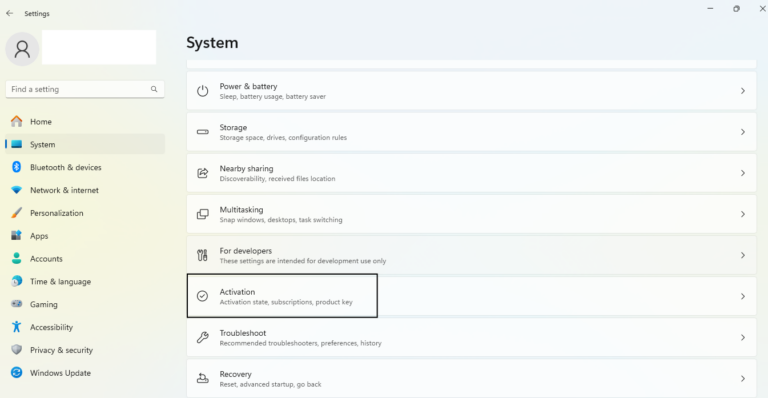
- Step 2.Click Upgrade your edition of Windows.
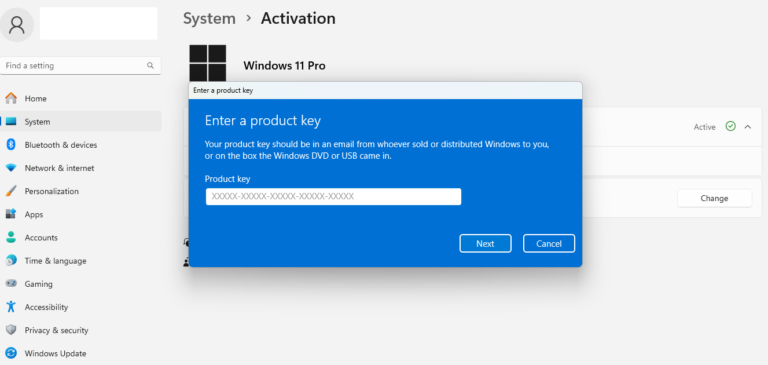
Note: If you have already purchased a product key of Windows Pro edition, select Change product key. Then, enter the 25-character key, and click Next.

- Step 3.Sign in with your Microsoft account, follow the on-screen instructions, and proceed with the transaction.
- Step 4.After confirming your purchase, install Windows Pro and restart your computer. Your Windows Home edition will be upgraded to Professional, and can easily use RDP.
Along with RDP, BitLocker Device Encryption (enhanced security for protecting data) is available in the Pro version. You can also access Hyper-V (a virtualization tool) and Group Policy Management (for advanced system administration).
2Use Microsoft Remote Desktop App
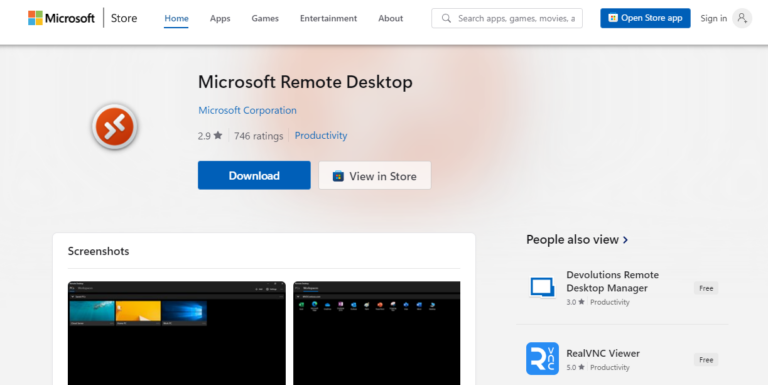
While RDP is not available natively in the home edition, you can still use the UWP Microsoft Remote Desktop app. You can download it from the Microsoft Store and connect it to a PC running Windows 10 or 11 Pro or Enterprise from another device. Here’s how to set it up:
- Step 1.Download and install the Microsoft Remote Desktop app from the Microsoft Store.
- Step 2.Configure the host PC and ensure that the PC you want to connect to is running Windows 11 Pro or Enterprise and has RDP enabled.
- Step 3.Open the Microsoft Remote Desktop app, click the “+” icon, and tap “Add PC.”
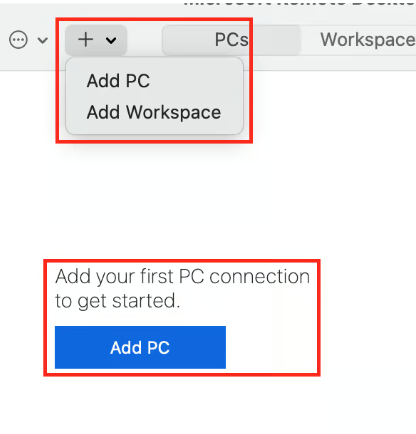
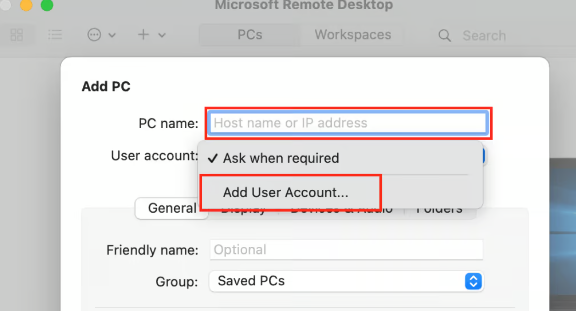
- Step 4.Enter the IP address or name of the host PC, and establish the connection.
3Third-Party Remote Desktop Software
For users with Windows Home Edition, there are several third-party apps available that allow quick remote desktop connection. Some popular options include:
AirDroid Remote Support
AirDroid Remote Support is an excellent tool for remote control and management. It is particularly useful for Windows 10 Home users who lack built-in RDP. It offers key features such as cross-platform support, allowing access to Windows, macOS, Android, and iOS devices.
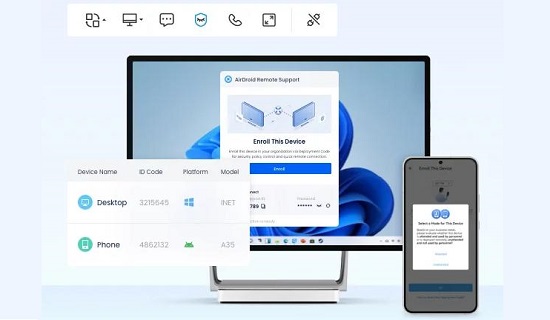
Users can benefit from real-time screen sharing, seamless file transfer, and built-in voice and text chat for easier communication.
Here’s how to set up AirDroid Remote Support:
- Step 1.Install AirDroid Business on the host and AirDroid Remote Support on the remote computer.
- Step 2.Launch AirDroid Remote Support on the remote device and note the ID.
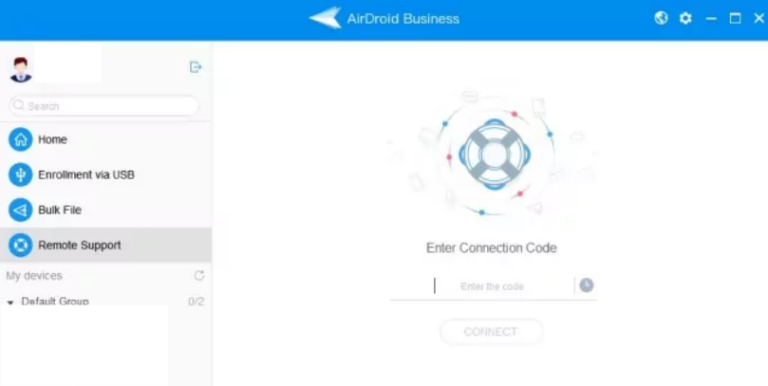
- Step 3.On the host computer, open AirDroid Business, enter the remote desktop ID and click Connect.
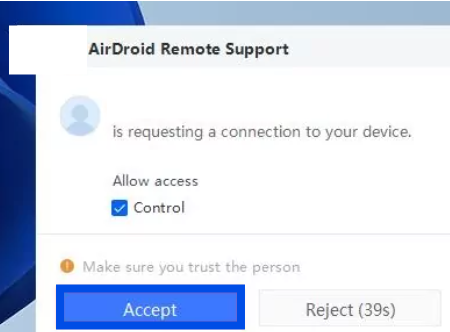
- Step 4.Accept the connection on the remote computer.
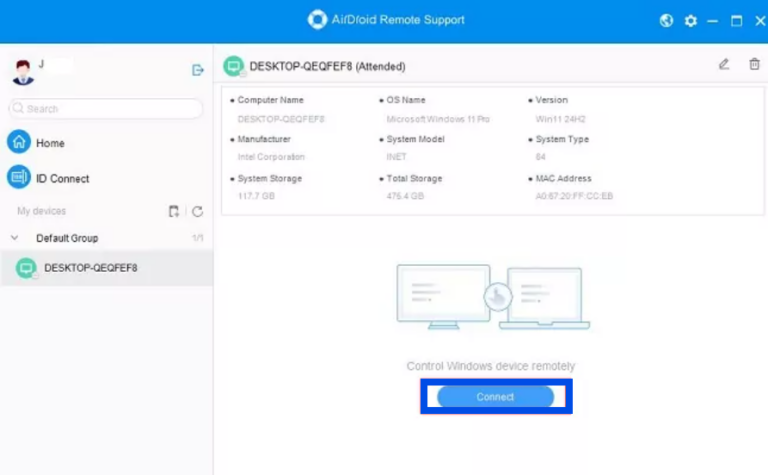
- Step 5.Select the remote computer’s name from the host and click Connect for remote access.
Ideal for personal, business, and technical support purposes, AirDroid Remote Support is an excellent alternative for those seeking real-time assistance across multiple platforms.
AnyViewer
AnyViewer is a lightweight and user-friendly remote desktop tool specifically designed for Windows systems. It supports remote connections across different Windows versions, including Home.
Also, it provides fast and stable remote connections, making it efficient for remote work or technical support. You can ensure the secure and seamless transfer of files between connected devices.
The software is designed to be user-friendly, allowing quick connection setup without complex configurations. You can also manage multiple remote sessions from one device.
To use AnyViewer, follow the steps:
- Step 1.Install and launch AnyViewer on both your home computer and the other computer. Create an AnyViewer account and sign in with the same account on both devices.
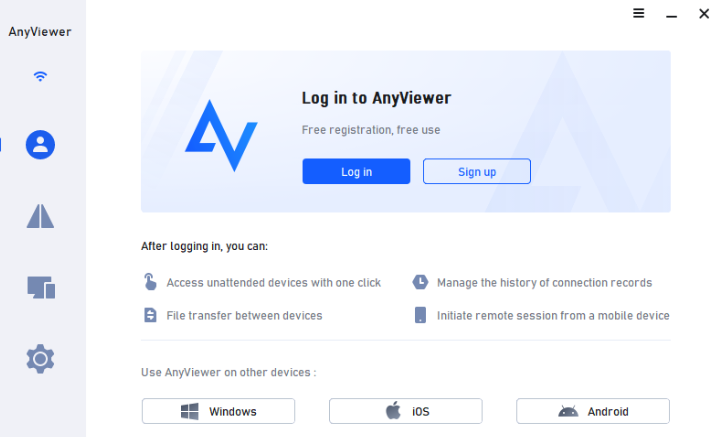
- Step 2.On the local computer, click on Device to view all computers connected to that account.
- Step 3.Locate the Windows home computer you wish to control, then select it and click One-click control.
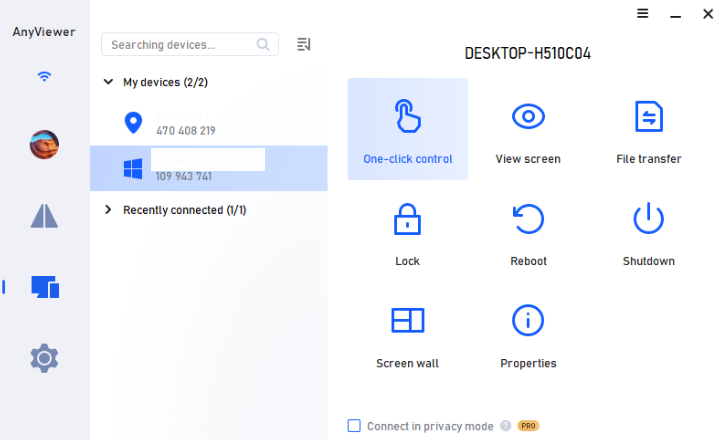
- Step 4.It allows you to take full control of the remote computer, performing actions as if you were physically present.
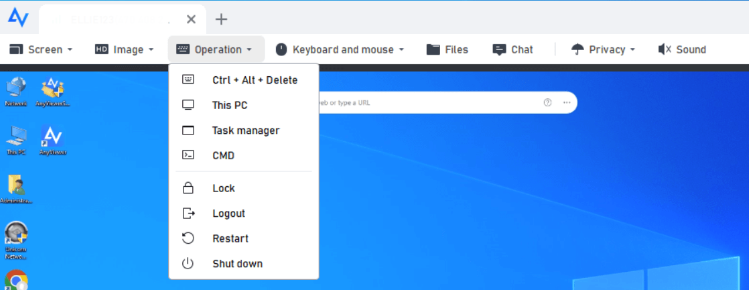
- Step 5.For one-time remote support, there’s no need to log into the same account. Simply click Connect and send a remote-control request to the remote computer.
AnyViewer is ideal for users seeking a simple remote desktop tool with a focus on performance and simplicity.
TeamViewer
TeamViewer is one of the most popular and simple remote desktop solutions, widely used for personal and professional purposes. It allows you to set up permanent access to devices, ideal for remote work or server management.
The features include screen sharing, file transfer, remote printing, and session recording. You can benefit from end-to-end encryption and two-factor authentication to ensure secure remote connections.
To connect to a friend's or family member's computer using TeamViewer:
- Step 1.Ask them to install the TeamViewer Full Version and share their ID and Password with you. The ID and password are available on the front interface.
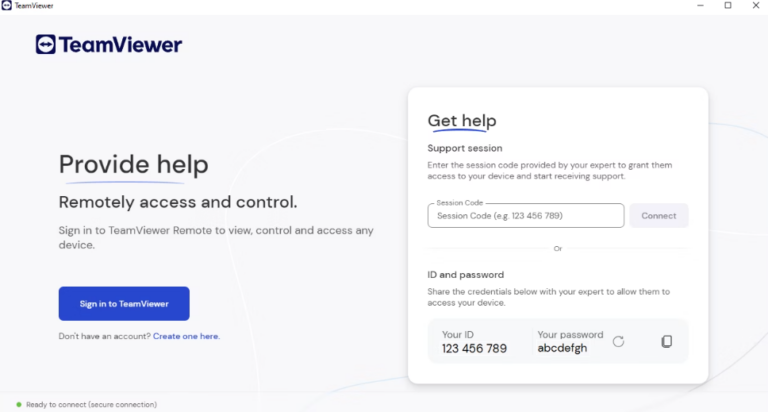
- Step 2.Install the TeamViewer Full Version on your computer.
- Step 3.Enter their ID under Control Remote Computer and click Connect to partner.
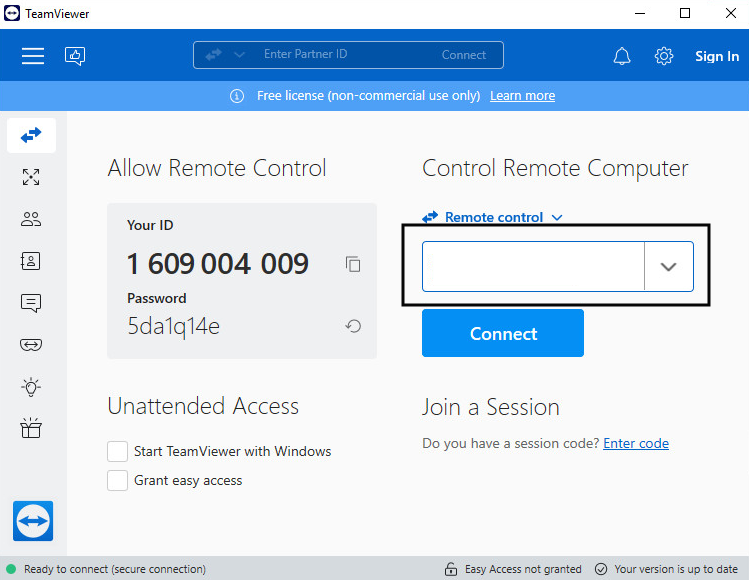
- Step 4.Enter their Password when prompted.
- Step 5.Once connected, you can control their computer as if you were sitting in front of it.
Get a comprehensive, secure, and feature-rich environment for both personal and professional use with TeamViewer.
Conclusion
Windows 10/11 Home does not support Remote Desktop as it is designed for basic consumer use, prioritizing simplicity and security for everyday tasks. Advanced features like RDP are reserved for Windows Pro and Enterprise editions, which cater to professional environments.
However, users still have effective alternatives. Upgrading to the Pro version unlocks the Remote Desktop feature. Also, third-party tools such as AirDroid Remote Support offer a secure solution for remote control across platforms.
With its easy setup, cross-platform access, and powerful features like screen sharing and file transfers, it’s a perfect alternative that lets you stay connected to your devices no matter where you are!



Leave a Reply.