[Quick & Comprehensive]How to Fix Wol Not Working
WOL is the abbreviation of the Wake on Lan that represents the industry standard protocol to help you awake the PC through a low power state like shut off, hibernate, and sleep. With this protocol remotely accessing the PC from the home or office situated at another place is essential.
The deplorable thing is that many Windows users have often complained about the "WOL not working" on Windows, and several factors could contribute to this annoying issue.
Dive into this post to learn about the potential reasons behind the "WOL not working Windows 10" issue. We'll also introduce spectacular ways to fix the issue.
Part 1: Reasons for Wol Not Working
Facing issues like "Wol not working Windows 11 or 10" isn't a good sight, and the following reasons might cause this unwanted issue.
1. The incorrect IP address of the destination computer or a failure to configure the subnet mask could cause the issue you're dealing with.
2. An incorrect Mac address might also be the main culprit behind the "Wol not working after shutdown" issue.
3. If you don't enable Wake on Lan in the BIOS/UEFI settings, it might cause the current issue, and an incorrect power state might also be the main culprit.
4. Using the outdated network adapter drivers could be a key factor behind the issue.
5. You can't rule out the power supply issues as the main thing behind the problem.
Part 2: How to Fix WOL Not Working
1Check AC Power
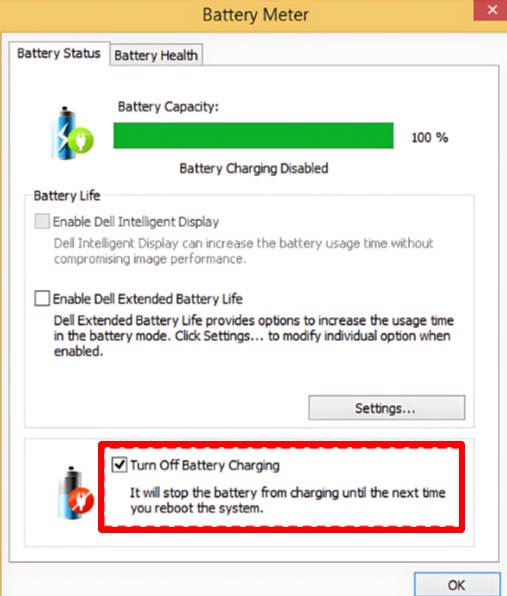
Facing the ''WOL not working'' issue will be evident if the remote computer is working on the battery power. Hence, if you want to make the WOL work appropriately, plugging the AC power is necessary.
Different manufacturers develop software to limit the charging to make the laptop run the AC power. You can rely upon Dell Battery Matter and select the Turn Off battery charging button to use AC power instead of battery power.
2Disable Fast Startup
Disabling the fast startup might assist you in fixing the ''Wol not working Windows 10'' issue, as network devices are empowered to get the power despite the computer getting switched off.
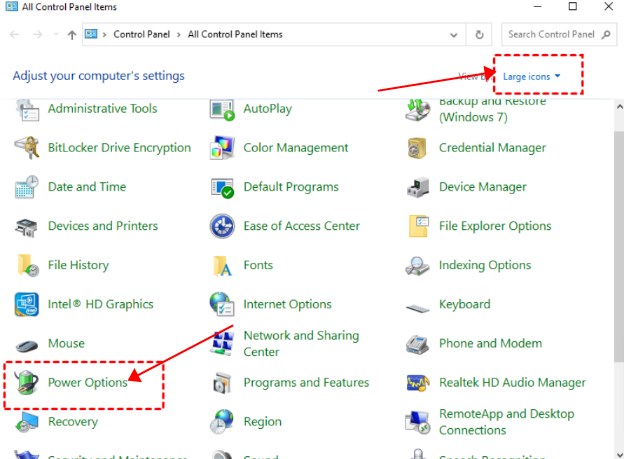
- Step 1.Launch the Control Panel and choose the Large icons. Proceed ahead by choosing the ''Power Options'' button.
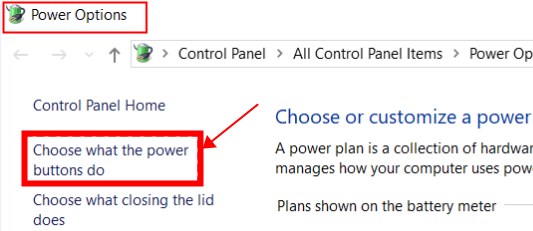
- Step 2.After going to the left side of the screen, you'll need to press the ''Choose what power buttons do'' icon and hit the ''Change settings that are currently unavailable''.
- Step 3.Press the Save Changes button after unchecking the ''Turn on fast startup'' option.

3Update the Network Interface Card (NIC) driver
Since an outdated Network Interface card driver could cause the "WOL not working" issue, installing the new driver might help you fix the issue.
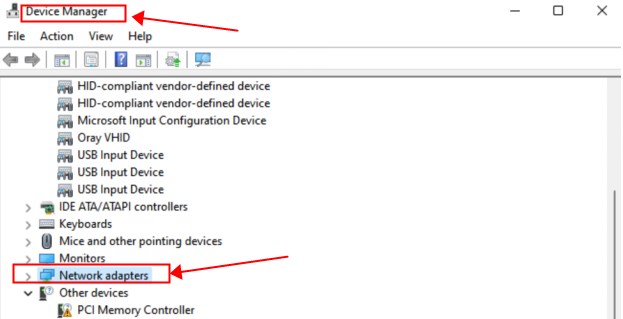
- Step 1.After navigating to Windows, you'll need to search for the Device Manager and press on it. Double press the Network Adapter subheading to launch it.
- Step 2.You can now access the network card's properties menu by double-pressing on the driver. Next, you'll need to use the ''Update Driver'' option.

- Step 3.Click ''Browse automatically for update driver software'' to update the Network drivers.
4Change Power Plan settings
Another way to get rid of the ''WOL not working'' is by changing the power plan settings. Follow the guide below to change the Power Plan settings.
- Step 1.Navigate to the notification area and press the battery icon before selecting the ''Power Options''.
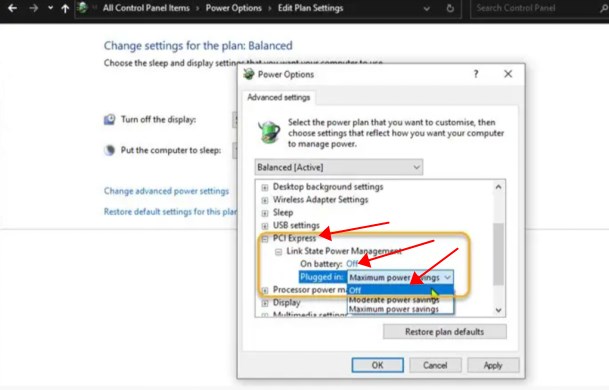
- Step 2.After going into the ''Power Options,'' you'll need to find the current Power Plan. Press on the Change plan settings and choose the ''Change advanced power settings icon afterwards.
- Expand the Link State Power Management and PCI Express and adjust the power saving toggle to Off for the Plugged in and On Battery State. Save all the changes by hitting the Apply and OK icons.
5Check BIOS settings
The issue with the BIOS settings might also prompt issues like ''Wol not working'' You can eliminate the issue by booting into BIOS and adjusting some settings.
- Step 1.After restarting the computer, you must enter the BIOS by clicking the F, Del, and Enter Keys. Next, you must switch on the Power Management, enabling the Wake on Lan feature.
- Step 2.Ensure that Deep Sleep is switched on in the BIOS. This power-saving option tends to turn off the NIC.
- Step 3.In this phase, you'll need to wake your computer system settings in BIOS after enabling the ''Allow PCI'' button. After finishing this task, click the F10 key before saving all the changes.
6Modify Registry key
Modifying the Registry key is another reliable way to tackle the ''Wol not working'' issue. Before heading this way, creating the system restore points or backing up the registry is most recommended.
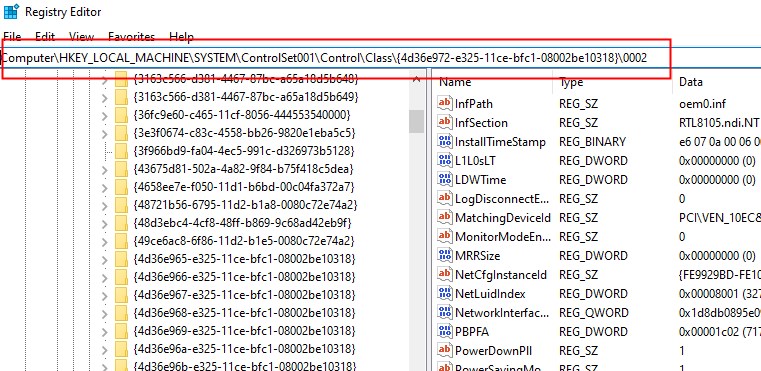
- Step 1.To open the Run dialog, press Win+R. Click on the press button after typing the ''regedit'' icon to open the Registry Editor.

- Step 2.Access the Registry key by typing thecopy Copied!
Computer\HKEY_LOCAL_MACHINE\SYSTEM\ControlSet001\Control\Class\{4d36e972-e325-11ce-bfc1-08002be10318}\0002
Keep in mind that the last part might be different on your PC, so you might need to manually find your network adapter.
- Step 2.Access the Registry key by typing the
- Step 3.To easily do that, in Registry Editor, press CTRL + F, then type S5WakeOnLAN or PowerDownPll in the box and hit Enter.
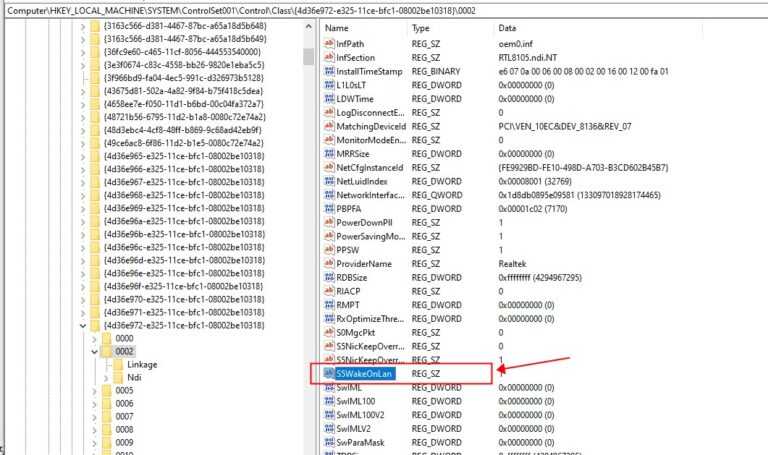
- Step 4.Double-click it and change its Value data to 1.

- Step 5.Next, double-click PowerDownPll and set its Value data to 0.

- Step 6.Restart your computer, it will work. If the issue is still unresolved, proceed with the next solution.
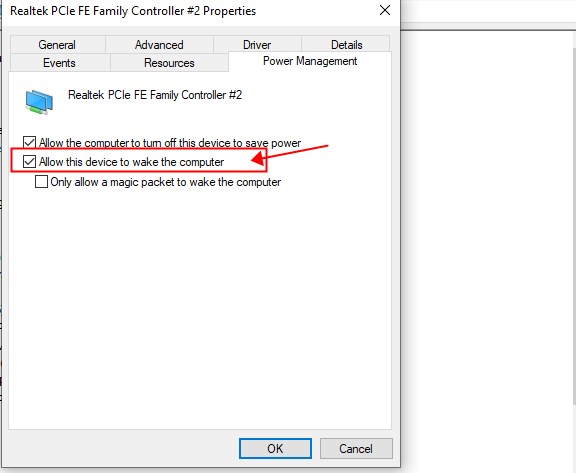
7Configure the Power Management settings
Configuring the Power Management Settings is also essential to dismantle the ''WOL not working Windows 10'' issue.
- Step 1.Press and hold the Device Manager icon prior to selecting the "Start" symbol.

- Step 2.Launch the Network Adapters before locating it, right-press the current network adapter, and hit the Properties button afterwards.
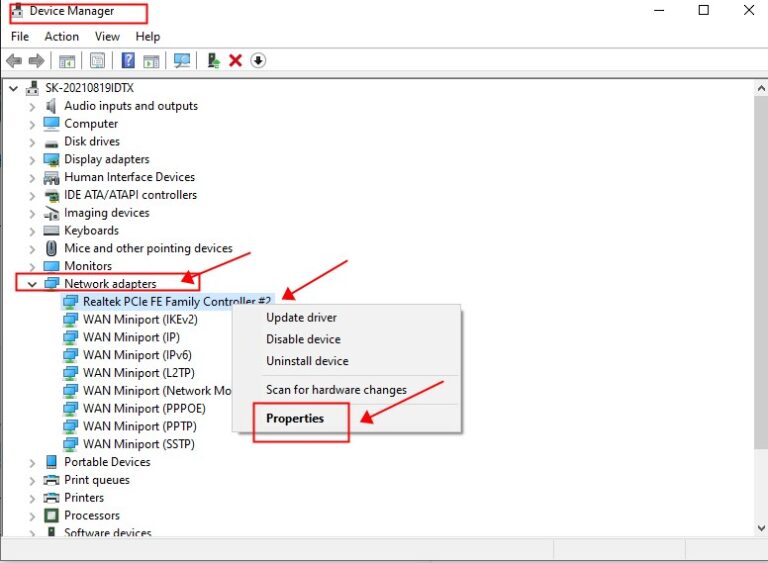
- Step 3.Make sure that the "Allow this device to wake the computer" icon is ticked before navigating to the Power Management Tab.
Part 3: Bonus: Remote Support Software Recommendation
Once you complete the remote startup after fixing the ''WOL not working'' issue, you can control the waking laptop remotely thanks to the remarkable features of the AirDroid Remote Support.
With this remote support software, you can access your computer or mobile device remotely, and during the established connection, you can send messages directly to the controlled device. Apart from sending messages, AirDroid Remote Support also allows you to share images and documents, and the presence of the Black screen Mode will ensure the security of the confidential content doesn't get compromised.
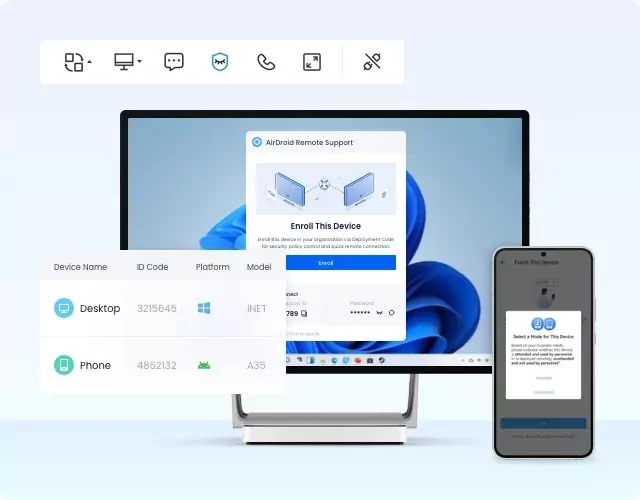
The best thing about AirDroid Remote Support is that it presents an effortless user interface, so you don't need to know anything about this software to start using it.
Conclusion
This post has highlighted the main reasons behind the "WOL not working" issue, and you'll also learn about remarkable solutions to get rid of this annoying issue. Controlling computers and mobile devices remotely has become possible courtesy of the AirDroid Remote Support, which provides easy and safe connections to different devices.


Leave a Reply.