Best Solutions for Remote Desktop over LAN on Windows
"I've yet to find a solution that works well over LAN rather than connecting over the internet. Internet solutions work okay but the performance and frame rate aren't really that great."
---From a Reddit user
The quest for the most efficient remote desktop local network solution on Windows platforms is a topic of significant interest among IT professionals and casual users alike.
There are two popular methods for achieving remote access within your LAN: the built-in Windows Remote Desktop and a free VNC software option.
The built-in Remote Desktop feature of Windows offers a straightforward approach, but alternatives like Virtual Network Computing (VNC) software provide additional flexibility.
This guide delves into the nuances of both methods, ensuring that users can make an informed decision based on their specific needs. Let’s get started!
Way 1: Taking Advantage of Windows Remote Desktop
Windows offers a native remote access tool called Remote Desktop Connection (RDC). This method is a great choice for those comfortable with Windows settings and security configurations.
It can run over the LAN and the Internet. When used within the LAN, there is no need to configure port forwarding.
Here's a step-by-step guide to enable Remote Desktop and access another computer on your LAN:
Step 1: Enabling Remote Desktop
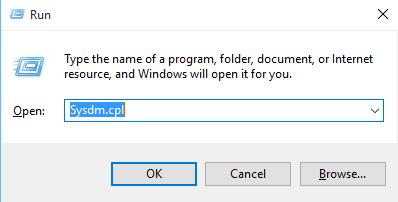
On the remote computer (the one you want to control), press the Windows key + R to open the Run dialog box. Type "sysdm.cpl" and press the "OK" button.
Next, the "System Properties" window will be opened. Navigate to the "Remote" tab.
Under the "Remote Desktop" section, select the button for "Allow remote connections to this computer."
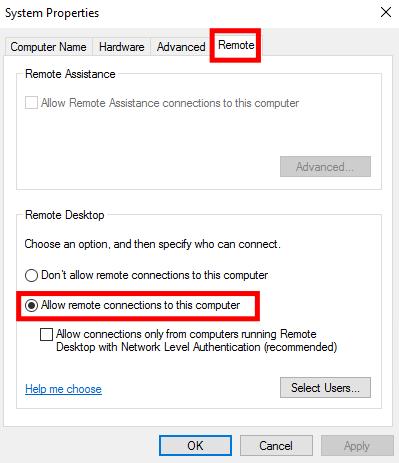
Then, click "OK" to save the changes.
Step 2: Allowing Access Through Windows Firewall
By default, Windows Firewall might block incoming remote desktop connections. Here's how to create an exception:
First of all, open the "Control Panel" on the computer and go to "System and Security" > "Windows Defender Firewall."
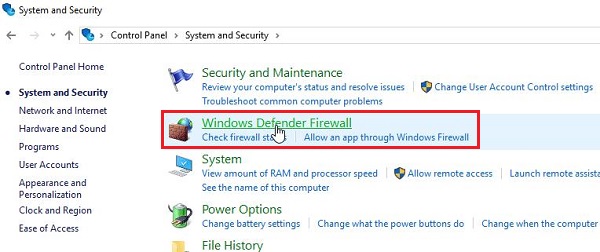
Click "Allow an app or feature through Windows Defender Firewall" on the left side.
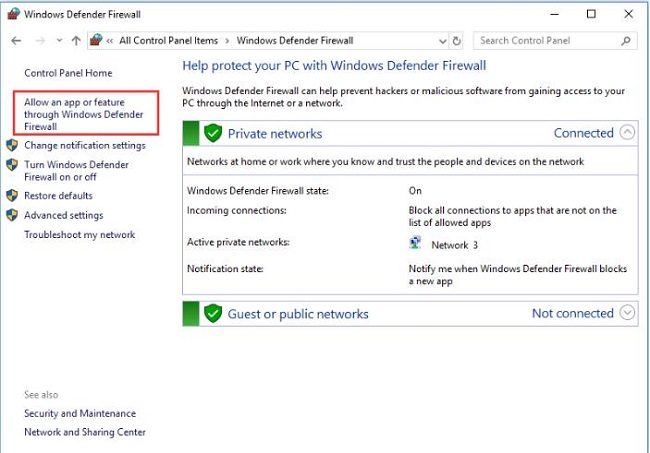
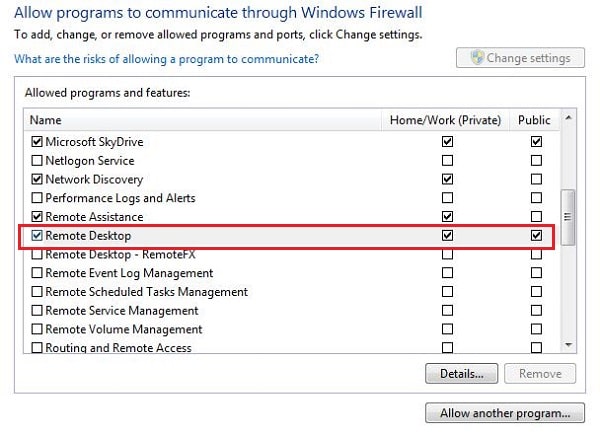
Click "Change settings" and locate "Remote Desktop" in the list of apps. Make sure both "Private" and "Public" options are checked.
Step 3: Assigning a Static IP Address (Recommended)
While not strictly necessary, assigning a static IP address to the remote computer simplifies the connection process. This ensures the computer always has the same IP address on your network, making it easier to locate during remote access.
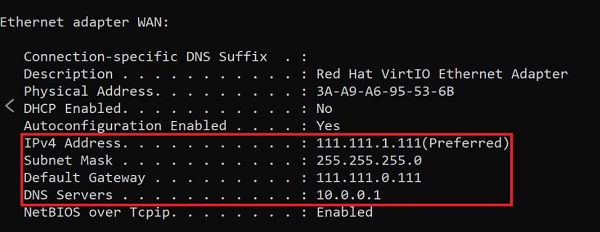
Open the Command Prompt and run the command "ipconfig/all." Make a note of the IPv4 Address, Subnet Mask, Default Gateway, and DNS Servers.
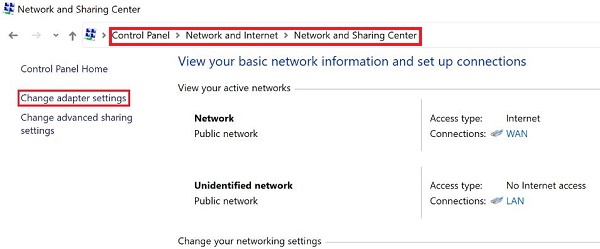
Then, open "Control Panel," go to "Network and Internet" > "Network and Sharing Center." Click on "Change adapter settings" on the left.
Right-click your network connection and select "Properties."
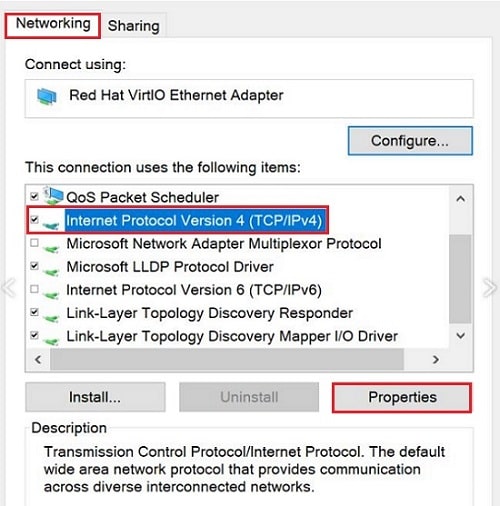
On the "Networking" tab, select "Internet Protocol Version 4 (TCP/IPv4)" and click "Properties."
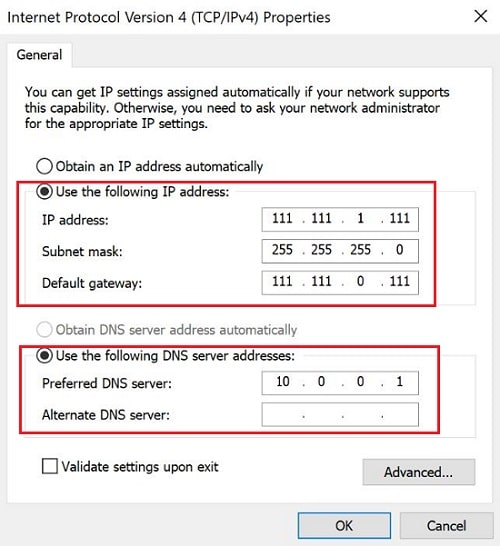
In the "General" tab, select "Use the following IP address." Fill in the IPv4 address, Subnet mask and Default gateway values you noted earlier.
In "Use the following DNS server addresses," add the DNS server you previously noted in the Preferred DNS server field.
Step 4: Remote Access to Another Computer
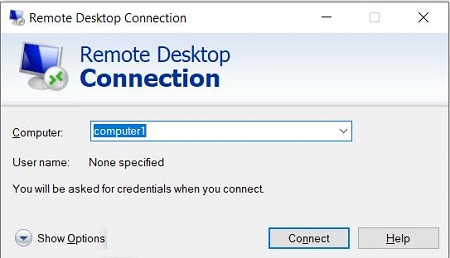
On your local computer (the one you'll use to access the remote computer), open the Remote Desktop Connection app. You can easily find it by searching for it in the Start menu.
In the "Computer Name" field, enter the IP address or computer name of the remote computer you want to access (the one you enabled Remote Desktop on in Step 1). Click "Connect."
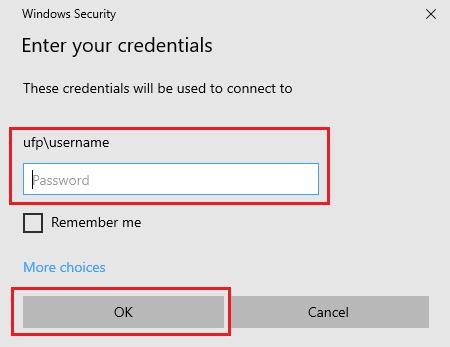
Then you'll be prompted to enter the login credentials for the user account on the remote computer. Enter the username and password and click "OK."
If a security certificate window appears, click "Yes" to connect.
Once connected, you'll see the remote computer's desktop displayed on your local computer. You can then use your mouse and keyboard to control the remote machine as if you were sitting right in front of it.
Way 2: Exploring VNC Remote Desktop Software
VNC (Virtual Network Computing) is another popular choice for remote desktop access. Several free and paid VNC software options exist. Here, we'll explore using TightVNC, a free and open-source VNC software.
Step 1: Download and Installation
Download the TightVNC installer application for your operating system from the official website.
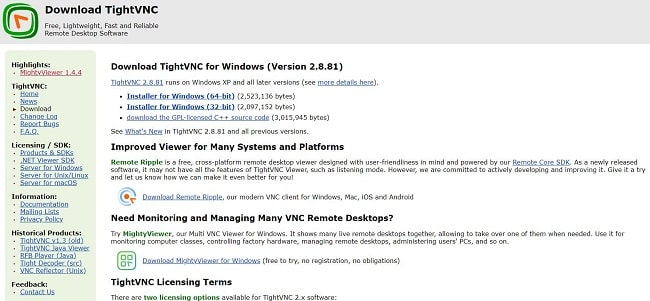
Run the installer, click on the "next" button, and follow the on-screen instructions to complete the installation on both the remote computer and your local computer.
Step 2: Set Passwords
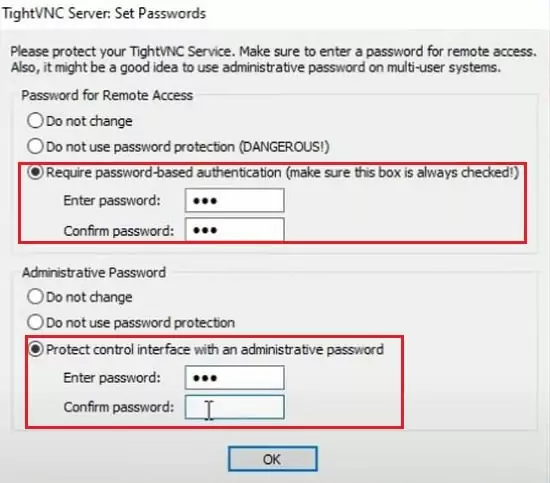
When you launch TightVNC Server for the first time, it will ask the passwords for control interface and VNC authentications.
Set remote access and administrative passwords on the local and remote computers for security.
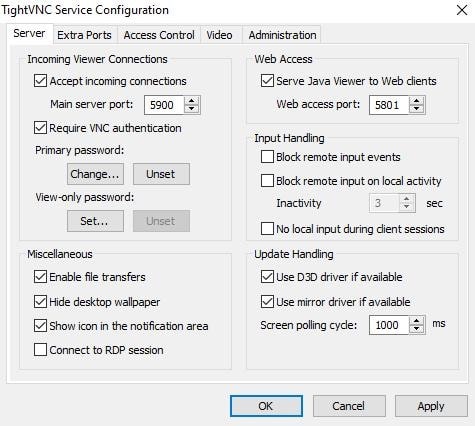
You can also make other configurations once you are in the TightVNC server:
Step 3: Firewall Exception (if needed)
Similar to Windows Remote Desktop, your firewall might block incoming VNC connections. Refer to your firewall software's documentation on how to create an exception for the specific port used by TightVNC (default port is 5900).
Step 4: Connection
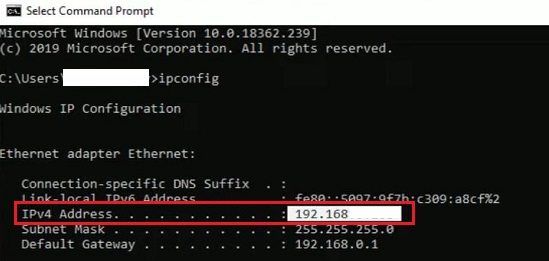
Open the Command Prompt on the remote computer and type "ipconfig/all" to get the IP address.
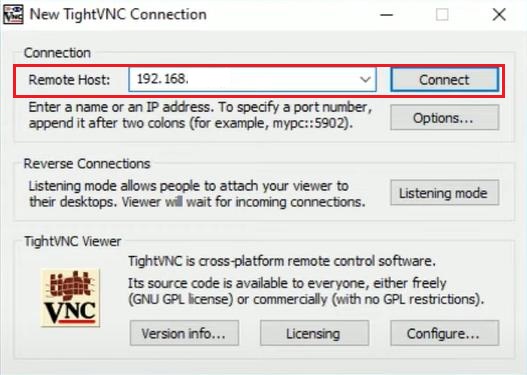
Open TightVNC Viewer on the local computer, enter the IP address of the remote computer and click "Connect."
You'll be prompted to enter the password of the remote computer configuration. Enter the password and click "OK".
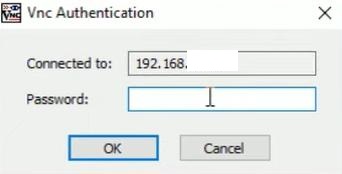
Once connected, you'll see the remote computer's desktop displayed on your local computer's TightVNC Viewer window. You can then control the remote machine using your mouse and keyboard.
Key Differences between VNC and RDP
A user in the Quora forums explains the main differences between VNC and RDP in great detail, which can help you better understand and choose the right method for your needs. Besides, we conclude all the differences for you:
| Features | RDP | VNC |
|---|---|---|
| Platform Compatibility | Proprietary, primarily for Windows | Cross-platform (Windows, Mac, Linux, Raspberry Pi) |
| Connection Type | Virtual desktop session; users log into a server | Screen sharing; multiple users see the same screen |
| User Experience | Direct login to a physical server | Allows full control of the remote computer |
| Performance | Optimized for Windows environments | May be slower due to pixel-based rendering |
| Setup Requirements | Requires port forwarding for internet use | Cloud connections available, easier for remote access |
| Use Cases | Best for single-user access | Ideal for troubleshooting and remote work |
| Security | Built-in encryption for secure access | Security depends on configuration; various options available |
| Session Management | Supports multiple users on the same server | All users see the same desktop, sharing keyboard and mouse |
Bonus Tips: Remote Access Desktop Over Internet - Using AirDroid Remote Software
Remote control can be achieved not only through LAN but also via the Internet. AirDroid Remote Support is a powerful tool designed to facilitate seamless remote access and support over the Internet. This software enables users to connect to devices from anywhere, providing real-time assistance and troubleshooting capabilities.
The Advantage of AirDroid Remote Software Compared to Lan Remote Desktop
- User-Friendly Interface – Intuitive design that is easy to navigate for users of all skill levels.
- Simplified Connection Process – Quick access without the need for complex configuration or port forwarding, unlike VNC.
- Cross-Platform Support – Compatible with various operating systems, including Android and iOS, unlike RDP which is limited to Windows.
- Advanced Features – Real-time screen sharing and file transfer capabilities enhance the support experience.
- Robust Security – Employs encryption protocols to protect data during remote sessions.
Final Thoughts on LAN Remote Desktop
In a word, both Windows Remote Desktop and VNC software provide effective solutions for remote access within your LAN.
Windows Remote Desktop is a convenient built-in option for those comfortable with Windows settings. On the contrary, VNC software runs as an alternative, particularly for those needing to access computers with different operating systems.
Whether you opt for Windows Remote Desktop or a VNC solution, both methods offer robust remote access capabilities over LAN. The choice ultimately depends on user preference, network setup, and specific use cases.
By following the steps outlined in this guide, users can establish a secure and efficient remote desktop connection, enhancing productivity and facilitating seamless IT support.


Leave a Reply.