A Beginner's Guide to Unzip/Zip Files Using PowerShell
"I have a .zip file and need to unpack its entire content using PowerShell. I'm entering the right command but it doesn't seem to work. The directory C:\a is still empty." - A user on Stack Overflow

PowerShell is a built-in command line of Windows PCs that helps you complete various tasks with a simple command prompt. One of its functions is the ability to zip or unzip a folder within seconds.
It uses the Expand-Archive command to extract the contents of a ZIP file in the same or a specified folder. If you're facing difficulties in executing this command, cheer up. In this article, we will dive deeper into how to use PowerShell to zip or unzip files in Windows 10/11.
Part 1: What's the PowerShell Unzip/Zip Command
PowerShell provides a comprehensive set of command prompts to automate various tasks on Windows. Using its "Compress-Archive" and "Expand-Archive" commands, users can create a compressed zipped folder as well as extract files from compressed archives.
The best thing about using the PowerShell Unzip command is you don't need to install any additional software. This cmdlet is a built-in part of Microsoft.PowerShell.Archive module.
To extract the files from a Zipped folder, you must specify:
- Name and path of the compressed archive to extract files from.
- Path to where the extract files need will be stored.
However, both the PowerShell unzip and zip commands require the target archive file extension to be .zip. Also, the size of the archive folder shouldn't exceed 2GB.
Key Takeaways
PowerShell Expand-Archive: Unzip or extract files from a zip archive.
PowerShell Compress-Archive: Compress or zip files and folders into a new zip archive.
Additional parameters: To update existing archives, overwrite zip/unzip files, support wildcards, and adjust zip compression levels.
Part 2: How to Unzip Files in PowerShell
It's quite straightforward to extract files from a compressed folder using PowerShell, as long as it's in .zip format. PowerShell allows you to unzip the files in the current folder or another specified folder.
The basic command syntax for PowerShell zip extraction is:
Expand-Archive -LiteralPath PathToZipFile -DestinationPath PathToDestinationBelow are various user cases of PowerShell file extraction:
Example 1: Zip Files in the Current Folder
Step 1: Click Start at the bottom and search for PowerShell. Right-click the top result and select "Run as Administrator."
Step 2: Now, execute the command:
Expand-Archive -Path "C:Users\Administrator\Desktop\Office2016.zip" -DestinationPath C:Step 3: This will extract all the files from a compressed folder named "Office2016.zip" in C:Users\Administrator\Desktop, to the same directory.
Navigate to the destination and confirm if the files are successfully extracted by PowerShell.
Example 2: Zip Files in a Specific Folder
To extract PowerShell zip files in another folder of your choice, type the directory's name in the Expand-Archive command. To do that:
Step 1: Open PowerShell and execute the following command:
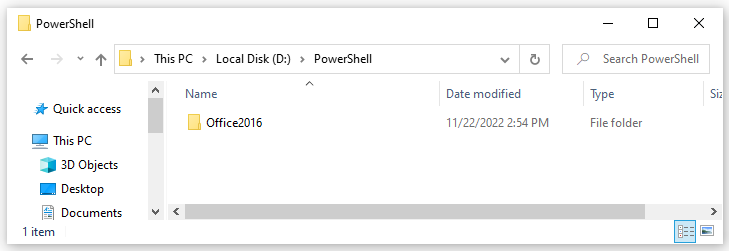
Expand-Archive -LiteralPath "C:Users\Administrator\Desktop\Office2016.zip" -DestinationPath D:PowerShellStep 2: This command will extract the files from Office2016.zip folder to the PowerShell folder in the D directory.

Step 3: Note the Expand-Archive command automatically creates the "Office2016" folder in the PowerShell directory if it's not present.
Example 3: Using -Force Parameter
If the files already exist on the destination path, use the -Force parameter at the end of the same PowerShell Expand-Archive command. It will unzip files in Windows 10 and overwrite the existing files with the extracted files.
For instance, take a look at the below command:
Expand-Archive -LiteralPath "C:UsersAdministratorDesktopOffice2016.zip" -DestinationPath D:PowerShell -ForcePart 3: How to PowerShell Zip Files and Folders
The "Compress-Archive" command in PowerShell compress files in a zip folder. The basic syntax for PowerShell zip is:
Compress-Archive -LiteralPath D:PowerShell -DestinationPath C:Archives Below are various test cases of zipping files in PowerShell:
Example 1: PowerShell Zip File/Folder to a New Archive
If you want to compress a single file in a new ZIP archive, run the below command in the PowerShell window:
Compress-Archive -Path "C:\Users\Documents\Report.docx" -DestinationPath "C:\Users\Documents\Report.zip"This command compresses the "Report.docx" file in the C:\Users\Documents directory into the Report.zip archive.
Similarly, if want to PowerShell zip folder, including its files and sub-folders, try the below command:
Compress-Archive -Path "C:\Users\Documents\MyFolder" -DestinationPath "C:\Users\Documents\MyFolder.zip"PowerShell will compress the "My Folder" and all its contents, creating a new zip file. Depending on your preferences, change the source and output destination.
Moreover, use the "-Force" at the end if you want to overwrite the existing zip folder.
Examples 2: Add More Files to Archive
Do you wish to add new files to the same archive folder? It can be achieved using the "Update" parameter. Run the below PowerShell zip command to update the existing ZIP file with new content:
Compress-Archive -Path "C:\Users\Documents\MyFolder" -Update -DestinationPath "C:\Users\Documents\MyFolder.zip" By applying this command, the zip folder is automatically updated with new files in My Folder.
Example 3: PowerShell Zip Files with Wildcards
The wildcard "*" parameter compresses the source folder's contents that match a pattern. For instance, to compress all the ".docs" files in the Documents folder, run the command:
Compress-Archive -Path "C:\Users\Documents\*.docx" -DestinationPath "C:\Users\Documents\Docs.zip"Navigate to the Docs.zip archive folder to find the compressed .docx files.
Example 4: PowerShell Zip Change Compression Ratio
The PowerShell zip command allows users to customize the zip compression ratio. Generally, you can change the compression ratio in 3 different "CompressionLevel" flags, which are:
- Fastest: Takes less time to zip the folder, reducing the compression ratio. This results in a larger zip file.
- NoCompression: As the name implies, this parameter zips the files or folder in the same size as the original files/folder.
- Optimal: If you want the highest compression ratio, use the Optimal parameter.
In the below command, we apply the "Fastest" compression level, which results in a larger ZIP file.
Compress-Archive -Path "C:\Users\Documents\MyFolder" -CompressionLevel Fastest -DestinationPath "C:\Users\Documents\MyFolder.zip" You can try other compression level flags to check the most appropriate zip file size that fits the requirements.
Bonus Tip: Execute PowerShell Commands On a Remote PC
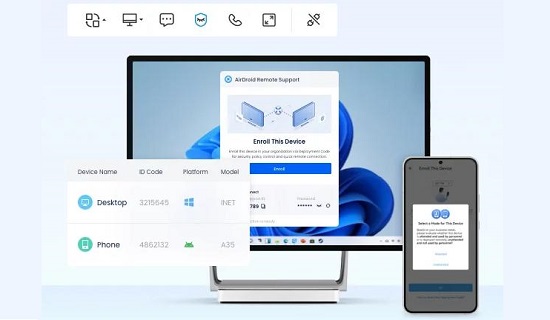
Want to complete PowerShell tasks on a remote PC effortlessly? Take assistance from AirDroid Remote Support to get secure access to distant devices without authorization. As it forces a "black screen" on the controlled device, you get the freedom to execute PowerShell commands or complete the tasks without worrying about privacy.

Key Features
- Remote Access: Gives you complete access to the remote Windows and Android devices with controlled sessions.
- Permission & Device Management: Integrate all the IT infrastructure on its sleek dashboard and assign permissions and policies for each user or device. It can handle multiple devices seamlessly, catering to the needs of both individuals and small business owners.
- Ease of Use: Its interface is designed to be straightforward, promoting ease of use for non-tech-savvy-users.
- Compatibility: Supports all models of iOS, Android, Windows, and Mac.
All these features make it a viable option for users who seek a low-cost remote access solution.
FAQs
Q1: Can I compress multiple folders into a PowerShell single zip file?
To zip more than one folder into a single archive file using PowerShell, you need to specify the paths to all folders. Take, for instance, the below command:
Compress-Archive -Path "C:\Folder1", "C:\Folder2" -DestinationPath "C:\Combined.zip"
It will compress the contents of Folder 1 and Folder 2 located in Local Disk C into a new zip folder, named Combined.zip.
Q2: Does the Expand-Archive cmdlet work on all PCs?
All the PCs having a PowerShell version 5 or later support Expand-Archive cmdlet. If you're using an older version of PowerShell, use a third-party tool like 7-Zip.
Final Remarks
We hope you find this guide useful. Now, you can proceed with zipping or unzipping in PowerShell in Windows 10 without any hassle. The article covers most user-case scenarios for PowerShell extracting Zipfilesas well as unzipping files/folders.
In addition, we introduced AirDroid Remote Support which helps you access and manage remote PCs efficiently. It aligns perfectly with your personal or business landscape and enhances your remote working experience.


Leave a Reply.