- Real-Time Fast Support
- All-around Remote Access & Remote Support Solution for Enterprises & Personal
- Always-On Unattended Remote Access
- Lightweight Remote Management
- Messaging & File Transfer
- AR Camera
Maximize Productivity: How to Switch Monitors in Remote Desktop?
Are you struggling to manage multiple monitors while using Remote Desktop? Is it challenging to switch between screens during remote sessions? Does it hinder your workflow and lead to work interruptions?
Maximizing productivity in a multi-monitor setup can be difficult, especially if you're unsure of how to efficiently navigate between displays.
Let’s walk you through the various steps for switching screens in remote desktops to streamline your workflow.
How to Switch Screens in Remote Desktop?
Switching monitors in RDP can enhance productivity, especially when working with multiple screens. Before switching monitors, ensure that your Remote Desktop session is configured to support multiple monitors. Follow these steps:
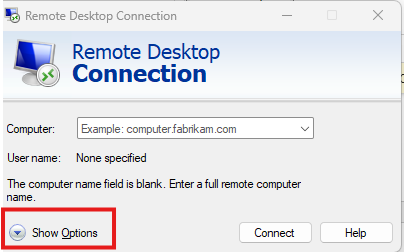
- Step 1.Open the Remote Desktop Connection(RDC) app.
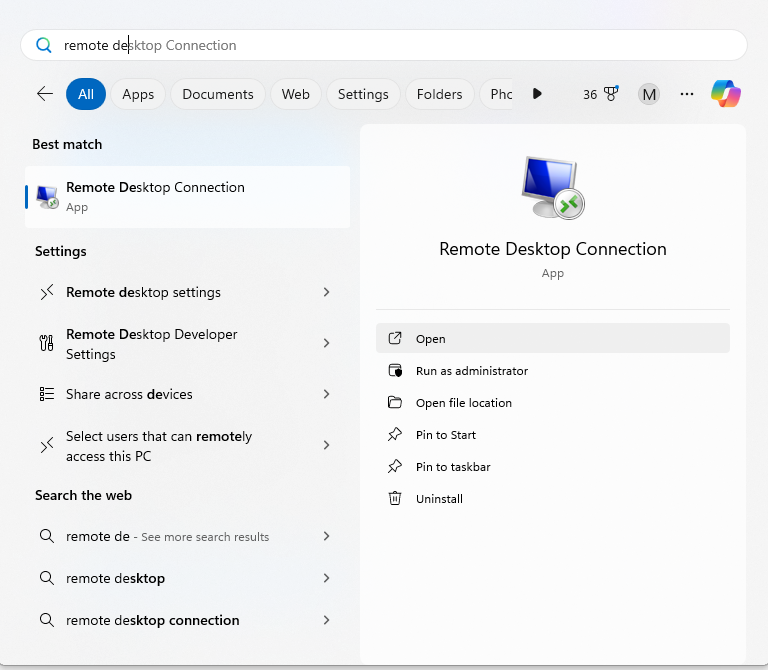
- Step 2.Click on the Show Options button at the bottom.

- Step 3.Go to the Display.
- Step 2.Click on the Show Options button at the bottom.
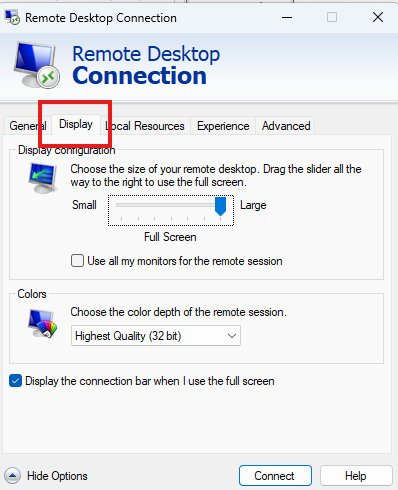
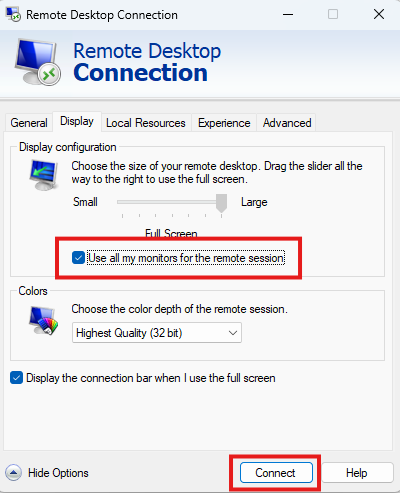
- Step 4.Check the box that says Use all my monitors for the remote session.
- Step 5.Click Connect to start your session with multi-monitor support.
- Step 6.Return to the General tab, input the IP address and computer name of the remote computer, and select Save As under the Connection settings.
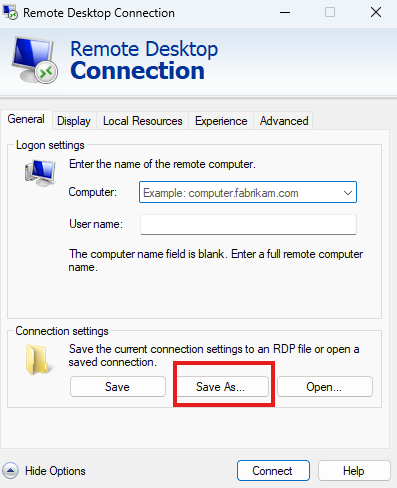
- Step 7.Specify your desired file name for the RDP file.
- Step 8.Locate the saved RDP file, right-click on it, and choose Open with Notepad. Add the line “selectedmonitors:s:0,2” to the file and save it. This configuration indicates that you will be using monitor 0 and monitor 2 for the Remote Desktop session, while monitor 1 will remain unaffected.
- Step 9.Open the RDP file and input your credentials. You are now ready to utilize Remote Desktop with multiple monitors.
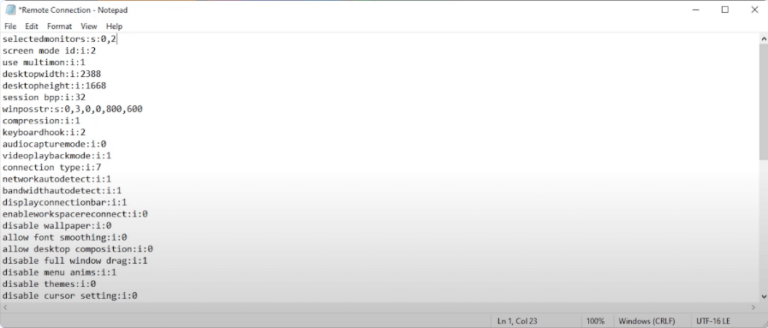
You can easily switch between two screens and designate one as your primary display by adjusting the display settings. Here’s how:
- Step 1.Right-click on the desktop and select Display settings.
- Step 2.In the display settings, you will see the layout of your two screens. You can click and drag to rearrange their positions as desired.
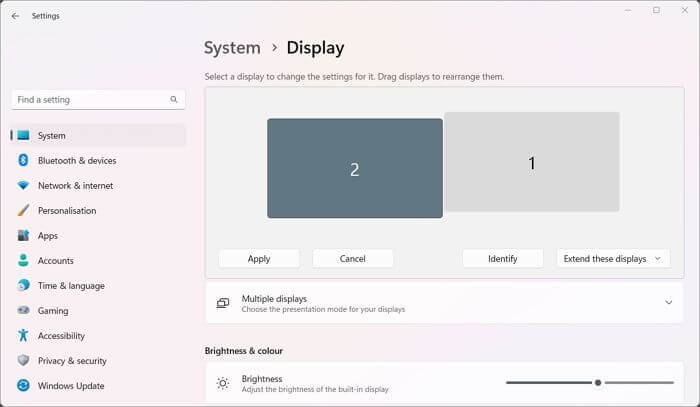
- Step 3.To designate a screen as your primary display, select it, scroll down, check the Make this my main display option, and click Apply.
Additionally, you can quickly move windows between monitors using the shortcut Win + Shift + Right/Left arrow keys to shift the active window to the right or left monitor.
Best Alternative for Multi-Monitor Connection: AirDroid Remote Support
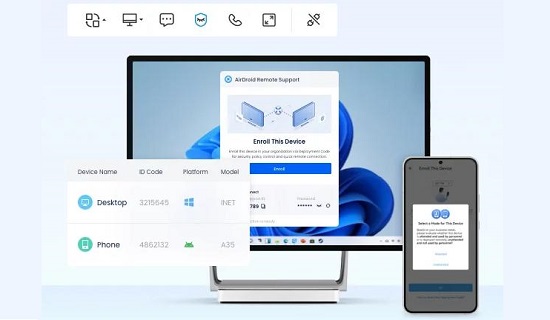
AirDroid Remote Support allows you to manage and switch between multiple monitors connected to a remote device. It provides a clear and intuitive interface to toggle between screens, making it easier to work across several monitors.
It is optimized for performance, ensuring minimal lag when switching between multiple screens. The smooth connection is ideal for users who require real-time collaboration and assistance across several displays.
For switching screens, you can effectively invite and manage multiple team members to assist with customer support and unattended devices.
You can enhance client privacy and security by setting up security policies, such as:
Prohibiting remote control and file transfers.
Restricting clients from receiving external assistance.
Automatically changing the 9-digit connection code after each session to increase security.
To establish a remote connection, enter the connection code in the AirDroid Business Desktop Client. The client must accept the connection request, or you can use a password for direct access. If the client has multiple screens, you can switch between them as needed.
How to Switch Monitors in Popular Remote Support Tools?
For those who need more flexibility and ease in switching monitors during remote sessions, other third-party apps can also help. The tools can optimize your workflow and allow you to manage multi-monitor setups remotely.
1. AnyDesk
AnyDesk is a popular remote desktop application that supports multiple monitors. It allows users to switch between different displays during a session easily.
System Requirements: A dual-core processor with at least 2 GB of RAM and a hardware-accelerated graphics card is recommended for a smooth experience.
AnyDesk displays each remote monitor as a numbered rectangle on the toolbar. Clicking on a numbered icon will switch the view to the corresponding monitor of the connected device.
To organize two or more sessions in full screen, adjust the rendering settings:
- Step 1.Go to the Settings via the main menu.
- Step 2.In the Display section, enable Hardware acceleration and select either DirectDraw or OpenGL for optimal rendering.
- Step 3.Direct3D runs in exclusive full-screen mode, which may not be ideal for multi-monitor configurations.
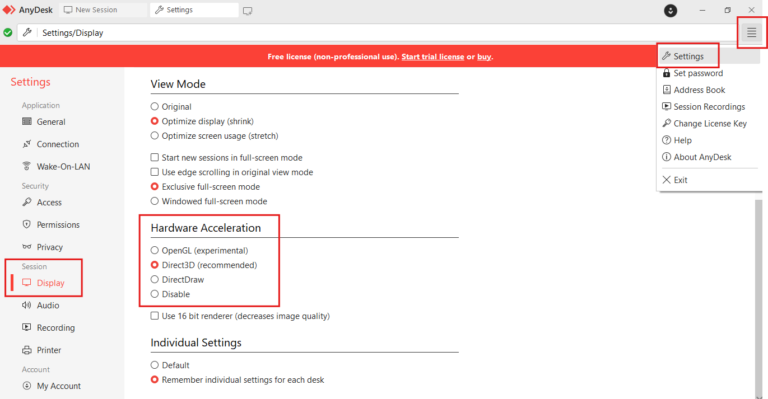
Each remote display is shown in a separate tab (similar to browser tabs). Users can switch between remote monitors by clicking on the corresponding screen number.
If your AnyDesk license allows, you can open separate windows for each monitor by establishing parallel connections.
2. VNC viewer
VNC viewer supports dual monitors, and you can change these settings to enable multiple monitors according to your need.
RealVNC Viewer typically displays all monitors connected to the remote computer by default. However, starting with version 7.1.0, you can easily switch between monitors by using the monitor icons located on the toolbar at the top of the session window.

You can choose to either cycle through monitors or select a particular monitor to view.
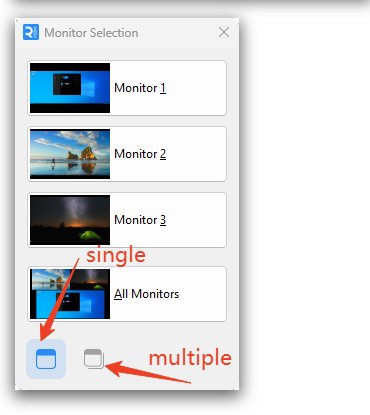
Note: The selected monitor is not saved between sessions and will need to be selected each time you connect.
3. TeamViewer
In TeamViewer, you can easily switch between multiple monitors on a remote device from the toolbar. If both devices have the same number of screens, you can view them separately on your monitors.
TeamViewer can only capture what the graphics card on the remote device displays. It means additional monitors cannot be generated if the remote device only has one.
To switch the monitor on Windows:
- Step 1.Click the icon with two monitors in the toolbar to switch between them.
![]()
- Step 2.You can choose to display a specific monitor or show all monitors in a single window. If "Monitors as individual tabs" is selected, each monitor is shown in a separate tab.

- Step 3.Monitors can open in separate session windows by unchecking "Open new connections in tabs."
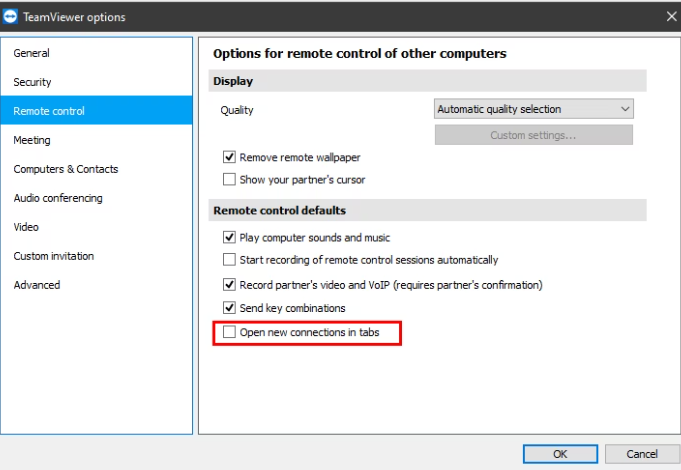
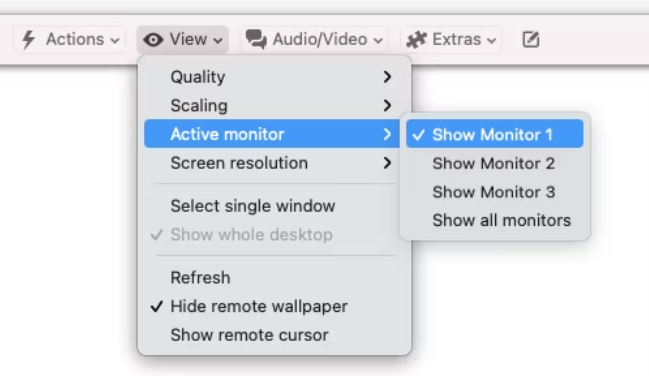
For switching monitors on MacOS:
- Step 1.In the View menu, select the monitor you want to view from the drop-down list or choose to display all monitors.
- Step 2.To manage multiple connections on macOS, select Window > Merge All Windows to condense them into individual tabs.
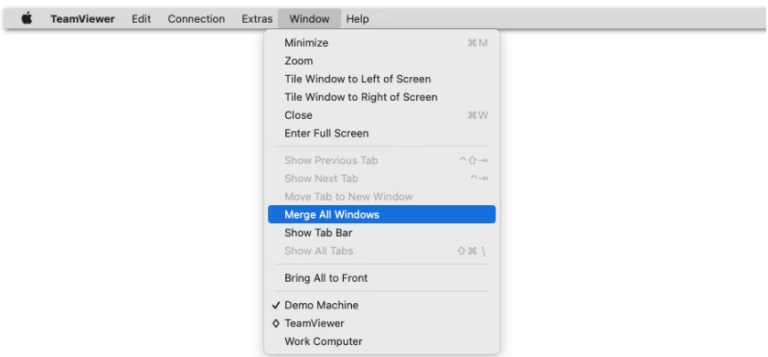
For license holders, opening multiple connections to the same device will use only one channel. If you want to separate multiple remote monitors, make multiple connections and place each window on a different monitor.
Conclusion
Switching screens on the remote desktop is a simple process that can significantly improve your productivity. Whether you're juggling multiple applications or need to streamline your workflow, the ability to seamlessly navigate between screens empowers you to work smarter, not harder.
By utilizing the right tools and techniques, you can create a dynamic workspace that adapts to your needs, ensuring you stay focused and organized. So, why settle for anything less?




Leave a Reply.