How to Provide Remote Computer Support and Troubleshooting?
Nowadays, numerous IT departments of companies depend on remote desktop software to provide remote IT support to their staff, including troubleshooting PC issues, software installations, etc.
In today's tech-driven world, remote computer support has become an invaluable tool for troubleshooting problems without requiring a physical visit.
No matter if your computer is Windows system or macOS system, we will provide you with the methods of built-in tools and third-party software.
This guide will train you with the knowledge and steps to confidently provide remote computer support or assistance, whether you're a seasoned IT professional or simply helping a loved one in need.
Part 1: How to Provide Remote Windows Computer Support?
There are several ways to establish a remote connection to a Windows computer. The best method depends on the specific situation and the comfort level of the person you're assisting or providing remote computer support.
Using Built-in Tools
Windows offers a variety of built-in tools for remote access, each with its own advantages:
1Remote Desktop Connection (RDC):
• Best for: Experienced users and IT professionals. For Windows 10, 11 Pro.
• Requirements: Both computers need to be on the same local network or have Remote Desktop enabled remotely.
• Process:
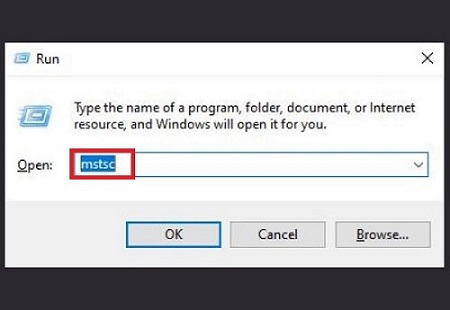
Step 1: On the technician's computer, press the "Windows key + R" to open the "Run" dialog box.
Step 2: Type "mstsc" and press the “OK” button.
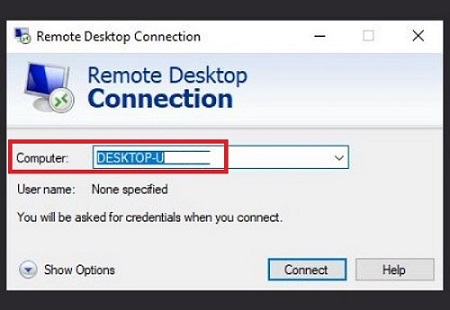
Step 3: Enter the computer name or IP address of the client computer. Then, click on the “Connect” option.
Step 4: The technician will be prompted to enter the username and password of the client's computer account with remote access permission.
Step 5: Once logged in, the technician can view and control the client's desktop.
2Quick Assist:
• Best for: Quick and easy one-time assistance for non-technical users. For Windows 10, 11.
• Requirements: Both computers need to have a working internet connection.
• Process:
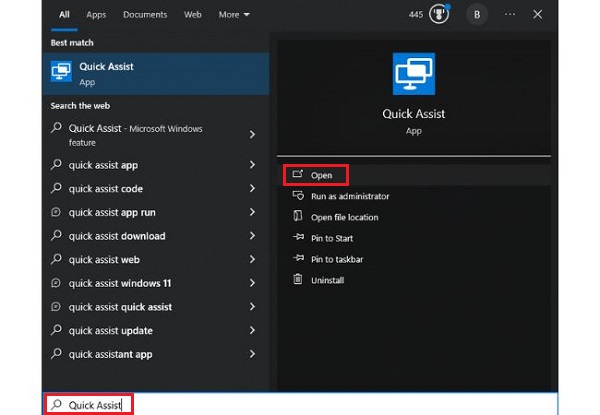
Step 1: Search for "Quick Assist" on both the technician's and client's computers. Then click on the “Open” button. It will take some moments to open the “Quick Assist” function on both PC.
Step 2: After opening the app, select "Help someone" on the technician's computer and "Get help" on the client's computer. If you choose the “Get help” option, you need to enter the security code there and press the “Submit” button.
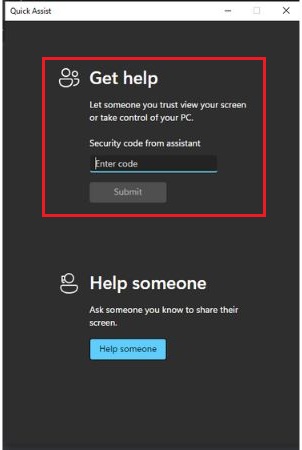
When you select the “Help someone” option, you need to sign in to your Microsoft account.
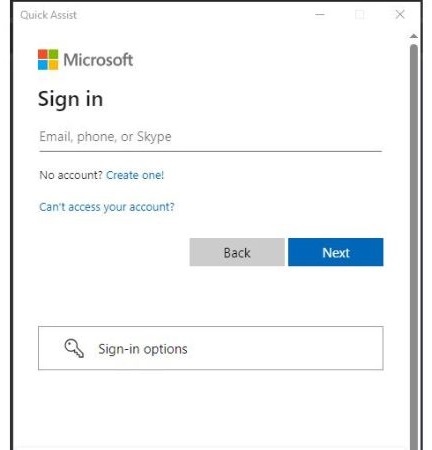
Step 3: A six-digit code will be displayed on the client's computer. The code will be expired in 10 minutes. The technician needs to enter this code to establish the connection.
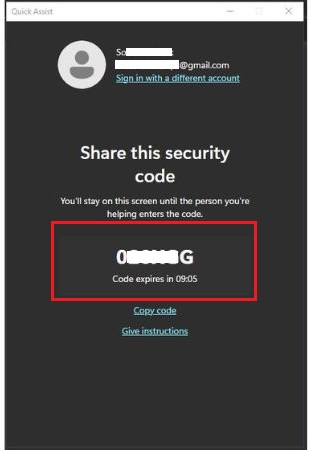
Step 4: Once connected, the technician can view the client's screen and even take control with the client's permission.
3Windows Remote Assistance:
• Best for: Intermediate users comfortable with manual configuration. For Windows 10.
• Requirements: You need to enable Remote Assistance access.
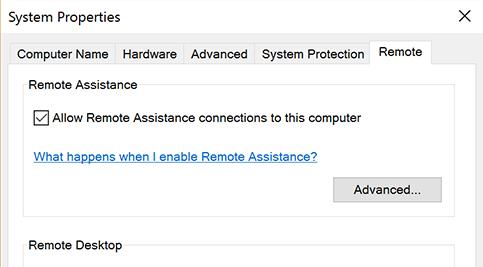
• Process:
The Windows Remote Assistance tool on Windows 10 may not be easily visible, but it can still be accessed by following these steps:
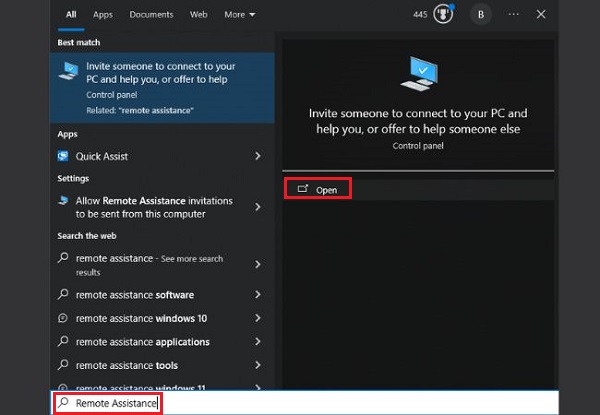
Step 1: Open the Start menu, search for "Remote Assistance", and select the "Invite someone to connect to your PC and help you, or offer to help someone" option.
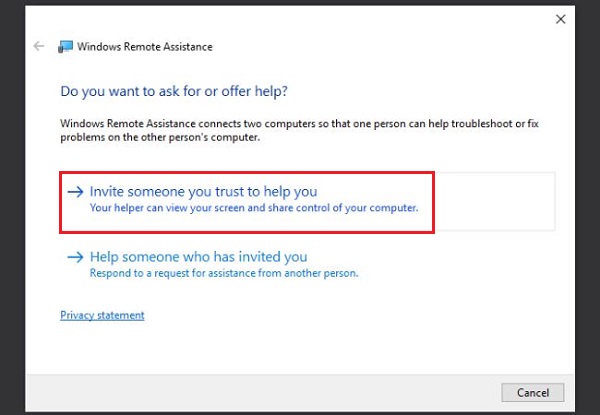
Step 2: Assuming you need quick assistance with your PC. Then click on "Invite someone you trust to help you".
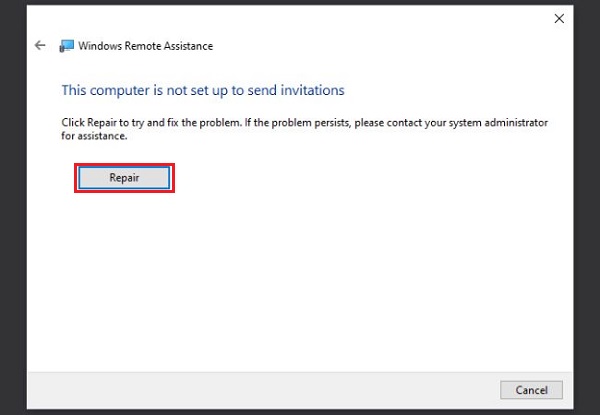
If Remote Assistance invitations are not enabled on your PC, an error message will appear. Simply select "Repair" and the troubleshooting tool will prompt you to enable Remote Assistance.
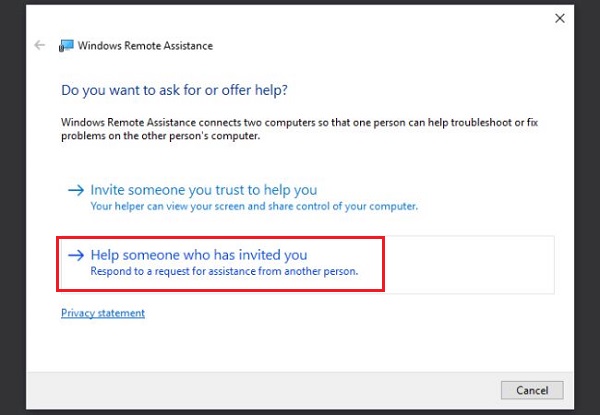
On the other hand, if you want to provide remote computer support or assistance, click on “Help someone who has invited you”
Step 3: To connect, the person can choose between clicking "Use Easy Connect" or "Use an invitation file". Easy Connect is the easiest option if it's available.
If the person has an invitation file, they can simply double-click it and enter the password to connect.
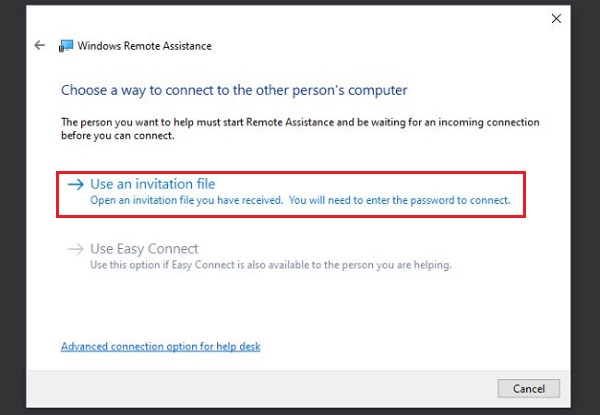
Based on whether the “Easy Connect” option is being utilized or not, the individual or person initiating the connection will have to either share an invitation file along with the displayed password on the other computer or simply provide the password.
Step 4: Now, you are connected. The individual at the computer will receive a final prompt to authorize the connection. Once approved, the connecting person can view their screen. They can choose to observe and give guidance, or click "Request control" to ask for control of the remote PC.
Using Third-Party Software: AirDroid Remote Support
• Best for: Feature-rich solution with easy setup and cross-platform compatibility.
• Requirements: Both computers need to have the software installed and connected to the Internet. Free and paid versions are available, with the free version offering basic functionality.
• Process:
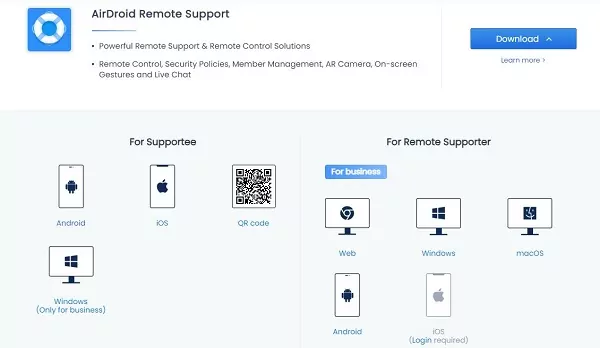
Step 1: Go to the AirDroid Remote Support website- https://www.airdroid.com/remote-support-software/. Then go to the download page to download the corresponding application.
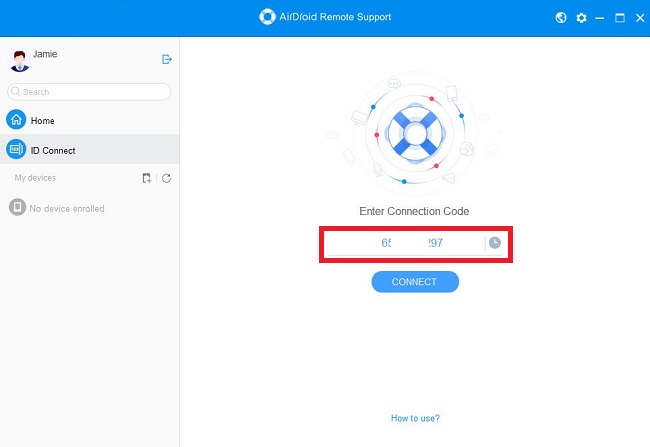
Step 2: After installing the necessary applications, the supporter can start support sessions effortlessly. The supporter opens the AirDoird Business Desktop Client (controller) and enters the supportee's 9-digit connection code in "ID Connect" and clicks "Connect."
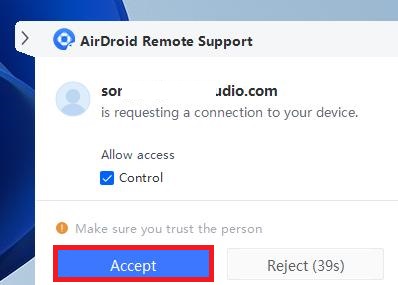
Step 3: The supportee will receive a request to connect. If the supportee clicks "Accept", the supporter can connect without entering a password.
Step 4: If the supporter enters the connection code and password to connect, the connection will be successful directly without the consent of the remote computer.
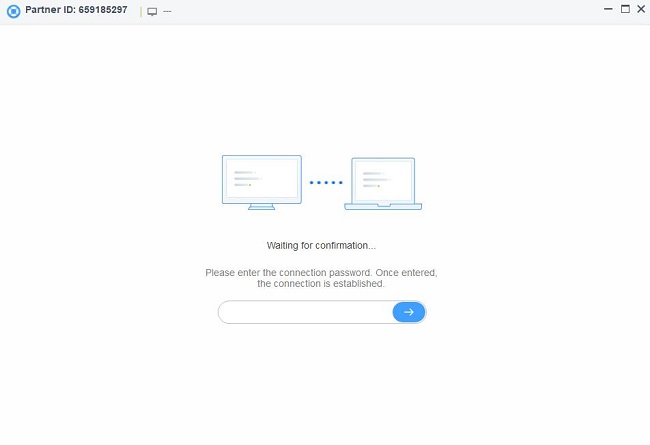
Step 5: Once the device is successfully connected, the supporter can remotely control and support the remote computer.

Part 2: How to Provide Remote Mac Computer Support
Similar to Windows, Macs offer built-in and third-party options for remote access.
Using Built-in Tools:
1FaceTime:
• Best for: Quick visual assistance with basic troubleshooting.
• Requirements: Both computers need to be Macs with FaceTime enabled and an internet connection.
• Process:
Step 1: Initiate a FaceTime call between the technician and client computers.
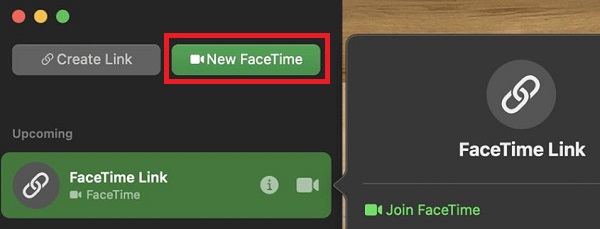
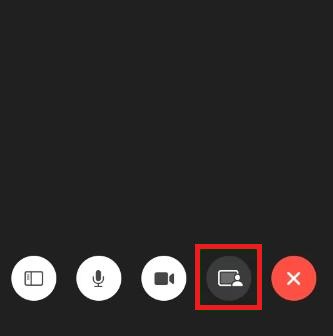
Step 2: During the call, the client can click on the "Share" button to share the content he wants to show.
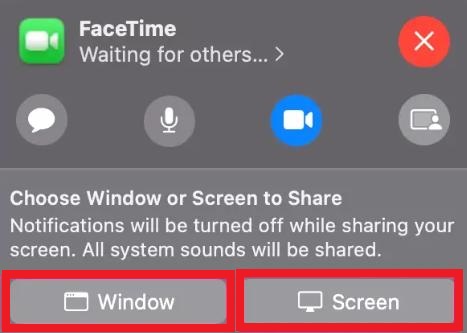
Step 3: This opens the FaceTime call menu from the top menu bar. Choose "Window" to share a specific window, or "Screen" to share the entire screen.
2Messages:
• Best for: Simple tasks like sharing files or guiding someone through basic steps.
• Requirements: Both parties just need to be connected to the internet.
• Process:
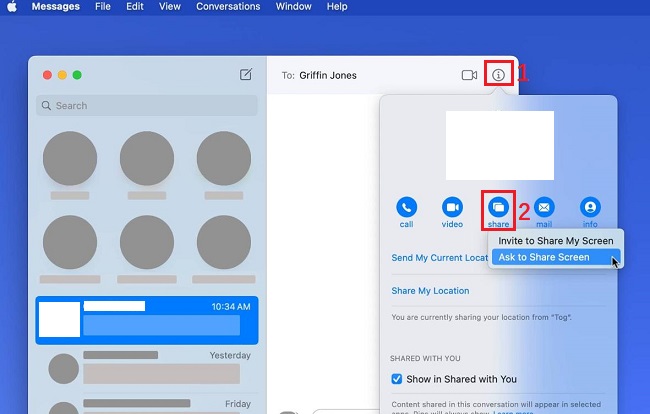
Step 1: Initiating the session: Similar to FaceTime, the Mac user initiates a Message conversation with you.
Step 2: Then click the "Details" icon (represented by an "i" within a circle). Select "Share" button. You will see two options: "Invite to Share My Screen" and "Ask to Share Screen."
3Apple VNC Client:
• Best for: Advanced users comfortable with manual configuration.
• Requirements: To start a VNC session between two Macs, they must be powered on and connected to the same router or wireless network.
• Process:
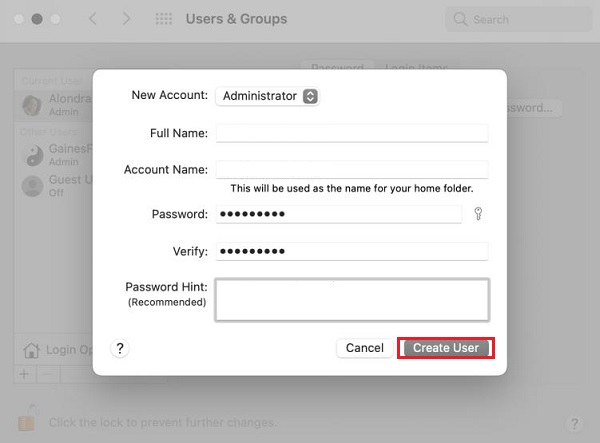
Step 1: Go to "System Preferences" > "Users & Groups," click the lock icon in the lower left corner and enter the current user's credentials to authenticate. Click the "+" icon and fill in the relevant fields, and finally click "Create User."
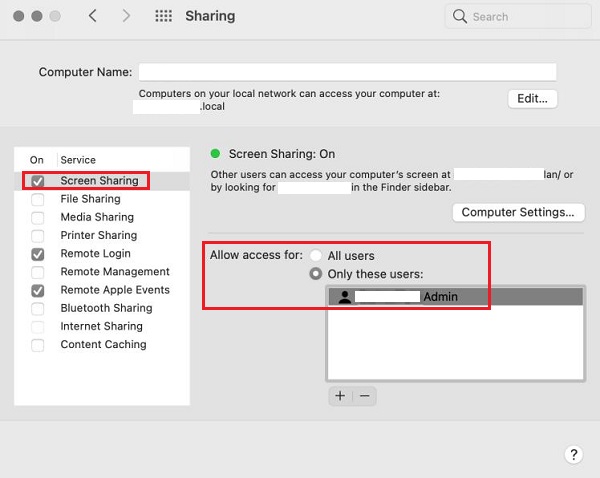
Step 2: Go to "System Preferences" > "Sharing" and check the checkbox next to "Screen Sharing." Then specify which users should have screen sharing access in "Allow access for." Make a note of the "Computer Name" displayed at the top of the screen.
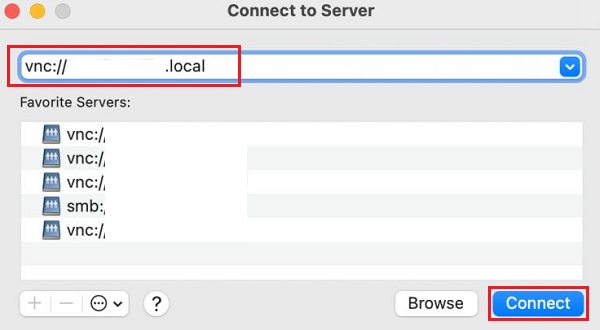
Step 3: On the desktop, go to "Go" > "Connect to Sever." Enter vnc://[network address] in the "Server Address" box and click "Connect."
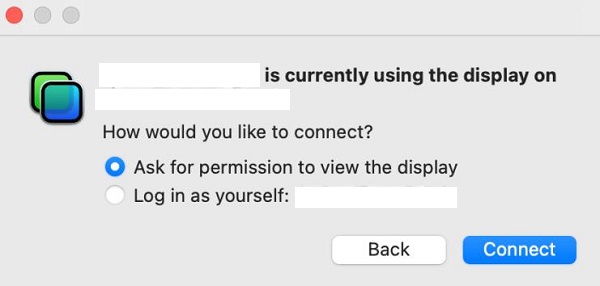
Step 4: Enter your credentials and click "Sign In." You have two options for signing in: "Ask for Permission to view the display" and "Log in as yourself." Regardless of which option is selected, the client's Mac receives a request that they must click to grant access.
Using Third-Party Software: Chrome Remote Desktop
• Best for: Cross-platform compatibility and ease of use.
• Requirements: Both computers need to have a Google Chrome web browser installed and an internet connection.
• Process:
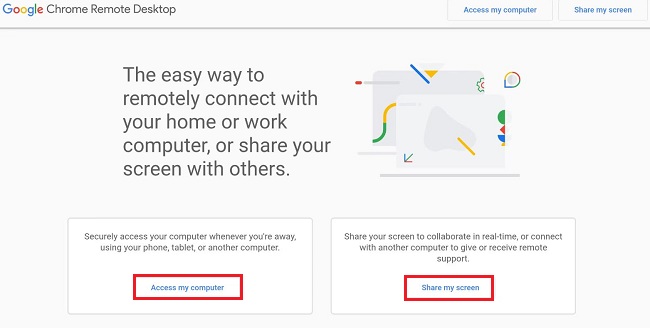
Step 1: First of all, you need to install Chrome Remote Desktop on both computers. Open Chrome and type remotedesktop.google.com/access in the address bar.
Step 2: You will see two options on the screen. Based on your preferences, you can choose “Access my computer” or “Share my screen” option.
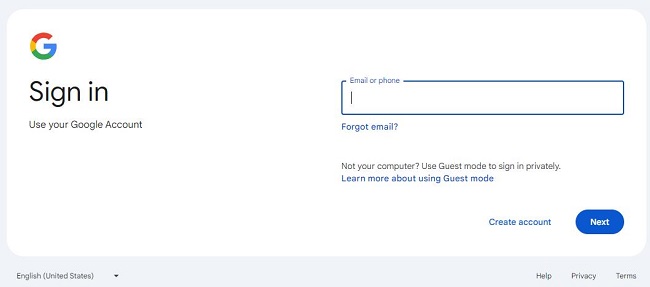
In this case, you need to sign in to your Google Account.
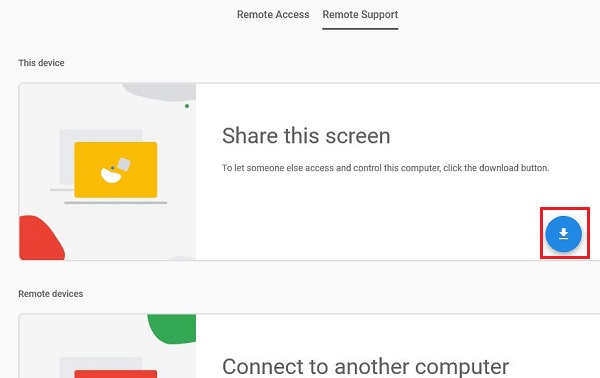
Step 3: Go to the "Remote Support" tab and click the blue download button under "Share this screen" if you do not have the application installed.
Step 4: Follow the instructions to install Chrome Remote Desktop.
Step 5: After installing the application, instruct the person who needs remote support to go to remotedesktop.google.com or click on the extension icon in your browser and click on "Share my screen."
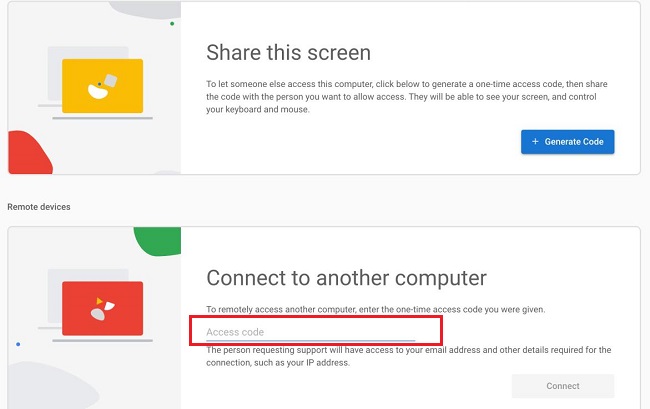
Step 6: Supportee need to click on the "Generate Code" button under "Share this screen."
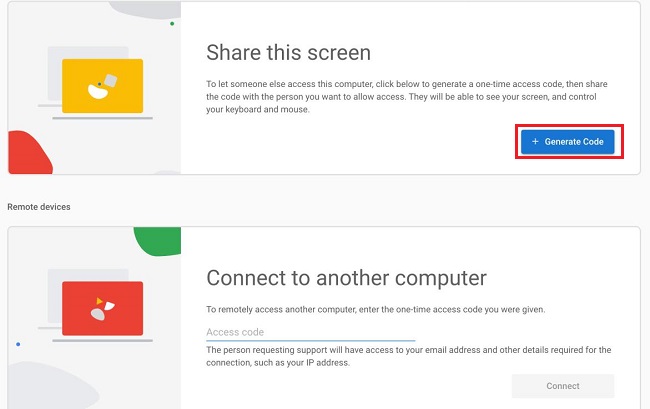
Step 7: A 12-digit link code will be displayed and the supportee will need to tell the supporter about it within 5 minutes.

Step 7: The supporter is required to enter the code in the "Connect to another computer" box within five minutes.
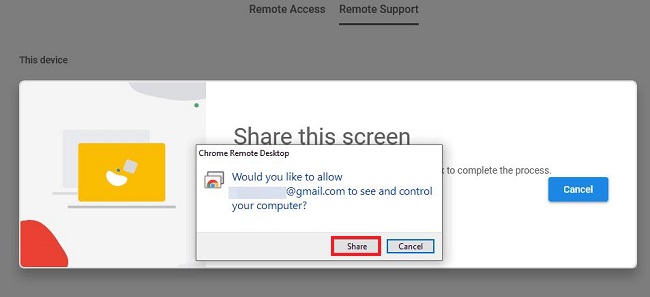
Step 8: The supportee will receive a pop-up notification to confirm whether or not to share the screen. Click "Share." The supporter will see the supportee's screen in the Chrome tab.
Part 3: Tips for Avoiding Remote Support Scams
Unfortunately, with the rise of remote support, there's also been an increase in scams. Here are some tips to stay safe:
- Never give remote access to anyone you don't know and trust.
- Be wary of unsolicited calls or pop-up messages offering technical support.
- Do not download or install any software recommended by unknown sources.
- If you suspect a scam, end the connection immediately.
- When using legitimate remote support tools, always verify the technician's identity before granting access.
Final Thoughts on How to provide Remote Computer Support
By following the above-mentioned steps and tips, you can confidently provide or receive remote computer support and ensure a smooth troubleshooting experience.
Remember, patience is a virtue in the world of troubleshooting, and clear communication is your bridge to understanding the client's woes. These remote access tools, and coupled with a healthy dose of caution are key to a successful remote support session.
Also, these things will transform you into a tech-savvy supporter, ready to resolve even the most confusing or complex computer problems.


Leave a Reply.