How to Record TeamViewer Session [Complete Guide]
Revolutionary technology introduces various remote access software, such as TeamViewer, that makes it easy to perform session recording and streamline audits, and helps to quickly troubleshoot any technical issues that arise.
TeamViewer can be a desktop screen recorder that can record how-to demonstrations, training sessions, webinars, and other online presentations, providing organizations with valuable material and shareable support. Read the following to learn more about how to record TeamViewer sessions.
Part 1: How to Record TeamViewer Session Using the Built-in Tool
There are two ways to record a TeamViewer session. You can record your screen using TeamViewer's built-in tool, including manual recording and automatic recording. If you want to record something more comprehensive, such as an incoming session, you can use a third-party application to record a TeamViewer session.

TeamViewer's built-in screen recording tool allows for the recording of all communications during a session, including sound, VoIP, video and webcam images. It can also be assigned to record specific desktop portions and simply edited, making it a great way to create webinars and how-to videos.
Recording Session Manually
Next, let's learn how to manually record a session on TeamViewer.
On Windows/Linux
To enable TeamViewer record session on Windows/Linux, follow this step-by-step guide as given below.
Step 1: First, connect TeamViewer to another device and navigate to the toolbar of the remote control. Then, move toward the "Files & Extras" button.
Step 2: After that, hover over the "Start session recording" option.

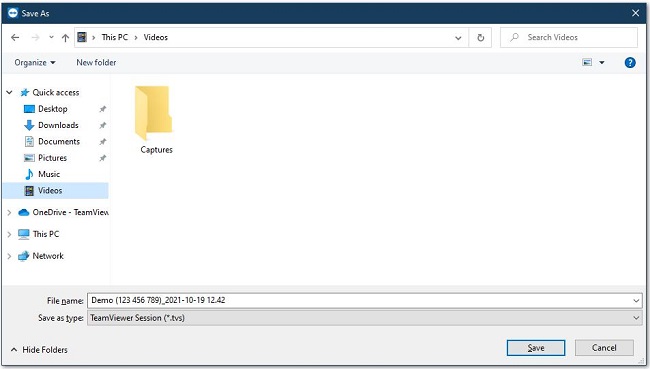
Step 3: When TeamViewer session recording ends, a notification becomes visible, allowing you to save the recording. In this way, the screen recording is saved.
On MacOS
Before intending to record the TeamViewer session on Mac, ensure the required permissions are fulfilled. Without turning on essential permissions, the Mac recording session is not accessible. Let's dive into a step-by-step guide to acknowledge how to give access permissions for TeamViewer and record sessions.
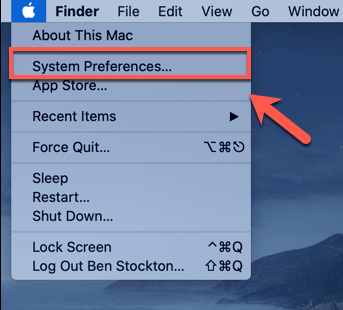
Step 1: Approach the Apple menu in your screen's upper left corner and tap on it. Choose the option "System Preferences".
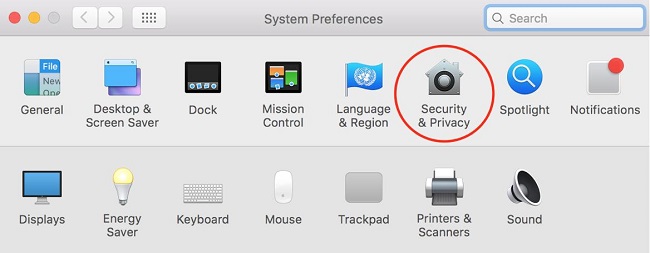
Step 2: After that, press on the "Security & Privacy" option.
Step 3: Go through the menu and click "Screen Recording" on the left sidebar.
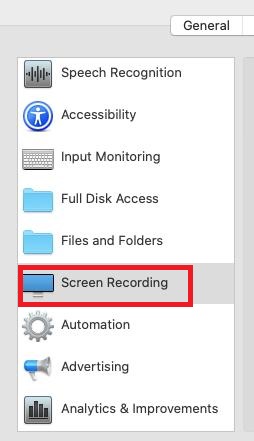
Step 4: A list of applications is shown here; search for TeamViewer, check the box next to it, and turn on TeamViewer permissions for screen recording.
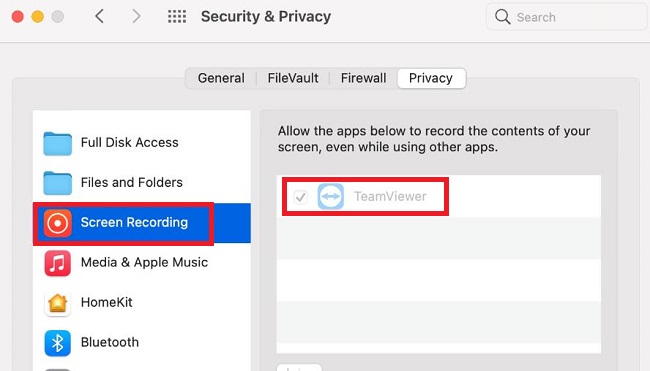
Step 5: If the TeamViewer is still operating, close and relaunch it. Once you have these steps, follow the next steps to start session recording.
Step 6: Connect TeamViewer with another system and locate the "Extras" drop-down from the toolbar. Then, head to the "Record" option, and a " Start " list becomes visible here. Select this option to start the screen recording.

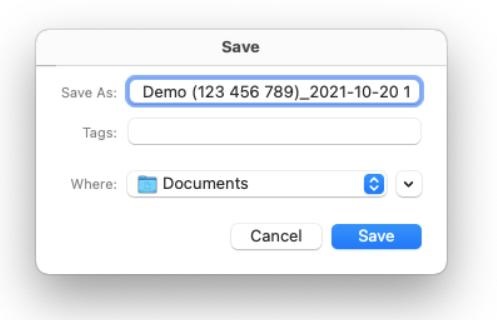
Step 7: Once you have done the recording, a prompt is shown to save the recording. You can rename it (optional) and choose where the recording should be saved. Then, tap on the "Save" option.
Recording Session Automatically
To take full advantage of the record session feature, you can manually record a session after establishing a connection to the remote computer or set it to record a session each time you connect automatically. Here are the steps on how to set up automatic recording of TeamViewer sessions:
On Windows/Linux
This step-by-step guide enables TeamViewer to record sessions on Windows/Linux automatically.
Step 1: Open the TeamViewer app and navigate to a gear icon located in the screen's top right corner.
![]()
Step 2: After that, move towards the "Advanced."
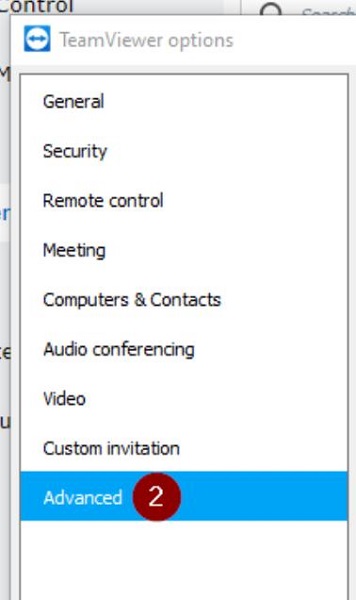
Step 3: Locate the "TeamViewer options."
Step 4: Enter the path to the folder you want to save to in the "Session recording directory."

Step 5: Then save the changes after clicking on the "OK" option.
On MacOS
Step 1: Locate TeamViewer from the upper menu bar and press it.
Step 2: Scroll down the drop-down menu and select "Preferences ."
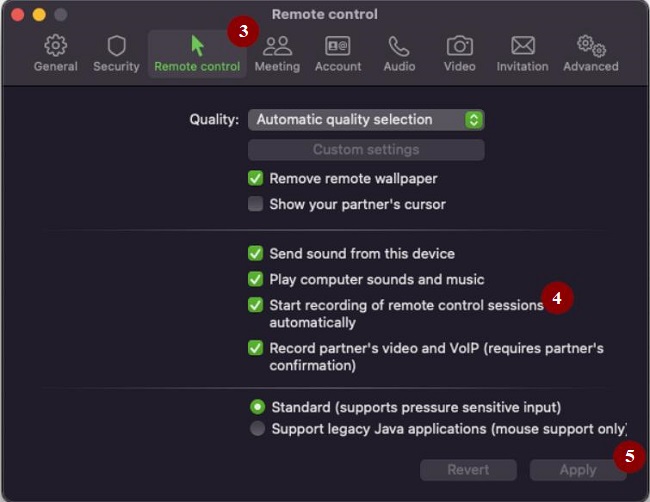
Step 3: Then click on the "Remote Control" option.
Step 4: An option "Start recording of remote control sessions automatically" will appear here. Check the box next to this button.
Step 5: Save the changes with a click on "Apply".
Part 2: How to Record TeamViewer Session Using Third-Party Applications
You can also record the TeamViewer session using third-party software like OBS Studio. This application is an open-source screen recorder that executes recording perfectly on Windows, Linux, and Mac. This method is approved as an effortless way to record TeamViewer sessions.

However, being a novice, it's compulsory to understand its usage to record TeamViewer sessions. Here is a step-wise guide for your convenience. Follow it to avail yourself of the TeamViewer record session feature.
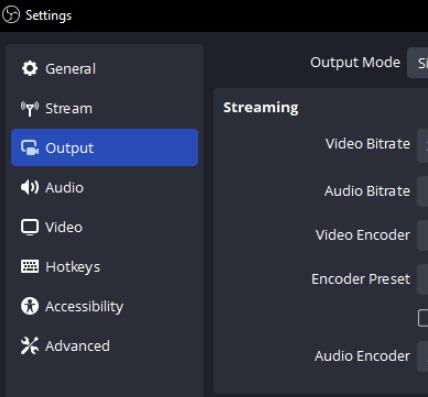
Step 1: Launch OBS Studio software on your device and fine-tune some settings. To do it, click on the "Settings" option before initiating recording, such as output format, resolution, and others.
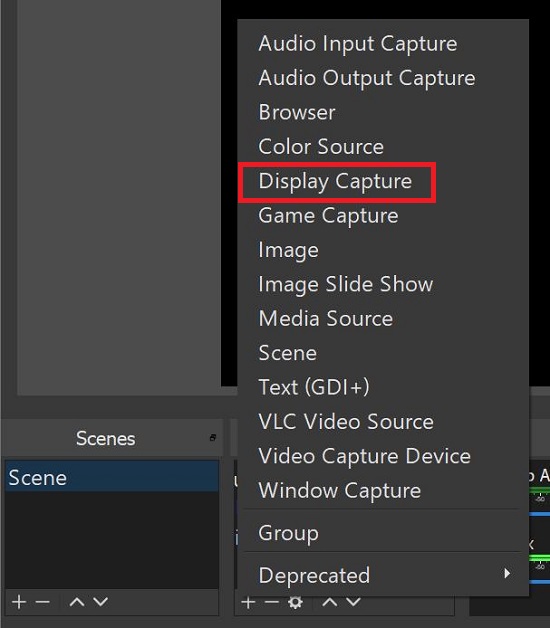
Step 2: Once you have done this, launch TeamViewer and connect to the other device for commencing an online meeting. Then, return to OBS Studio again and tap on "+" > "Display Capture" to add the TeamViewer screen.
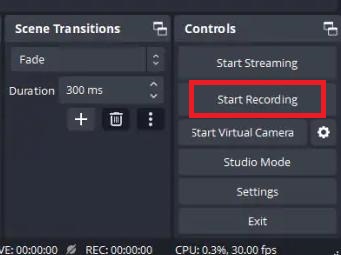
Step 3: Add the option “Application Audio Capture (BETA)” to the list of sources. Once you're done, tap on the "Start Recording" option on the bottom left. Then, start your TeamViewer screen recording activity.
Part 3: FAQs about TeamViewer Session Recording
TeamViewer is a popular software that allows you to remotely access and control other devices and host or join online meetings. One of the features that TeamViewer offers is the ability to record your sessions, which can be helpful for various purposes such as documentation, training, or troubleshooting.
Can TeamViewer Record Incoming Sessions?
No. When you record a session with TeamViewer, only the outgoing connection is recorded. This means the recording is only saved on the user's device, making the connection. If you want to record an incoming session, you need to ask the other user to start the recording from their side.
Can TeamViewer Record Audio?
Yes. TeamViewer can record remote control or meeting sessions (including sound, voice-over IP, video, and webcam images). To enable audio recording, you need to check the option "Record audio (sound and voice)" in the Advanced settings of the recording dialog box. You can also modify the audio quality and volume from there.
Where Are TeamViewer Recorded Files Stored?
Click "Extras" - "Play or convert recorded session" in the TeamViewer window, which opens "This PC" - "Documents" with a suggested extension of (*.tvs).
How to Set up the Session Recording Directory?
To change the default location where TeamViewer saves your recordings, you need to follow these steps:
After entering the TeamViewer settings, find "Advanced" - "TeamViewer Options/TeamViewer Settings" and type the desired folder path in the Session recording directory text box.
Is It Possible to Convert TVS Recorded by TeamViewer to Other Formats?
Yes. TeamViewer uses its own proprietary format (.tvs) to store the recordings, which can only be played by TeamViewer itself. However, you can convert the .tvs files to other common formats such as .avi, .mp4, or .wmv using the built-in converter tool. To do that, you need to:
Click on (≡) in the upper left corner of TeamViewer. Navigate to "Extras" - "Play or convert recorded session..." Select the desired .tvs file and click the "Convert" icon in the recorded session window.
![]()
Is the TeamViewer Session Recording Feature Available in the Free Version?
No. The record and playback remote sessions feature is not available in the free version of TeamViewer. You need to upgrade to TeamViewer Business and above to use this feature. The free version of TeamViewer is only intended for personal use and has some limitations, such as the session duration, the number of devices, and the features available. If you want to use TeamViewer for commercial or professional purposes, you need to purchase a license that suits your needs.
Part 4: Best Alternative to TeamViewer for Recording Screen & Sessions
If you are looking for a more affordable and user-friendly alternative to TeamViewer for recording screen and sessions, you might want to check out AirDroid Remote Support.
AirDroid Remote Support is remote support software that allows you to remotely access and control mobile devices and provide technical support to your customers. With AirDroid Remote Support, you can also use more advanced features such as unattended access, AR camera, tutorial gesture, live chat and more.
To record screen & session at AirDroid Remote Support, there are only three steps:
Step 1: Initiate a remote support session.
Step 2: Launch screen sharing. Both the support specialist's end and the customer's end can initiate screen sharing.
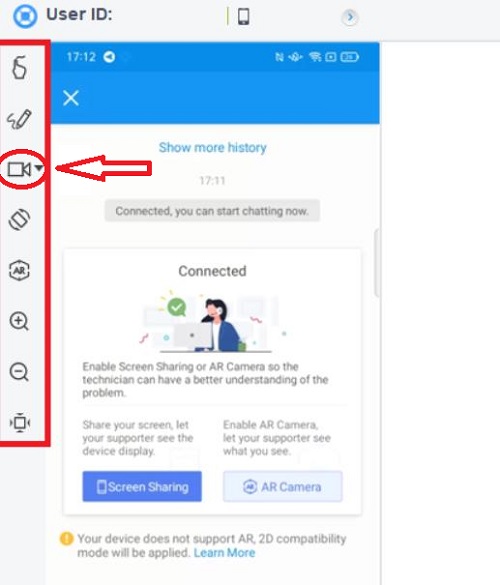
Step 3: Click on "Start recording" icon in the left column on the desktop client for screen/session recording.
Conclusion
In today's digital world, remote businesses are thriving, making online meetings and session recordings essential for success. TeamViewer simplifies this process, offering manual and automatic recording options and aiding in troubleshooting and training. However, for a more user-friendly and affordable alternative, consider AirDroid Remote Support. AirDroid allows high-quality session recordings, annotated screenshots, and effective troubleshooting tools.


Leave a Reply.