How to Fix Telnet Connection Refused?
Quick Fixes
- Install Telnet client: Go to Control Panel > Programs and Features > Turn Windows features on or off > Telnet Client
- Enable Telnet: Turn the "Disable" option to No in the "/etc/xinetd.d/telnet" destination.
- Correct IP address: Double check the IP address of the host device.
"Can someone please help me out, I'm trying to connect but it says 'Connection refused'."

It's not uncommon to encounter the "Telnet connection refused" error when trying to access a remote server over Ternet. This error virtually locks you from accessing another system remotely, causing unnecessary delays.
The good news, however, is that basic troubleshooting tricks can resolve Cisco Telnet connection refused issues. Read on to find out.
Why "Telnet Connection Refused" Appears
There can be a range of factors responsible for causing the error "Telnet connection refused." The most common reasons include:
Telnet Not Installed: The Telnet service is not installed or disabled on the PC. Without it actively running, you'll get the connection refused error.
Network Issues: The network-related problems include incorrect IP address or hostname, unreachable remote host, and so on.
Firewall Restrictions: A firewall on the remote host connection is blocking the successful Telnet connection.
Incorrect Port Configuration: if the port configuration is not correct or you're using the wrong IP address, it can cause the Telnet connection refused error.
Solutions to Fix Cisco Telnet Connection Refused
Depending on the factor, the "Connection refused by remote host Cisco Telnet" error can manifest in several types. But don't worry as will discuss each scenario in detail.
Case 1: Telnet Not Running
The most common reason for "AWS Telnet connection refused" is the Telnet service not actively running. Either the Telnet client is not installed on the computer or it is disabled in the configuration file. The outcome is same: Telnet: unable to connect to remote host: connection refused.
Solution 1: Install Telnet Client
Confirm if the Telnet service is installed on the machine you're trying to connect to. To do that:
Step 1: Head to the Control Panel and click on Programs.
Step 2: Under the "Programs and Features" tab, select "Turn Windows features on or off."
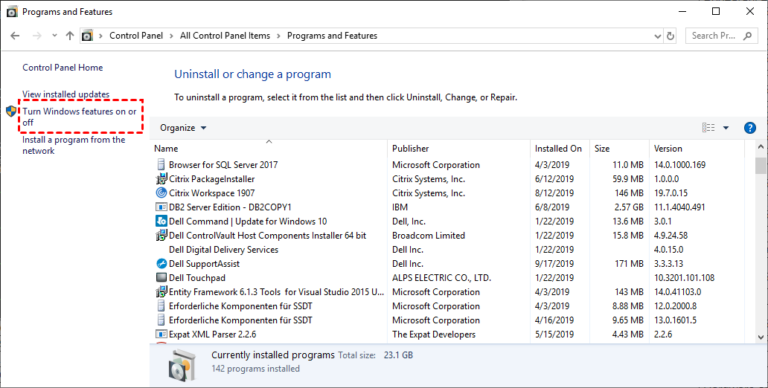
Step 3: Scroll down and check the box in front of "Telnet Client" and click Ok.
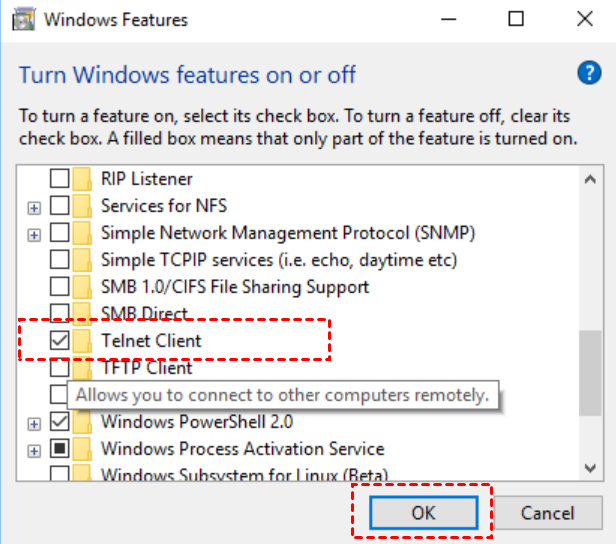
Now, try connecting to the remote device again.
Solution 2: Enable Telnet Service in Configuration
By default, the Telnet client might be disabled in the configuration file due to security reasons. Or maybe, you have accidentally turned off the service, leading to the "Telnet connect to address 127.0 0.1 connection refused error."
Here's how to check and fix it:
Step 1: Generally, the Telnet file is located in "/etc/xinetd.d/telnet."
Step 2: Open the Telnet file in any editor and change the "disable" to No as shown in the figure.
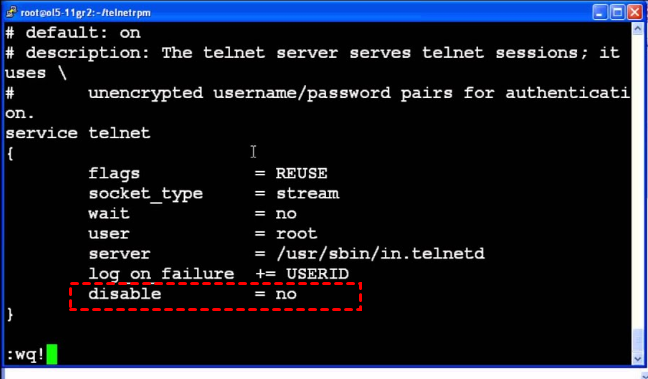
Step 3: Restart the device.
Solution 3: Check IP Address
Double-check the IP address or the hostname you are using to connect to the remote machine. If it's incorrect, the connection will be refused.
Solution 4: Check Firewall Settings
Sometimes, the firewall in between the hosts is rejecting the Telnet connection to the remote host's specified port. It can be at the remote host or at the intermediary level. Make sure that the required ports are opened in the server firewall or that the device's IP address is not blocked.
To do that:
Step 1: Head to Control Panel > System and Security > Windows Defender Firewall > Advanced Settings.
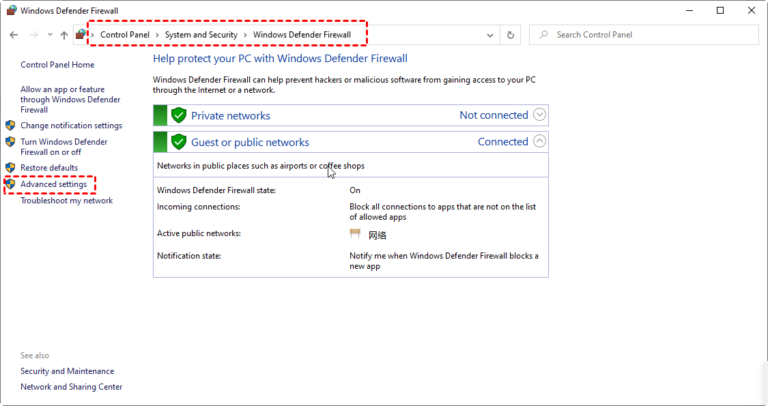
Step 2: Now, go to "Inbound Rules" and click "New Rule."
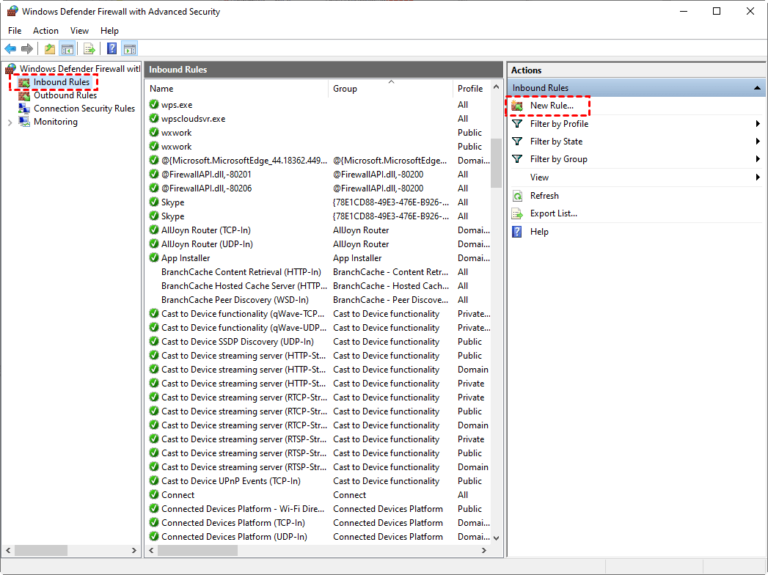
Step 3: Tick the "Port" option and hit Next.
Step 4: Now, select TCP and enter the Port Number corresponding to "Specific local ports."
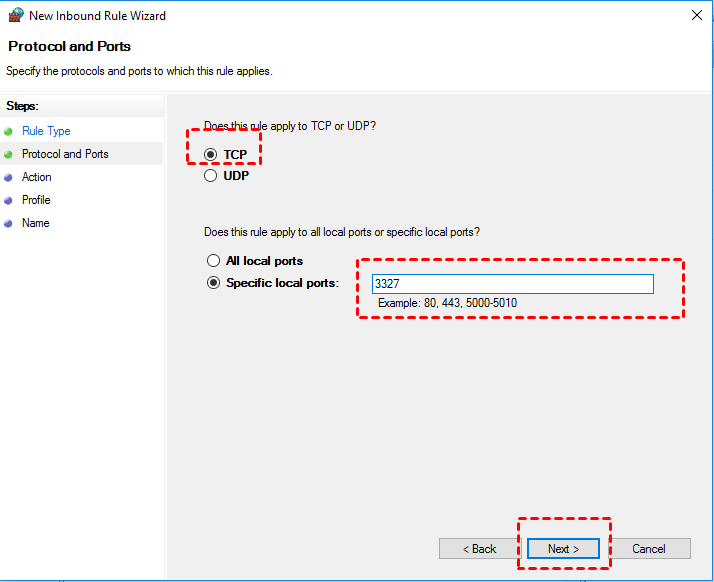
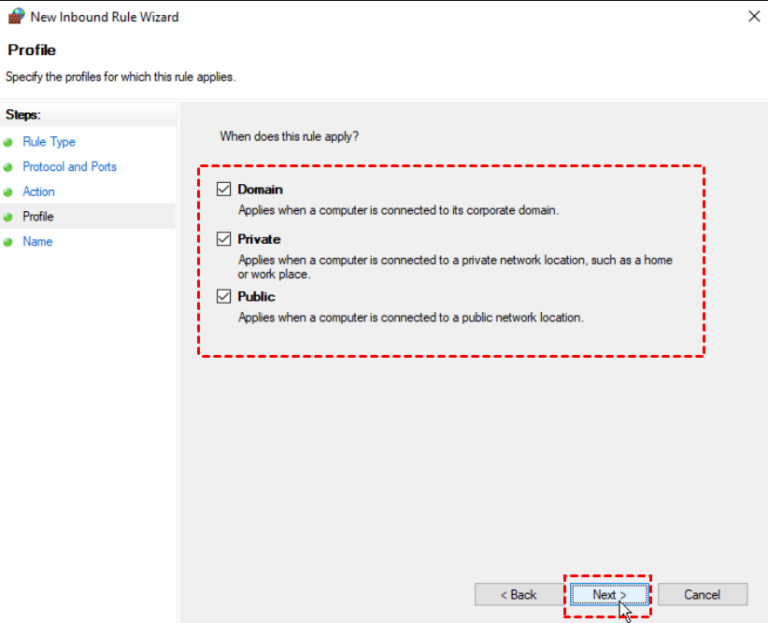
Step 5: On the next interface, select Allow > Next, and make sure all the network types you need are selected: Domain, public, private.
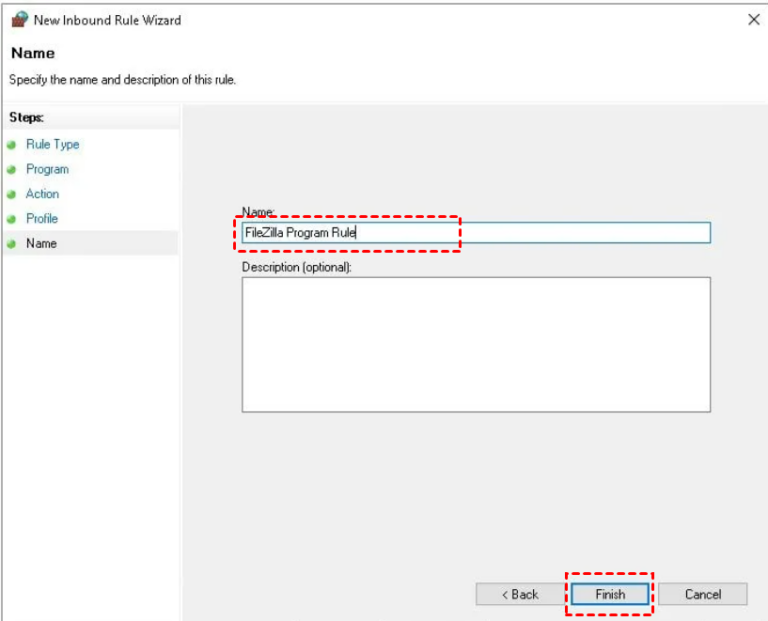
Step 6: Type in the name of the New Rule and hit Finish to complete the process. Now, restart your PC and try connecting to Telnet again.
Case 2: Service is Not Listening
One major reason for the error "Cisco Telnet connection refused by remote host" is the connected port doesn't have active listening. A port is essentially an endpoint to which you're directed when establishing a remote connection.
Solution 1: Check Telnet Client Port Settings
To confirm the port settings:
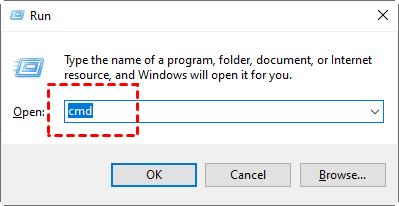
Step 1: Press "Win + R" and enter "cmd" to open Command Prompt.
Step 2: Run the "netstat -a" command to see the active connections as well as the port it is actually bound to.
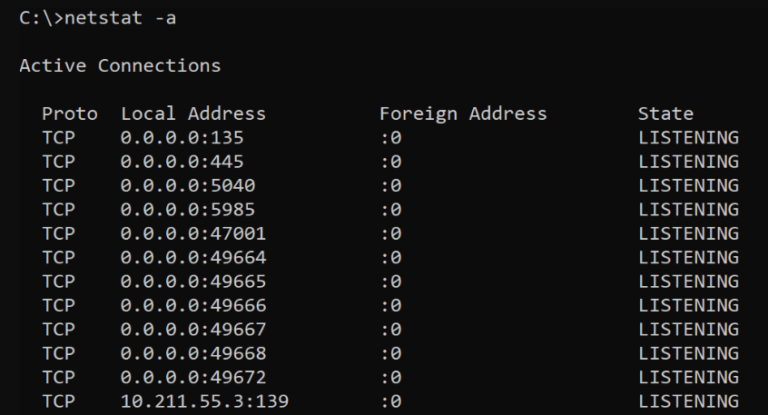
Step 3: If the target connection is not visible, you might be using a wrong IP address.
Step 4: To address this, run the "ipconfig" command and copy the "IPv4" Address. This is the IP address to which the connection is actually bound.
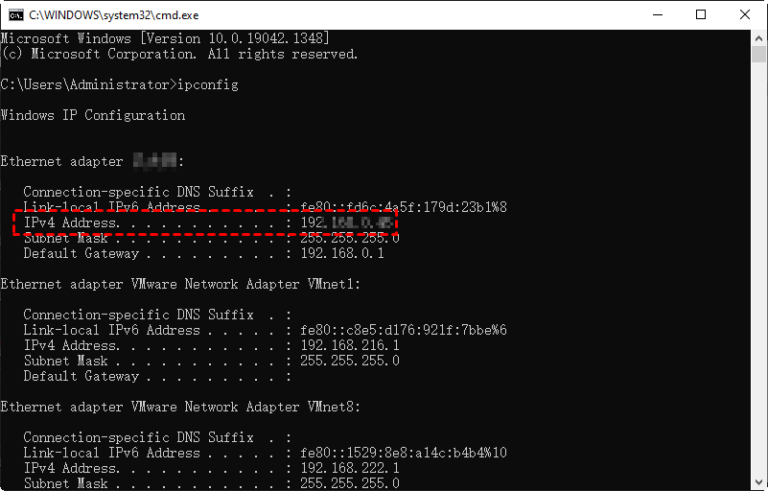
Using the correct IP details will automatically fix the issue of Telnet: unable to connect to remote host: Connection refused.
Solution 2: Check VTY Lines
The Cisco devices have a limited number of "Virtual Terminal Lines" (VTL) available for termite connection – often 5. If all the lines are full, you can encounter the Telnet connection refused by remote host Cisco.
What you need to do is either increase the number of VTY lines or disconnect the idle sessions. To do this, use the "clear line vty" command in Global Configuration Mode.

Bonus Tip: Achieve Seamless Remote Connection Without Telnet or IP Address
If you're looking for the most reliable, friendly, and cost-effective remote support solution, try AirDroid Remote Support. It helps you connect to unattended, remote computers within seconds, without the need for authorization.
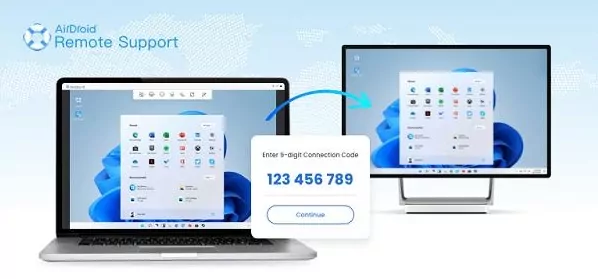
Not a single case of connection-related error has surfaced despite it having millions of active users. AirDroid comes loaded with advanced remote management features, such as unattended remote access, black screen mode, real-time screen sharing, and more.
Within seconds, you can connect to a desktop from afar and complete your tasks seamlessly. To ensure utmost privacy, it hides the screen of the remote device being controlled. This way, you never have to worry about a stranger peeking into your personal work.
This powerful tool is a blessing for small businesses and entrepreneurs. You can manage all the IT assets from a single, sleek interface and assign roles and tasks to the team members. Moreover, AirDroid Remote Support is ideal for customer support service and IT help desks.
FAQs
Q1: What does connection refused on Telnet mean?
If you're getting the "Telnet connection refused," it means that the remote host is unable to establish a connection. The possible reasons include misconfigured Telnet settings or the port you're trying to connect is not open.
Q2: Why is Telnet not working on my port?
The most probable factor for Telnet not connecting to the port is the blockage of connection due to firewall restrictions. If not properly configured, the between the two hosts prevents access to the designated port.
To resolve this, you need to have a port opened for the remote device in the firewall settings.
Final Remarks
Whenever you encounter the "Telnet connection refused" error, this guide is all you need. It covers all the basic solutions to solve the issue yourself, like tweaking firewall rules, port settings, and Telnet network and connectivity settings.
As the procedure is often complicated, it might pose technical difficulties for many people. Thus, AirDroid Remote Support is a perfect solution for accessing and managing unattended devices remotely. It is feature-rich, easy to use, and an ideal tool for real-time control and coordination.
Feel free to ask any questions.


Leave a Reply.