How to Fix "Telnet is Not Recognized" in Windows 7/10/11
- You need to enable the Telnet Client feature, cause it may not preinstalled on your Windows.
- In Windows 7, enable the Telnet Client via the Control Panel or using provided command.
- For Windows 10 and 11, you can also try PowerShell.
- Try Telnet alternatives like PuTTY and AirDroid Remote Support.
One thing about Telnet is that is not just smooth sailing. There are times when it runs so perfectly, that you get your projects running smoothly like a well-oiled machine. You are living the dream, then as it happens, glitches get in. Perhaps you switched to a different CPU, your windows got changed or updated.
The thing is whether its that Windows 7, 10, or 11 you are going to get a “Telnet is not recognized” error. It can be one of those demoralizing moments and the question is, can you fix it? Sure, there is a way around this but before we get to that, let's figure out this problem first.
Why "Telnet is Not Recognized"
Okay, Telnet by default is not active on modern versions of Windows. That is from Windows 7 going to 11. Understand this, it's got some security vulnerabilities. Some do consider SSH instead. By some point Telnet is outdated. Assuming you don't get it included as a default part of your Windows features, you are going to get the Telnet not recognized error. So here is what you need to do to get it running.
Enabling Telnet Client via Control Panel (Windows 7/10/11)
The convenient thing about the Control Panel is that its graphical interface does not change between all Windows-enabled devices. This comes in very handy when Windows fails to recognize Telnet.
Step by Step Instructions:
- Open the Control Panel: Click the Start button. Type "Control Panel" in the search bar. Press Enter to open it.
- Go to Programs and Features: Under the Control Panel, under the category of Programs, click on "Programs and Features ". This will open a window with all your installed applications.
- Turn Windows Features On or Off: On the left side of the Programs and Features window, you will see an option titled "Turn Windows features, on or off." Click on it.
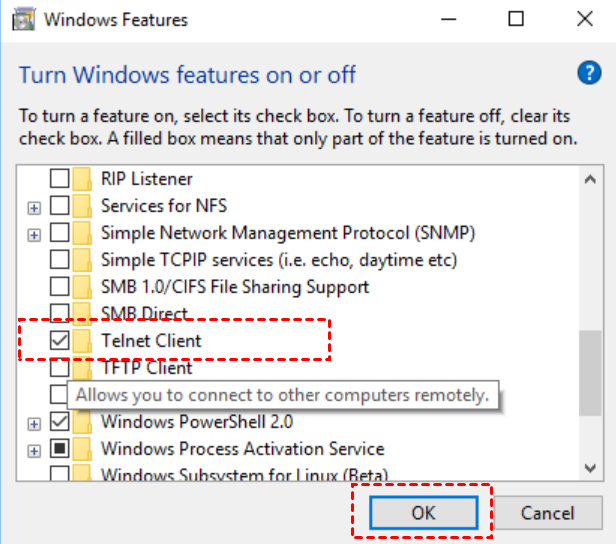
- Activate Telnet Client: Following the list of features windows down, scroll down your screen to get the Telnet Client. Tick the box beside it. Click OK to enable it. Windows will take a few moments to implement these changes including installation for this feature.
- Getting Ready for Telnet: After the installation is complete, go ahead to turn on the Telnet client by typing "cmd" in the Start menu and then pressing Enter. Then type "Telnet" Once you've completed the steps press the Enter key. If 'Telnet' appears on your screen then you've successfully turned on the Telnet client.

Here's a tip, for troubleshooting :
If you can't find the Telnet Client in your Windows Features list it could be due, to missing system updates. Have Windows Update set to Run on your computer, and try connecting with the Telnet client once more.Trigger Command Prompt to Install Telnet Client (Windows 7/10/11)
Command Prompt is a very quick and efficient way, here is what you need to do
Step-by-Step Guide:
- You can get the command prompt by searching it from the search bar. Simply type in the command prompt.
- In the next part, you are going to do some right-clicking on the search result that is on the Command Prompt. Then run as admin.
- Now you are going to enable Telnet using DISM. Here is the command you need
- Type in the command prompt bar cmd after you copy this code, then hit enter
dism /online /Enable-Feature /FeatureName:TelnetClient This will enable the Telnet client to use the Deployment Imaging Service and Management Tool which is a command line tool.
Check whether it is installed: Just open Command Prompt and type Telnet then check if it acknowledges it or not. If yes, that's all good.
Other Command Line Options
Sometimes it is possible to fail using DISM because of your system configurations. Then use pkgmgr in such situations:
pkgmgr /iu:"TelnetClient" This also installs the Telnet client
Enable Telnet Client through Powershell (Windows 10/11)
PowerShell has more advanced scripting ability than the command prompt hence preferred by systems administrators. This may be the way to go if you know PowerShell.
Step-by-Step Guide:
Step 1: Run PowerShell as Administrator:
Click on Start Menu, at the bottom of the start menu search field type in “PowerShell”.
Step 2: Install Telnet Client using Powershell
Having Powershell already open using administrative power, run the following command to install the Telnet client;
Copy and paste the following script in the window of Windows Powershell and run.
Install-WindowsFeature -name Telnet-ClientOnce done, the installation process is complete. That's it. You receive a successful installation message right in your PowerShell.
Other Alternatives to Telnet
While there are some uses where Telnet would be appropriate, there are occasions where it does become inappropriate—especially during issues of security and features. Therefore, two powerful alternatives will be discussed hereafter: PuTTY and AirDroid Remote Support.
PuTTY:
PuTTY is an open-source emulator for terminals supporting various network protocols: Telnet, SSH, and serial communications. It arrives as one of the very popular tools to connect with remote servers or devices on a network.
The best about PuTTY is that it works with many other standards like SSH, which is a security feature lacking in the Windows-built-in Telnet. It's possible to personalize since there are a variety of options to customize it. Light, portable, and no installation hassles make this tool workable on any machine. If you have some situation where the security has to be top-notch, then instead of Telnet you should use PuTTY.
AirDroid Remote Support
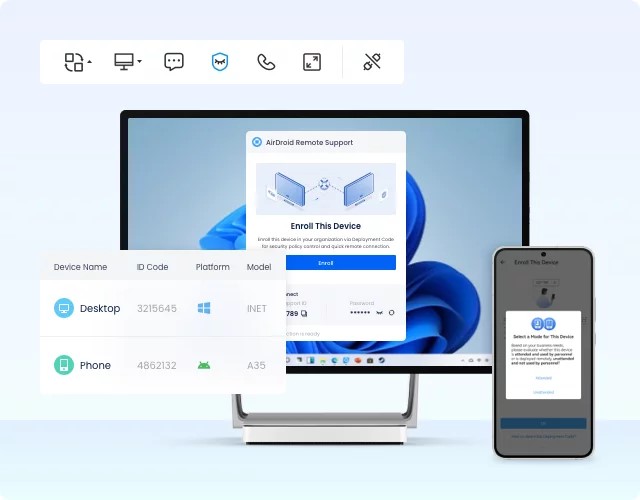
AirDroid Remote Support will give an easy way to use the solution for the realization of the capability of managing one's computer safely from a distance, even by non-technical users. It also has a Black Screen Mode, meaning that the screen of the other person will turn black so as not to compromise privacy during the session. AirDroid gives end-to-end encryption; hence, its secure remote access is more reliable compared to other traditional tools available.

Besides the lightweight feature, AirDroid does not affect the performance of devices at all, hence making it perfect for support services or handling multiple devices at one time and still being compatible with almost all platforms or devices in use.
FAQs
Why does my Windows computer not let me Telnet?
Telnet on Windows has been disabled in every latest version although it can be turned on by going to Control Panel, PowerShell, or Command Prompt.
How do I know if my system’s Telnet is enabled?
In case you type “Telnet” into the command prompt or PowerShell and get the program responding as expected, this means that your computer is capable of Accessing Telnet.
Is there any security risk with Telnetting?
Since these messages are sent in plain text it is unsafe to use Telnet for such communication puts important information at risk; instead use secure methods like SSH to transmit such data.
Can I replace Telnet with PuTTY?
PuTTY is a more secure alternative compared to the default Telnet client which offers some additional features while serving as a blend of what SSH, Telnet, etc. require from each other.
What else could I use if Windows can't find the Telnet?
AirDroid Remote Support is one of the safest and easiest solutions, with features like Black Screen Mode, which provides high security for their data.


Leave a Reply.