- Real-Time Fast Support
- All-around Remote Access & Remote Support Solution for Enterprises & Personal
- Always-On Unattended Remote Access
- Lightweight Remote Management
- Messaging & File Transfer
- AR Camera
How to Fix VNC Viewer “Access is Denied” Error? Step-by-Step Guide
Are you struggling with the “Access Denied” error when trying to connect to VNC Viewer? Frustrated by the lack of clear guidance on how to resolve this issue?
Many users encounter this error when attempting to access RealVNC server due to permission restrictions or configuration mishaps.
Let’s explore the reasons behind the error and provide practical solutions to help you regain access.
Understanding the “Access is Denied” Error
The “Access is Denied” error in VNC Viewer typically occurs when the user attempting to connect lacks the permissions to access the RealVNC Server.

The error is a security measure designed to prevent unauthorized access, so that only designated users can control the remote system.
Some common scenarios where users encounter this error include:
- Users connecting from a standard account without administrative rights will trigger the error.
- Entering incorrect login credentials will result in a denied connection.
- Changes in group membership or removal from the Administrators group can prevent access.
- Attempting to connect to a device with restricted access settings may block unauthorized users.
- Recent password changes without signing in again can lead to authentication failures, resulting in the error.
How to Troubleshoot the Access Denied Error?
To fix the access denied error in VNC Viewer, here are some solutions to consider:
1 Verify User Group Membership
Before proceeding, it’s essential to ensure that the user attempting to connect is a member of the Administrators group on the remote computer. This group typically has the necessary permissions to access RealVNC Server.
For Windows
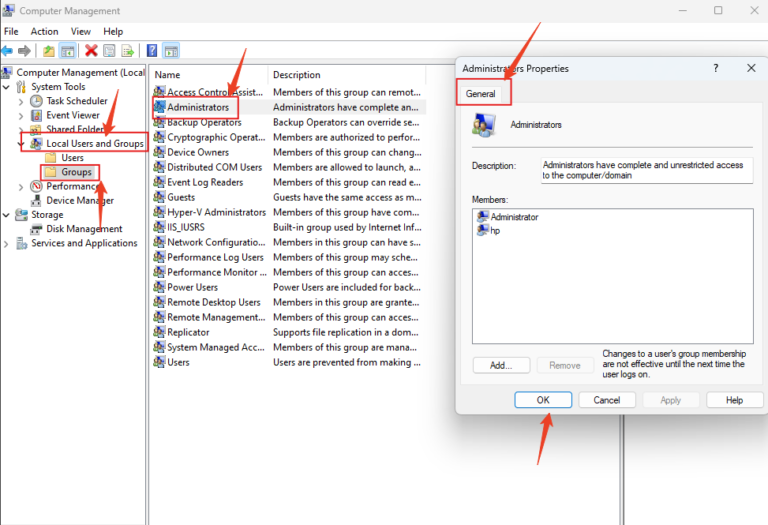
- Step 1.Right-click on the Start button and select Computer Management.
- Step 2.Connect your iPhone to computer using a USB cord. Next click “Start to Unlock” to let the process begin.
- Step 3.In the left pane, expand Local Users and Groups and click on Groups.
- Step 4.In the right pane, double-click on Administrators to see the list of users.
For macOS
- Step 1.Open System Preferences and select Users and Groups.
- Step 2.Click the lock icon to unlock and enter an administrator password if prompted.
- Step 3.Check if the user’s account appears under the Admin.
- Step 4.To grant connection access to additional users and groups, you must add them to the Users and Permissions section of the RealVNC Server.
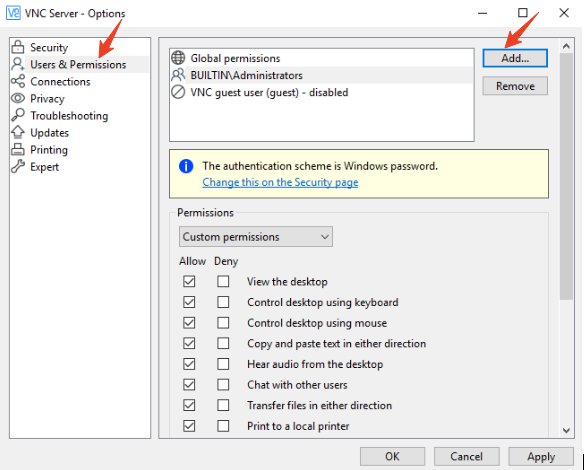
- Step 5.You can choose to add either a group of pre-registered users or individual accounts, with the option to register users from both local and domain accounts.
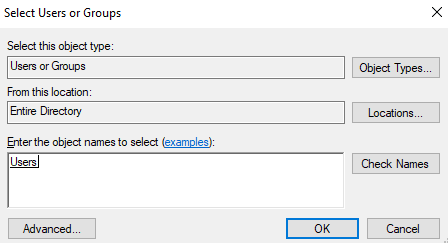
- Step 6.When operating RealVNC Server on Windows, you can select users and groups using the Object Picker interface.
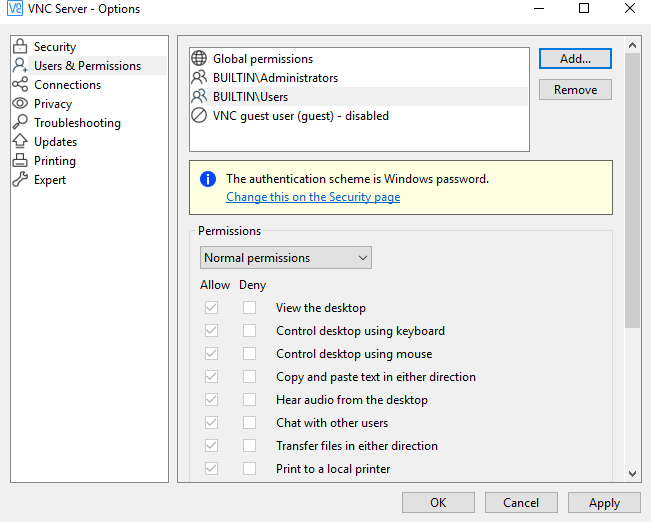
- Step 7.After adding the user, you can configure the appropriate permissions for that user or group, allowing them to authenticate successfully.
2 Re-sign into VNC Viewer
Anotehr way to try is to resign into VNC Viewer:
- Step 1.Open the RealVNC Viewer.
- Step 2.Click on the red cross next to your name at the top right corner of the window.
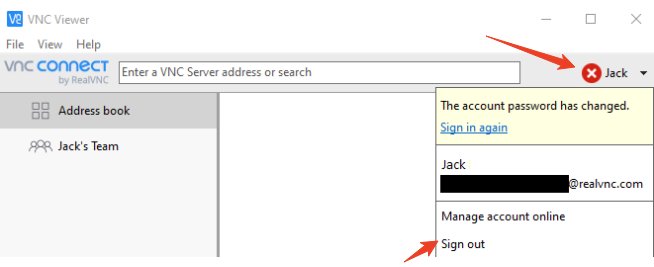
- Step 3.Click on Log In and enter your updated RealVNC account credentials (email and new password).
- Step 4.Ensure you see a green check mark next to your name, indicating a successful sign-in.
3 Use the VNC Permissions Creator
The VNC Permissions Creator is a free tool designed to help system administrators efficiently manage user accounts and session permissions, particularly when RealVNC Server is deployed across multiple computers.
- Step 1.Download it and utilize the interface to add users or groups and assign permissions as needed.
- Step 2.Click the Refresh Parameter button to generate string permission in the right format.
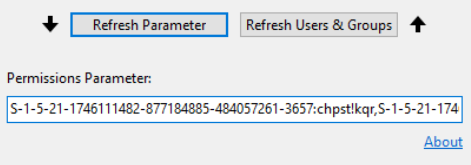
- Step 3.On Windows, user and group names will be automatically converted into security identifiers (SIDs). Note that groups are denoted with a % preceding the SID.
The VNC Permissions Creator also allows you to convert a parameter value into a more user-friendly format. This feature is particularly beneficial for Windows users, as it can translate SIDs into recognizable user and group names. To do this, paste the parameter value into the Permissions Parameter area and click the Refresh Users and Groups button.
Also, to register a local user account or group (as opposed to a domain or built-in Windows account), use the following syntax:
- Use <LOCAL> for user accounts.
- Use %<LOCAL> for groups.
- Step 4.For instance, if you need to configure five computers where three have a local account named TestUser, directly specify the <LOCAL> syntax in the Permissions Parameter area.
- Step 3.On Windows, user and group names will be automatically converted into security identifiers (SIDs). Note that groups are denoted with a % preceding the SID.

- Step 5.By applying the permissions string to these five computers, users will be able to authenticate to RealVNC Server using the credentials.

- Step 6.However, computers that cannot resolve the TestUser account will deny access until a local account with that name is created.
4 Reinstall VNC Viewer
If you are still experiencing issues, follow the steps below to uninstall and reinstall VNC viewer:
- Step 1.Click on the Start menu (Windows icon) in the lower-left corner of your screen.
- Step 2.Type Control Panel in the search bar and press Enter to open it.
- Step 3.In the Control Panel, navigate to Programs and then select Programs and Features (or simply Uninstall a program depending on your view settings).
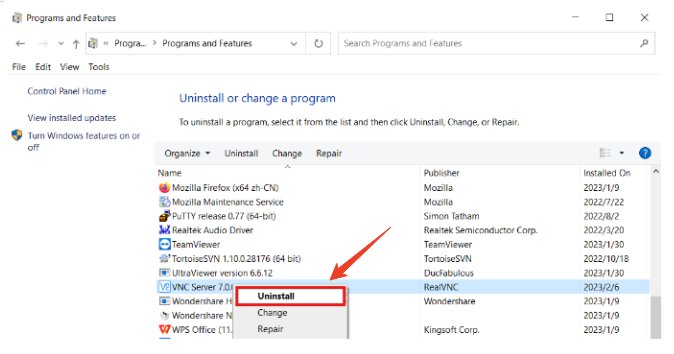
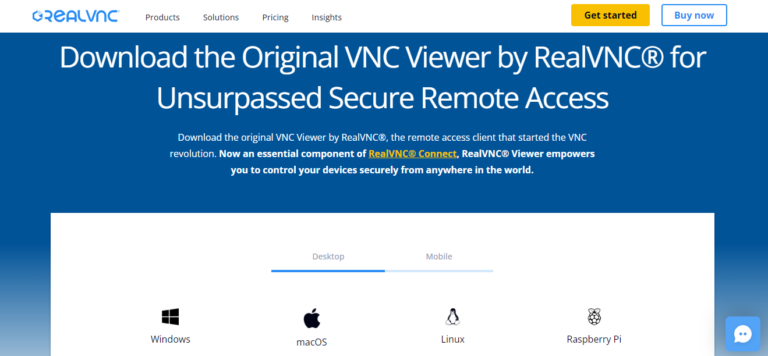
- Step 4.Download the VNC viewer again. Choose the appropriate version of VNC Viewer for your operating system (Windows, macOS, or Linux) and click on the download link to begin downloading the installer.
- Step 5.Once the download is complete, double-click on the installer file to launch the installation process.
- Step 6.Follow the on-screen instructions to complete the installation. This typically includes accepting the license agreement, choosing an installation directory, and configuring any desired settings.
- Step 7.Enter the connection details for the RealVNC Server you wish to access and attempt to connect.
- Step 8.Check if the issue has been resolved and you can now connect successfully.
Try Alternative: AirDroid Remote Support
If you're looking for a reliable alternative to VNC Viewer for remote support, consider AirDroid Remote Support. The versatile tool allows you to remotely access and control devices with ease, making it ideal for tech support and troubleshooting.
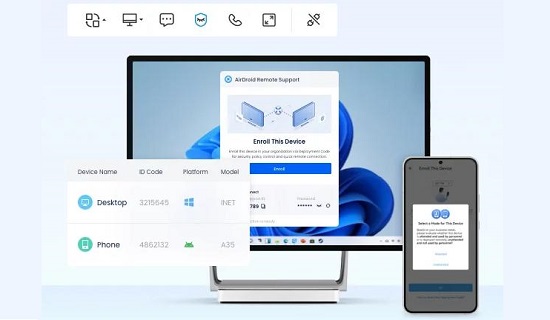
With features like screen sharing, file transfer, and real-time chat, AirDroid enables seamless collaboration between support agents and users. Also, its intuitive interface ensures that both technical and non-technical users can navigate the application effortlessly.
Whether you need to assist a colleague or provide customer support, AirDroid offers a comprehensive solution to meet your remote assistance needs.
Conclusion
Encountering the “Access Denied” error in VNC Viewer can be frustrating, but with the right approach, you can effectively resolve it. Remember to verify user permissions, re-sign into the application, and consider reinstalling VNC Viewer if necessary.
By ensuring proper configurations and permissions, you can enjoy a quick remote access experience. If you face further issues, explore alternatives like AirDroid Remote Support!


Leave a Reply.