How to Connect MacBook to TV With HDMI?
As is the case with almost all of Apple’s products, things aren’t always as straightforward as they should be. One issue in particular is connecting to an external display like a TV; how do you even do it?
Not all MacBooks have the worldwide standard, HDMI cable port, and there may be a few ports you’re not familiar with at all.
We’ll break down each of the ports you can use with your TV’s HDMI port so you have a better understanding of Apple’s extensive MacBook port selection!
Part 1: Check What Cables You Need Before Connecting a Mac to TV
Before you can connect your MacBook to a TV, you need to look over your Mac’s port selection. If you notice the standard HDMI port, then you can skip this section and proceed to get connected below.
But if you’re missing the HDMI port, then you need to identify which ports your MacBook has. This is necessary to ensure you get the right cables, adapters, etc. MacBooks can have one of these three port layouts depending on the model:
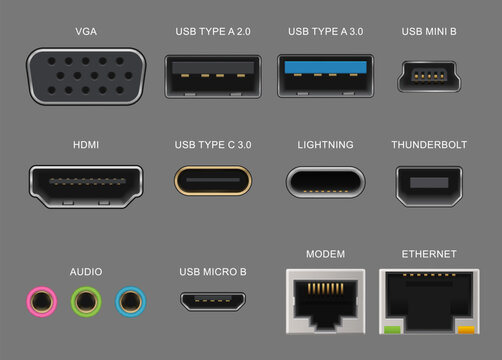
● HDMI Port - The HDMI port is the most popular and most used port for transmitting video and audio to a display. All of Apple’s latest MacBook Pro models released after 2021 include an HDMI port.
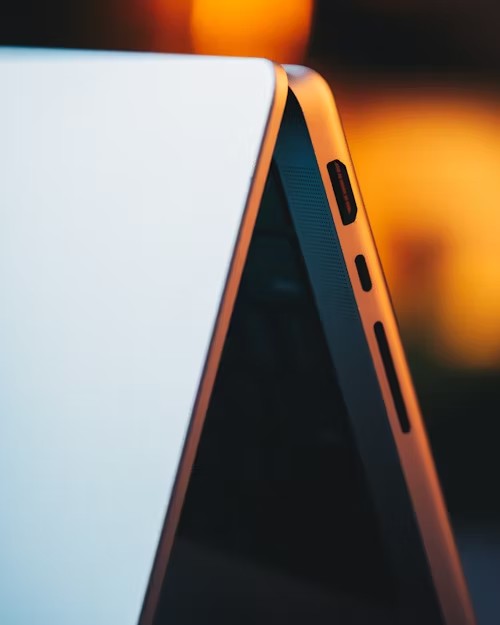
● USB-C / Thunderbolt 3 & 4 Port - The next most popular port for both charging display purposes is the USB-C and the latest Thunderbolt 3 & 4 ports. Most of Apple’s modern MacBooks have a USB-C Thunderbolt port, but to connect to a TV, you’ll likely require an additional adapter.
● Mini DisplayPort / Thunderbolt 1 & 2 Port - One of the oldest ports for display purposes on MacBook models featured on late 2000s and mid-2010s MacBooks is the Mini DisplayPort or Thunderbolt port.DisplayPort is used mainly for older-gen displays and for users that require G-Sync or FreeSync support.
Here’s a quick comparison of the three ports, and important things to know about connecting via ‘HDMI’ :
| Mac Ports | TV Ports | Required Cable/Adapter |
|---|---|---|
| HDMI Port | HDMI Port | No / HDMI Cable Only |
| USB-C Thunderbolt 3 - 4 Port | HDMI Port or USB-C Port | USB-C Digital AV Multiport Adapter |
| Mini DisplayPort / Thunderbolt 1 - 2 Port | HDMI Port or DisplayPort | Mini DisplayPort to HDMI Adapter |
Part 2: How to Connect MacBook to TV with HDMI
Once you’ve identified which ports your MacBook has, it’s time to get connected.
Make sure you’ve got the appropriate cables/adapters for your MacBook model and TV. All TVs already come with an HDMI port as a standard, but some also feature a USB-C port with display capabilities.
Here’s a guide to connecting your MacBook to a TV using an HDMI cable.
If required, use the additional adapters as mentioned above. The steps are largely the same except instead of connecting directly between your MacBook/TV, you connect the HDMI cable from your TV to the adapter.
That said, here’s how to get connected:
- Step 1.Turn on both your MacBook and TV.
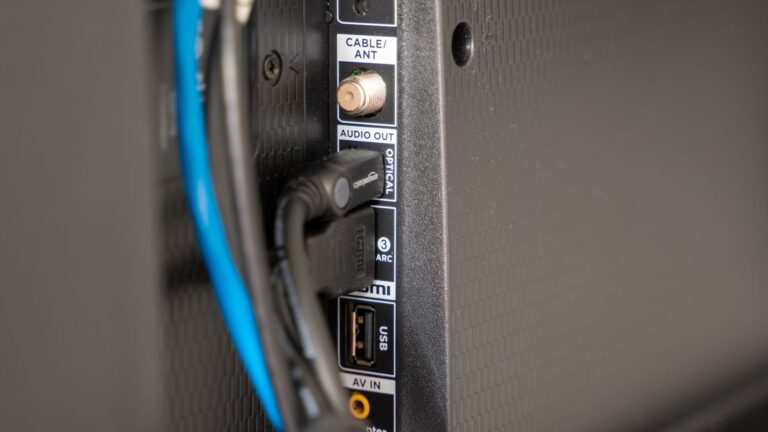
- Step 2.Connect one end of the HDMI cable to your TV.

- Step 3.Connect the other end of the HDMI cable to your MacBook (or to the adapter).

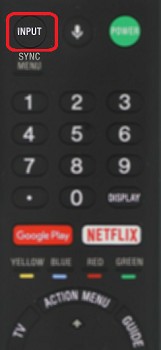
- Step 4.Using your TV remote, switch over to the HDMI input with your MacBook’s screen. Press the ‘Source’ or ‘Input’ button and select the corresponding HDMI input.

- Step 5.Your TV should now be displaying your MacBook’s screen.
- Step 6.If you need to change some settings of the external display such as the resolution, arrangement, brightness, etc. Select the Apple logo in the top-left corner of your menu bar > System Settings > Displays.

For the most part, connecting your MacBook to a TV with an HDMI cable is pretty straightforward. However, with Apple’s insistence on making some ports exclusive to certain Mac models, it can be confusing.
Not to mention getting the right adapter can be pricey, and these adapters can be finicky especially if you choose to go for a more affordable alternative.
Part 3: How to Connect MacBook to TV with Sound
In most cases, simply connecting your MacBook to a TV will automatically transform and transfer audio via the HDMI connection. However, there are some cases where you may need to configure your Mac’s settings before you can hear the audio from your TV.
Here’s what you need to do:
- Step 1.Complete the HDMI connection between your TV and MacBook.
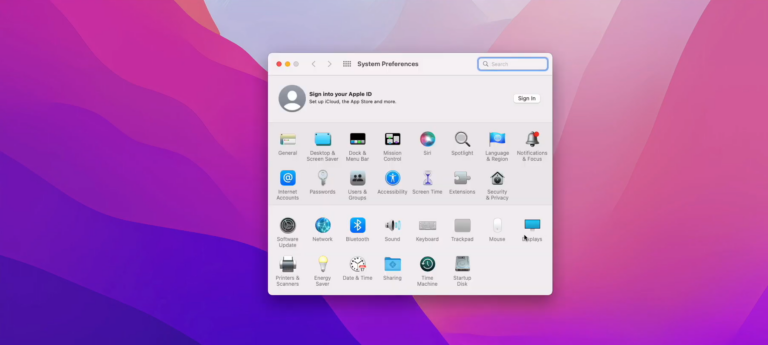
- Step 2.On your MacBook, select the Apple icon in the top-left-hand corner of the menu bar.
- Step 3.Select ‘System Preferences’.

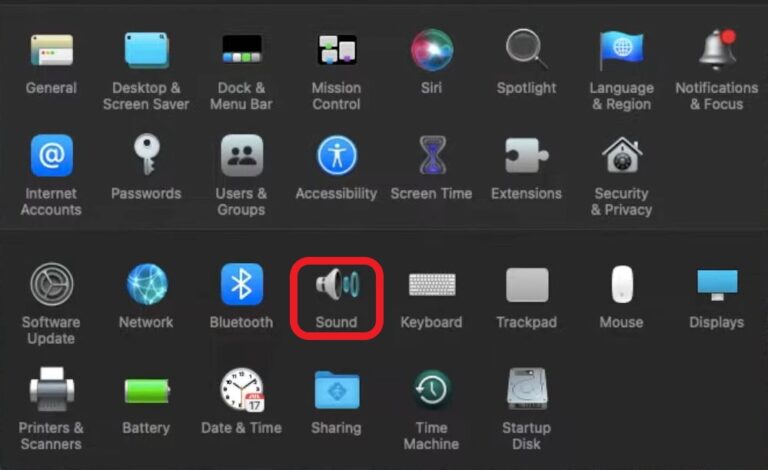
- Step 4.Select ‘Sound’ and then select the ‘Output’ tab.
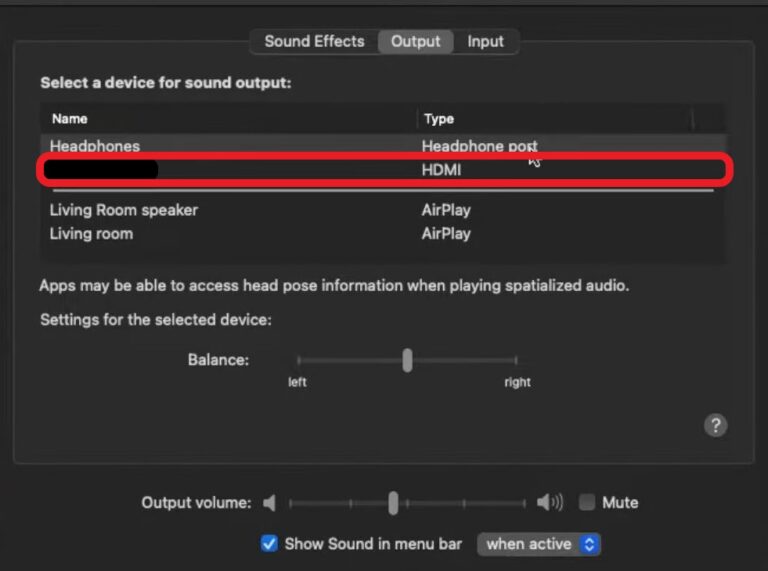
- Step 5.Remove any connected headsets or earphones including wireless AirPods.
- Step 6.Make sure your TV is selected as the current ‘Output’ for your MacBook. Additionally, try increasing ‘Output volume’ to see if you can hear anything on your TV.

Part 4: Extra Tips: Connect MacBook to TV Wirelessly
AirPlay
Instead of connecting your MacBook to a TV with an HDMI cable, you can also use AirPlay, Apple’s wireless casting solution. This requires you to have a smart TV that supports the AirPlay 2 casting protocol.
Check your TV’s settings to see any mention of ‘AirPlay & Homekit’ or similar. Additionally, connect both your smart TV and MacBook to the same Wi-Fi network. Then follow the steps below:
- Step 1.Turn on both your smart TV and MacBook.
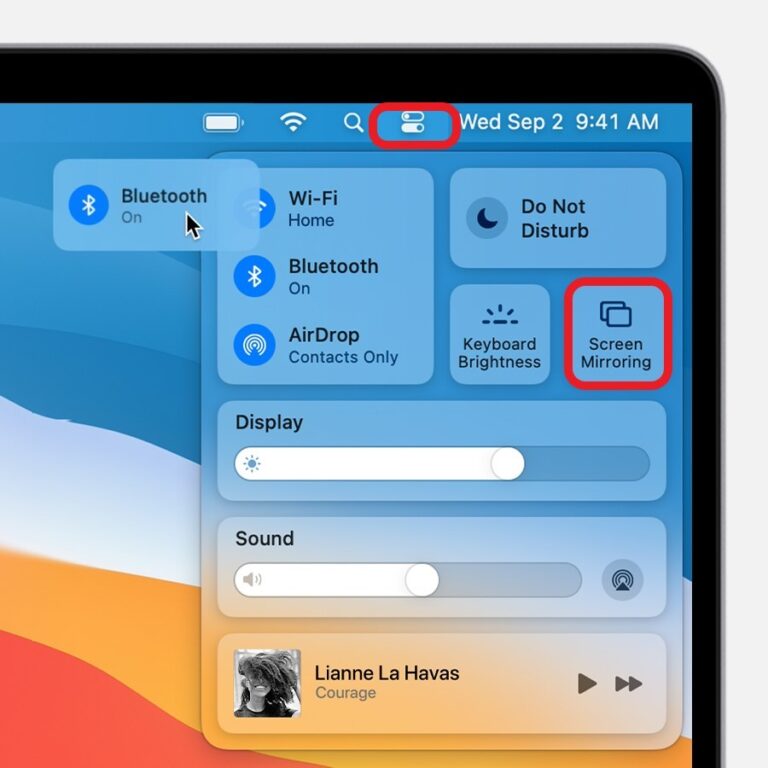
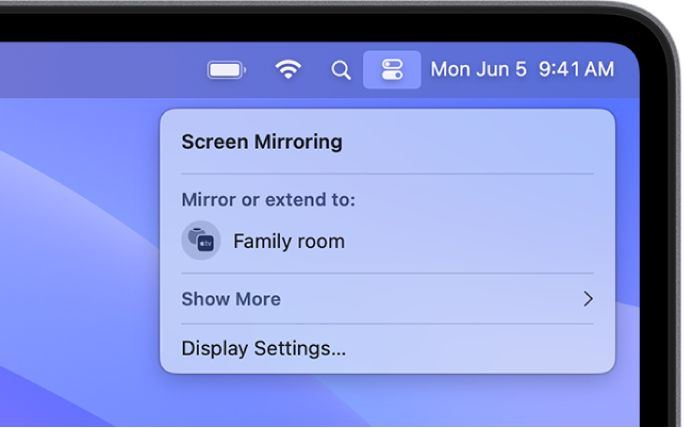
- Step 2.Open the ‘Control Center’ in the top-right corner of the menu bar.

- Step 3.Click on the ‘Screen Mirroring’ tile.
- Step 4.Browse through the list of available devices and select your smart TV.

- Step 5.If prompted, enter the 4-digit AirPlay code displayed on your TV.
Chromecast
As an alternative to both HDMI connectivity and AirPlay, you can also use the Chromecast built-in feature to mirror your MacBook to your smart TV. This is only available on smart TVs that support Chromecast built-in like Google TVs or Android TVs.
To use this method, both your smart TV and MacBook need to be on the same Wi-Fi network. Your MacBook also needs to use the Google Chrome web browser.
Once you’ve got all the above setup, follow these steps:
- Step 1.Open the Chrome web browser on your MacBook.
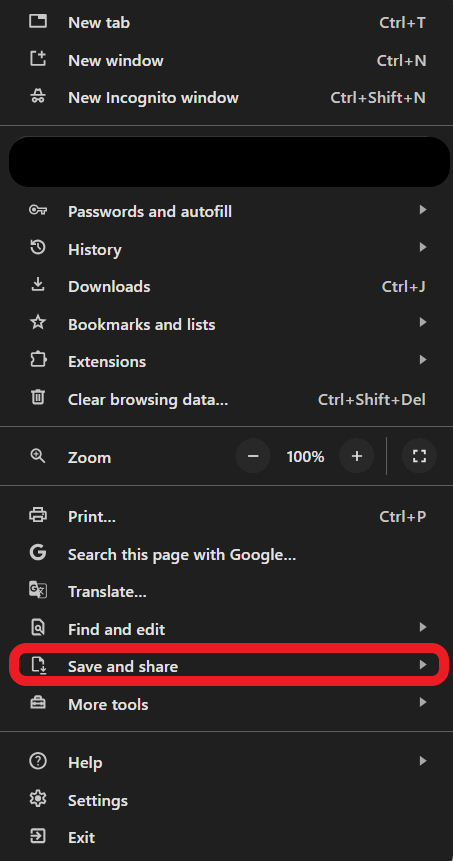
- Step 2.Select the ‘Customize and control Google Chrome’ icon in the top-right corner.

- Step 3.Click on ‘Save and Share’.

- Step 4.Select ‘Cast…’ under the ‘Save’ tab.
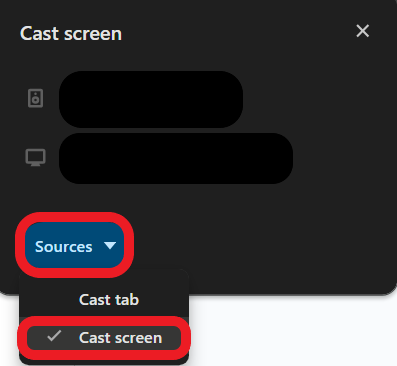
- Step 5.Under ‘Sources’, select ‘Cast screen’.

- Step 6.Select your smart TV from the list of available devices.
- Step 7.Select whether to share the whole screen or an app/browser tab.
AirDroid Cast
The last method to cast wirelessly from your MacBook to a smart TV is by using a third-party app like AirDroid Cast!
AirDroid Cast is filled with plenty of dedicated casting features, and among them are local and remote connectivity, plentiful connection options, cross-platform mirroring, 1080p Full HD resolution quality, and more!
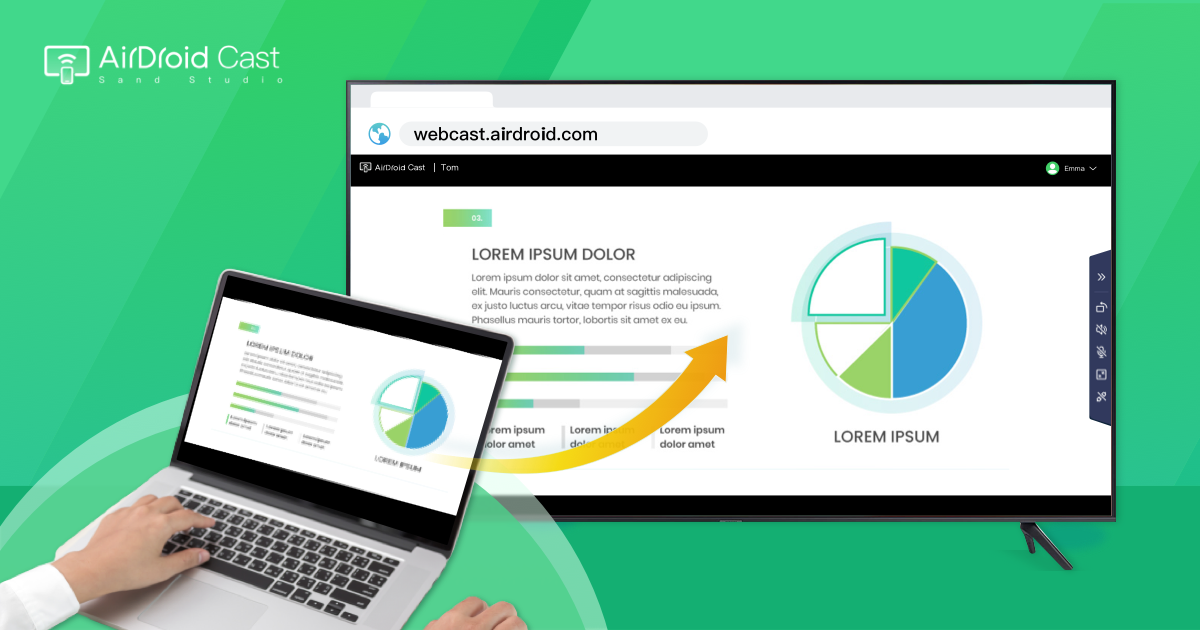
The best part is you only need a web browser to receive a screen mirror, so any smart TV can receive screen shares using the AirDroid Cast Web platform!
Here’s how to connect your MacBook to your smart TV:
- Step 1.Install AirDroid Cast on your MacBook.
- Step 2.Once installed,open the app and create an AirDroid Cast account.
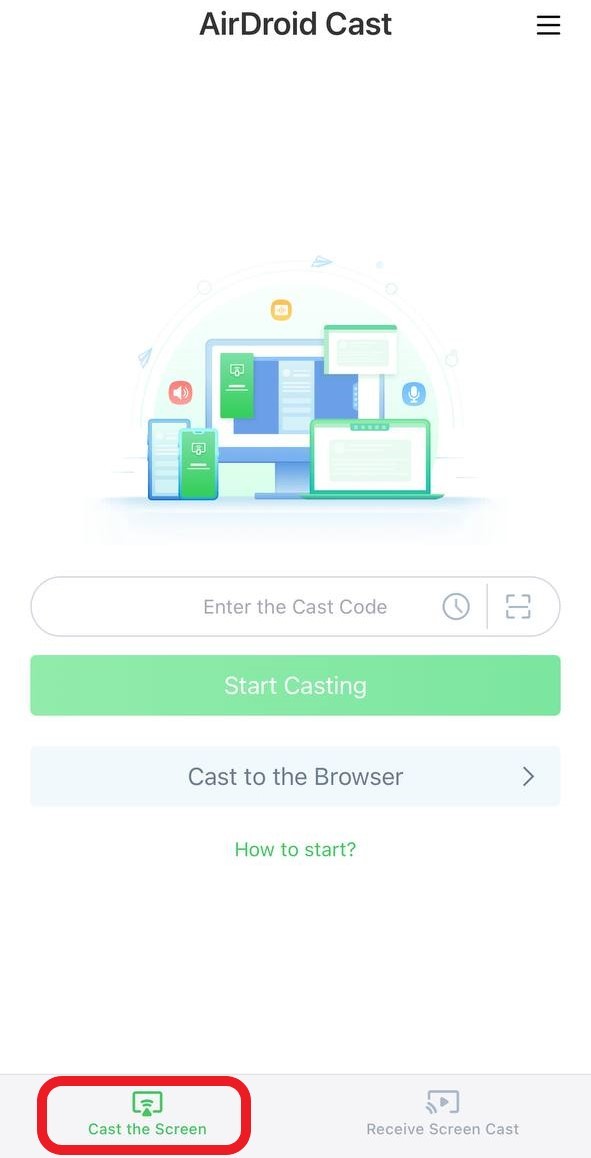
- Step 3.Select the ‘Cast to’ tab.

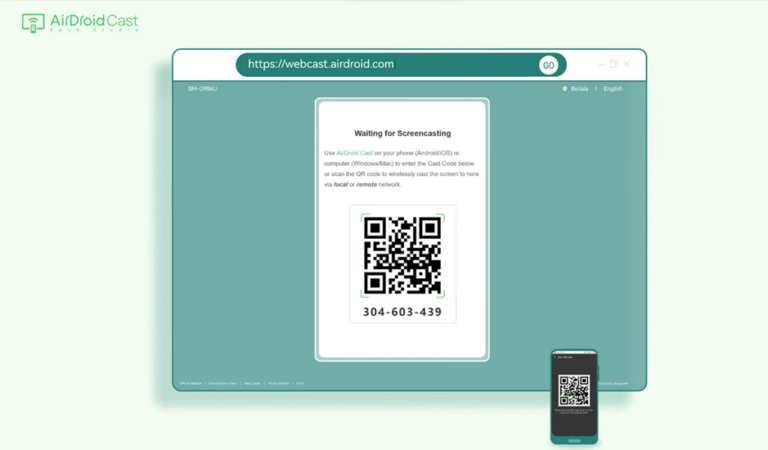
- Step 4.On your smart TV, open the web browser and open the AirDroid Cast Web.

- Step 5.You’ll see a QR code and a 9-digit Cast Code. Enter the cast code to the ‘Cast to’ tab on the AirDroid Cast app on your MacBook.
- Step 6.Allow any additional pop-ups to allow mirroring on your smart TV.
Part 5: Summary
And that’s how to connect a MacBook to a TV using an HDMI! We’ve highlighted the differences and the cables/adapters required to use your TV’s HDMI port. But if you still need help identifying your MacBook’s ports, check the link here.
That said, if you’re looking for a reliable wireless solution to mirror to your TV, check out AirDroid Cast, your one-stop solution for all things screen mirroring!






Leave a Reply.