How to Share Multiple Screens in Teams: 5 Different Methods to Try
Microsoft Teams is an excellent tool for chatting and video conferencing in the workplace, with many dedicated features built to optimize your workflow.
But it can be challenging to master all of its features, especially if you aren’t aware of what the software can do.
One feature in particular that many businesses and users need in Microsoft Teams is screen sharing, but what about multi-screen sharing? So today, we’re breaking down everything you need to know about how to share multiple screens in Teams!
Part 1: Can You Share Multiple Screens in Microsoft Teams?
The answer to this question is a little complicated since it’s both yes and no.
It is possible to share your screen and switch between windows or tabs on your PC, effectively giving you multiple screens to work with during a meeting.
However, if you’re talking about multiple people in a meeting sharing their screens simultaneously, then no, as of the time of writing, this isn’t possible in the stock Teams app on both desktop and mobile.
There are a few workarounds and apps that let you accomplish this but it’ll take some troubleshooting on your end.
Part 2: 5 Methods to Share Multiple Screens in Teams
Method 1: Share Multiple Screens in Teams with Built-in Feature
The first method we’ll showcase is how to switch between multiple screens during a meeting using Teams’ existing screen-sharing features. As mentioned earlier, this doesn’t allow you to share multiple screens simultaneously in Teams.
Instead, this allows you to switch between different windows/screens on your PC.
However, even though it’s ‘switching’ between screens, the method is pretty inconvenient. There’s no seamless way to switch between screens and you’ll have to basically end the screen share first and start it back up on another window.
Here’s how to share multiple screens in Teams with the built-in feature:
- Step 1. Open the Microsoft Teams app > Meet > Start Meeting.
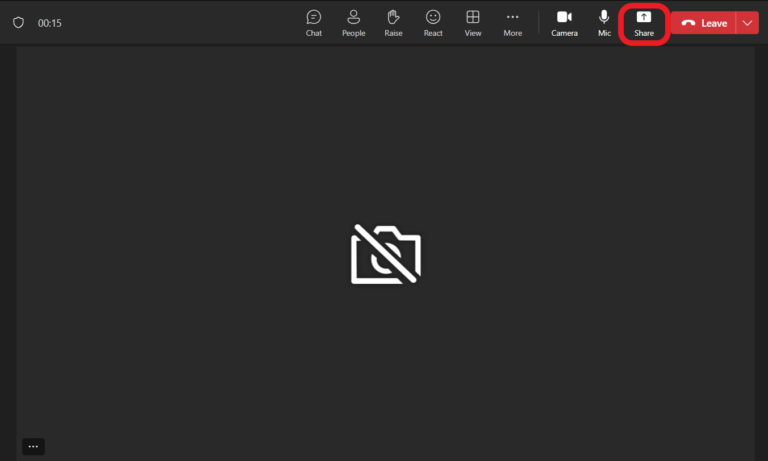
- Step 2.Once you’ve joined the meeting, click on the ‘Share’ button in the top-right corner.

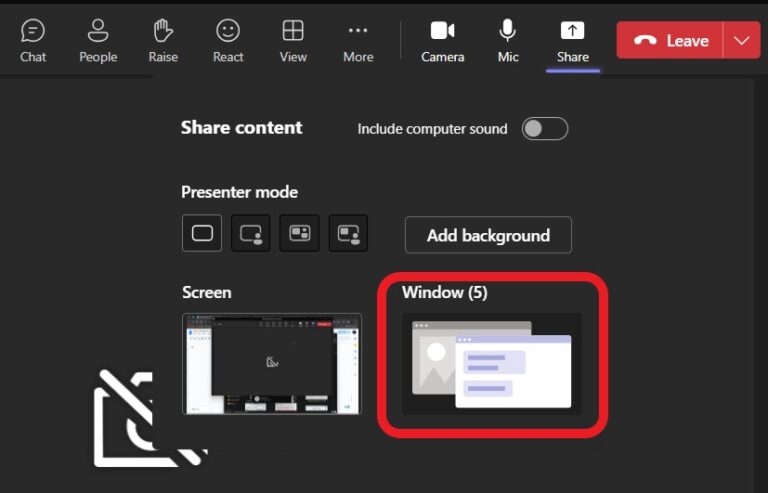
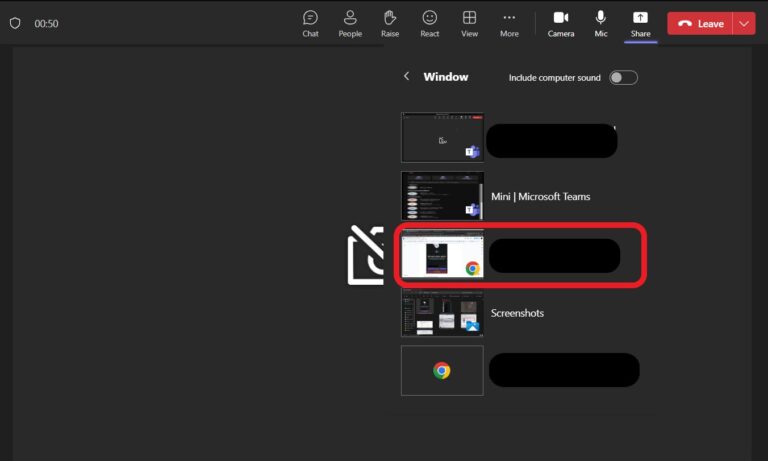
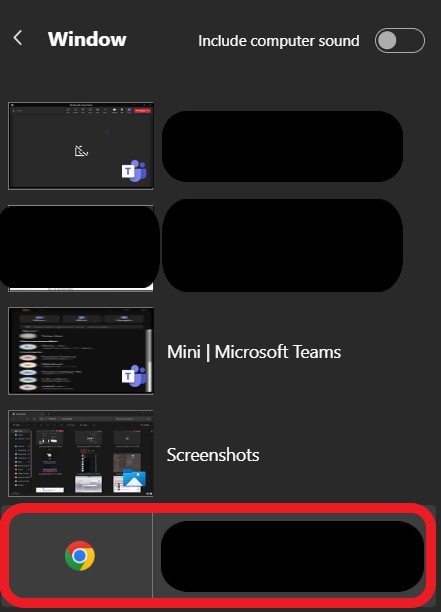
- Step 3.Select ‘Window’ and choose which app window you’d like to share and select it.

- Step 4.Teams will now start mirroring the window you’ve chosen.

- Step 5.Once you’re done with sharing this screen, click on the ‘Stop Sharing’ button in the Teams pop-up window. Now select the ‘Share’ button again and select the next window you’d like to share.

- Step 6.Repeat the process if required.
Method 2: Via Split Screen Feature
While it’s not possible to share multiple people’s screens at the same time, there is an easy workaround you can use on your PC. This is especially useful if you have multiple presentations, files, pages, or materials to share at a time.
This method uses the Windows split-screen feature.
This allows you to partition your screen into multiple windows. This way, you’re breaking up one screen into multiple interactable windows that you can control and display simultaneously.
That said, here’s how to share multiple screens in Teams using the split-screen feature:
- Step 1.Open the files and/or apps that you want to share in a Teams meeting.

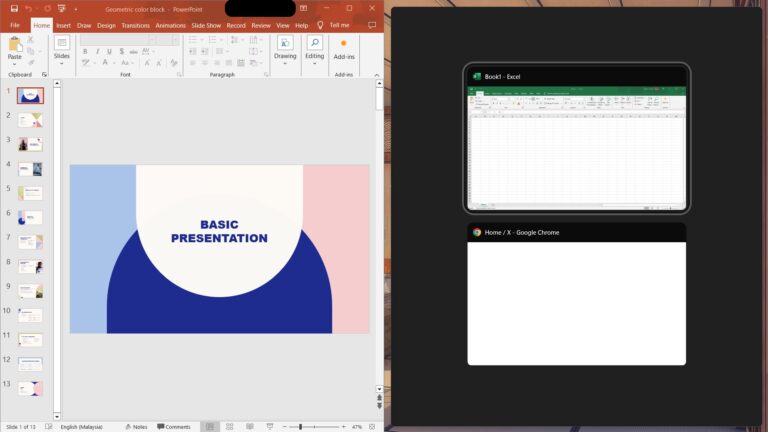
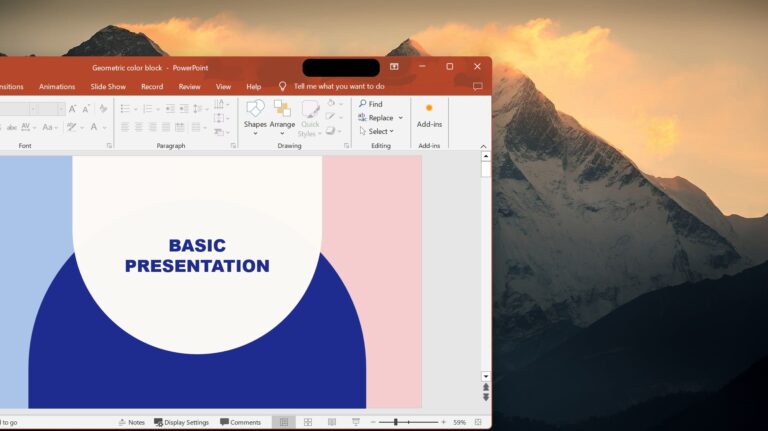
- Step 2.Select one of the apps (eg. Powerpoint) and press the Windows key + Left or Right Arrow key simultaneously. This will snap the app into a smaller window.

- Step 3.Now select one of the other apps to display on the other side of the split screen. To split the other apps manually, you can select the other window you want to share and repeat step 2.
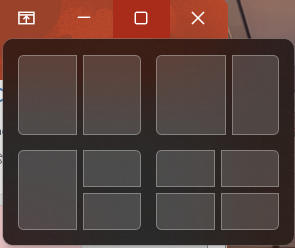
- Step 4.Alternatively, you can also hover over the minimize/maximize button of a window. Here you can select one of the templates to follow and snap each app into place.

- Step 5.Now open the Microsoft Teams app > Meet > Start Meeting >Share.
Method 3: Via Virtual Display
The next method to share multiple screens in Microsoft Teams is an enhanced version of Method 1, which will make switching over to another screen seamless & without having to start/stop screen sharing in a meeting constantly.
This method relies on using Windows’ built-in multiple desktop feature also known as virtual displays. This essentially creates an unlimited number of desktops on your PC, which you can switch over to while sharing your screen.
Again, this doesn’t allow multiple people to share their screens simultaneously, but it's the next best thing.
To use this method, follow the guide below:
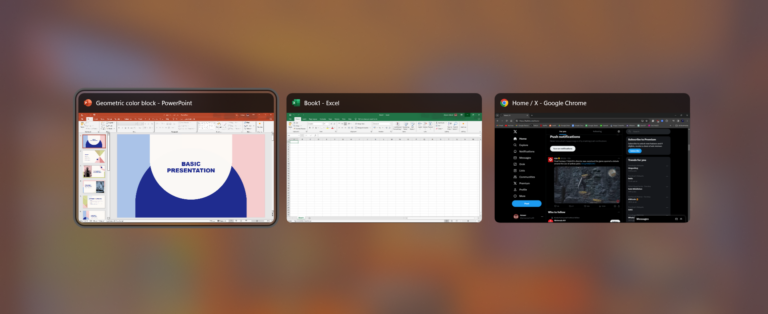
- Step 1.Hit the Windows key + Tab key on your keyboard simultaneously.Select the ‘New Desktop’ button at the bottom panel of the screen. Add as many desktops as you need for the meeting.

- Step 2.You now have multiple desktops you can use to open specific files or apps. Open the files/apps you want to share in Microsoft Teams on the different desktops you added.
- Step 3.To switch between the desktops, press the Windows + Ctrl + left or right arrow keys. This also works while you’re screen sharing in the Teams app.
- Step 4.Now open the Microsoft Teams app > Meet > Start Meeting >Share >Screen.
Method 4: Use a Second Monitor for PC
The next method is among the easiest ways to share multiple screens on Teams, by literally using ‘another screen’. This way, you’ll have two screens in front of you that you can access and control while screen sharing on Teams.
For this method, you’ll need an extra monitor for your laptop or desktop to connect to and an HDMI cable to connect the two.
One of the biggest reasons to use a second monitor with Teams is so you can see and control your secondary screen before switching to it. It’s more convenient, and it’ll save you time in the long run.
Here’s how to get connected and share multiple screens on Teams with a second monitor:
Connect an HDMI cable between your desktop/laptop and your secondary monitor.
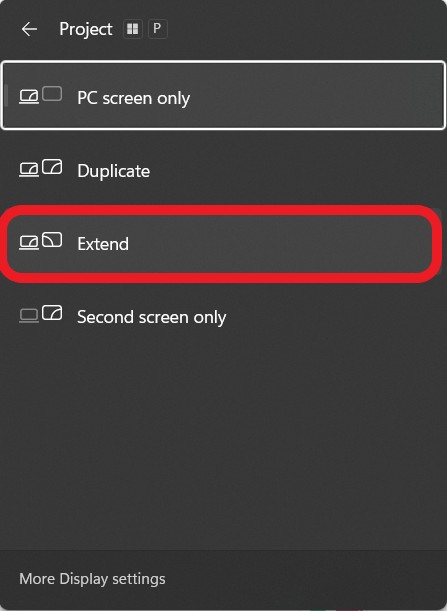
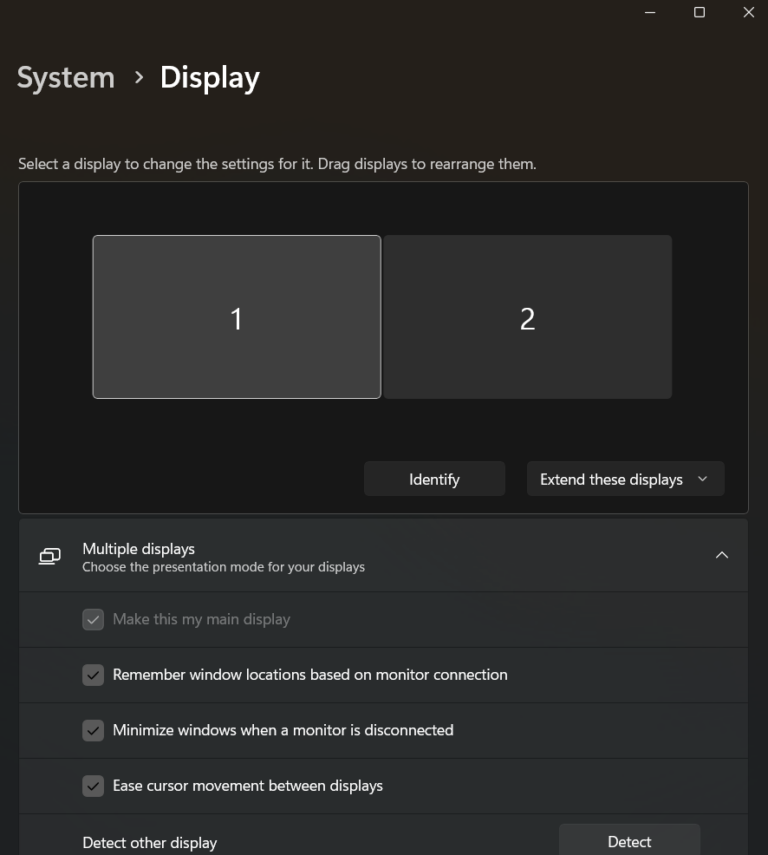
- Step 1.By default, your PC will ‘Duplicate’ your main screen to the secondary monitor. To change this, press the Windows key + P. This will open the ‘Project’ menu. Select ‘Extend’ to have a separate desktop to work with.

- Step 2.Alternatively, right-click on your desktop and select ‘Display Settings’.Here you can identify which screen is which, change whether you’d like to duplicate/extend the display, and a few other options you might need.

- Step 3.Open the Microsoft Teams app > Meet > Start Meeting >Share >Screen.
- Step 4.Now drag any apps/files you want to share to the right-hand side of your main display to move it to the secondary monitor.

Method 5: Share Multiple Screens in Teams with MultiShare
The last method to share multiple screens in Teams is also the only method that allows multiple people in a meeting to share their screens simultaneously; MultiShare.
MultiShare is a Microsoft Teams app that allows you to add the multi-screen sharing feature to your Teams desktop app. This means that you can allow multiple people to share their screens simultaneously, instead of taking turns and waiting for someone to finish screensharing.
It saves time, it’s more convenient and allows you to efficiently complete collaborative tasks.
However, the only way you can use MultiShare and download apps to your Teams app is by using a verified work or school Microsoft account. Normal Microsoft accounts don’t have access to Teams add-on apps.
If you already have access to apps in Microsoft Teams, follow the steps below to use MultiShare:
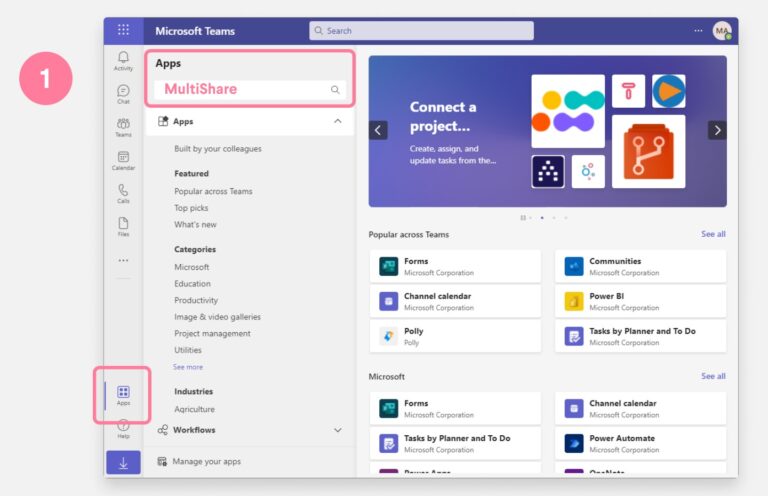
- Step 1.Open Microsoft Teams and select the ‘Apps’ button.Type in ‘MultiShare’.

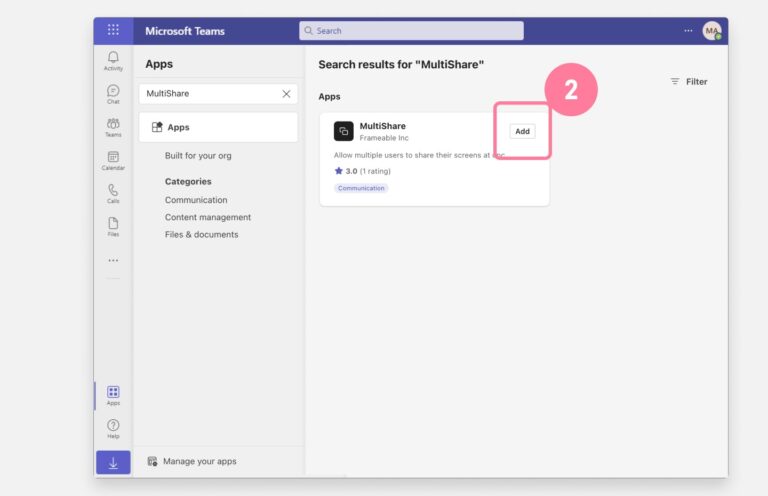
- Step 2.Click on the ‘Add’ button.

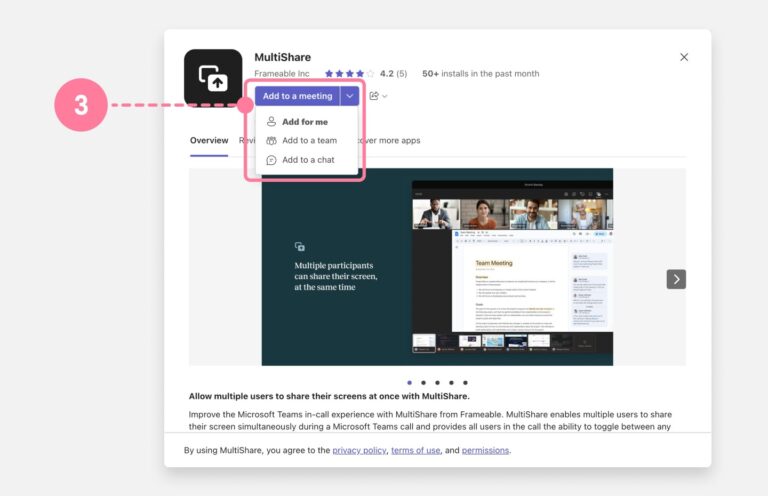
- Step 3.On the app page, select the ‘Add to a meeting’ button. Here you can select whether to add the app to a meeting, a specific chat/team, or add Multishare to your Teams app only.

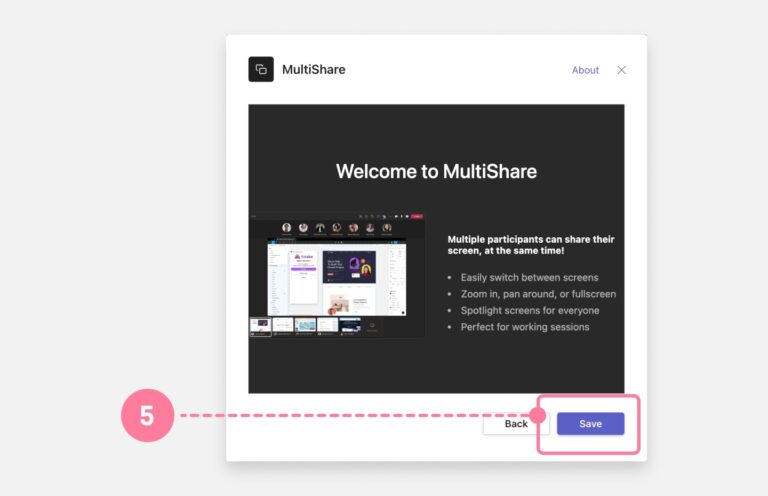
- Step 4.In the MultiShare welcome screen, select ‘Save’.

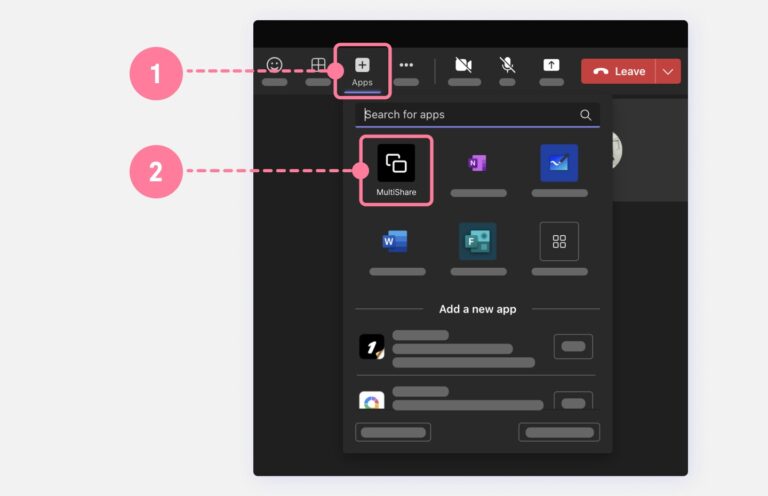
- Step 5.To use MultiShare to share multiple screens during a call, select the ‘Apps’ button while in a meeting.
- Step 6.Select ‘MultiShare’.

- Step 7.Select ‘Save’.
- Step 8.You’ll notice a new ‘MultiShare’ tab on your Teams app.
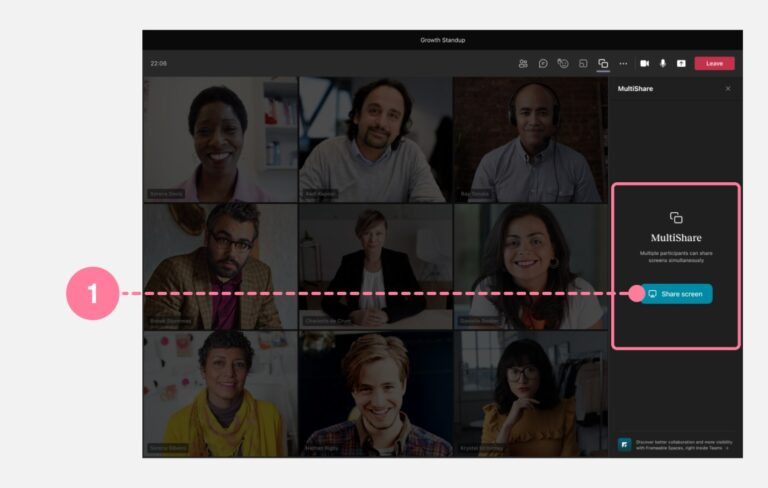
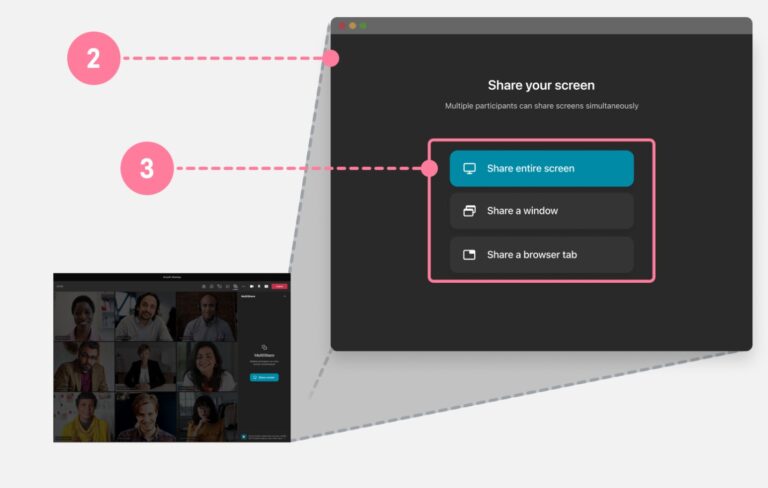
- Step 9.Select ‘Share Screen’.

- Step 10.Select if you want to share your entire screen/window/browser tab in the pop-up window.

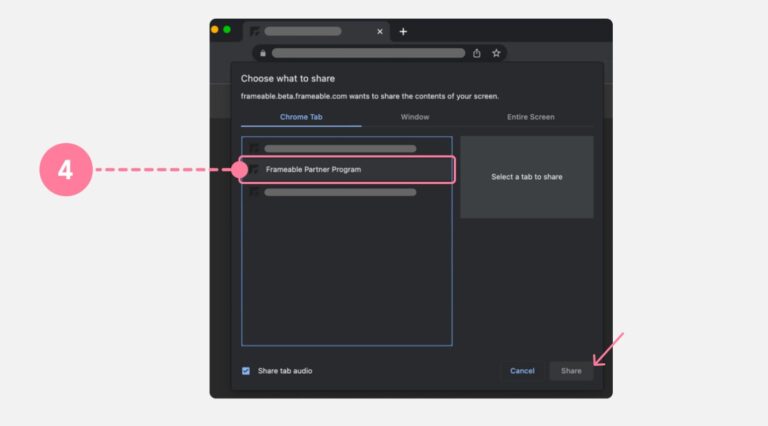
- Step 11.Select the specific window/tab/screen you’d like to share.

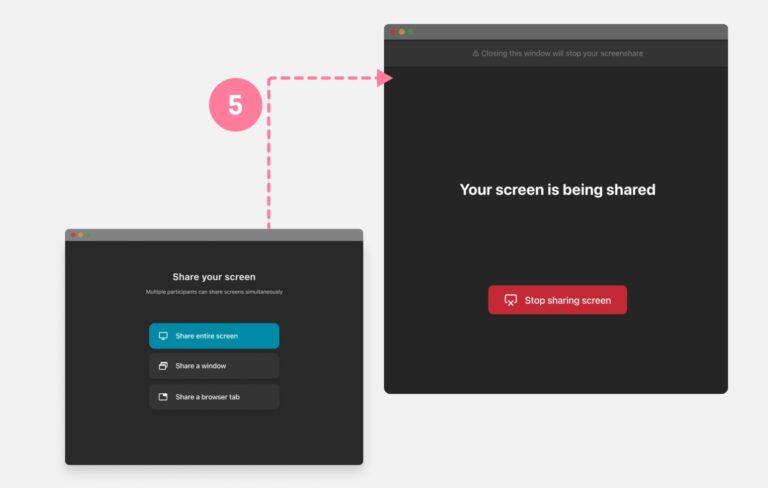
- Step 12.You’ll notice a new ‘Your screen is being shared’ window pop-up. Keep this window open. Closing this will end the screen share on MultiShare.

- If other participants want to share their screen at the same time, follow the same steps above using the MultiShare app.
Part 3: How to Share Multiple Screens from Phone to PC?
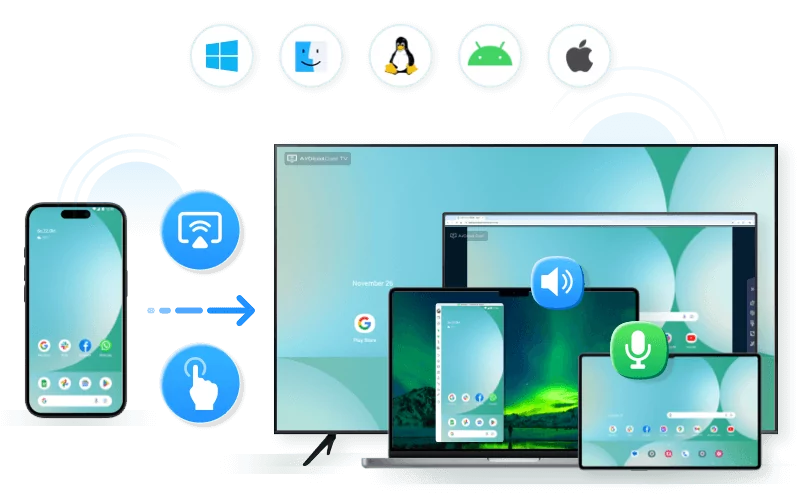
So far, all the methods we’ve underlined have been exclusively for PC users, but what if you want to share multiple phone or tablet screens with a PC? In that case, you’ll need a third-party app like AirDroid Cast to handle your screen-sharing needs.
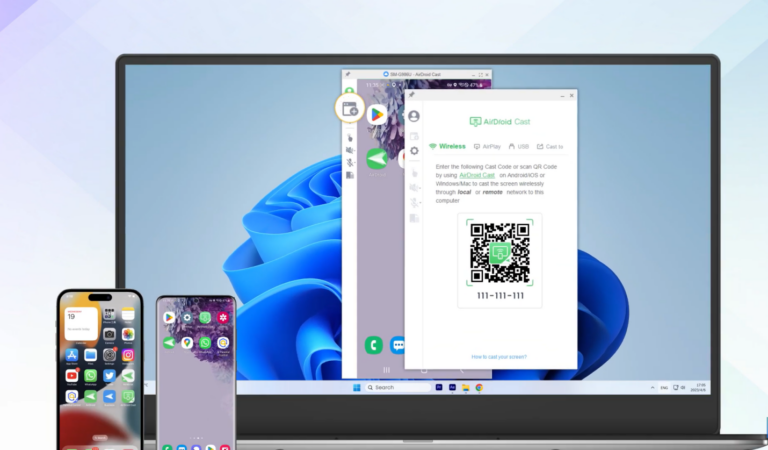
The best part is, that AirDroid Cast allows up to 5 devices to mirror screens to a PC simultaneously!So, you can realize the multiple screen sharing in Teams!
If you’d like to try it out for yourself, here’s a quick guide to mirroring multiple mobile devices to your PC:
- Step 1.Download and install AirDroid Cast.
- Step 2.On your mobile device, select the ‘Cast the Screen’ tab.
- Step 3.On your PC, complete the AirDroid Cast app installation and create an account.
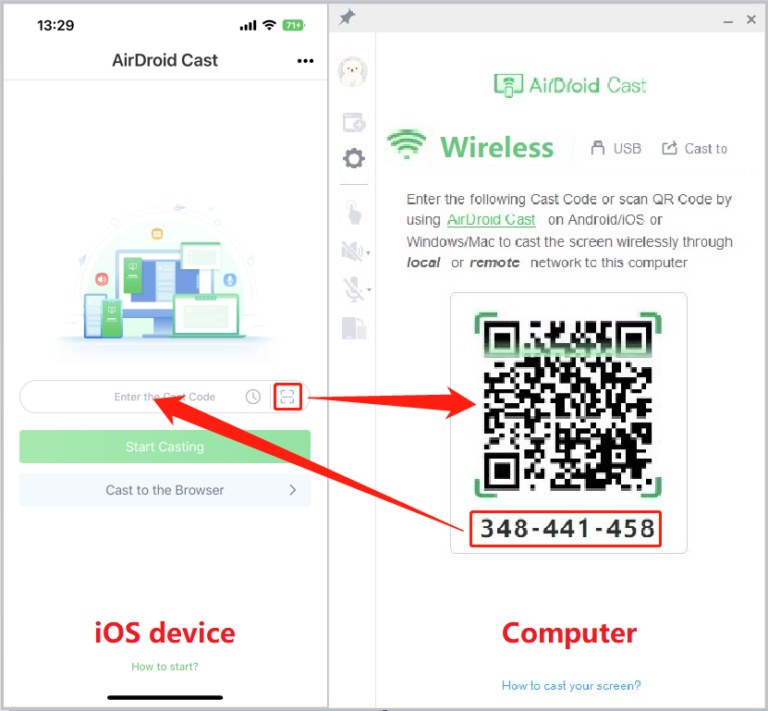
Select the ‘Wireless’ tab in the AirDroid Cast app on your PC. - Step 4.You’ll see a QR code and a 9-digit Cast Code. Scan the QR code or enter the Cast Code to the AirDroid Cast app on your mobile device.

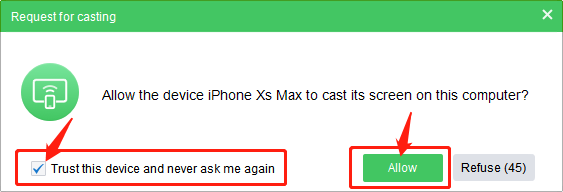
- Step 5.If prompted, allow any pop-ups to allow mirroring to your PC.

- Step 6.To add another mobile device screen mirroring to your PC, select the ‘Open New Window’ button in the left-hand-side menu bar in the AirDroid Cast app on your PC.

- Repeat the process from step 5 onwards to connect and mirror an additional mobile device to your PC.
Part 4: Summary
We’ve reached the end of our guide on how to share multiple screens in Microsoft Teams with a variety of methods.
But we know that it can be overwhelming, so here’s a simplified TLDR version for you:
Method 1 is best used if you don’t have many screens to share but need to switch between a few apps/windows.
Method 2 is great for sharing multiple files/apps on one screen sharing session by splitting the tabs.
Method 3 is a better version of Method 1 but requires you to organize meeting materials beforehand.
Method 4 is a convenient way to control what and when you share something on-screen and is great if you already have a secondary monitor to use.
Method 5 is the best and only way to allow multiple people to screen share on Microsoft Teams simultaneously.





Leave a Reply.